How to Sew a Hair Scrunchie Using the Super Easy Burrito Roll Method

I use a lot of scrunchies to put up my long hair and my favorite style is a scarf scrunchie.
There are several methods of making a DIY scrunchie. Today, I want to show you how to sew a scrunchie using what’s called the “burrito roll” method.
This is also used to add a lining to a garment with invisible stitching, so it’s an important technique to learn.
Best lightweight sewing machine!
Tools and materials:
- Fabric
- 0.25 inch (6 mm) wide elastic
- Scissors
- Pins
- Ruler
- Knitting needle or chopstick
- Sewing machine
- Iron
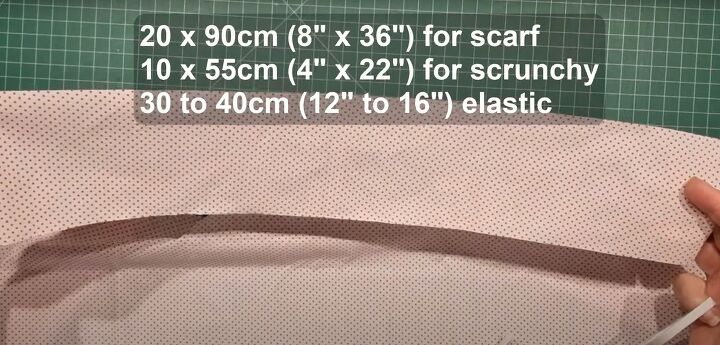
1. Prepare your materials
Cut two pieces of matching or contrasting fabric, one 8 inches by 36 inches (20 cm by 90 cm) for the scarf and the other 4 inches by 22 inches (10 cm by 55 cm) for the scrunchie.
You will also need a piece of narrow elastic 12 to 16 inches (30 to 40 cm) long.
I used the longer length to sew the scrunchie and then cut it shorter afterwards.
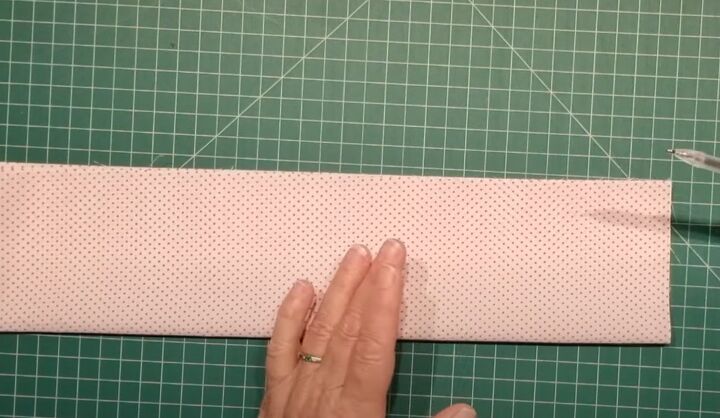
2. Shape the scarf ends
Fold the larger piece of fabric in half widthways and then lengthways.
Place it down with the open edges away from you and to your right.
Decide if you want curved or diagonal ends to your scarf.
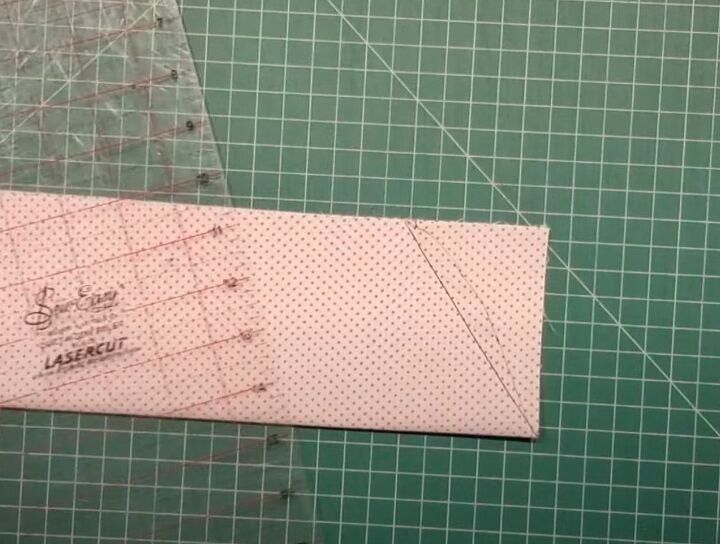
Draw the appropriate shape from about 2.5 inches (6 cm) along the top edge towards the lower right corner and cut it out.
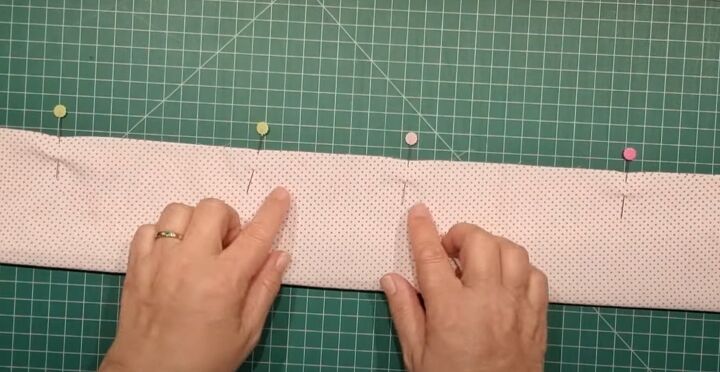
3. Sew the scarf
Fold the scarf in half lengthways with the right sides together.
Pin and sew the top and side edges, leaving a 4 inch (10 cm) opening in the center of the top edge.
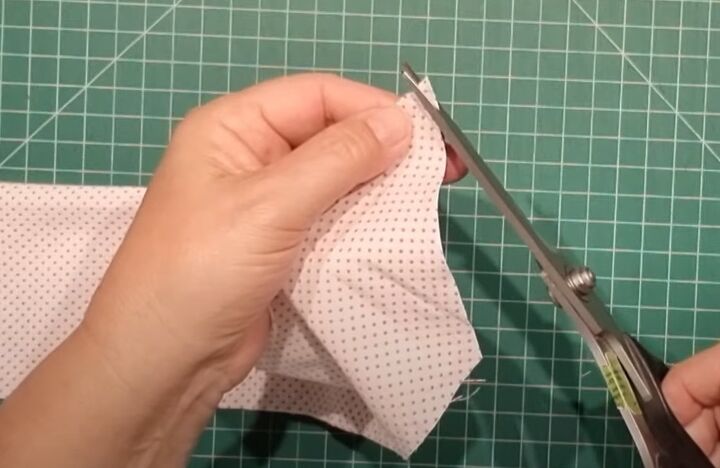
Snip the corners of the scarf, being careful not to cut into the stitching.
Turn the scarf right side out by feeding the ends through the opening.
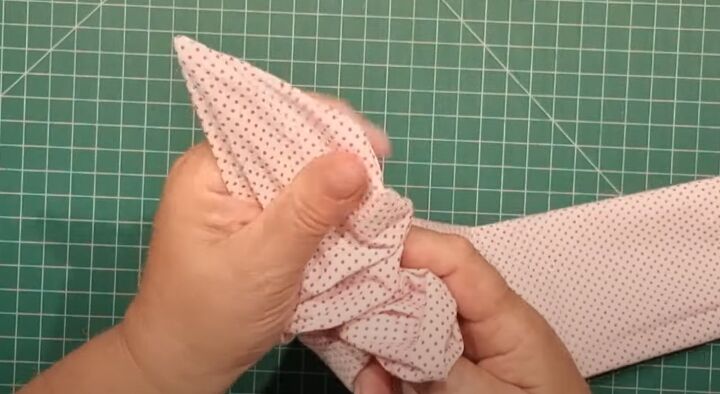
Use a knitting needle or chopstick to push out the corners.
Press the seam and sew the opening closed.
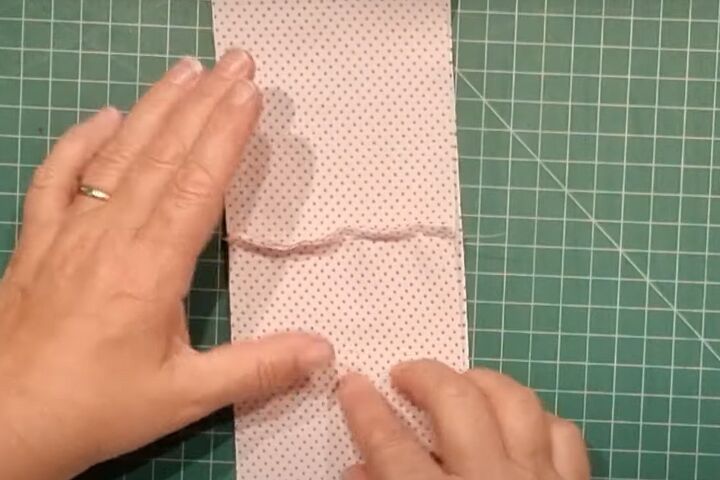
4. Sew the scrunchie
Join the short ends of the scrunchie together, with the right sides facing.
Press the seam open.
Knot the ends of the elastic together or overlap and sew them.
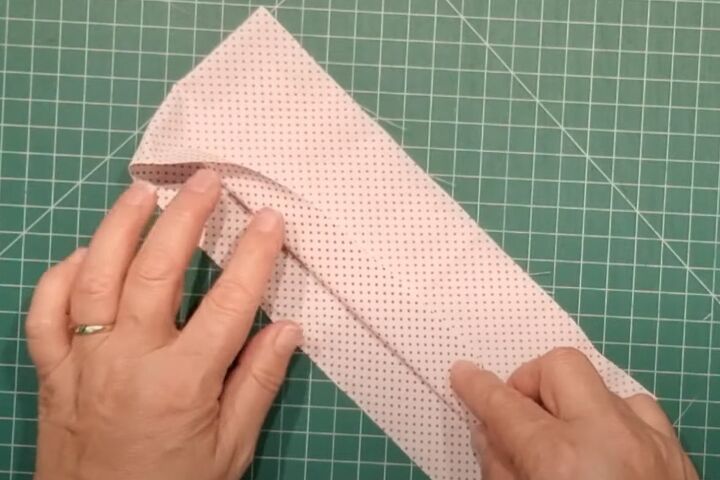
5. The burrito roll
Place the scrunchie flat with the wrong side outside.
Fold the lower edge of the top layer to the center.
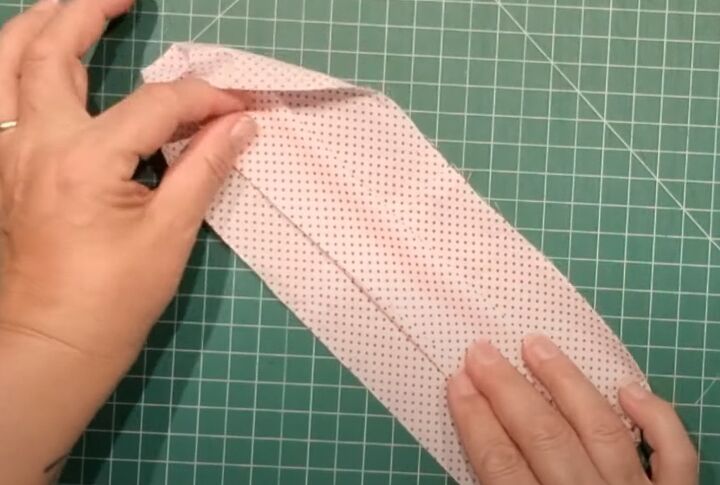
Fold the top edge down over it.

Place one side of the elastic on top of the folded fabric.
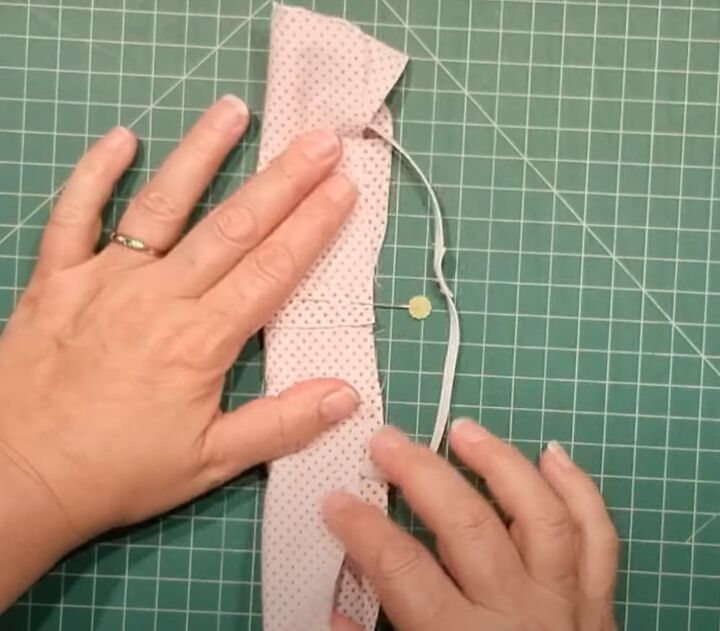
Bring the two outer edges of the scrunchie together over it leaving the rest of the elastic free, and pin them.
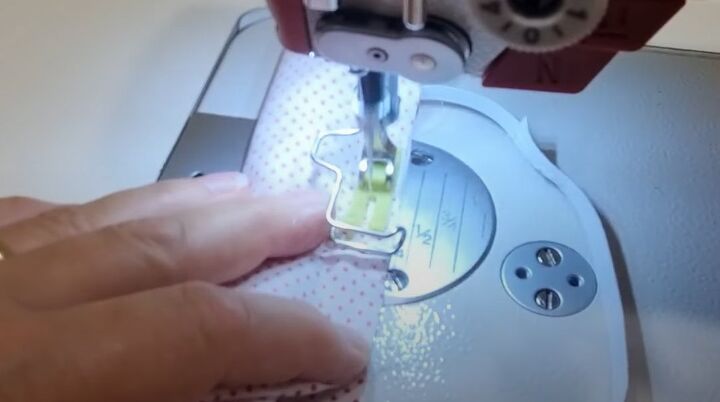
Sew the pinned section together.
Continue working in sections around the scrunchie, pulling the inner folded fabric out as you go and sewing the outer edges together.
Be careful not to catch the elastic in your stitches.
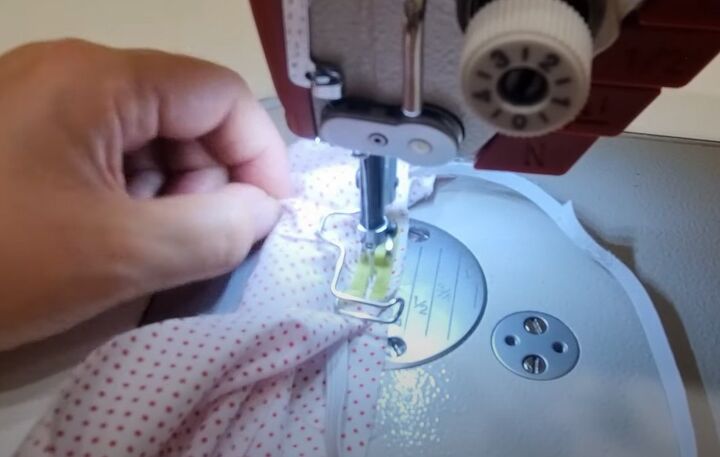
Stop sewing an inch or so (2 cm) from where you started, to leave a small opening.
Pull the fabric through the opening to turn the scrunchie right side out.
6. Finishing
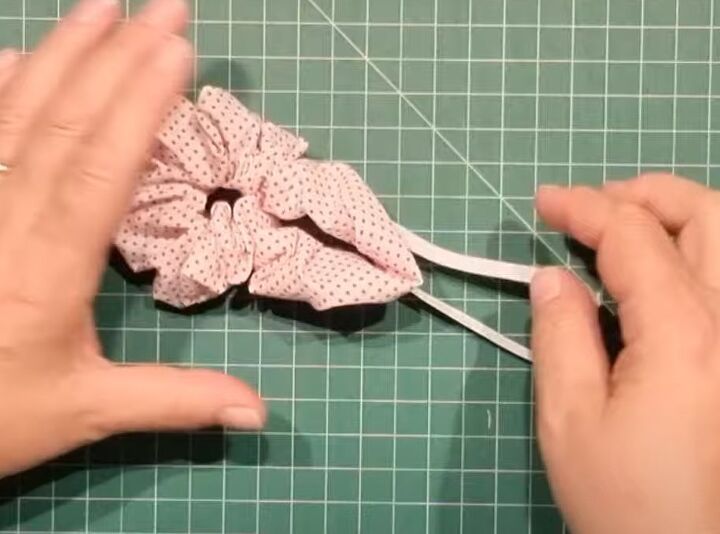
Sewing the scrunchie is easier with a longer piece of elastic, but I prefer mine to be tighter.
Check the size of yours and if necessary cut off the excess elastic and re-join the ends.
Sew the small opening closed.
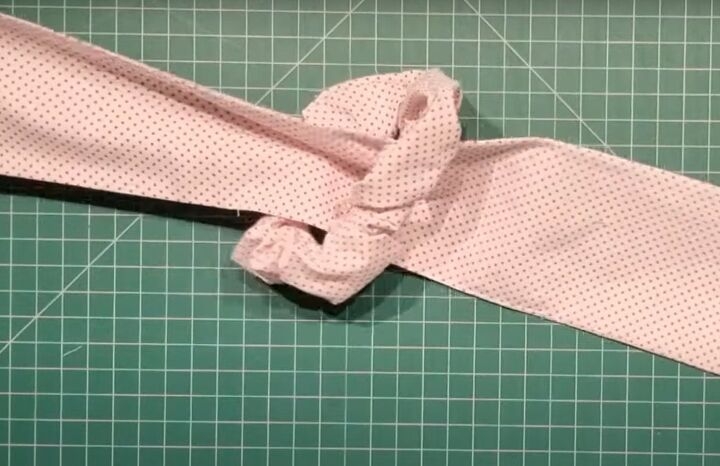
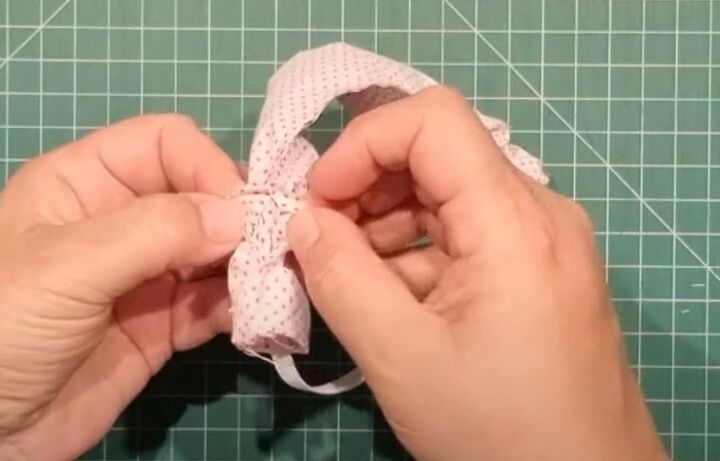
Pass the scarf through the scrunchie and tie it in a knot.
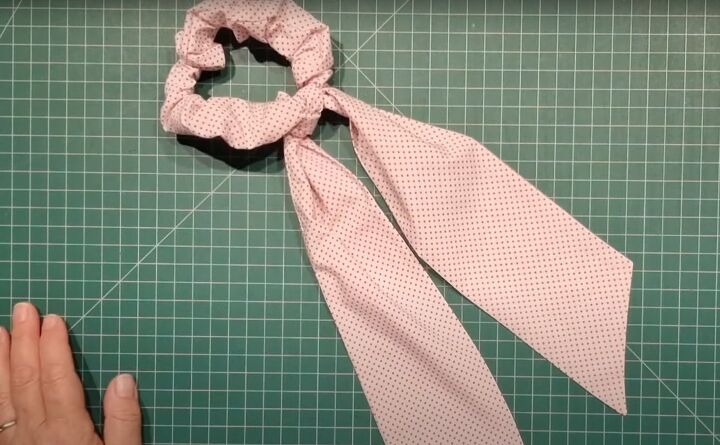
How to sew a hair scrunchie
Wrap the scrunchie around your hair as usual. The scarf tails add a cute, feminine touch that I think is really pretty.
I like wearing these in my hair for rock and roll nights, but they would also look great in sparkly chiffon or a sequinned fabric for an evening look. Scarf scrunchie hairstyles are so easy to do!
I hope you enjoyed my DIY scrunchie pattern and learning the burrito roll technique!
Please let me know how you got on in the comments below.
Next, check out my Easy Card Holder Sewing Pattern Tutorial for Beginners.
The author may collect a small share of sales from the links on this page.


Comments
Join the conversation