Take in Your Pants All on Your Own With This Tutorial

I don’t know about y’all, but I hate when there’s a pair of pants I really love and they just don’t quite fit right. I love the way skinny pants look on me, and so what I do in those situations is take in my pants so that they’re skinny. It’s a lot easier to do than you’d think, so check out this tutorial to learn how to do it yourself.
Tools and materials:
- Pants
- Sewing pins
- Sewing machine
- Measuring tape
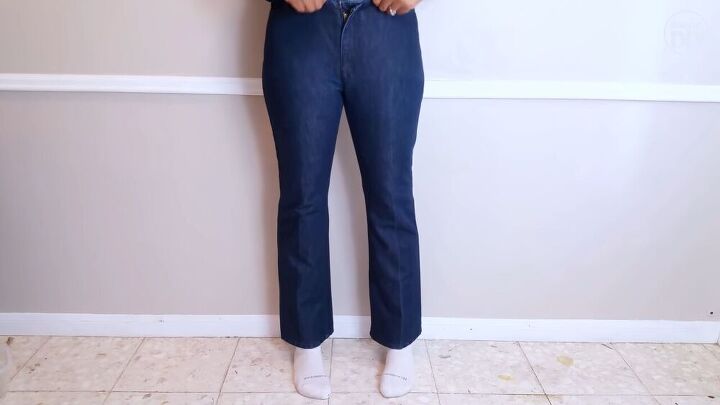
When it comes to taking in a pair of pants, you’re always going to start by trying them on. If you want to take in jeans in an easy way, first make sure that the waist and hip parts fit right. You’re going to want to stretch and pull on the jeans to figure out exactly how’re going to want them to look.
When working with jeans, it’s best to avoid messing with the interior seam, so you want to focus only on the outer seam. You’re going to pin the pant leg down so that it fits your leg the way you want it to. You can definitely pin down the other side as well, but I don’t find that necessary, and I’ll show you how I do that.
You can also try the pants on inside out, but what I do in this case is that I start turning the pant leg inside out and move the pin over to the inside. Since I’ve done this enough times, I don’t feel like I need to move every pin, rather just that first one and then the last one to mark where to stop.
Technically, you’re supposed to open up the hem, but I never do that. What you can do instead is double-stitch over the hem, which means you’re going to stitch a bit, backstitch over it, then continue forward. This will prevent the hem from pulling when you put the pants on. So what you’re going to do is stitch a straight line from that first pin to the last one. After you’re done sewing it, try the pants back on.
Side note, you can see that when you only stitch one side, it causes the material to pull to that side. I really didn’t want to mess with the other seam, though, so it wasn’t worth it to me to even it out. However, since I’ll be rolling up the bottom of the pant leg anyway, it fixes that problem and makes it look straight.
Once you’re satisfied with the fit of the leg you did, you can fold it onto the other leg and use it as a guide, pinning the second leg accordingly. Then take it to the sewing machine and stitch your markings.
You’re now going to grab your scissors and cut off the excess. You want to make sure, though, to leave enough room so that if it gets frayed in the wash your seam won’t be comprised. I cut mine about ½” to ⅝” away from the stitch.
Before I turn the jeans right side out, I like to fray the stitch a bit at the bottom so that when I fold up the ankle it’ll have a cool look. If you don’t like that look, you can just skip this step!
I also took in a pair of slacks, which is a bit different than jeans. The great thing about regular pants is that you can take them in from both the inner and outer seams. It’s also not a problem if the waist doesn’t fit you as well when you’re not dealing with jeans. So start off the same way, by pinning the legs how you want it, but this time you can pin both on the inside and the outside. The way I chose to determine the correct measurement for my waist was to fold it in from the back and then pin it down. Remember that you can try it on multiple times to get the best fit.
The next thing you’re going to do is measure how far in your pins are. Seeing that mine were all about an inch in, I removed my pins knowing that that was the amount I was going to take in the legs.
What you’re going to do now is turn your pants inside out and determine how much you want to take in at the waist. I measured 1” at the waist and continued down with the same measurement until the end. Add pins all along the way. Then do the same for the inner seam, and taper it from the knee to the crotch. You don’t want to take anything off at the crotch because that makes it fit funny.
Once you’re done with pinning the leg, you’re going to try them on again. If you’re happy with the fit, repeat the pins on the other side in the same way we did with the jeans. Then sew it down, and try it on one more time. If you’re satisfied with it, go ahead and trim off the excess. Cut it away just enough so that when it frays it won’t get close to the edge. I decided to serge my seams just to keep it clean, but it’s not necessary, so if you don’t have a serger, don’t worry about it.
And your pants are done! I personally love the way both of these turned out. The gray slacks are perfect with a pair of heels, and the jeans are cute and casual. It was easy enough to do, and not only are they fashionable skinny jeans, but they now fit me completely perfectly. That’s the really cool thing about taking them in on your own; you really get to customize the measurements to your body. If you want to watch me do this project, be sure to check out the video, and don’t forget to show me your own results in the comments!
Enjoyed the project?
The author may collect a small share of sales from the links on this page.


Comments
Join the conversation
What do you do when the pants have pockets. I have to take in pants for a 91 year old woman and she wants to keep the pockets. Great lesson. Thanks
Yes I will! Great idea, have several pairs that do not fit! I lost weight, now I am going to try this! Thank you