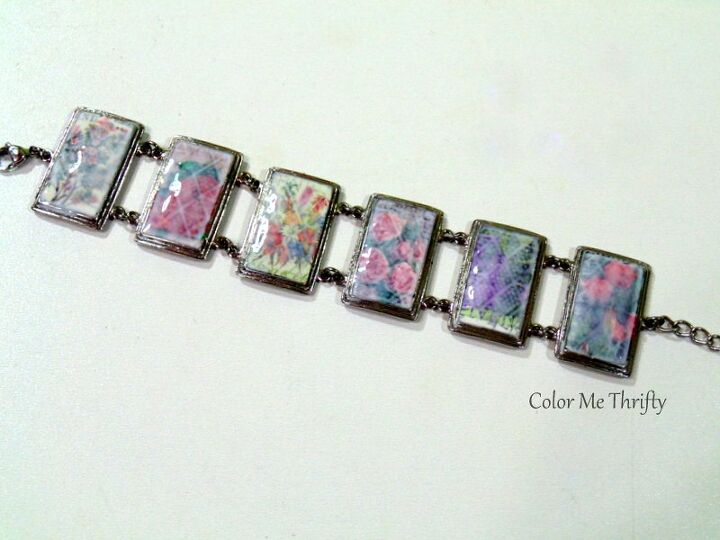
Easy Decoupaged Bracelet Makeovers
It's so easy to transform something that's pretty ordinary into something fabulous, like these fun DIY decoupaged bracelets.
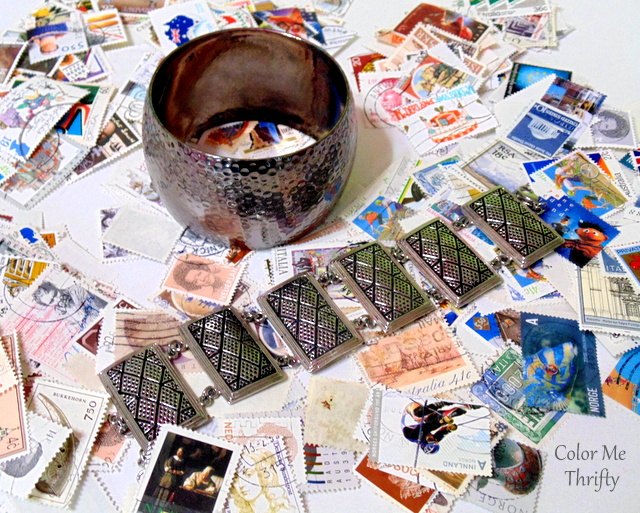
I love to wear bracelets during the warmer months when they can be seen, so when I saw a couple of $1 bracelets at a thrift store I grabbed them.

Both these bracelets are metal and pretty good quality.
The link bracelet has an extender chain on the end, and the cuff bracelet just fits over my hand.
NOTE: I am not a stamp collector. I purchased these stamps specifically for crafting purposes.

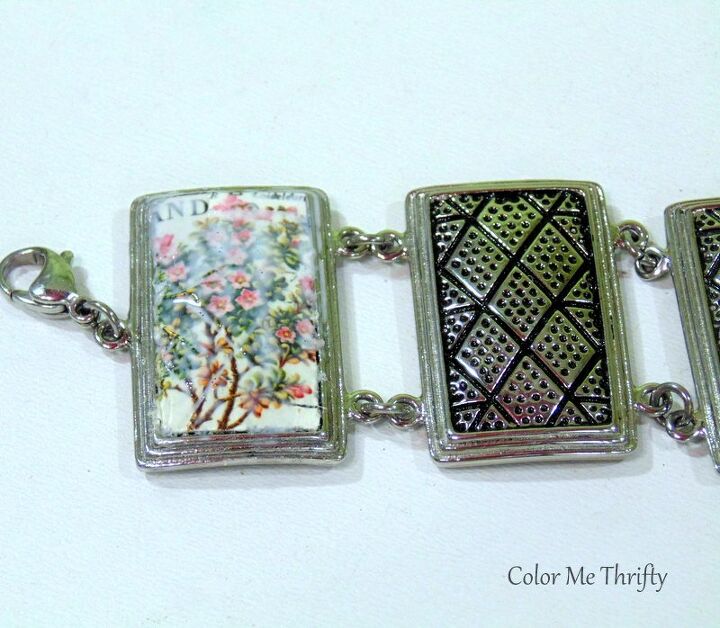
I started with the link bracelet by filling the center area of one section with the decoupage medium.
That center area is textured, so it's important to get enough medium on it so the stamps adhere well.
Be careful not to get the medium all over where you don't want it.
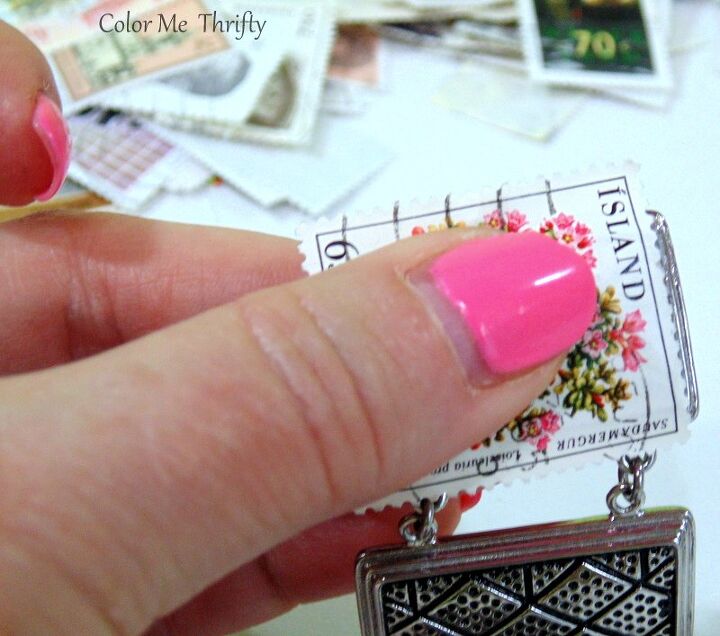
I have a few floral stamps in my crafting stamp collection so I put the first one down in place, pressing firmly all over.
Once the stamp was in place I trimmed it with an xacto knife and applied a top coat of the medium.
After doing the one link I thought it would be easier to create a paper template of the link area.
I measured the inside of the link and cut a piece of regular paper to fit.
Then I simply put the template over the stamps and cut around them.
Easy peasy.

I added the next stamp and used my xacto knife just to tuck in whatever edges weren't a perfect fit. Especially at the corners.
When I was finished I went over all the links with my fingers, making sure the stamps were well adhered.
Then I applied a couple of top coats of the decoupage medium, letting it dry well in between.
I didn't have to sand the stamps because they were down nice and smooth. But if you need to, you can use a fine grit sanding block like I do in the cuff bracelet makeover.
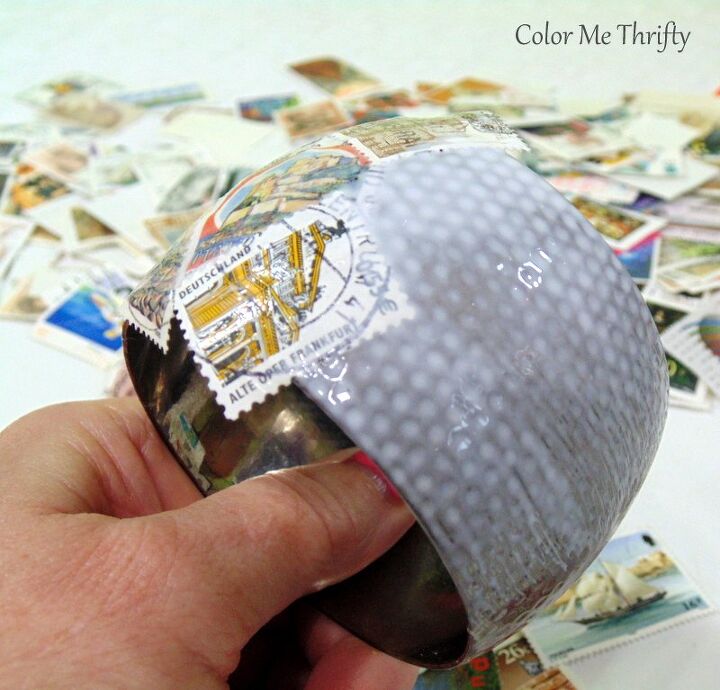
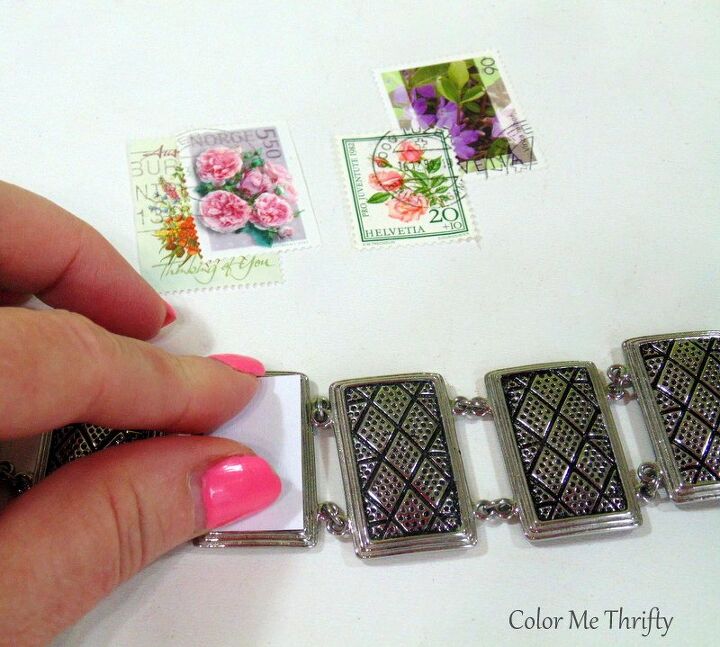
While that bracelet was drying I moved on to the rather plain cuff bracelet, which was perfect for a decoupage makeover.
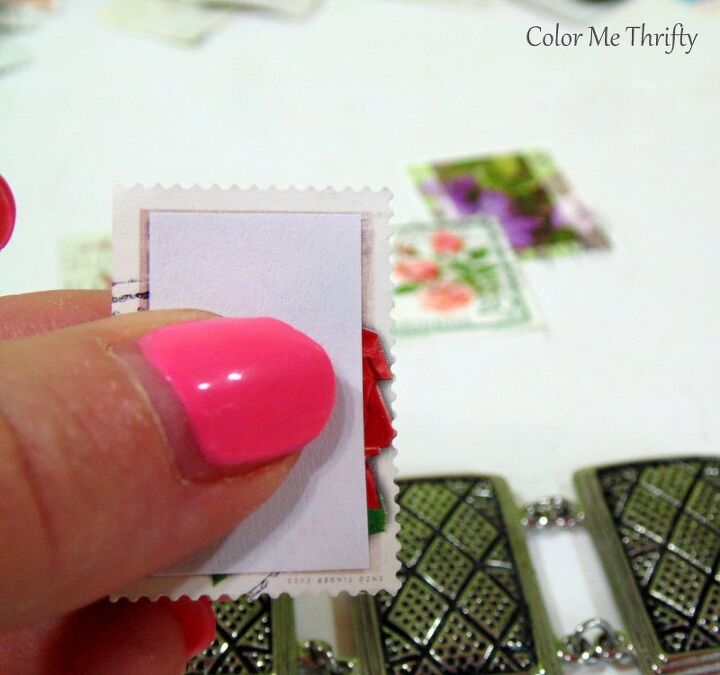
On this bracelet I quickly discovered that the stamps went on nicer at angles, rather than straight up and down.
I think that's because of the rounded shape of the bracelet.
Letting the stamps extend over the sides of the bracelet will make for nice edges.
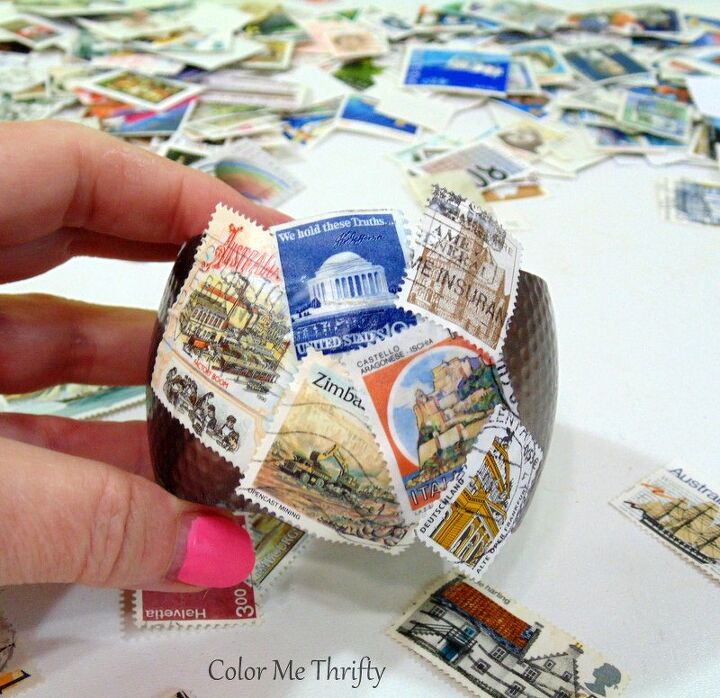
There's really no pattern to this.... you just keep adding stamps, deciding what ones to use as you go along.
I decided not to use stamps with faces, opting for mostly buildings/scenes.
But that's just a personal choice.
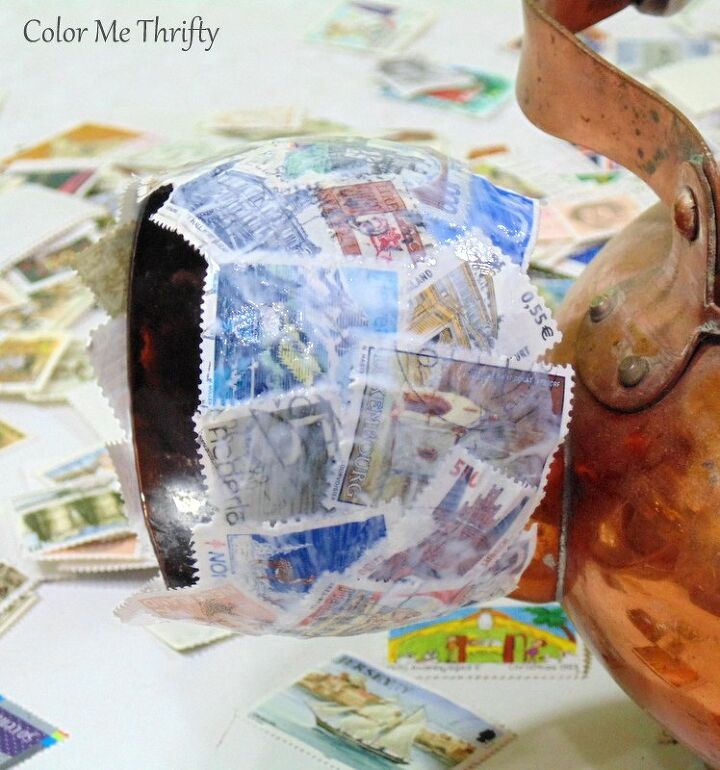
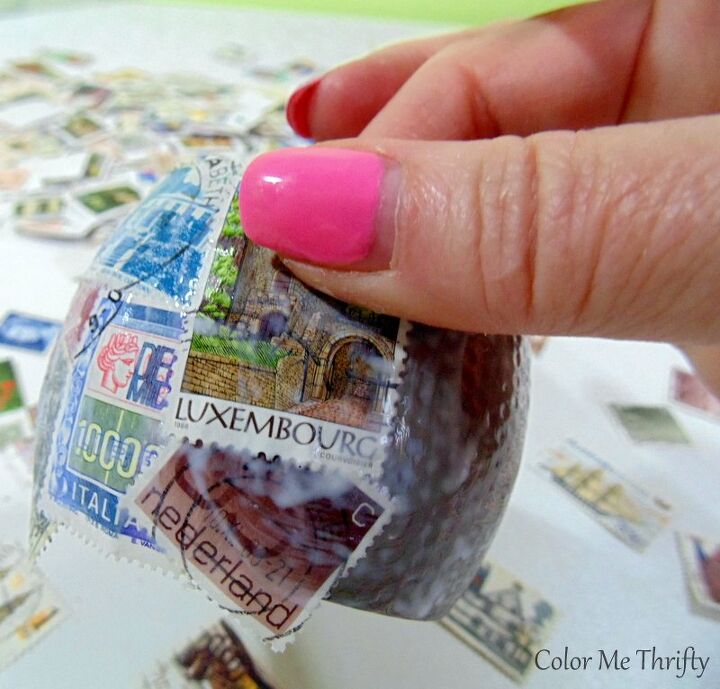
Once the cuff bracelet was covered all over with stamps I hung it on a teapot spout to dry.
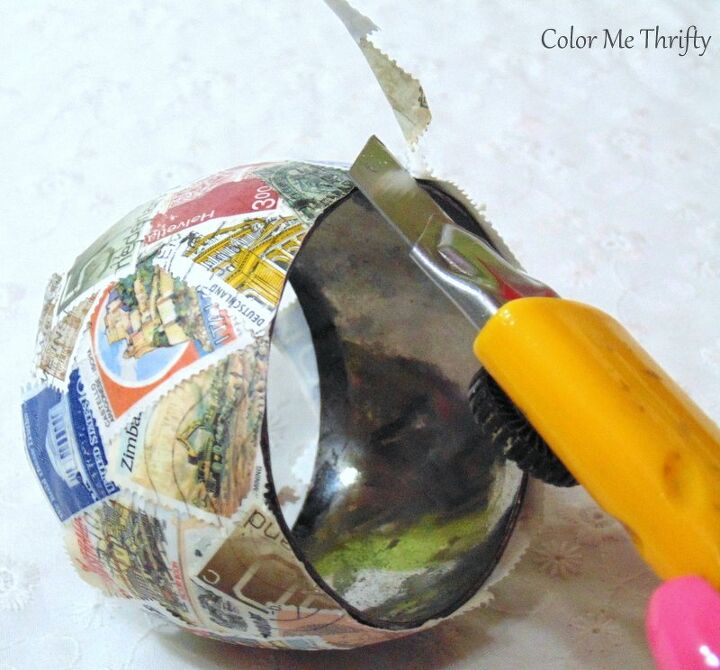
Then I trimmed the pieces hanging over with an xacto knife to make a nice edge.
Make sure your knife blade is very sharp. It should take no pressure at all to trim the pieces off.
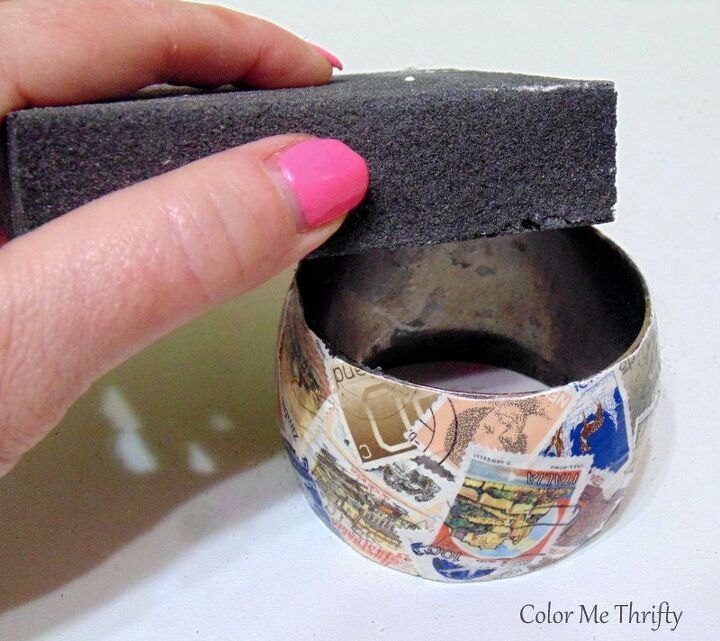
At this point it's important to give the bracelet a nice light sanding with a fine grit sanding block.
This is to remove and paper edges that are not quite smooth.
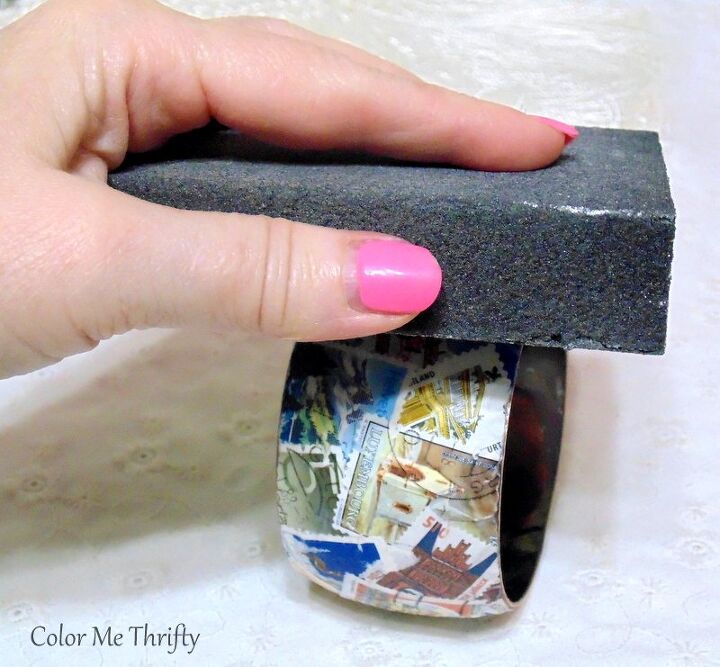
And the body of the bracelet should be sanded as well, because of the layering of the stamps.
You don't have to press very hard at all with the sanding block, and you can feel with your fingers when it's nice and smooth.
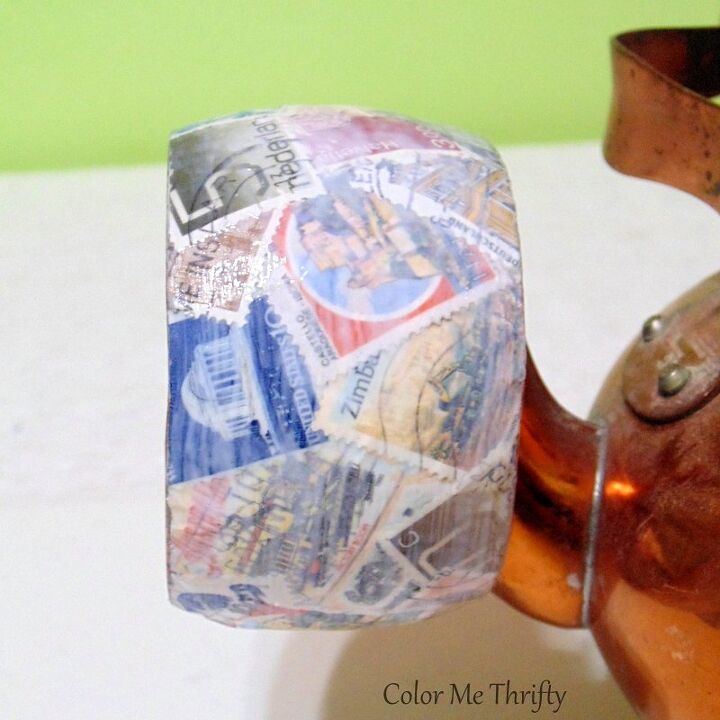
Then the bracelet should get two or three coats of the decoupage medium, with sanding in between each coat.
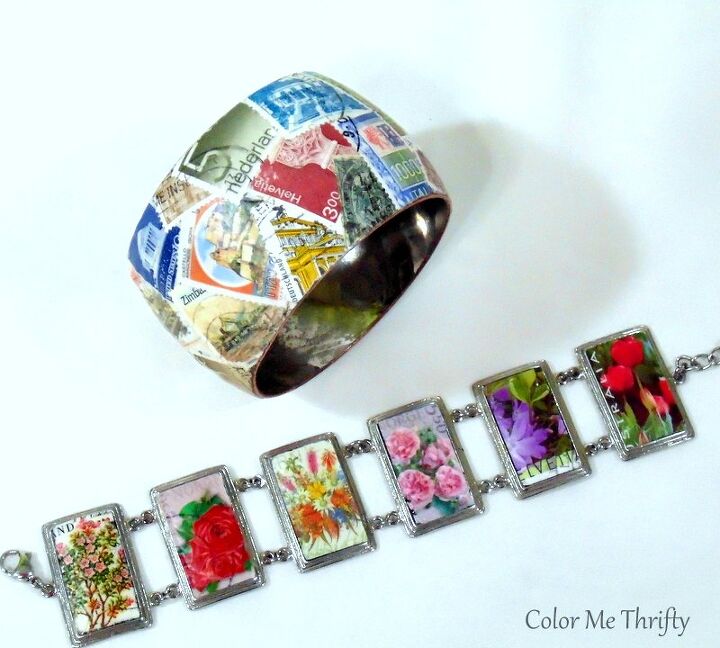
So here's the before of both bracelets again.
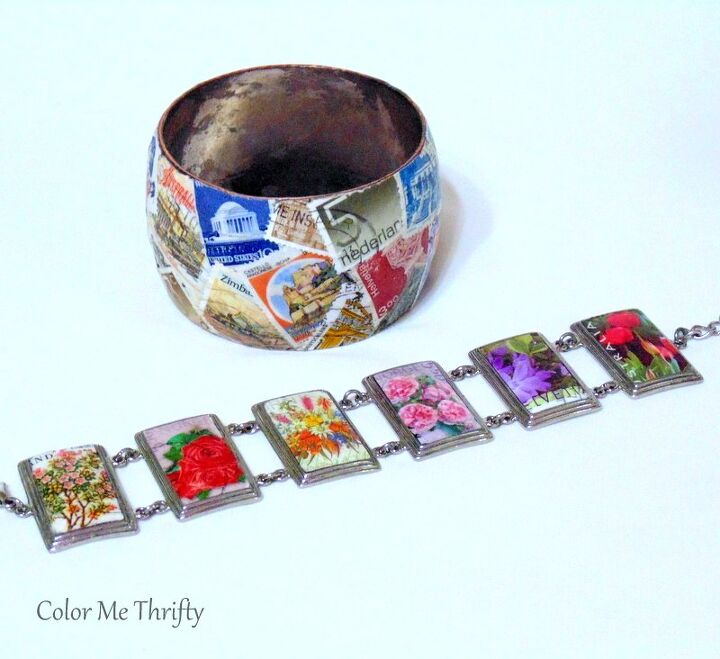
And here's the after.
You could definitely customize bracelets like this by using themed stamps. Themed by country, subject (like the flowers I used), color, etc.... whatever you love really.
I wanted the cuff bracelet to look different from all sides, and I purposely didn't do the inside. The contrast of the aged silver metal with the stamps looks good to me. Plus nobody will see the inside when I'm wearing it.
I didn't have duplicates of any of the floral stamps, so I picked from what I had.
For me, using all different stamps makes it look more interesting.
I love how both these decoupaged bracelets turned out, and they were so easy to do.
if you enjoyed this project you can check out more jewelry related projects here on my blog.
The author may collect a small share of sales from the links on this page.


Comments
Join the conversation
didn't think I'd like jewelry covered with stamps, but I was wrong! This is a very creative and lovely update. Nice job finding a totally new idea!
Tuula, I love what you did with the stamps! Do you think it would be ok to use Mod Podge instead of Decoupage? Are Decoupage and Mod Podge the same thing?