Beading 101- Make a Looped Beaded Necklace

Want to know how to make a beaded DIY necklace? You are going to love this tutorial because I'm going to show you a chic and beautiful pattern for a beaded necklace. As you know, I love easy beading projects, but this one isn't super easy simply because of the pattern that you'll need to follow. I do have to say, it's totally worth it, though! This beaded necklace reminds me of Cleopatra because of its uniqueness. So, grab your materials as listed above, and let's get this show on the road!
Tools and materials:
- Headpin
- 3 Different colored beads
- Round nose pliers
- Long nose pliers
- 16 small chains, 5 inches long
- 19 pearls- 10mm
- 19 pin heads
- 1 lobster clasp
- 19 jump rings
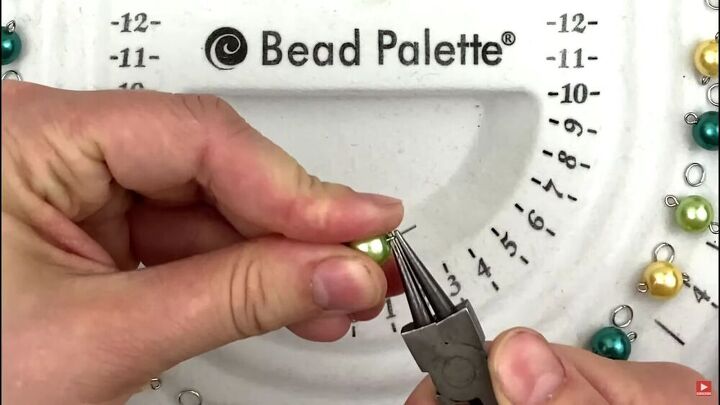
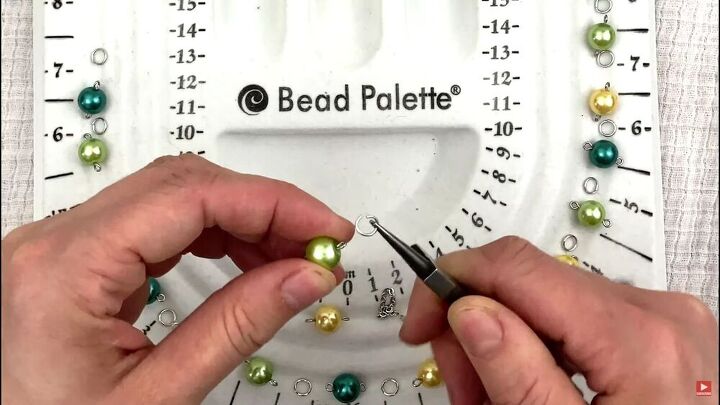
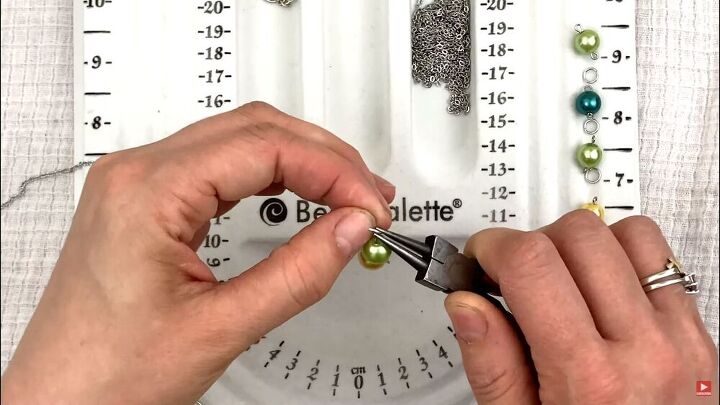
Make the loops
Let's start with making loops; you'll need to make them on either side of each bead. Insert a headpin through one of the beads. Begin by making a loop on one side with your round-nose pliers. Grab the one end and twist the edge of the headpin down to 90 degrees.
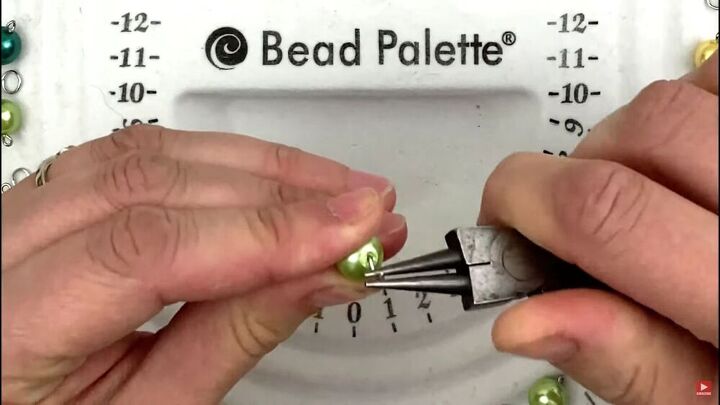
Then, grab the edge with your round nose pliers and curl it around.
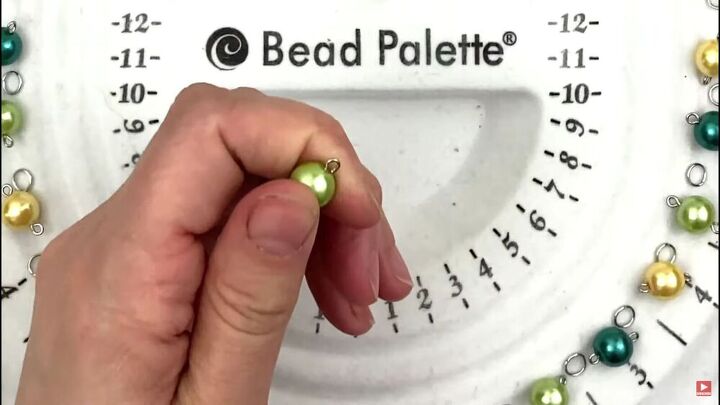
For the other end, repeat the same process but make a smaller loop. Do this for all the beads.
TIP-
Make sure to cut off the headpin's end.
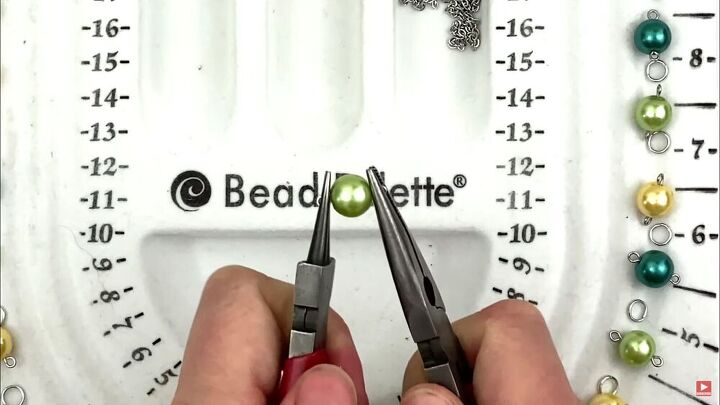
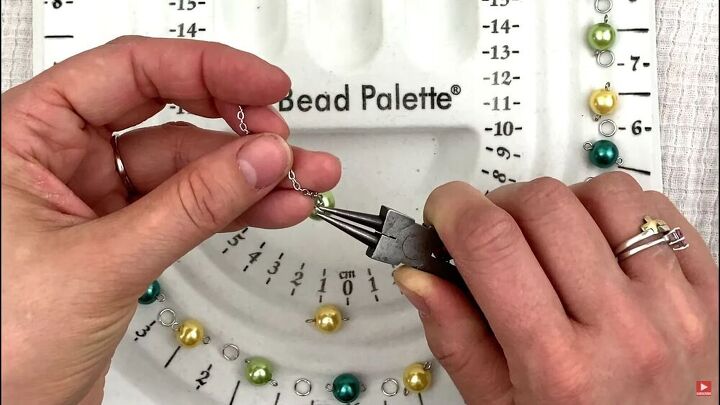
Modify the loops
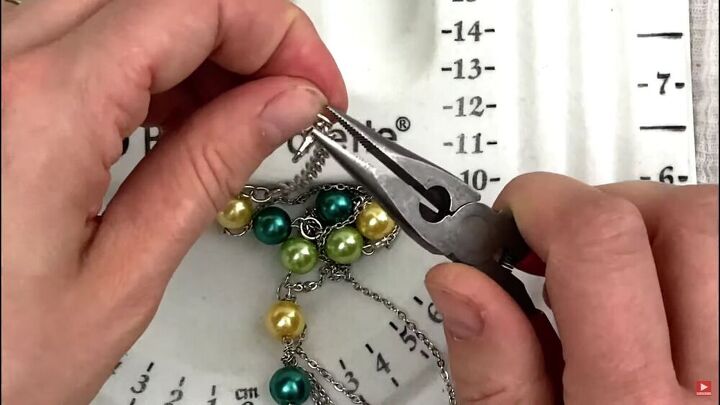
Now, you'll need to close the loops so there's no gap where the chain can escape. Also, you'll notice that on some of the beads, the loops are not at the same angle. So, take two pliers and lightly twist each loop simultaneously so that they are facing the same way.
Connect the jump rings and chain
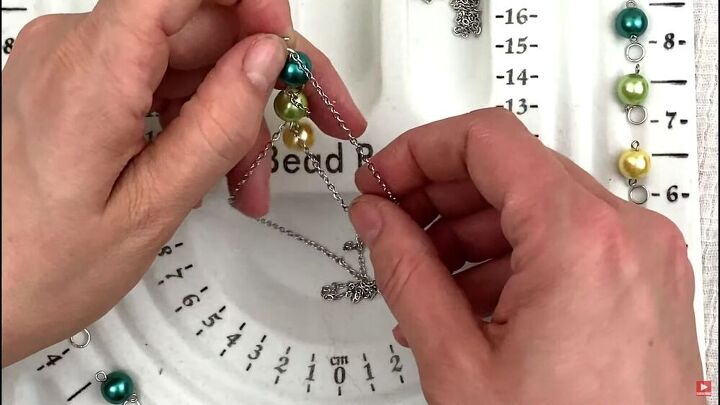
Now, connect the beads to the jump rings. To do this, take two beads. Starting from the top, you'll only need one chain for each two jump rings. Start by opening your jump ring and feed one of the bead's loops through it.
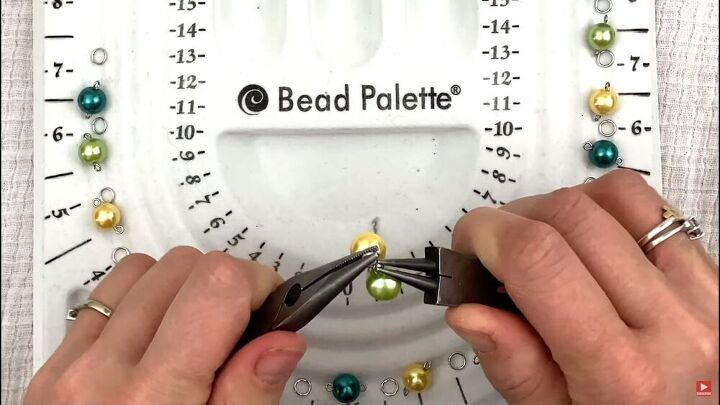
Then, take a chain, put it on, and finish off by feeding through the next bead. Remember, the chain needs to be in between the beads. When you're done, close the jump ring and set the pair of beads aside.
Now, continue with the rest of the beads. You can make these chains as long or as short as you'd like. To see the full process, check out my video from 4:55 minutes.

Loop the chains
Ok, so this may seem tricky, but it's pretty straightforward. When you add your fourth bead, add two chains; the first chain from the first two beads and a new one. This will create that beautiful loop effect. So, remember, the chains skip every other jump ring. Check my video from 6:07 minutes to see how I do this.
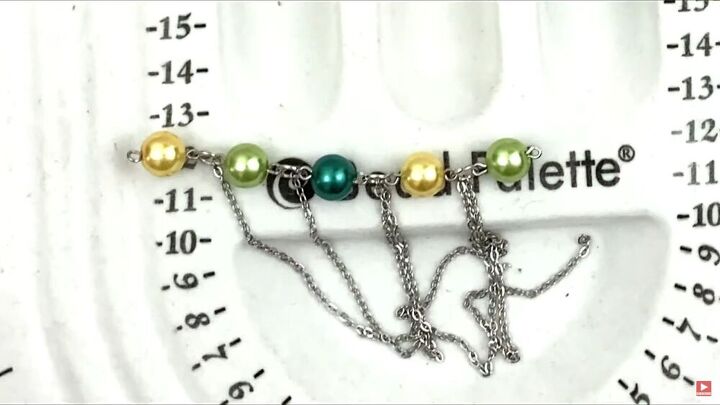
Follow the same process with the preceding beads.
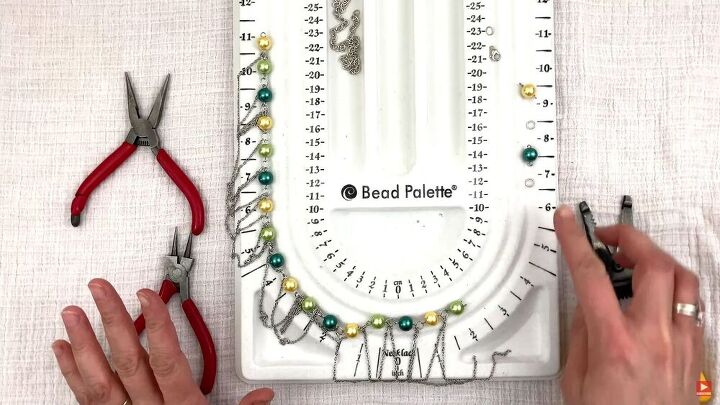
TIP-
Make sure to close the gaps on all the jump rings.
For the last 2 beads and jump rings, connect the chains 2 jump rings down. So, the two jump rings on the end only get one chain.
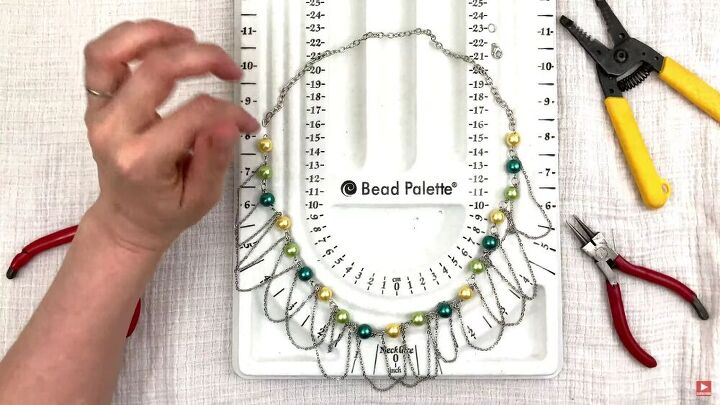
Add the main chain
Now for the necklace to sit snug around your neck, You'll need to add a longer chain to connect the two outer beads. Simply grab one end of the chain and loop it on either end of the adjacent beads. You'll notice the chain I'm using here is a lot bigger; this is super important as it needs to hold the weight of the beaded necklace.
To make it an adjustable necklace, cut the chain on one side and add a jump ring to one end and a lobster clasp, too.
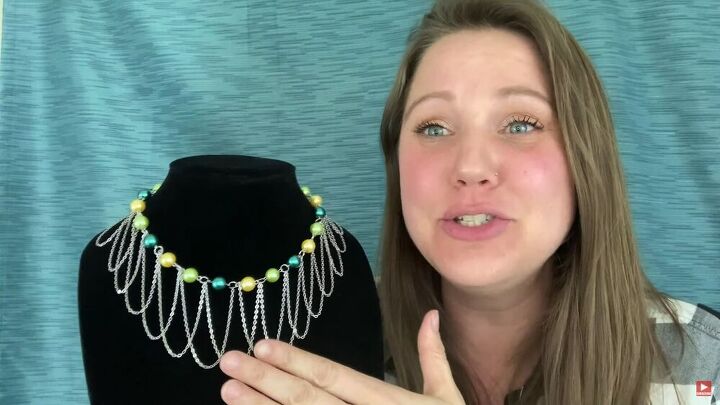
Yay! Your DIY beaded necklace is complete, and the result is just breathtaking! Yes, it can take a while to make a beaded necklace, but it's a super fun process and definitely worth it. Would you look at that? It's so intricate and just simply gorgeous! I'm so chuffed with myself, and I'm sure you are, too, when you finish off this stunning beaded necklace.
The author may collect a small share of sales from the links on this page.


Comments
Join the conversation