How to Make an Elegant DIY Layered Chain Necklace With Charms

Today, I’m going to take some simple parts and some simple techniques and put them together, and teach you how to make your very own DIY layered chain necklace. Let’s get started.
Tools and materials:
- Heavy chain
- Textured rings
- Jump rings (in two different sizes)
- Star charm
- Lobster clasp
- Luna moth charm
- Decorative glass pendant
- Chain nose pliers
- Bent chain nose pliers
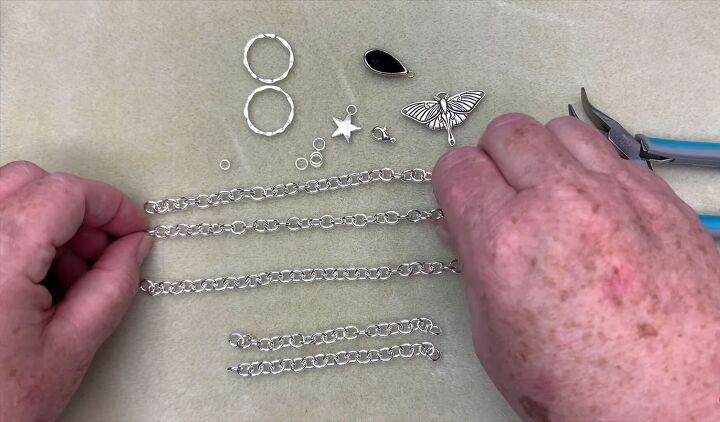
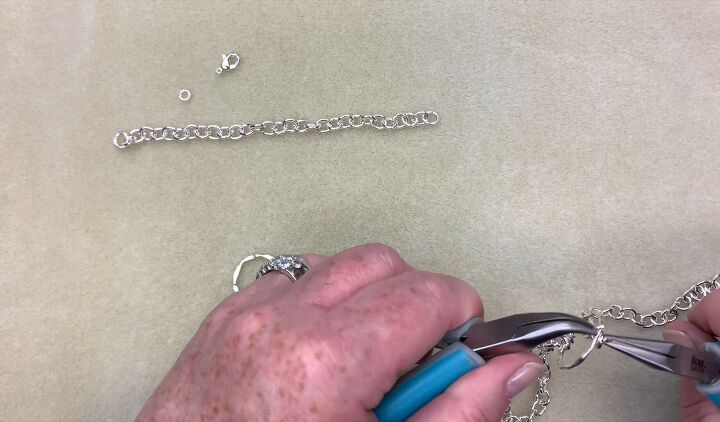
1. Cut your chain to size
The first step is to cut five pieces from your long roll of chain. I have two pieces that are 20 links long, one that is 33 links long, and another two that are 30 links long.
The chain I’m using is not soldered, so to get it into size, all you have to do is open the links up with pliers, just like a jump ring. You can adjust these measurements accordingly and make the chains longer or shorter to make the necklace sit just nicely on your neck.
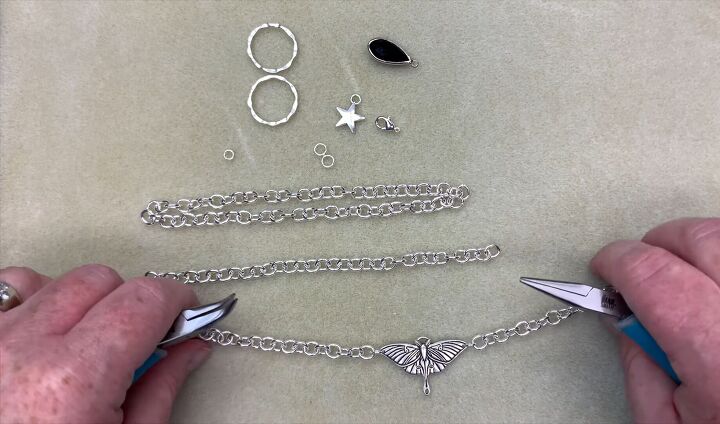
2. Attach the moth charm
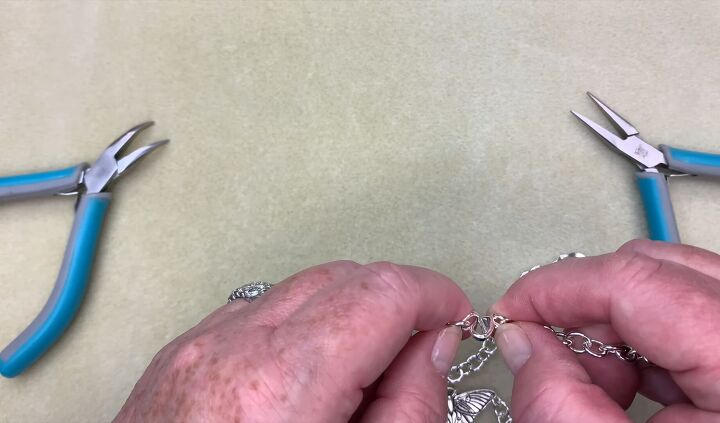
Take one of your larger jump rings, open it up, and then attach it to one of the pieces that is 20 links long. Once done, you want to also put the jump ring through the wing of the luna moth and then do that up.
Make sure you do your jump rings up nice and tight. Then, repeat the process on the other side so that you have a chain on either side of the luna moth charm.
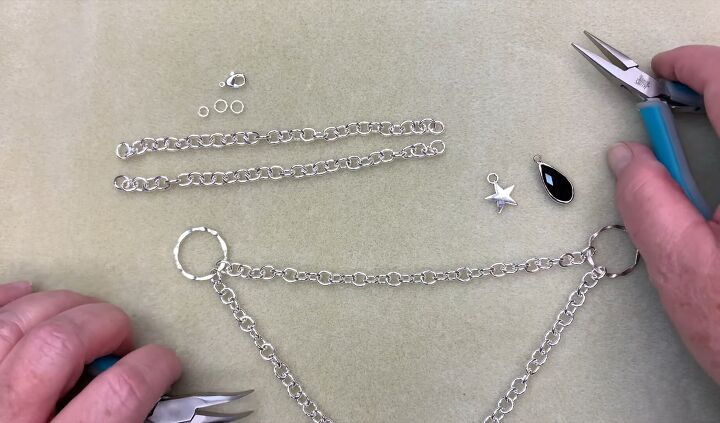
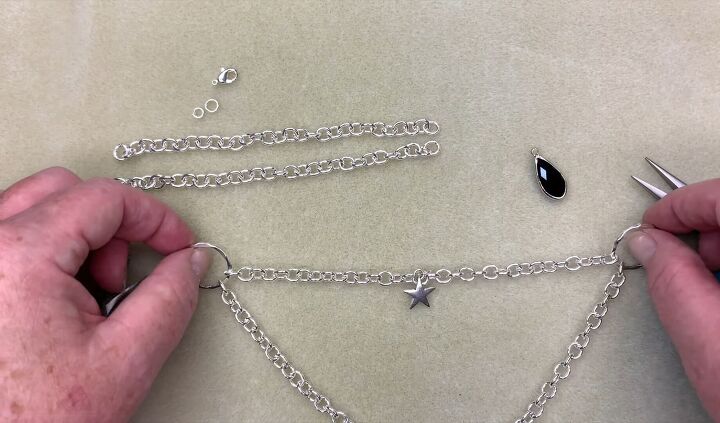
3. Attach the rings
Take the chain with 33 links to use for the middle section. For this section, you want to open up either end of the chain and attach them to the textured rings. Then, attach the textured rings to the ends of the chains you were working with before as well.
4. Attach the star charm
The next step is to find the middle link in your long section. Because there is an odd number of links, there will be a middle one in there. You can put the two rings together and fold the chain in half to help you find the middle link.
When you’ve found the middle link, take one of your jump rings and open it up and add your star to it.
5. Add the glass pendant
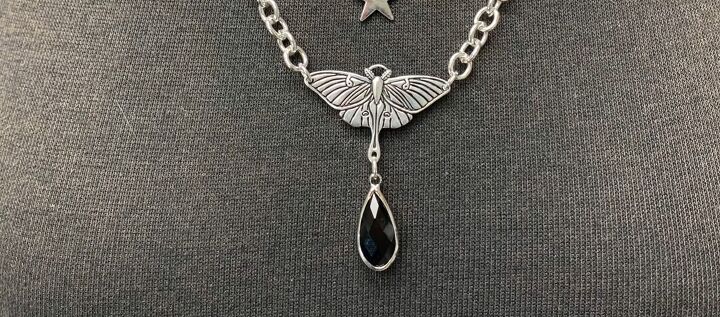
Now you’re going to take another one of the larger jump rings and attach it to the beautiful little glass pendant. Then, attach the jump ring to the circle at the bottom of the luna moth, and that gives the moth charm a nice little added touch.
6. Finish the back part of the necklace
Take one of the chain pieces with 30 links, open it up, and attach it to one side of the textured ring. Do the same thing on the other side with the other textured ring and 30-link chain.
7. Add the clasp
To finish off, take the smallest of jump rings, open it up and attach it to one side of the back chain. Then attach the lobster clasp to the jump ring as well. You just attach the clasp to the very last link on the other side to do the necklace up.
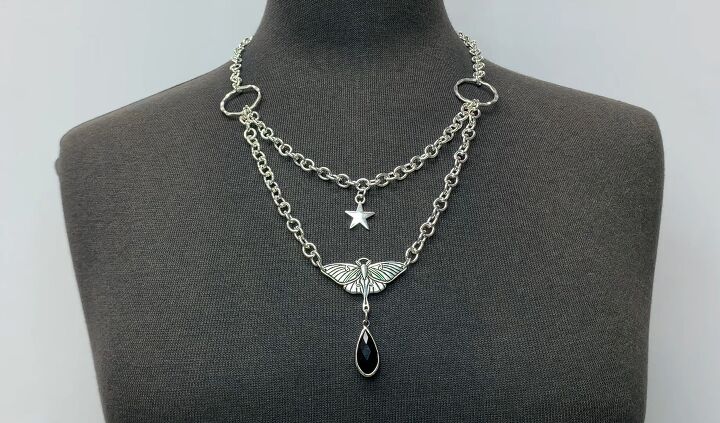
DIY layered chain necklace tutorial
Here is the finished look! This is a really edgy, funky cool piece. It is a reversible style necklace, so all of the pieces are the same on the front and back, and it doesn’t matter which way you put it on.
I hope you’ve enjoyed learning how to make a layered necklace, and you’ll give it a go!
The author may collect a small share of sales from the links on this page.


Comments
Join the conversation
I made a similar necklace a few years ago using a thick chain and my mother's charm bracelet. She had passed away and I knew I wouldn't wear the bracelet as much as I would a necklace. I thoroughly recommend wearing the jewelry of a loved one who has passed. It's a tender and personal way to feel their presence in a practical sense.