DIY Crystal Jewelry Tutorial: Make a Gorgeous Crystal Ring & Bracelet

Today, I'm going to show you how I made a gorgeous crystal ring and bracelet. This project was super easy and affordable, but the results are pretty impressive. So, let’s jump into this DIY crystal jewelry tutorial.
Tools and materials:
- Crystals
- E6000 glue
- Thick wire
- Thin wire
- Wire tools
- Scissors
- Binder clip
- Leather cord
- Bead
- Metal jewelry clamps
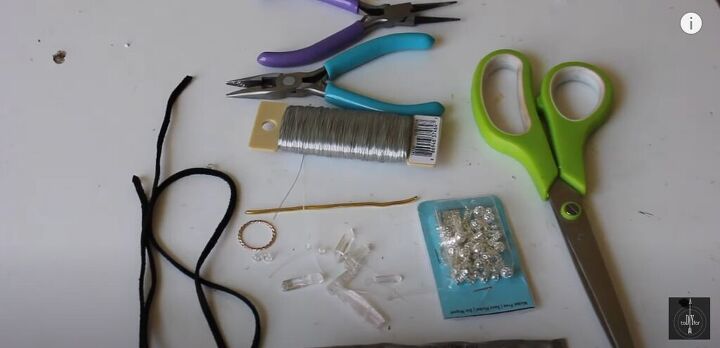
1. Gather materials
To start off, I have several different materials here to create our DIY crystal jewelry with.
You’re definitely going to need some crystals and some malleable wire. I also have some leather cording as well and a few other bits.
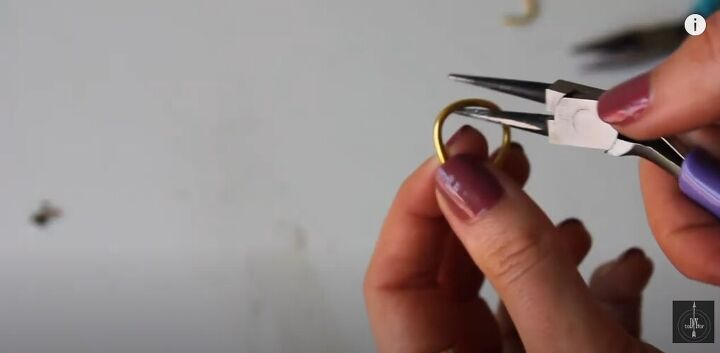
2. Bend your wire into shape
So, I'll show you how I made a ring with just some cheap wire that I picked up at the dollar store.
This wire is really easy to work with because it's malleable. Use your wire tools to bend the ring to the shape of your finger.
Alternatively, you could use a cheap plain ring or upcycle an old plain ring.
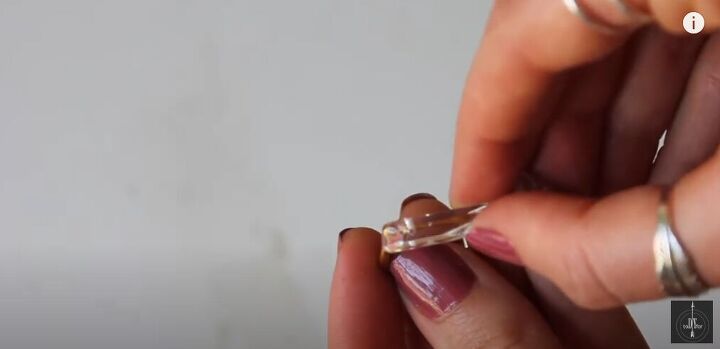
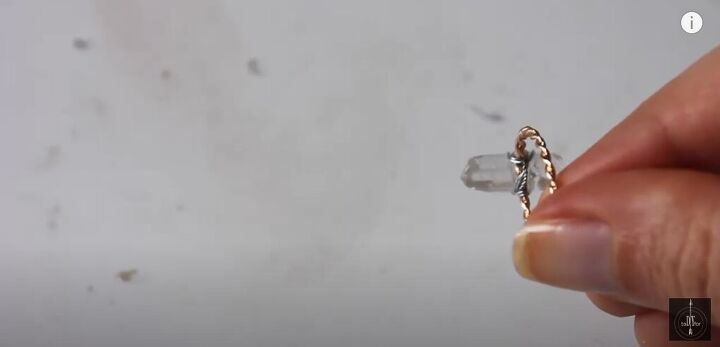
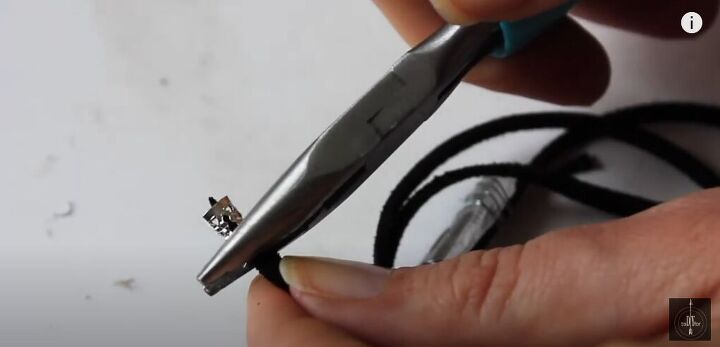
3. Attach the crystals
Next, I’m using e6000 glue to attach the crystal to the ring.
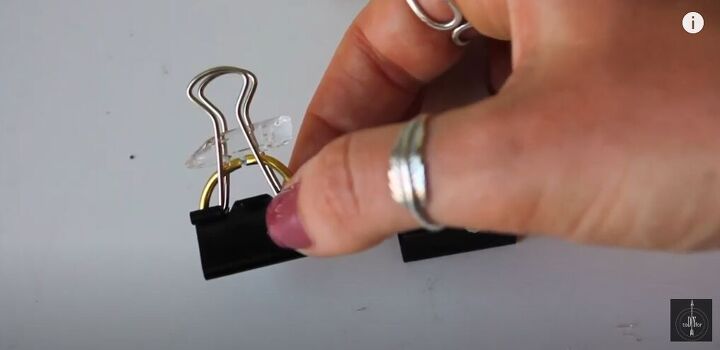
I used a binder clip to hold the crystals in place while the glue dried.
Then, while the rings started to dry, I went ahead and attached a crystal to my leather cord to make my DIY crystal bracelet. Let that glue dry overnight.
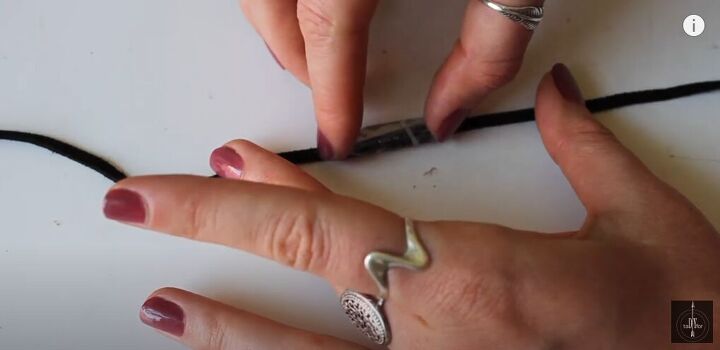
4. Add wire
The next day, you’ll see that the crystal is holding onto the ring but it's definitely not super stable.
So, the next step is to take a really thin wire which will serve as both a functional and decorative element. Wrap the wire all the way around the ring.
You can do as much or as little as you like. Then, fold the wire down underneath the crystal and clip off any excess.
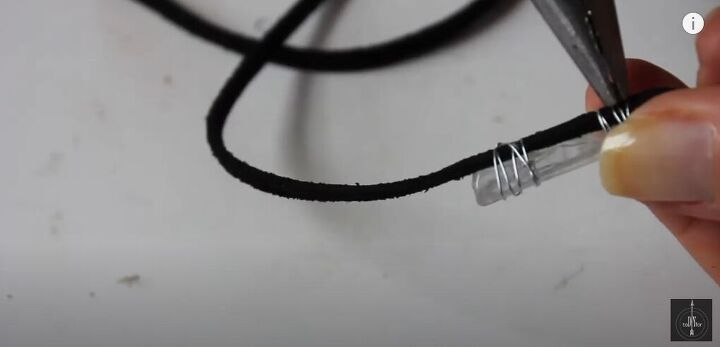
Moving onto your DIY crystal bracelet, you’re going to do the same, wrapping the wire around the crystal to secure it. Again, fold the wire down underneath the crystal and clip off any excess.
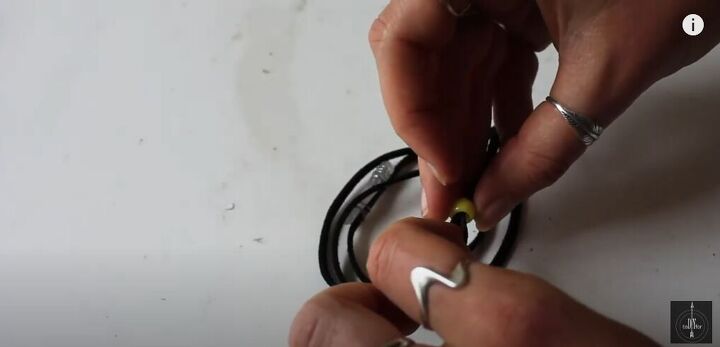
5. Add bead to bracelet
I decided to wrap the bracelet around my wrist three times.
Then, I tied it up with a bead. You’ll need a bead that has a hole wide enough to allow the cord to pass through it twice simultaneously.
6. Add clamps
Then, on the ends of each of those cord strands, attach a metal clamp so the bead can’t slip off.
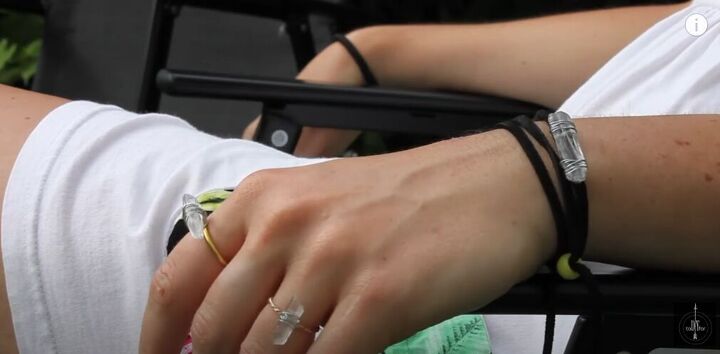
DIY crystal jewelry
Now you have a gorgeous crystal ring and crystal bracelet. I hope you enjoyed this super easy DIY crystal jewelry tutorial.
These pieces are so simple but add so much to whatever look you’re wearing. If you try making these, share your experience with me in the comments!
The author may collect a small share of sales from the links on this page.


Comments
Join the conversation