Check Out How I Made an Adorable Romper From Scratch in This Tutorial

I love a good romper. They can be so cute and obviously they’re perfect for hot summer weather. I was really excited to give this project a try, and spoiler alert: I’m in love. I’m seriously so happy with the way this romper came out and I am so excited to wear it. In this tutorial, I’ll walk you through exactly how I made this awesome romper from scratch.
Tools and materials:
- Fabric
- 2 Front Pieces
- 2 Back pieces
- 2 4” straps
- 2 pocket pieces
- 2 facings for pockets
- 7-9” invisible zipper
- 4 buttons
- Sewing pins
- Clippers/scissors
- Sewing machine
- Seam ripper
- Marking chalk
- Ruler
I started off with a pattern for a romper that I bought, but after doing a test-run, I realized that I didn’t love it. So the first thing I had to do was modify and adjust the pattern for this project. Once my pattern was ready, I traced the front and back pieces, as well as the darts, onto a separate paper.
I put on a shirt and used marking chalk to mark different lines. I marked where I want the neckline to be, the strap placement, the diagonal armpit part, where I want the back to be, and for reference, I also marked my waist.
I took off the shirt and placed it on the pattern, matching up the waistline and the shoulders, and drew the markings I made on the shirt onto the pattern, with added seam allowance. Then I cut out the pattern.
Using a polyester blend that was 58” wide and 1 ⅜ yards long, I drew out the straps and cut out all the pieces of the pattern. Then I traced my dart lines onto the fabric.
The first things I sewed were the darts. This pattern had two darts on the front, and two in the back. I folded the darts and sewed them.
Next, I took my front pieces and placed them right sides together, and sewed all along the center-front seam. I did the same thing on the back, but only sewed it to the end of the zipper.
To make the pockets, I took the pocket facing and folded the edges under by ⅝”, then ironed the fold and sewed it down. Then I placed it on the pocket, right sides together, and sewed all around. I then flipped it inside out and folded down all the edges by ⅝”, and did a topstitch at the fold line and went up, across, down, and stopped at the other fold.
Once my pockets were done, I placed them onto the romper, made a line where I wanted the fold to be, and pinned them in place. Then I sewed from one fold line all around to the other side of the fold line, making sure to leave the flap open.
I then pinned the zipper onto the romper, right sides together. Once they were pinned, I flipped it over to the other side so I could pin down the second side with the right sides together as well. Once that’s in place, I sewed it down.
The next thing I had to do is was hem the different raw edges of the romper, so I did a simple rolled hem along the neckline. If you’re making this and you want it to look more professional, I would suggest doing a facing on the neckline, instead of a rolled hem. After the neckline, I hemmed the bottom of the shorts.
To connect the front of the romper to the back, I pinned them together, right sides facing each other, and sewed along the side seams and crotch seam.
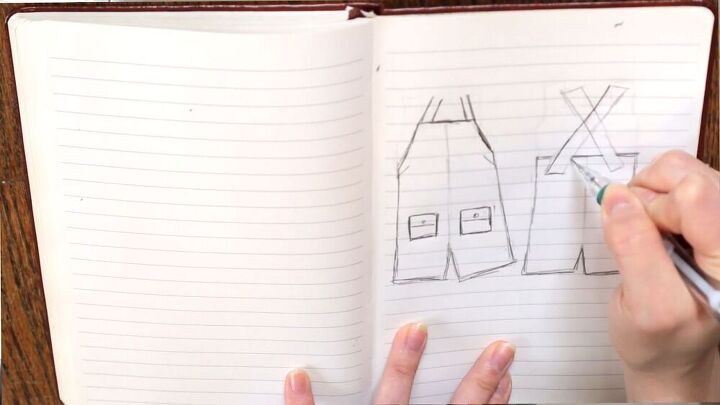
The next thing I needed to do was add the straps. I couldn’t decide if I wanted a regular strap or an overlapping strap with a button, so I hit the Instagram polls, and the winner was the button straps. To make them, I took the fabric and folded it in half lengthwise and pinned it. Then I sewed along the long edge and closed one end. Then I flipped it inside out and ironed it flat before attaching them to the front of the romper.
To add buttons to my straps, I had to create buttonholes. The button I had chosen was too big for the buttonhole hook, so I did it the old fashioned way. First, I marked the top and bottom of the button on the strap where I wanted the button to be. Then I sewed a small rectangle with a zigzag stitch, and used my seam ripper to cut open the inside of that square. Lastly, I hand sewed the two big buttons on the back and the two small buttons on the pockets.
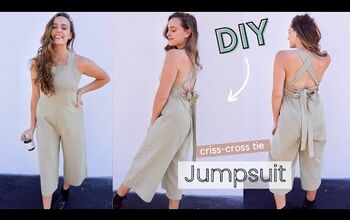
Okay, you guys, I’m obsessed. Seriously, this came out so cute! I absolutely love the buttons on the crossed straps and am so happy with the way it looks. I need it to be summer forever so I can wear this all the time. It was also relatively easy to do, so I’m calling this one a success. Should I just go ahead and make one in every color? I probably won’t, but if you make one, show me your variations in the comments!
Enjoyed the project?
Suggested materials:
- Fabric
- Pattern (Zipper)
- Buttons
- Sewing pins
- Scissors
- Sewing machine
- Seam ripper
- Marking chalk
- Ruler
The author may collect a small share of sales from the links on this page.


Comments
Join the conversation
Wow, this turned out awesome! So cute!