3 Elegant Marble Nail Ideas That Are Easy to Create At Home

Today we are creating three beginner-friendly marble gel polish looks. These marble nail ideas can be tweaked and vamped up any way you like. This particular form of nail art is super versatile and easy to customize using different colors, patterns, or combinations.
Tools and materials:
- Curing machine
- Gel polish kit
- Fine-tipped nail brush
- Regular tipped nail brush
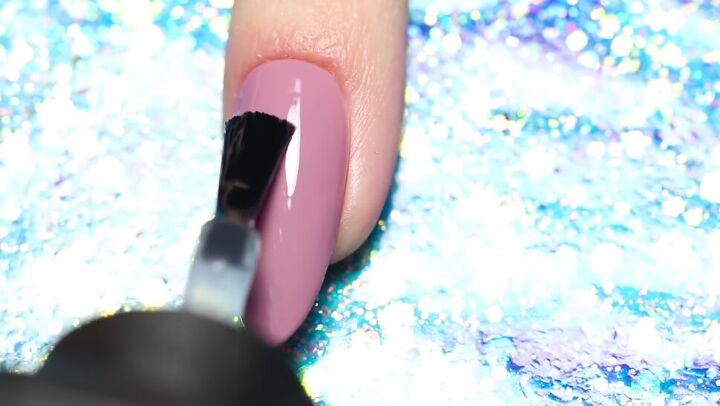
Marble nail idea 1
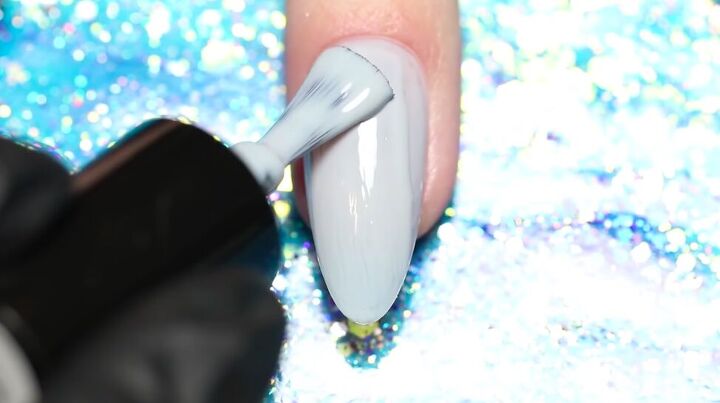
1. Apply a base color
Apply your first coat using a light color of your choice. For this look I chose gray.
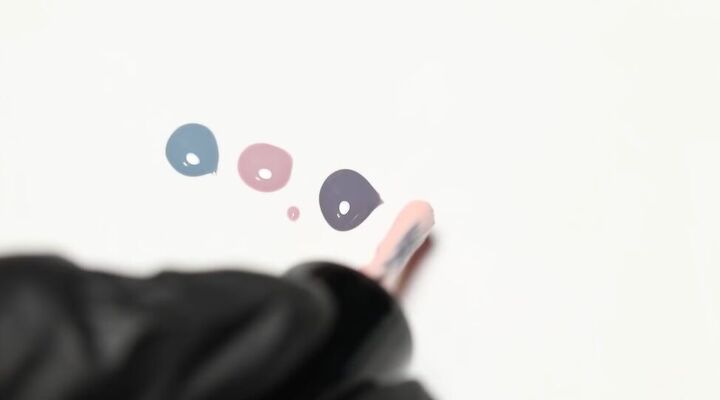
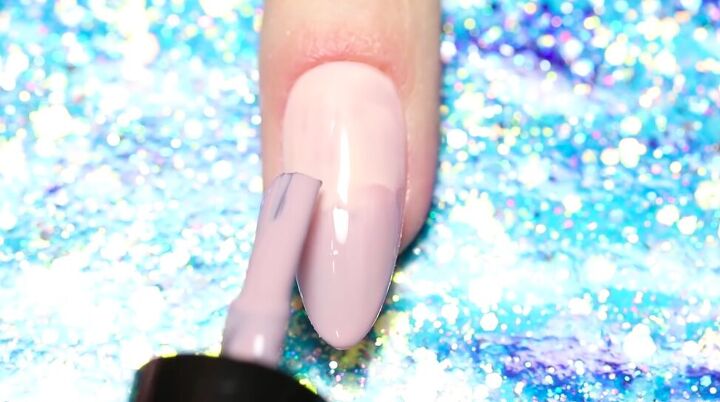
2. Choose the marbling colors
Next, choose four colors for your marbling effect and drop a dollop of each color on a clean surface.

3. Scoop up the colors
Scoop the colors onto your brush one by one until they are all on the brush together.
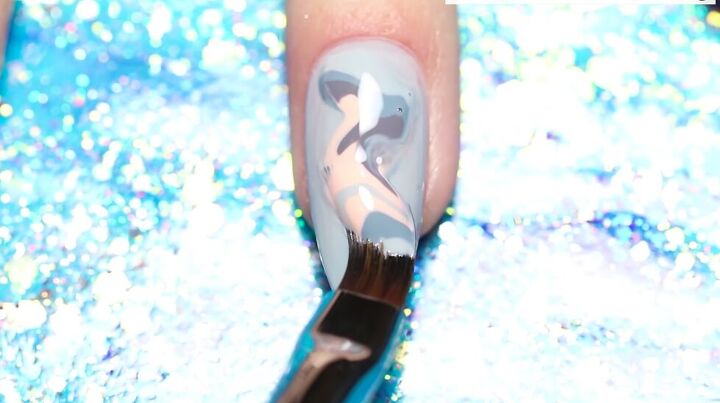
4. Apply colors to the nail
Carefully brush the paint onto your nail in a downwards zigzag motion, taking care not to blend the colors too much. Adjust the paint using a fine-tipped brush until the marbling effect covers the entire nail.
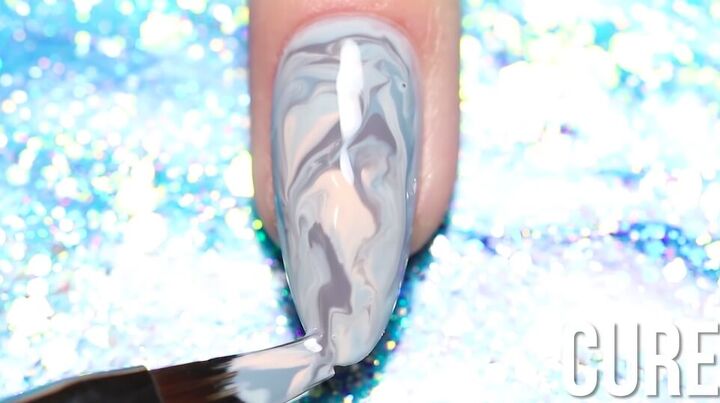
5. Top coat and cure
Apply a clear top coat to the finished nail and cure.
Marble nail idea 2
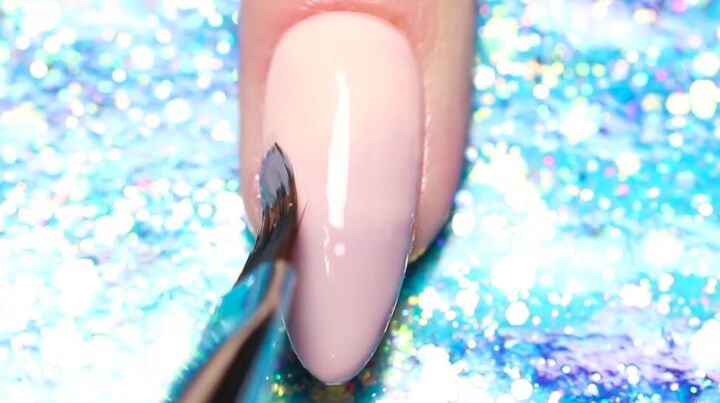
1. Apply a base color
Apply two layers of your base color, cure, and then apply a clear top coat.
2. Paint marbling lines
Choose a color that is lighter than your base coat. Paint lines on your nail freehand in a zigzag motion, using a fine-tipped nail brush.

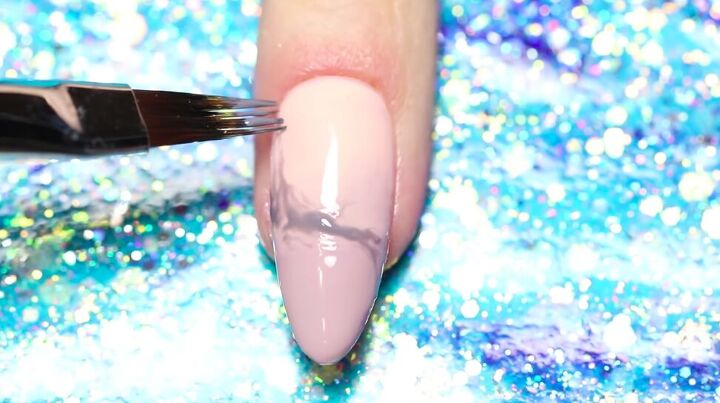
3. Smudge the lines
Go over the lines again, slightly smudging the lines as you go to create the marbling effect.
4. Create a shadow
Take a color that is slightly darker than the lines you just painted and repeat the same process.
5. Top coat and cure
Apply the top coat and cure.
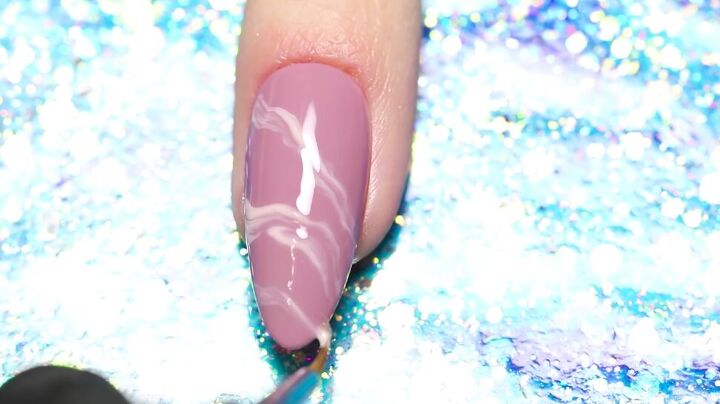
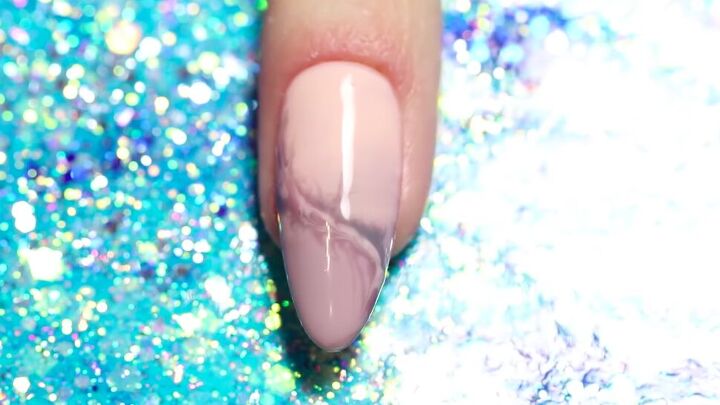
Marble nail idea 3
1. Apply base colors
Choose two light colors of slightly different shades for your base color and apply each to half of your nail.

2. Blend the colors
Using a brush, blend the two colors together where they meet.
3. Apply a top coat
Apply the base color twice before applying the clear top coat.
4. Paint marbling lines
Using a darker color, take a fine-tipped brush and create a line in a swirly motion from the upper left to the bottom right of the nail. Run your brush over the line to create a swirling, marbling effect.
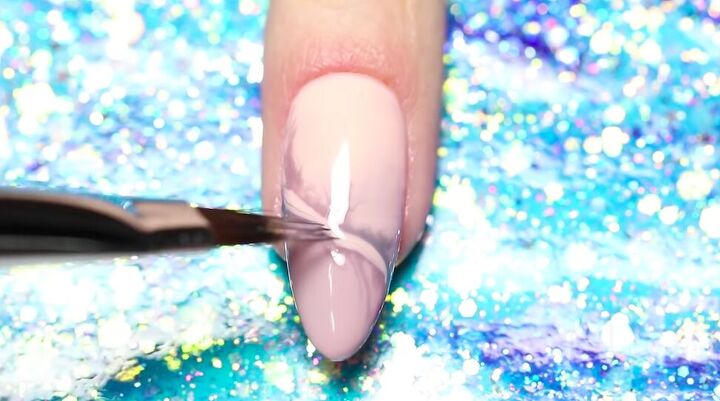
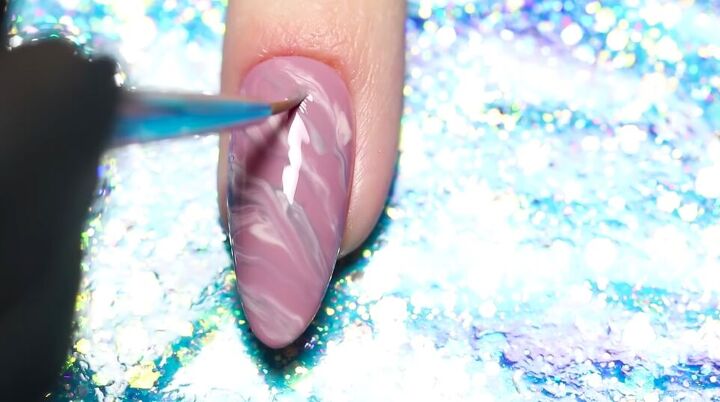
5. Create light and shadow
Using one of the colors on your base coat, go over the marbling line for a shadowing effect.
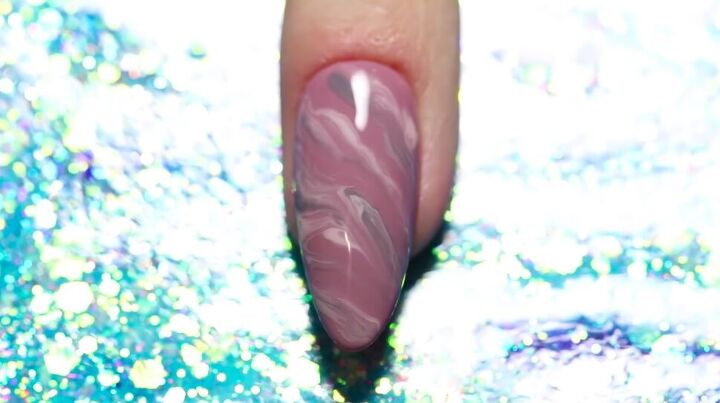
6. Top coat and cure
Apply the clear top coat and cure.
Marble nail ideas
There we have it! Three super easy and fun marble nail designs! Let me know in the comments below how yours came out. Feel free to share pictures of your own unique color combinations!
Products used
The author may collect a small share of sales from the links on this page.


Comments
Join the conversation
I also am concerned with the severe redness along the cuticle line of the hand model
I am guessing it is NOT infection! Some that have cuticles that are not smooth and therefore can't be pushed back successfully as most can do .. must actually trim the cuticles that won't push back smoothly.. she had most likely just done them that same day to be red. By next day they will be normal color. Until they grow out and the process is repeated. Am 70 years old and have several nails on each hand that I have trimmed the cuticle on since I was 16 yrs old. My mother had the same issue. All you gals out there with normal beautiful cuticles remember to thank GOD for that blessing!