The Easy Summer Robe

Hello Readers. It is already June and it is time for a new theme. This months theme is animal prints. I always shy away from animal prints so this will push me into having more in my wardrobe. We are going to start with this loose sort of jacket in a giraffe print.
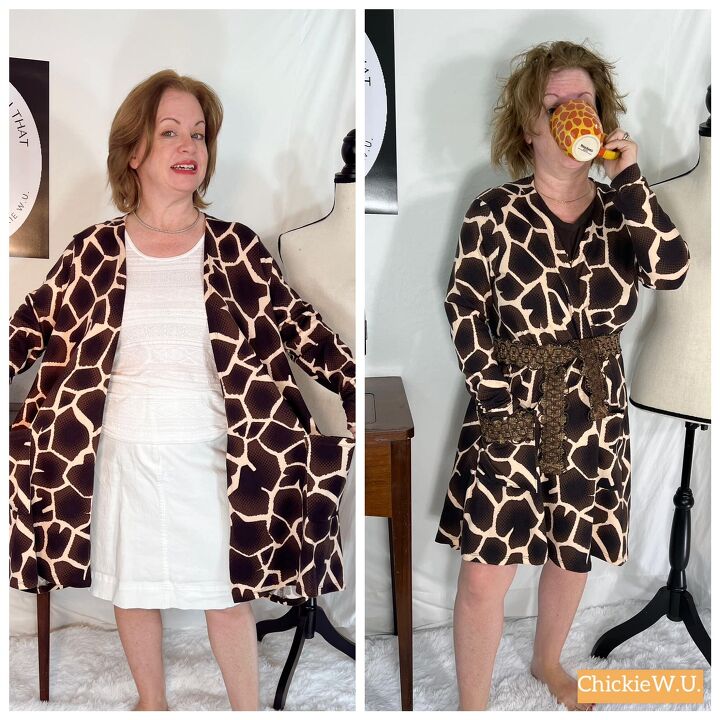
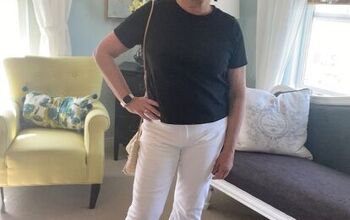
Before and after.
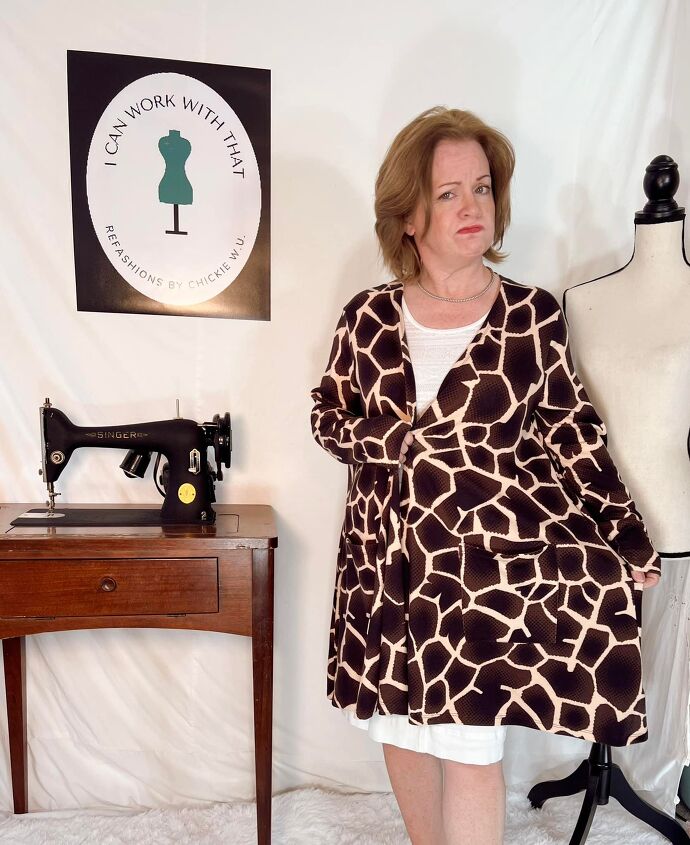
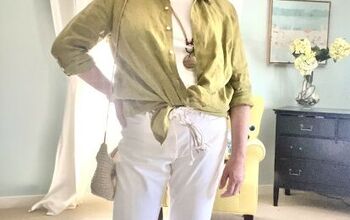
I think this light weight piece is meant to wear over leggings. It is from a certain company that is famous for leggings. (And scandals!) It is knit material with a lot of stretch. It also had 2 big pockets. I like pockets! I didn't really need a jacket but it looked a lot like a bathrobe to me. But it didn't have a belt to tie it closed. A robe needs to have a belt to tie around the waist right?
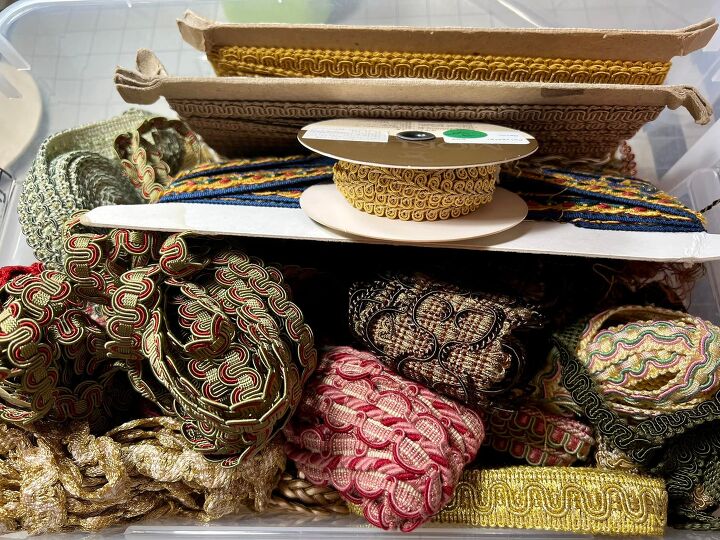
I went digging through the stash in my closet and looked for some kind of brownish trim I could use. I wanted something with pizzaz!

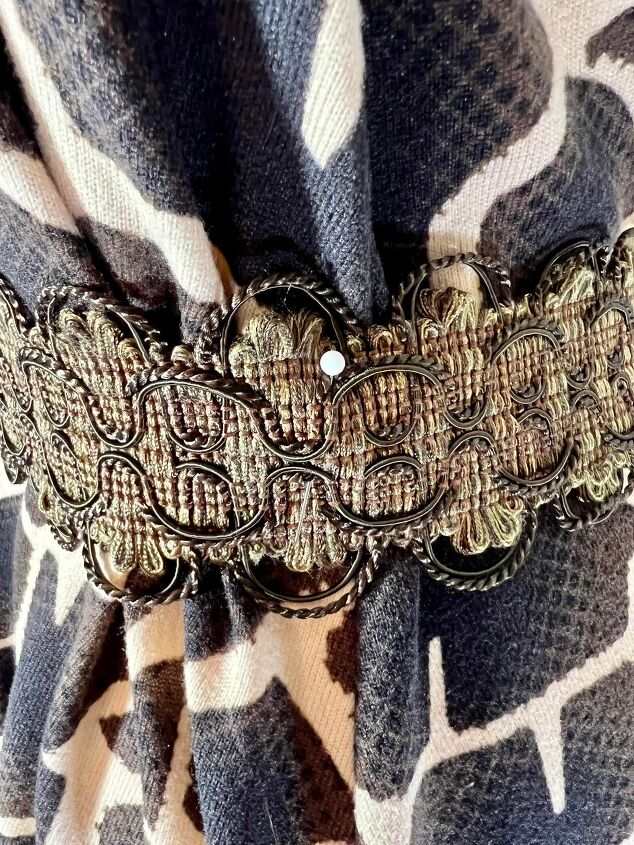
Here it is. It is brown and flat. I am going to make it work for my new robe. If you do not have access to a stash of trim any sewing supply store will have loads of ribbons and trim to choose from.

I made sure there was enough to tie around my waist and I was ready to go. I knew this trim would fray like crazy. I folded the end in twice and used a zigzag stitch to sew back and forth over the fold. I wanted to close the end and stop all fraying. I did this to both ends of my belt.
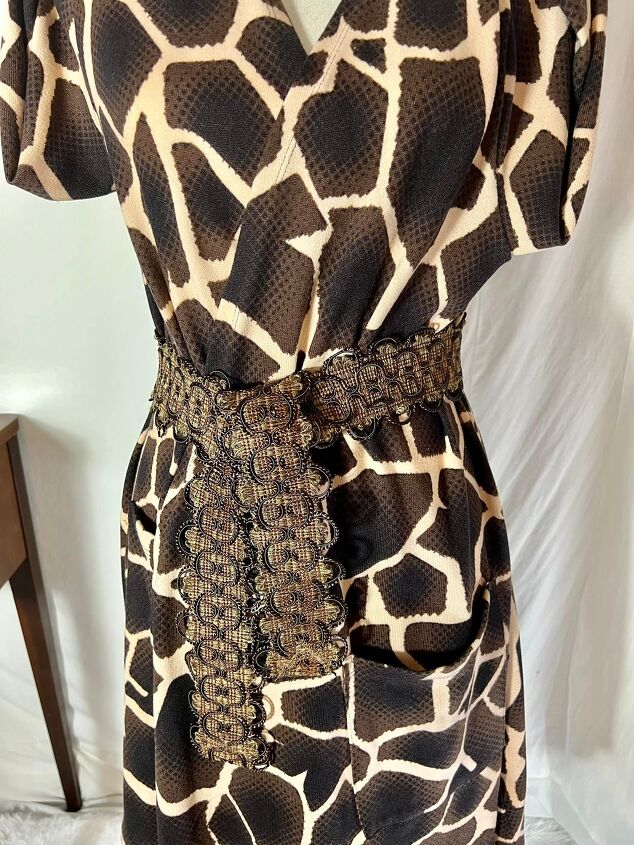
I wanted to attach the belt to the robe so I put it on my dress form. You could also just try it on if you do not have a dress form. I wanted to see how the belt fit around the waist and where I could stitch it to the sides of the robe because it didn't come with belt loops. I don't want to make belt loops and I have no extra giraffe fabric to make them with.
I used pins to hold the belt to the robe and made sure I could fold the front over itself to close the robe in the front. I adjusted the belt a bit. I used my sewing machine to attach the belt to the sides of the robe.
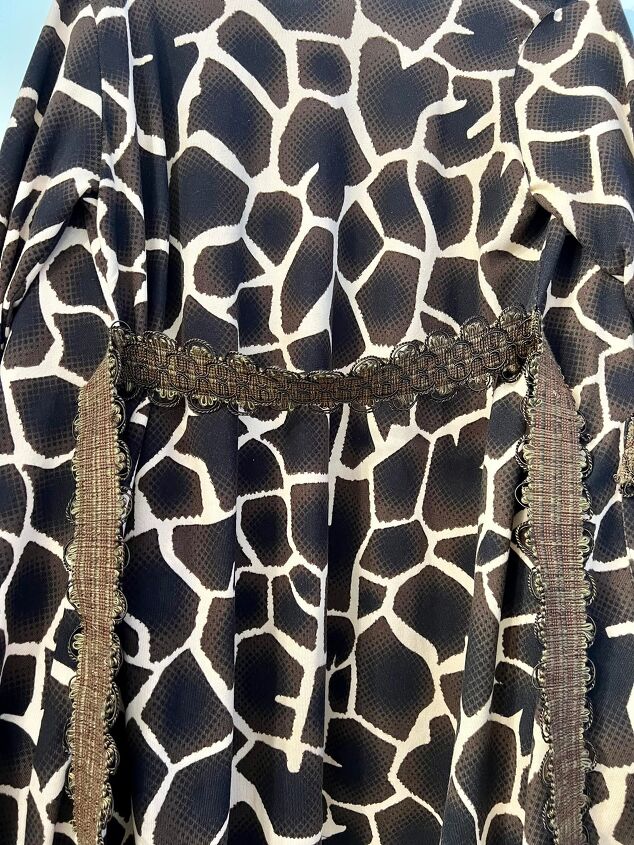
I attached the belt to the robe so it wouldn't fall off when it wasn't tied. It seemed easier to attach it rather than try top make belt loops.
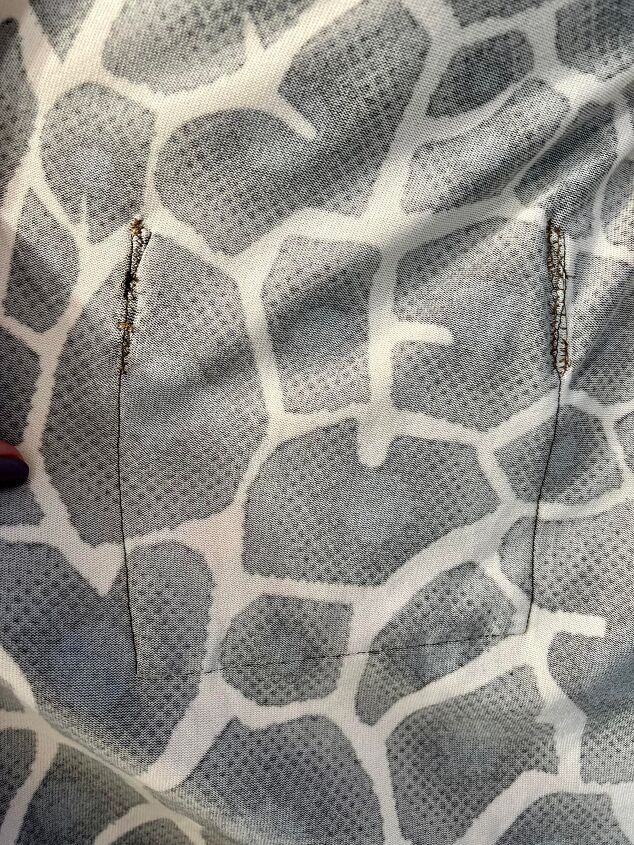
You can see where I attached the trim to the sides of the pocket here. The ends of the trim are folded in and under twice to hide all the loose ends and it is all stitched down so it won't be able to fray.
I wanted trim on the pockets but I made sure the pockets are still functional.

My robe was great for the morning when it was a bit cool in the house. I liked the trim with the robe. It was a lux touch on the simple robe. We all need a bit of luxury now and then. Thanks for reading along, now go make something fun for yourself.
Chickie
The author may collect a small share of sales from the links on this page.


Comments
Join the conversation