How to DIY Unique Printed Pants

I've been asked a few times how to print on fabric. In this tutorial I'm going to show you how to block print fabric to make unique printed pants.
I would suggest for your first attempt that you print on plain fabric rather than an already made-up garment, but this is how I turned plain black pants into something special.
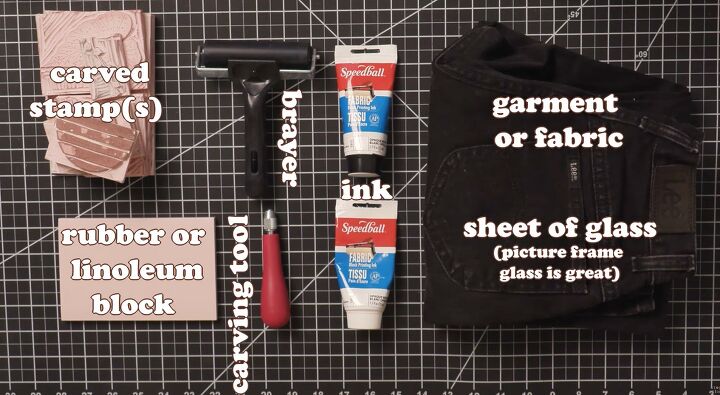
Tools and materials:
- Rubber or linoleum block
- Carving tool with small, medium and large blades
- Brayer
- Block printing fabric ink
- Garment or fabric to print
- Piece of glass to roll paint on
- Paper and pencil or tablet with design software
- Ink pad
- Scrap paper
- Old garment or scrap fabric to test on
- Lint roller
- Painters' tape
- Fine paintbrushes
- Old toothbrush
1. Prepare materials and create design
I used an iPad with the Pro-create app to create my design. Whether you're using software or paper and pencil, start by making your canvas the same size as your block. In my case this was 4 inches by 6 inches.
Trace or free-draw your design and don't be afraid to experiment, or erase it all and start again.
If you want your design to be a repeating pattern, make sure that the lines you draw on one side connect to the lines on the other side, and that the corner designs also match. Draw a grid or use a ruler to make that easier.
For the corners, I copied and pasted the same design into each, divided them into four and placed them so they would match up. You can do the same with a piece of paper cut into four.
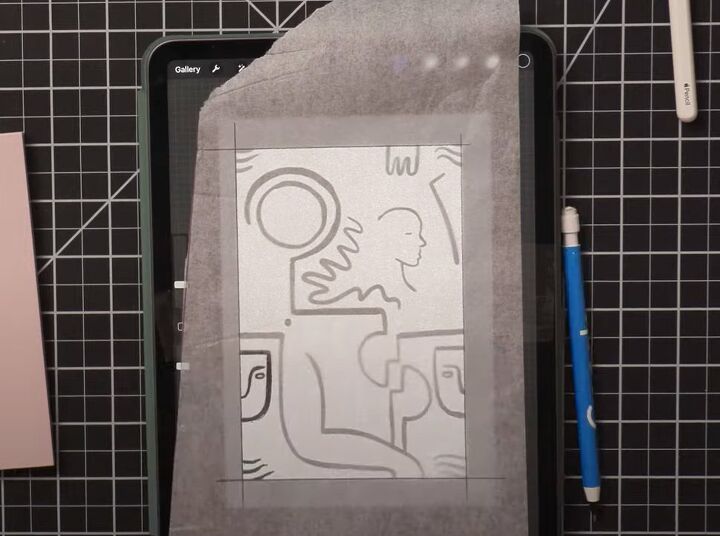
2. Trace design
Trace your design onto tracing paper with a pencil. Make the lines fairly thick, so there's more graphite to transfer.
If you're using an iPad or iPhone, use the "Guided access" feature to lock the screen while you trace from it.
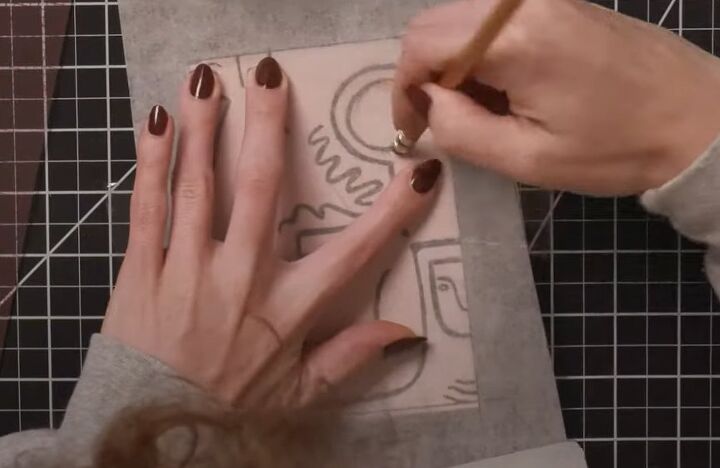
3. Transfer design
Place the traced design face down on to your block and press down on it.
Rub the eraser end of a pencil over the lines to transfer as much of the graphite as possible.
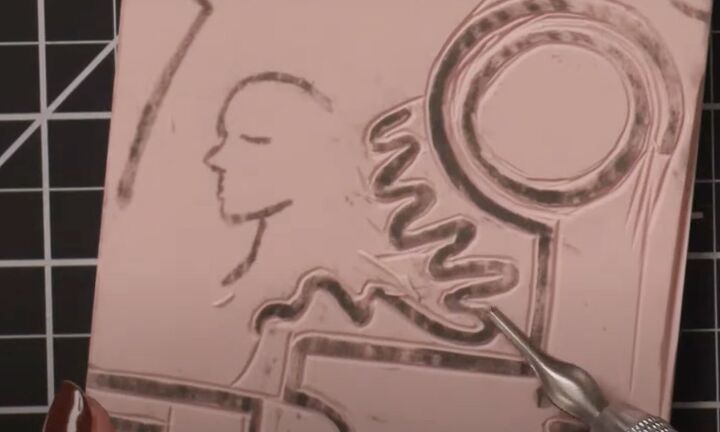
4. Carve design
Use the small carving tool to outline the elements of your design, including the finer details.
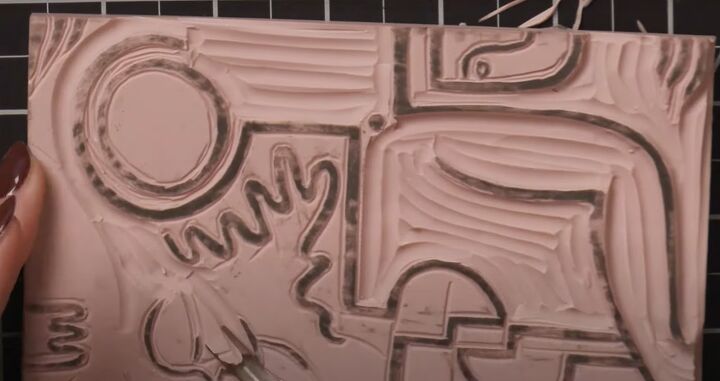
Switch to the widest tool to remove the larger sections of the design and give definition and use the medium blade to carve out anything remaining.
5. Test stamp
Dab an ink pad over the carved design to make some practice runs on paper. Use the brayer to create even pressure on the block.
Do any further carving necessary to create a sharp print and make sure the design lines up at the sides and corners.
In my case, the corner designs weren't lining up as I wanted, so I removed them from the block.

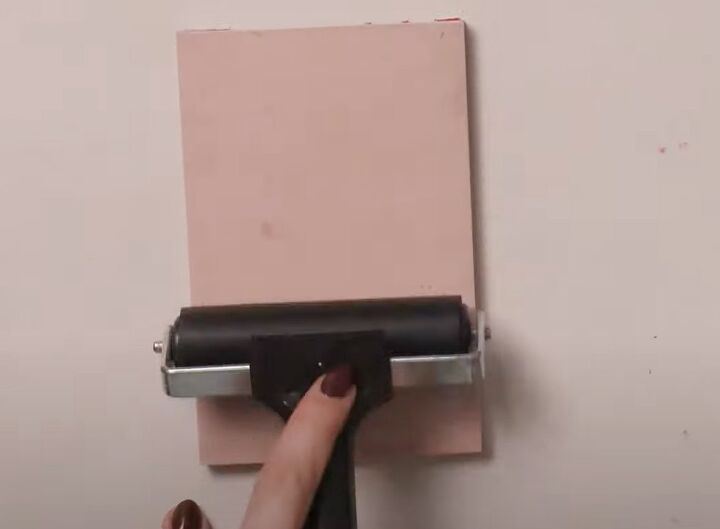
6. Test printing
Squeeze some ink onto the glass sheet and spread it with the brayer. Use the brayer to apply the ink to the block.
Place the block face down onto your test garment or fabric, press it down evenly and lift it away cleanly, to test how well the ink applies to fabric.
If any paint appears where it shouldn't be, carve that section out more deeply.
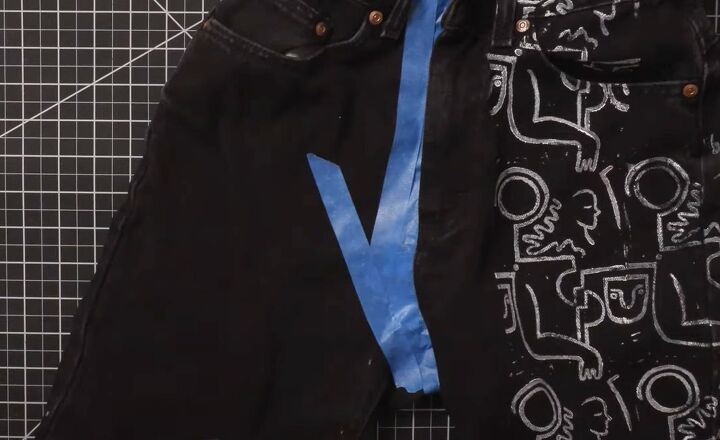
7. Final printing
Use a lint roller on your final fabric or garment before starting to print.
Ink your block and clean any ink from the edges. Making sure to press down very evenly across the block without moving it, make your first print.
Any flecks of ink on your fabric can be removed easily at the end of the printing.
Ink your block between printings. When you get close to an area you don't want to print on to, use painters' tape to mask it off.
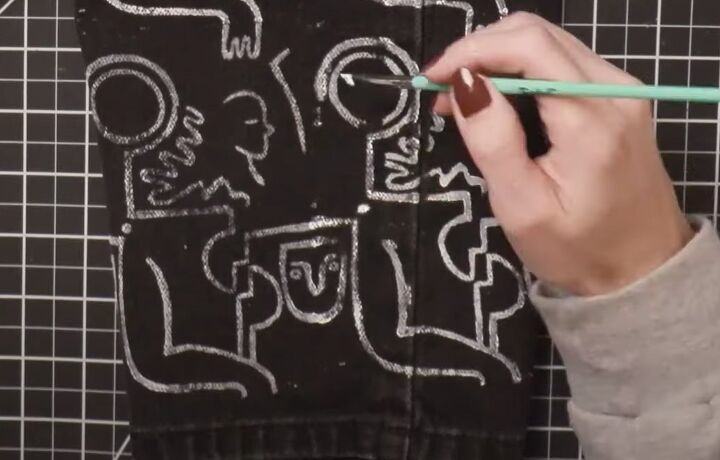
8. Finishing
Dip a paintbrush in the printing ink to touch up any areas that didn't take the color well.
Use soapy water on a toothbrush or clean paintbrush to clean up any flecks or splatters of ink.
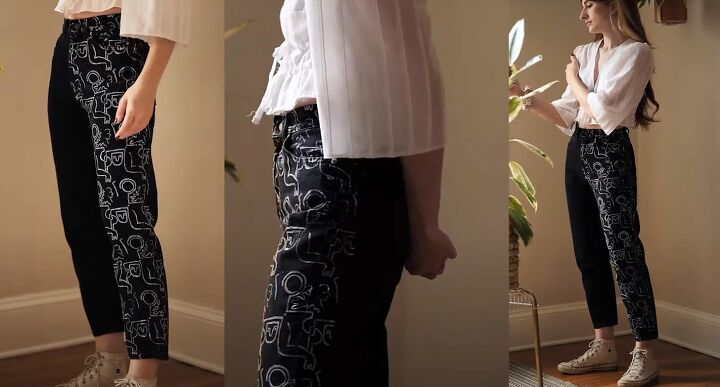
DIY printed pants
The block printing ink I used takes a week to dry completely, which is why I only printed the front of my pants. That also means that the ink is still removable with soapy water for up to a week.
I hope you enjoyed seeing my block printing ideas and that you'll give it a try. Please let me know how you get on in the comments below.
The author may collect a small share of sales from the links on this page.


Comments
Join the conversation
Fantastic! Love the look. you did good!