Easy High-waist Pants Sewing Pattern Tutorial

If you want a pants sewing pattern made to your measurements, then this project is for you.
It’s a sewing tutorial for beginner and intermediate sewists who want to learn how to sew pants that fit really well.
The measurements I give are for size 8 to 10. If you’re a size 10, add 1 inch to the waistband ties.
Tools and materials:
- 2 yards of 45 inch wide medium weight fabric
- 7 inch zipper
- Hook and eye or snap fastener
- Ruler
- Tailor’s chalk
- Scissors
- Pins
- Seam ripper
- French curve (optional)
- Iron
- Sewing machine
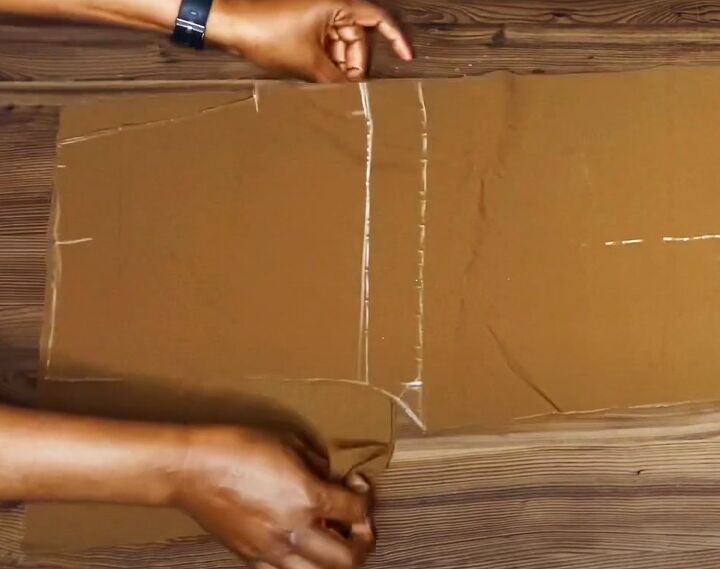
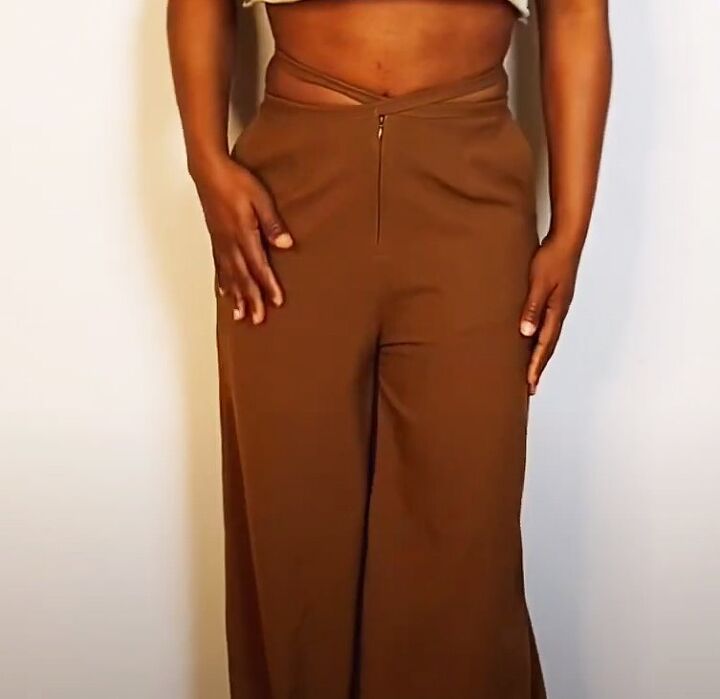
1. Pants front
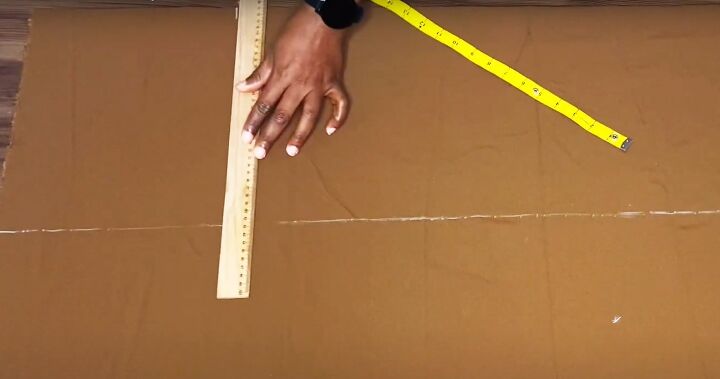
Fold your fabric in half widthways so it’s 45 inches wide and 28.5 inches long.
Place the folded edge towards you.
Draw a line across the width 12 inches from the folded edge.
Draw a line from the folded edge 9.5 inches from one side edge to meet the first line.
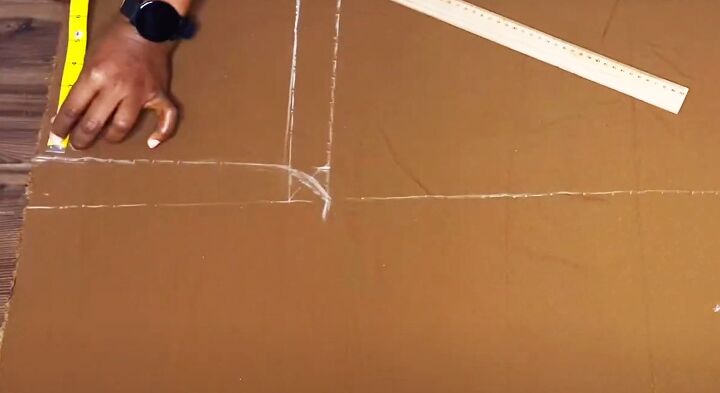
Draw a line parallel with the hipline and 1.5 inches below it and mark 1.5 inches along that line for the crotch curve.
Mark 2.5 inches along the waist edge for the center front seam and join the points with a curve.
Measure from the center front seam along the waist edge 7 inches for one quarter of the waist circumference, 1 inch for the dart and a 1 inch seam allowance.
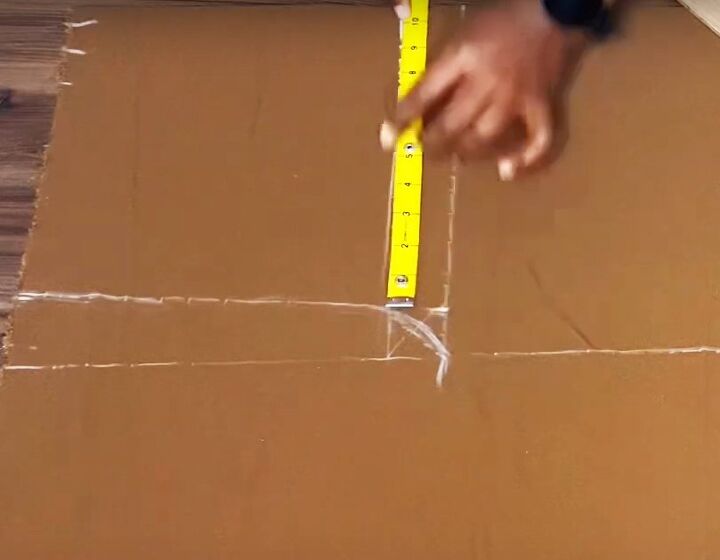
Mark from the inner crotch curve 9 inches for one quarter of the hip size and a 1 inch seam allowance.
From the front of the crotch curve, measure 12 inches along the thigh line.
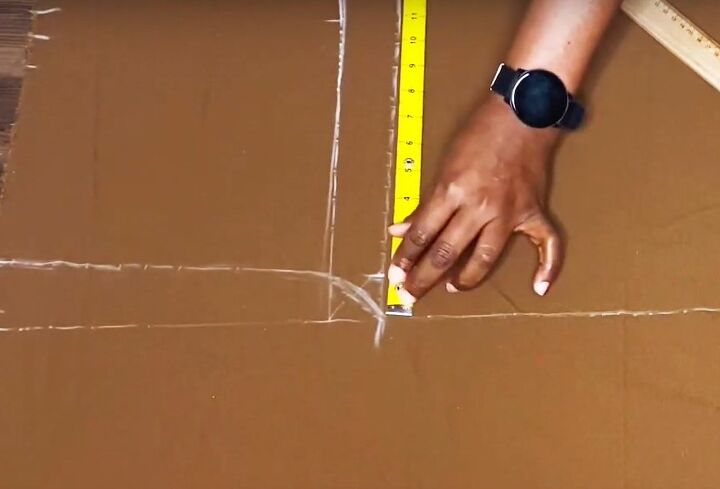
Use your French curve or a similar shape to draw in the hip curve between the waist and hipline.
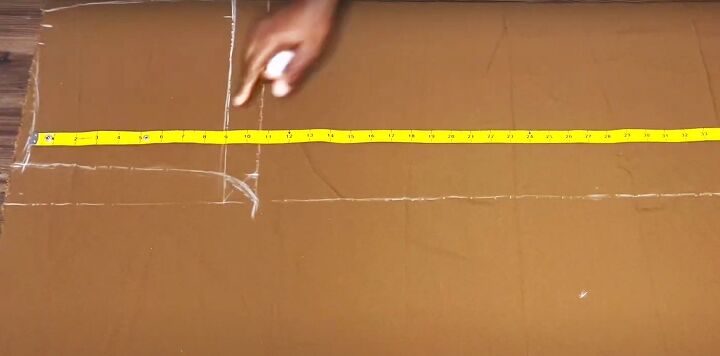
Shape the front waist by tapering from half an inch down the front seam towards the hip curve.
Mark the length of the pants at 41 inches from this line and add a 2 inch hem allowance.
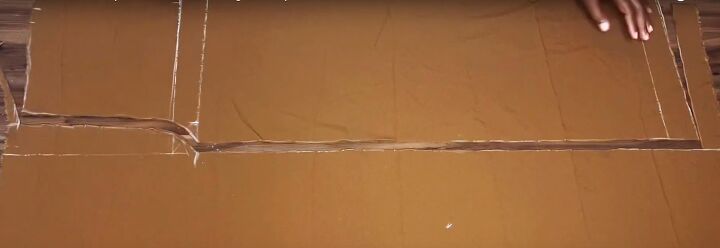
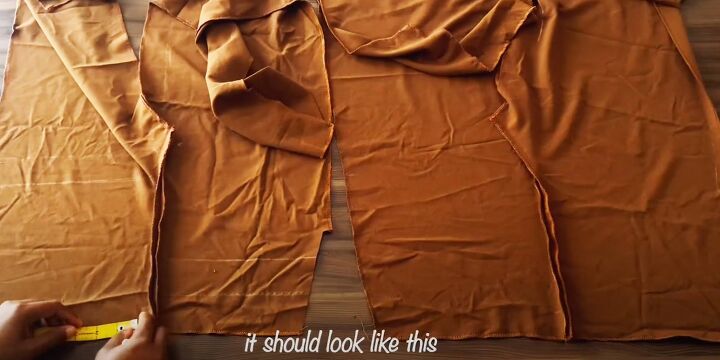
Cut out the front of the pants.
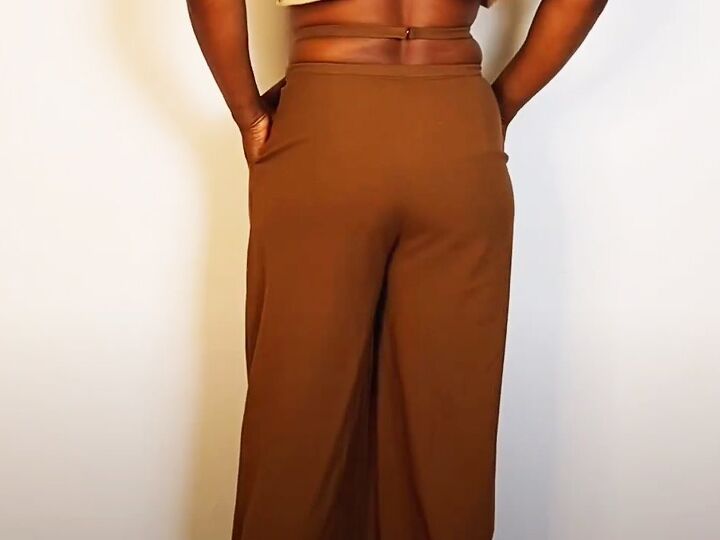
2. Pants back
Use the front as a template for the back sections but make the changes that I show in the video from 2:04 to 3:00.
Cut out the pants back.
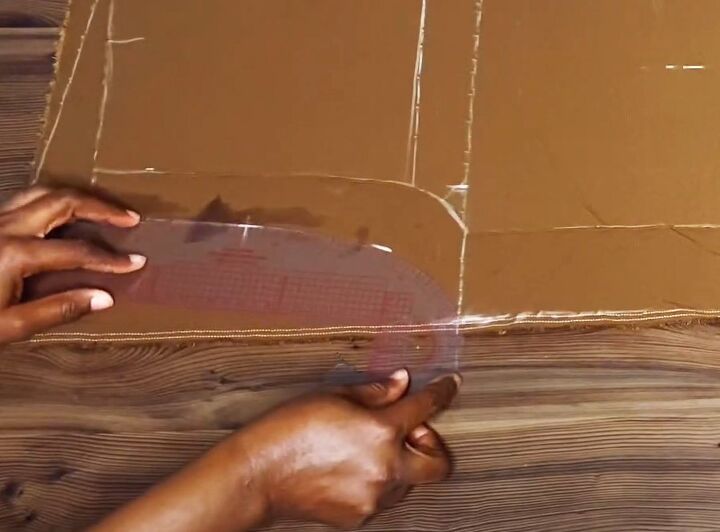
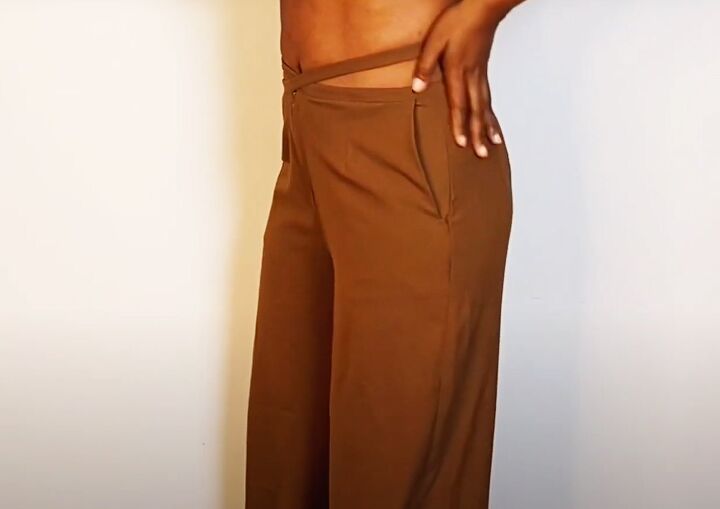
3. Pocket panels
Cut two pocket pieces 7 inches wide on the fold by 10 inches long.

Make a mark at 1 inch in from the outside waist and a second 6 inches down the hipline and half an inch in.
Connect the marks and cut off the excess.
Open out the pockets, place them under the cut out and trim them to match.
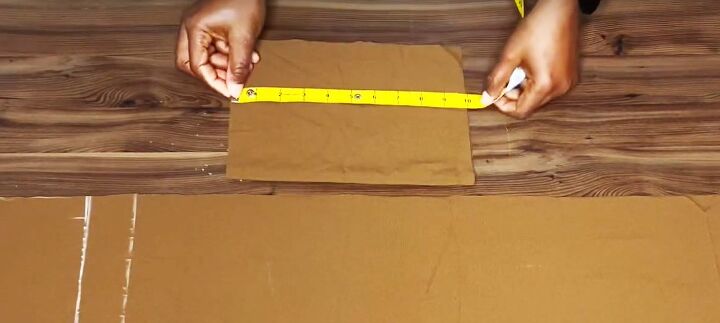
4. Darts
Mark 7 inches down the front crotch seam for the zipper.
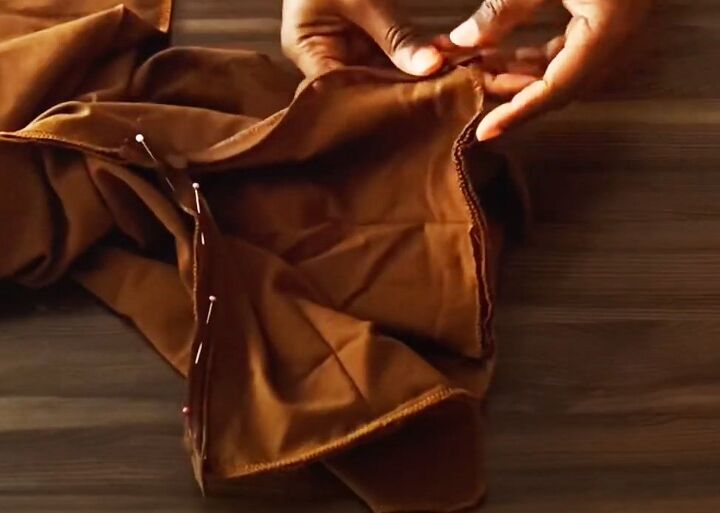
Join the front and back crotch seams and finish all the raw edges.

Measure 4 inches on either side of the center front seam for the center of the darts. Make them 1 inch wide and 3.5 to 4 inches long.
Mark the back darts in the same way but 1.5 inches wide and 4.5 to 5 inches long.
Sew the darts.

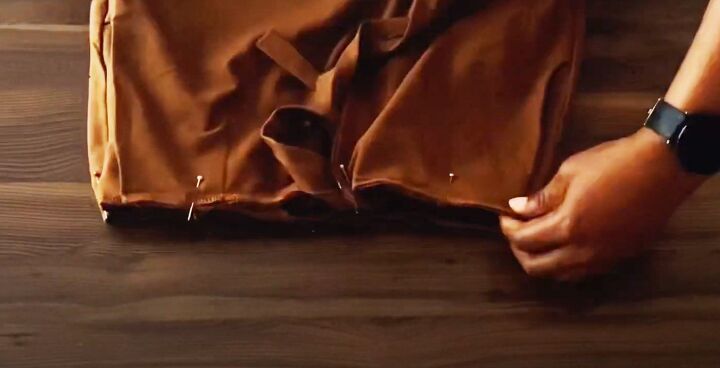
5. Insert pockets
Pin and sew the open pocket pieces onto the pants front along the shaped edge with the right sides together.
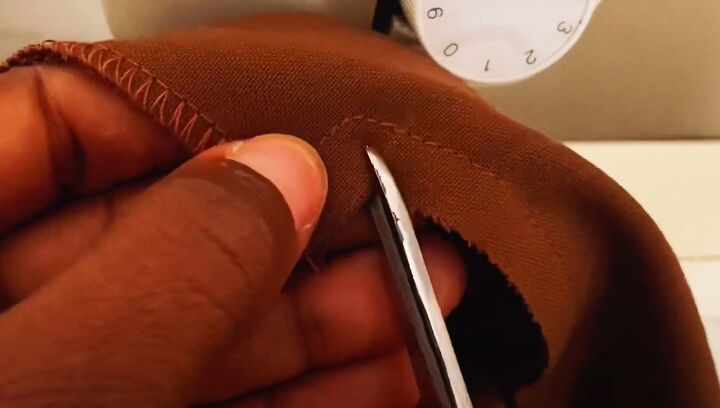
Notch the inner corner and top stitch the seam on the right side.
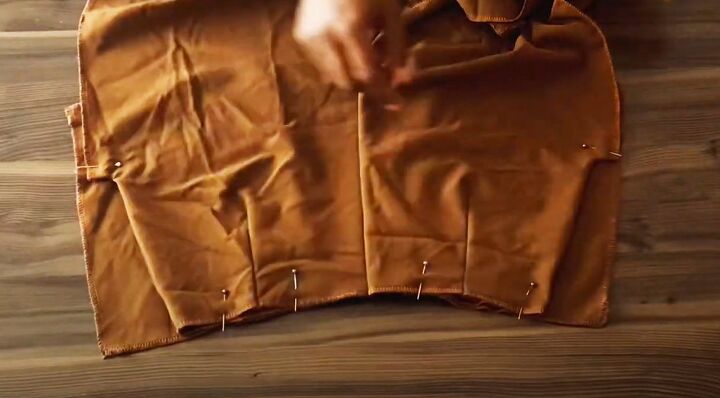
Fold the pocket panels to the inside and pin to the waistline and sides.
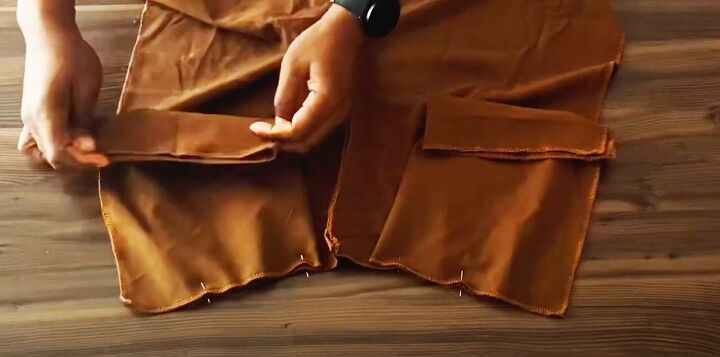
Sew in place across the waist edge and close up the bottom of the pocket bags.
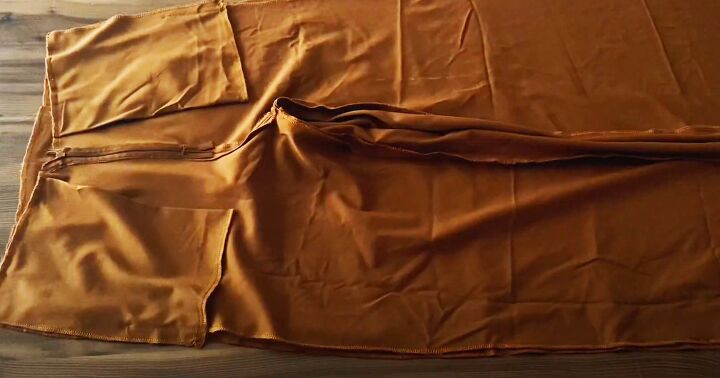
6. Zipper
Open the center front seam for 7 inches.
Open the zipper and pin and sew it to the front edges with the right sides together.
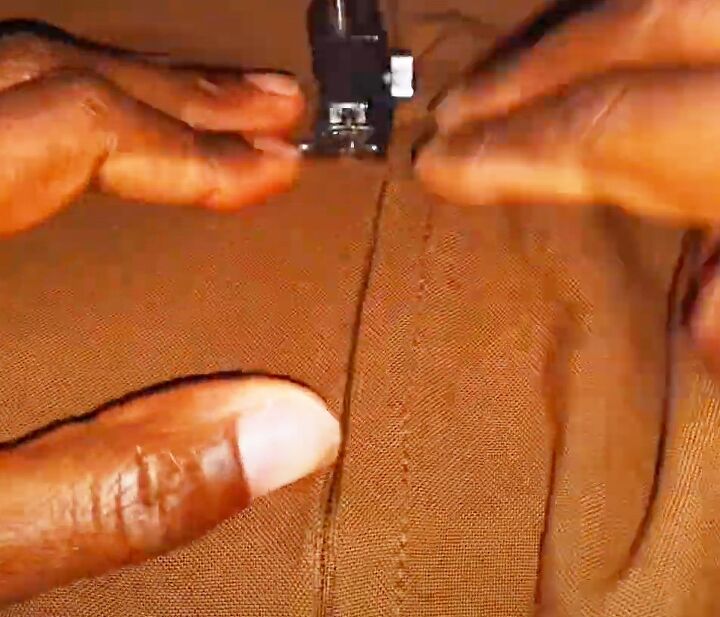
Close the zipper and top stitch on the right side.
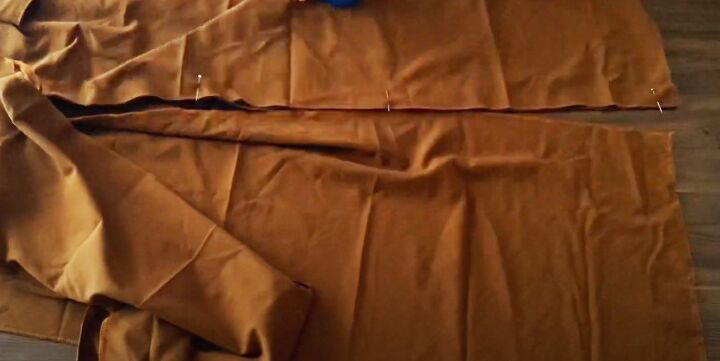
7. Legs
Place the front and back together with the right sides facing.
Pin and sew the inner leg seams.
Press the hem allowance to the wrong side.
Join the outer leg seams.
Turn up the hem and sew in place.

8. Waistband
Cut a strip of fabric 54 inches long by 2.5 inches wide.
Press both long edges to the center.
Fold the waistband in half lengthways and press.
Mark the center and quarter points.
Sew one side to the inner waist edge. Place the center point at the center back seam and the quarter points at the center front.
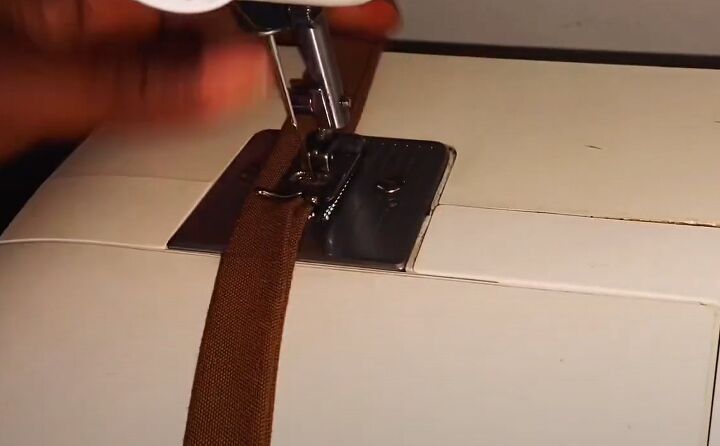
Turn the band to the right side and top stitch in place along the length of the band.
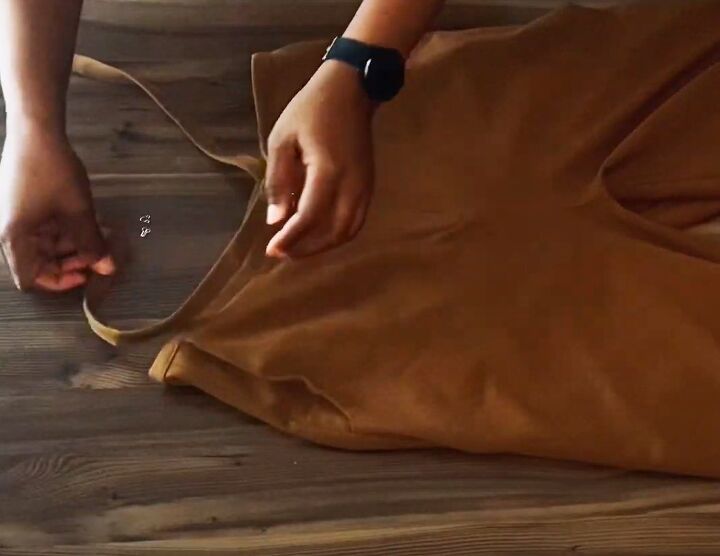
Attach a fastening to the ends of the band.
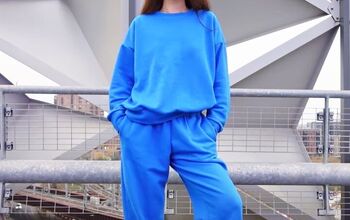
DIY pants
I love these wide legged palazzo style DIY pants with the featured high waist. It’s a favorite pattern of mine and easy to adapt to other sizes. You can leave out the side pockets if you prefer.
Please tell me what you think of them and how you get on with them in the comments below. I love to get your feedback!
Next, learn How to DIY a Cute and Easy Upcycled Denim Bag.
The author may collect a small share of sales from the links on this page.


Comments
Join the conversation