DIY Hailey Bieber-inspired Pearl Chrome Nails Tutorial

In this tutorial, I’ll show you how to make the pearl chrome nails that Hailey Bieber wore. Let’s jump right into it.
Tools and materials:
- Base coat gel
- Pearl chrome powder and brush
- Gel nail glue
- Rhinestones/Nail decor
- Tweezers (optional)
- Detail brush (optional)
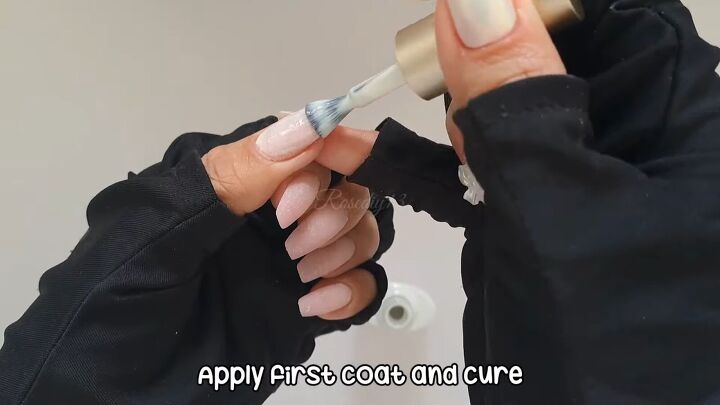
1. Apply the first layer of the base coat
Apply the first coat of white gel polish and cure under a UV lamp.
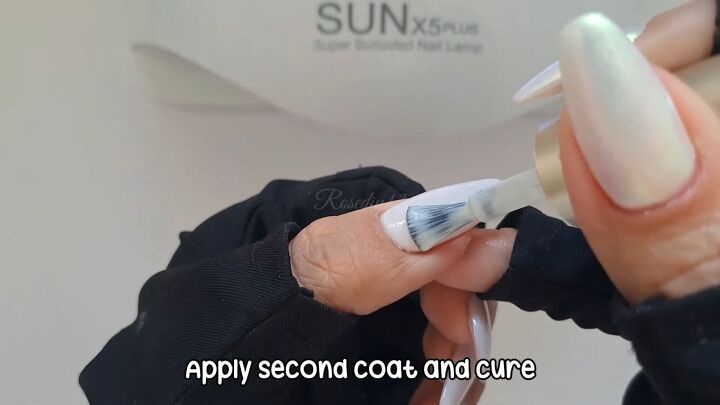
2. Apply a second layer
Apply the second coat of gel polish and cure.
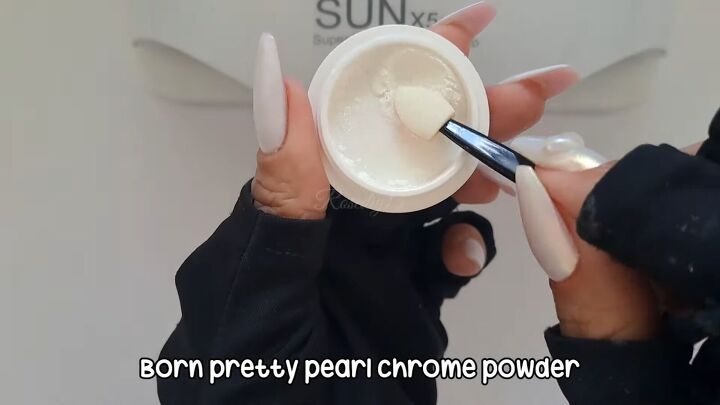
3. Apply dip powder to a brush
Apply pearl chrome powder to a small brush.
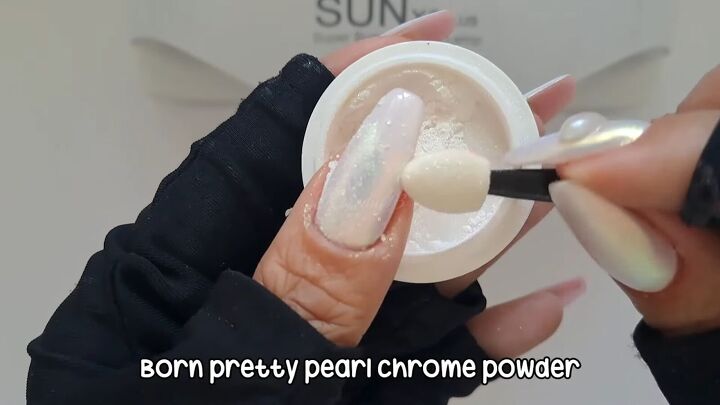
4. Brush on the pearl chrome powder
Brush the pearl chrome powder onto the nail using a buffing motion in small circles. Cover the entire nail.

5. Apply nail glue
Dab a small drop of nail glue gel onto the middle of the nail.
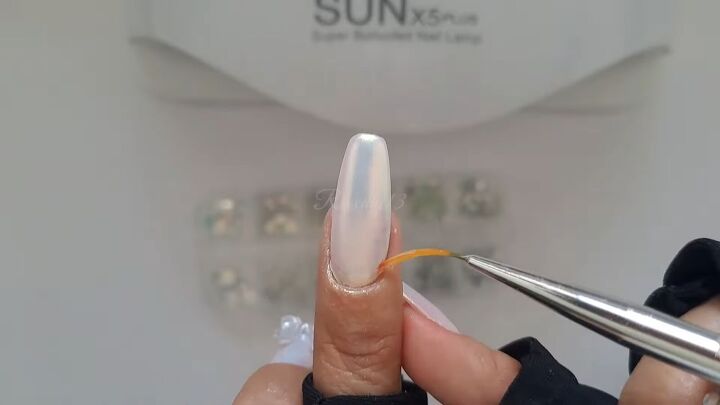
You can also use a thin detail brush to get specific shapes.
For example, I’m adding rhinestones around the base of the nail so that is where I need to apply the nail glue.
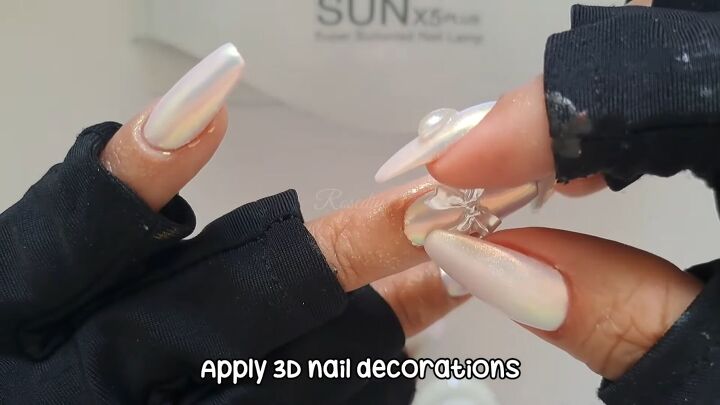
6. Add nail decorations
Press your 3D nail decorations to the center of the nail.
You can use tweezers to pick up and apply the smaller decor items.
With the bigger decor items, like this heart, you might want to add a spot of glue around it to ensure it stays on.
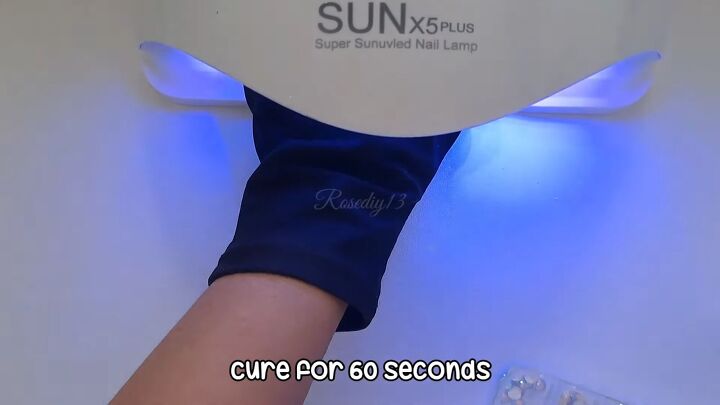
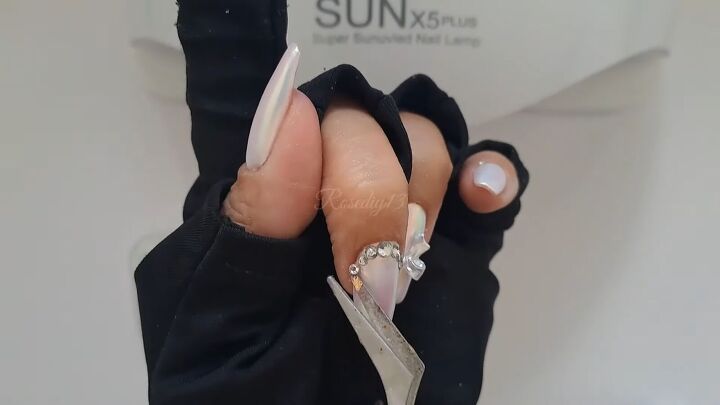
7. Cure
Cure your nails for 60 seconds.
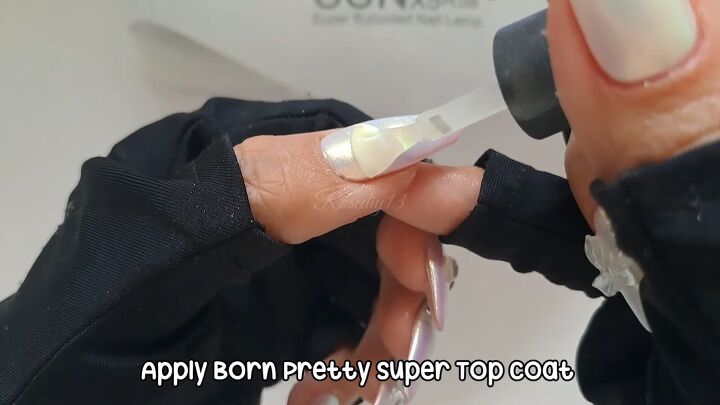
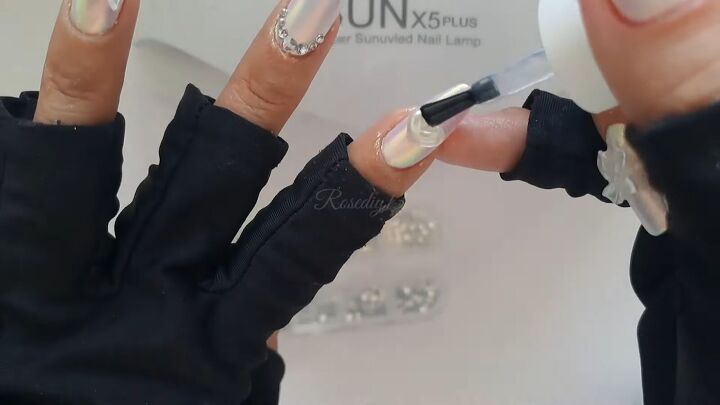
8. Apply top coat
Apply a top coat to each of your nails, including the ones with decorations on them.
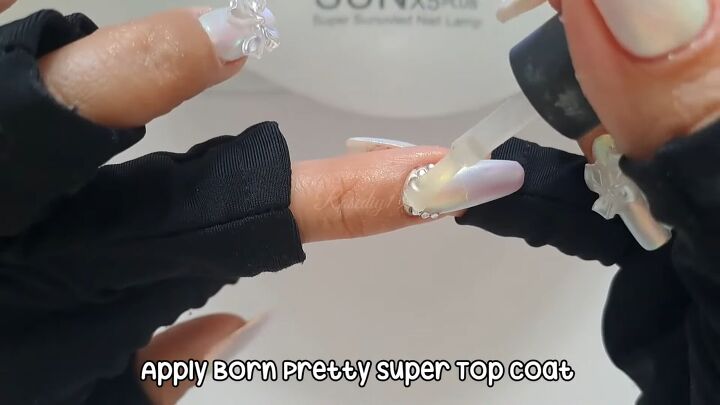
I even applied a top coat over top of the rhinestones.
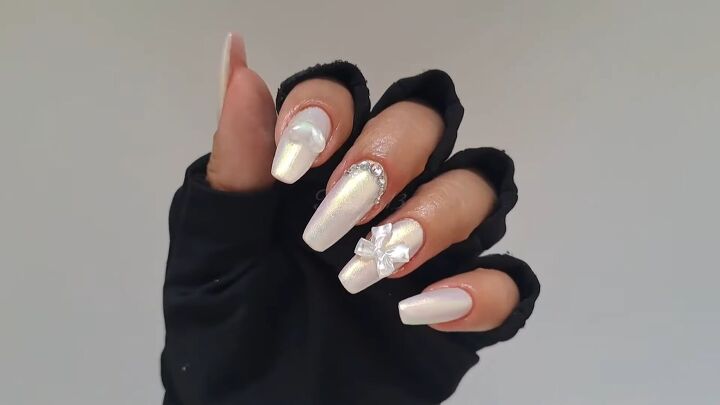
DIY Hailey Bieber-inspired pearl chrome nails
Here are the finished Hailey Bieber chrome nails! These pearl-white chrome nails are super elegant and so easy to replicate.
Let me know if you’ve tried chrome nails in the comments below.
Next, check out my 6 Easy Home Remedies to Make Nails Grow Faster & Stronger.
The author may collect a small share of sales from the links on this page.


Comments
Join the conversation