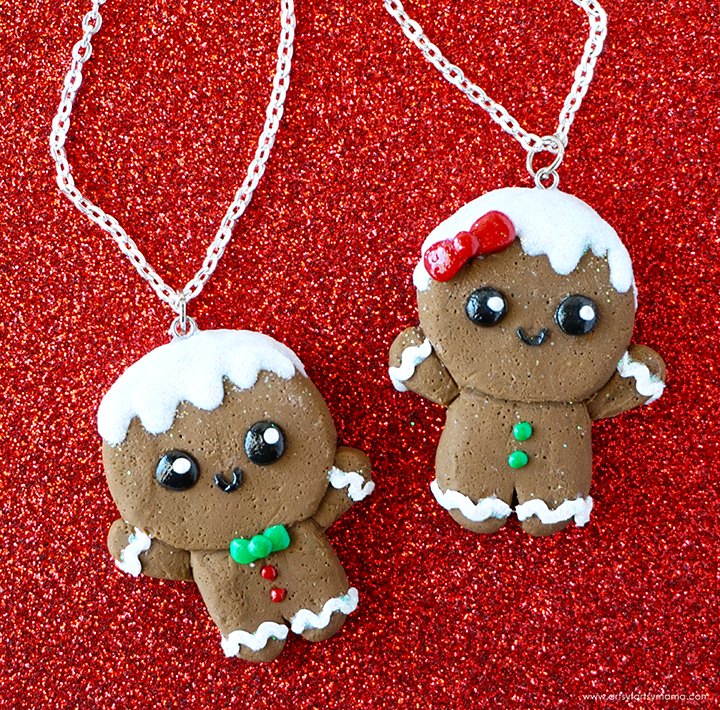
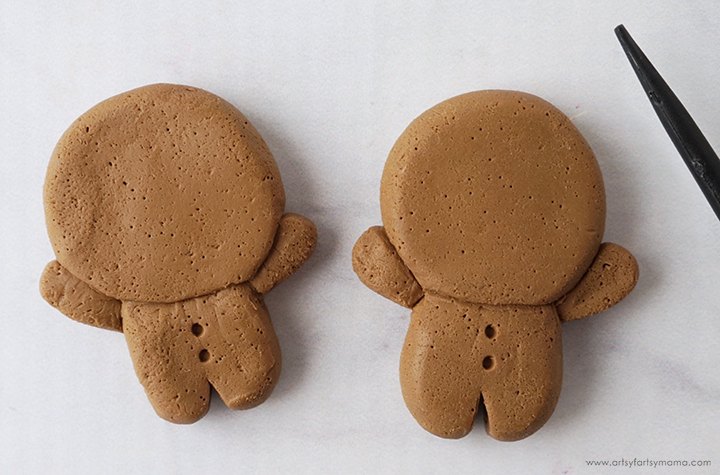
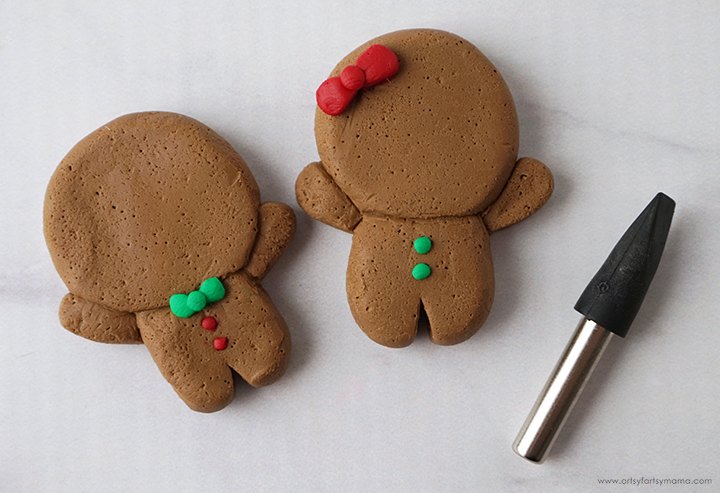
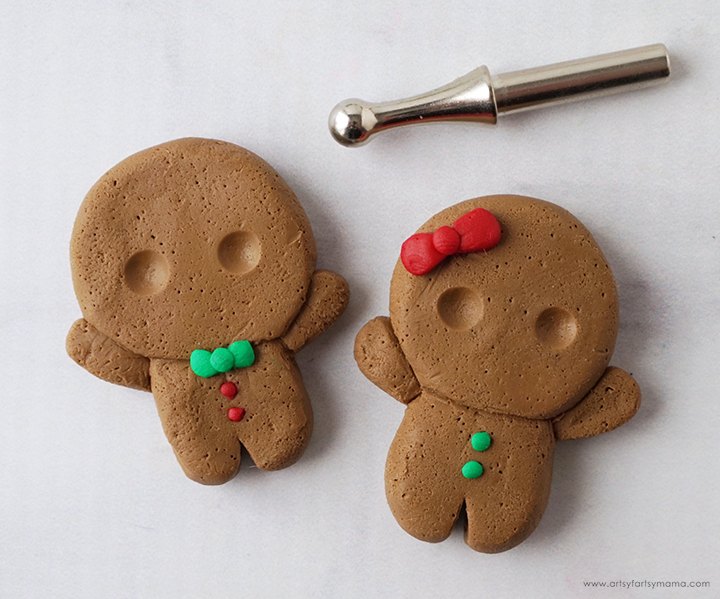
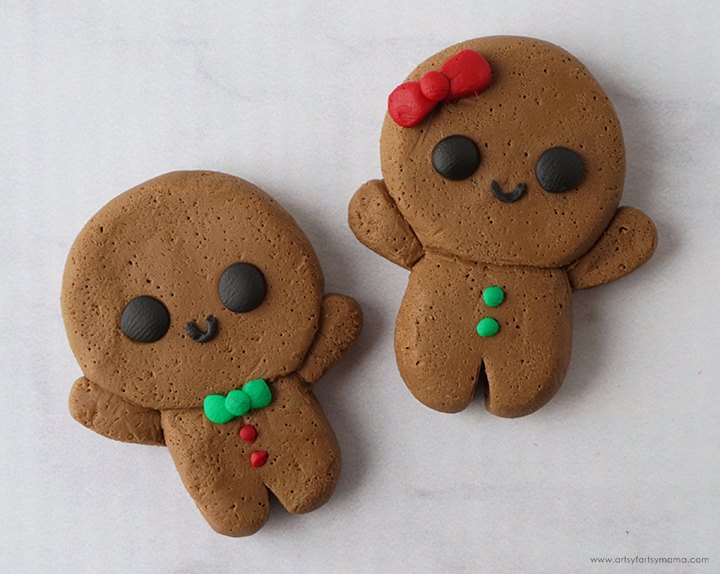
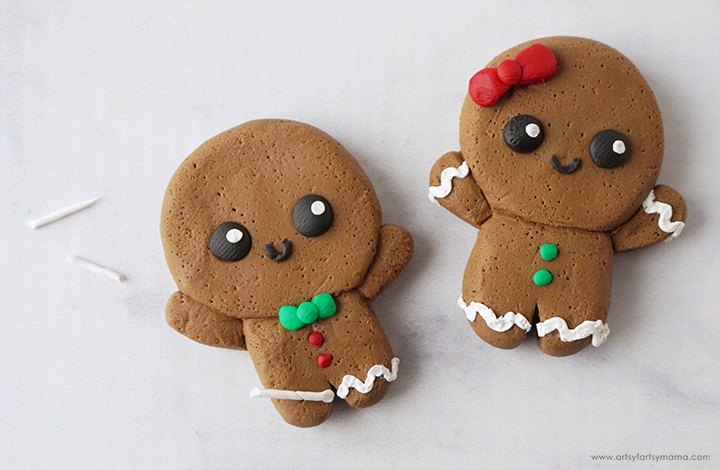
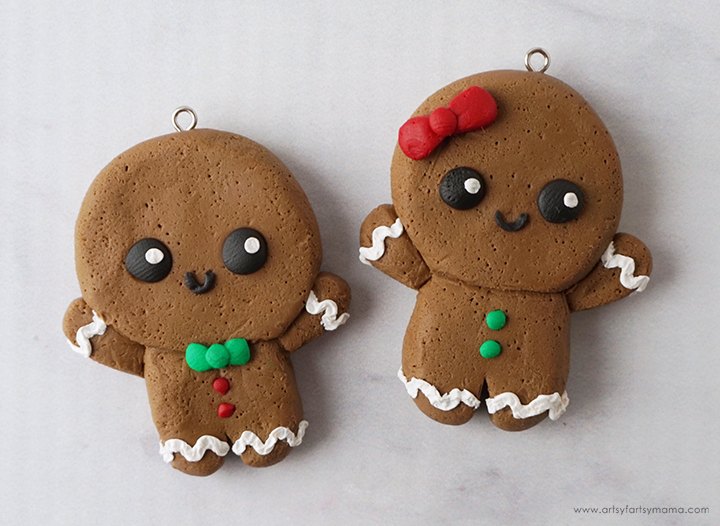
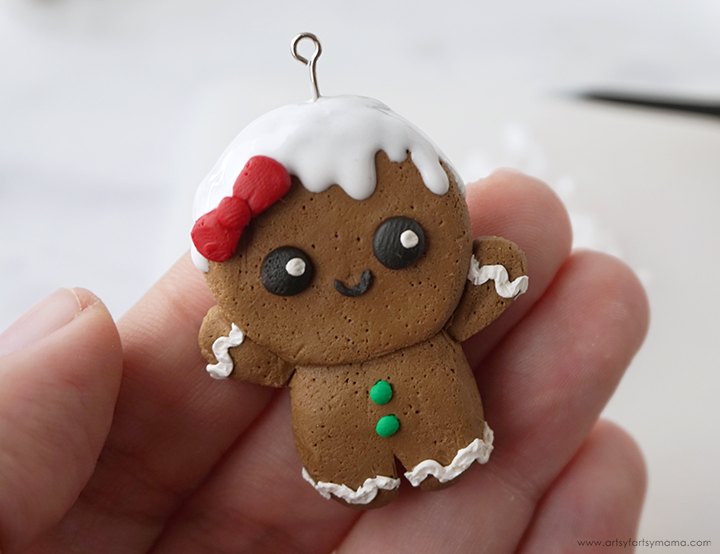
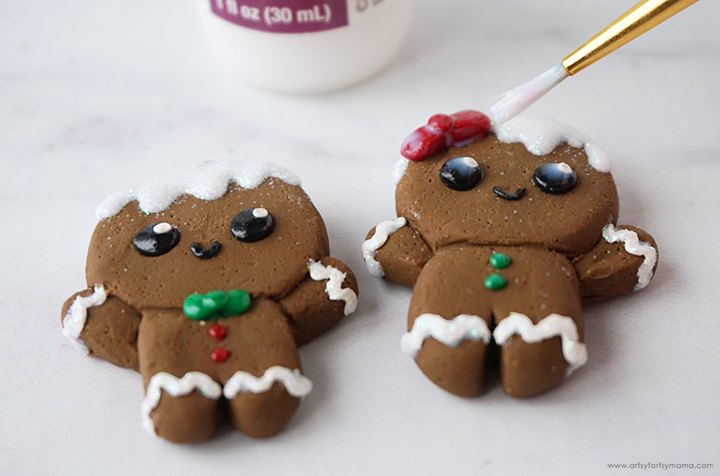
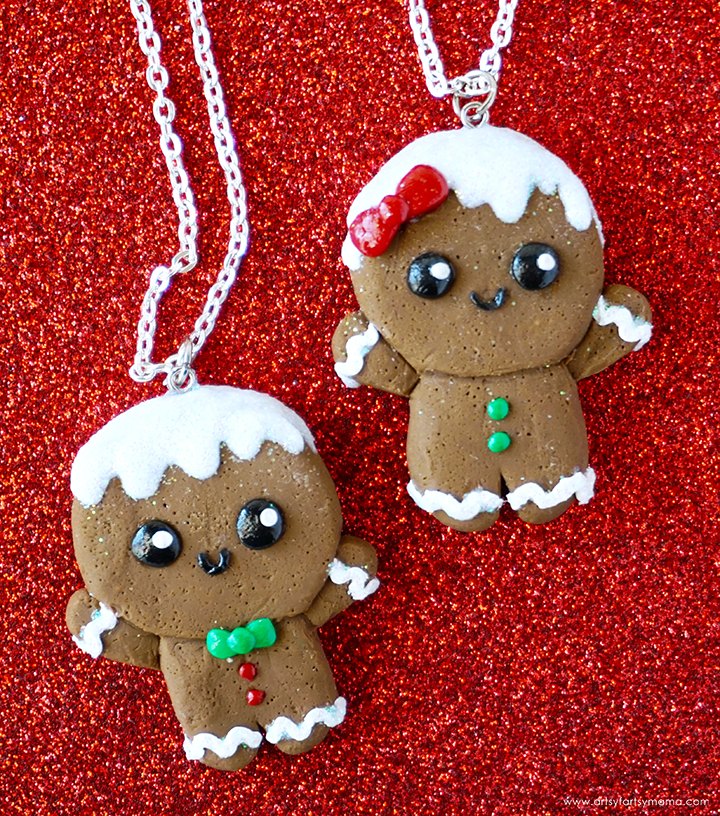
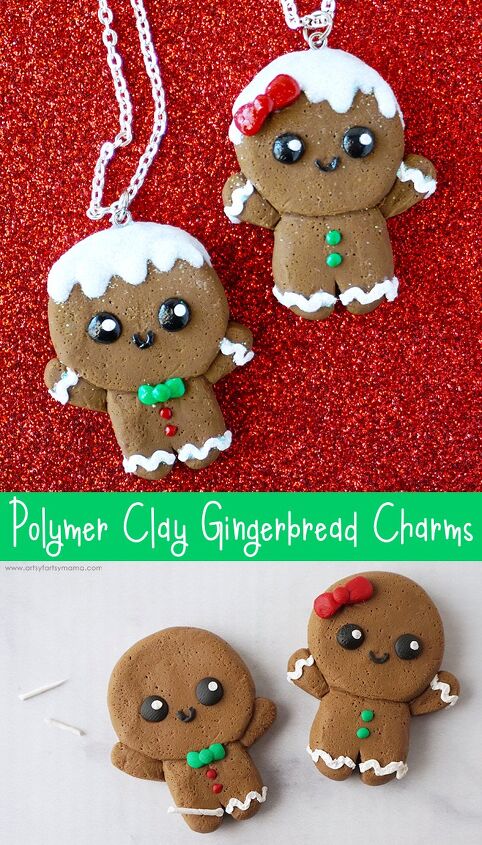
Polymer Clay Gingerbread Charms

$5
1 Hour
Easy
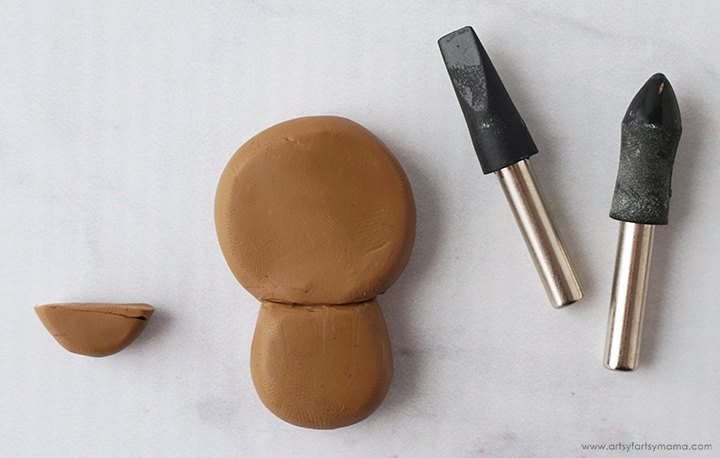
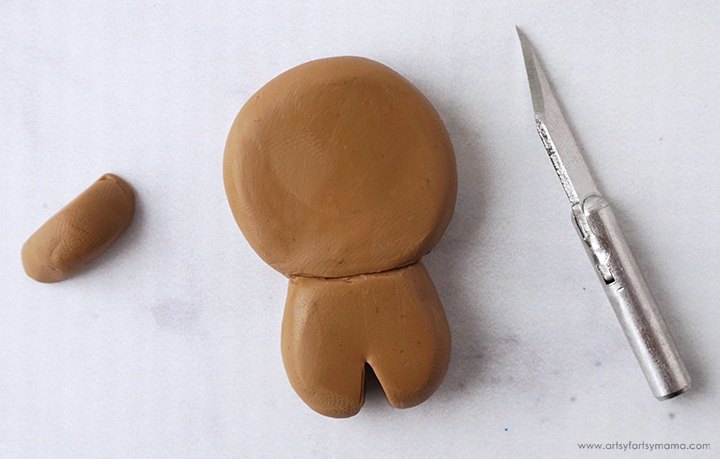
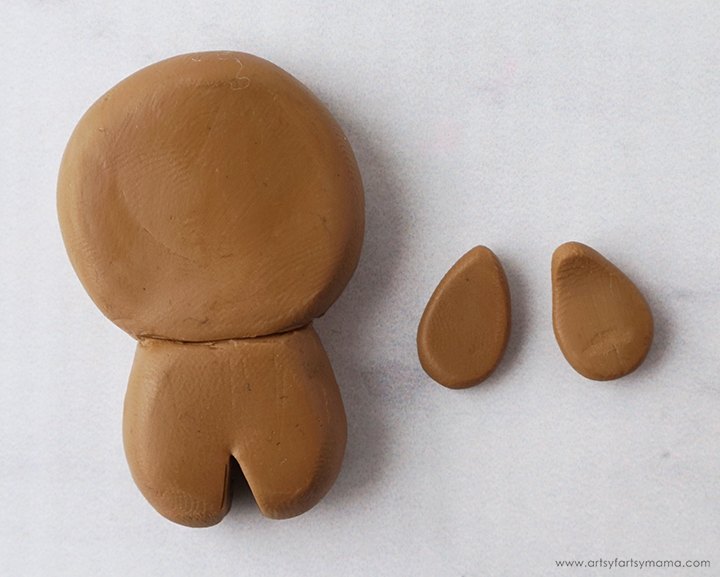
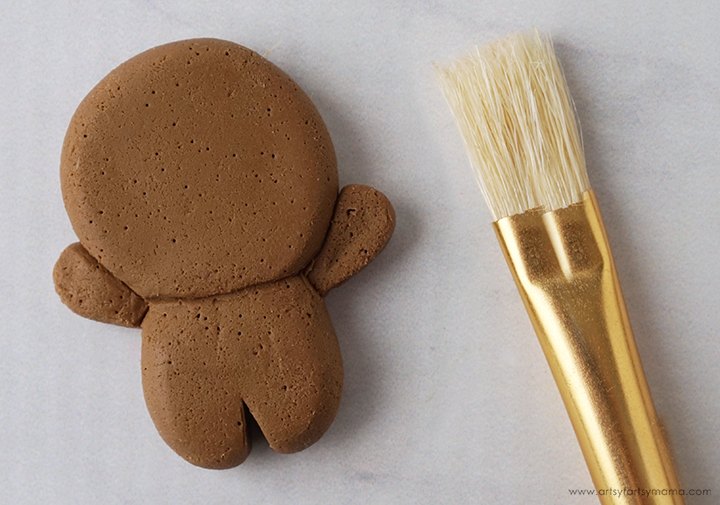
Make yourself an adorable gingerbread man charm that looks good enough to eat!


I can't believe it's already time for Christmas crafting! What holiday projects are you working on? I had so much fun making these Gingerbread Charms out of polymer clay, and I think they are the perfect project to start off the season. Even if you are new to working with clay, these little guys are pretty simple to make. Once finished, these adorable charms can be used for jewelry, a keychain, or even as a handmade ornament!


This clay Gingerbread Man Charm craft is part of Creative Crafts: Christmas Edition! Creative Crafts is a series hosted by Me and My INKlings, Makeable Crafts, Creatively Beth, and Bella Crafts Publishing where some of your favorite crafters come together to create crafts around a specific theme! Be sure to check each of the hosts blogs all week for more Christmas craft ideas!


Not all polymer clays are the same. I've worked with a bunch over the years, and using the right clay for your project will give you the best results. Personally, I like using Sculpey clay! For this project, you will need clays in brown, white, black, red, and green.


You'll also need some tools! I absolutely love the 5-in-1 Tool that includes five interchangeable heads to help with all of your detailing, smoothing, and shaping. I would also recommend getting a slicer tool and acrylic roller.


Roll out two balls of brown clay, one slightly larger than the other. The actual sizes depend on how large or small you want your gingerbread charms to be. Flatten one out into a "wheel" shape, and the other into a teardrop shape. Round out the edges and keep the front and back flat using the acrylic roller. Believe it or not, these pieces are going to make our gingerbread man's head and body!


Use the slicer tool to cut off the smaller end of the teardrop piece. This will give you a perfectly flat edge to work with.


Set the small piece you just cut off aside. Place the flat edge of the teardrop against the bottom edge of the wheel. Use the tools to blend the pieces together (especially on the back) and add the seam line back in along the bottom of the head.


To make the legs, simply make a small cut in the bottom center of the teardrop using a craft knife. Gently pull the pieces apart and round out the edges.


Split the smaller cut-off piece in half to make two small teardrop shapes. Flatten them out a little with the acrylic roller like the head and body.


Place the pointed ends into the corners where the body and head meet. You can put the hands in any position you want. I wanted mine to put his hands in the air like he just doesn't care! Use the tools to blend the clay together along the seams (especially in the back), and add the seam lines back in along the head, if necessary.


To give the gingerbread a more realistic look (and to cover up fingerprints), add some texture! You can do this with an OLD toothbrush, or a stiff paint brush. Lightly tap the clay with the dry brush, and make sure to get all of the edges! The harder you press, the larger the holes will be. If you mess up, lightly rub the clay with your finger to smooth it back out, and then add texture using the brush again.


Use a pointed tool to make guides to place the buttons. For a gingerbread "girl", center two small holes between the chin and the legs. For a gingerbread "man", make the holes down a little lower from the chin.


Decide what color of clay you want to use for the buttons, and roll out two SMALL balls of clay. Carefully place them into the holes. If the clay ball is too large, carefully remove the clay and start over. Once you get the clay the right size, place it in the holes and gently tap with your finger to flatten the buttons out a little.


To make a bow, start by shaping a small rectangle. Use this angled tool to press the centers of the rectangle together. Make a little ball of clay, and add it on top in the center. Place the bow right under the chin for a bowtie, and somewhere on the top of the head for a hair bow!


Use a rounded-edge tool to make marks where you want the eyeballs to be. If you mess up, you can flatten the marks out and start again (don't forget to add the texture back in)!


Roll out balls of clay, like the buttons, to fit into the eye sockets. Once you are happy with the clay size, gently tap the clay down to flatten it a little. For the smiles, I rolled out a thin "snake", shaped it into a "U", and carefully placed it on the face between the eyes.


Make a tiny ball of white clay and add it to the eyes for a highlight. Roll out a thin snake of white clay, and shape it into "frosting" curves on the hands and feet. Because it was so small, I used a pointed tool to help me shape the clay and to press it down (giving it texture) as I went along all of the hands and feet.


Place a jewelry eye pin in the top center of the charms. Because the clay hasn't been baked yet, they should go in quite easily.


I decided to add a bit of "icing" to the top of the head. This is easy to do using white Liquid Sculpey. I poured out a little bit of the Sculpey, and then carefully put it onto the gingerbread girl using a toothpick. Be sure to pull the eye pin up a little while you do this so it doesn't get covered up!


*You could Liquid Sculpey for the icing around the hands and feet, but I didn't know how well it worked until I put it on the head...


Bake the clay charms according to package directions. Let the pieces cool completely before handling.


Add some gloss to the eyes, bows, and buttons using Sculpey Gloss Glaze. I also combined a little bit of glaze with some white iridescent glitter, and painted the mixture along all of the frosting on the head, hands, and feet for a bit of sparkle. If you want, you can also apply a thin coat of Sculpey Satin Glaze to the rest of the project for a matte, smooth finish to protect your project. Use a small paint brush to apply the glaze in thin coats and let it dry completely.


Even though the eye pin was baked into the project, it can still be pulled back out. To keep it from slipping, carefully pull the eye pin out and add a little bit of super glue to the end. Place it back into the hole in the charm, and it should be good to go once the glue dries!


Add a jump ring to the eye pin, and thread a chain through the ring to complete a necklace. This would be a fun piece of jewelry to wear throughout the entire holiday season, or to make as a gift for a friend! I would love to hear what you think, and what types of holiday characters (or other clay creations) you would like to try making!


If you make some Gingerbread people or any other holiday-inspired crafts, leave me a comment and let me know, or tag a photo on Facebook, Twitter, or Instagram!


Don't forget to Pin, Like, and Share!

The author may collect a small share of sales from the links on this page.

Lindsay | Artsy-Fartsy Mama
Want more details about this and other fashion and style ideas? Check out more here!
Go
Comments
Join the conversation
 2 comments
Next