DIY Cape With Hood Tutorial for Halloween

Halloween is coming up, which means that for those of us who love sewing, crafting and DIY, it’s time to begin creating our outfits.
In this tutorial, I’ll be showing you a sewing pattern cape with a hood. A cape is a great piece for Halloween as it can accompany many different outfits. We’re also going to be making ours out of a plush blanket which means that not only will it be useful for creating your costume, but it will be nice and snuggly as well!
Tools and materials:
- Plush blanket (90x90 inches - 229x229cm)
- Tape measure
- Pen
- Scissors
- Sewing machine with a serger
- Pins
- Lace

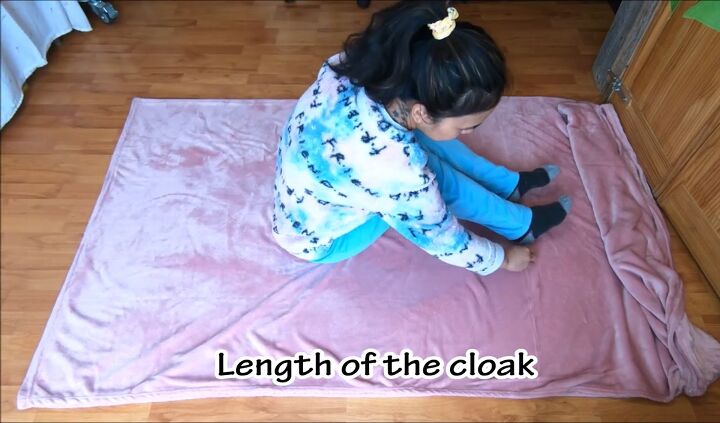
1. Measure the length
Fold the blanket in half. Then lie on the fabric and mark what you would like the length of the cloak to be, i.e. where you would like it to fall to. I want my cloak to be sweeping the floor for an extra sinister look but you can make your cloak shorter if you like.
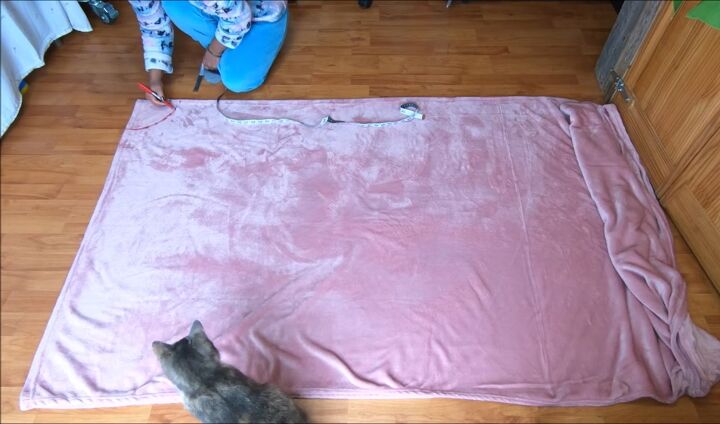
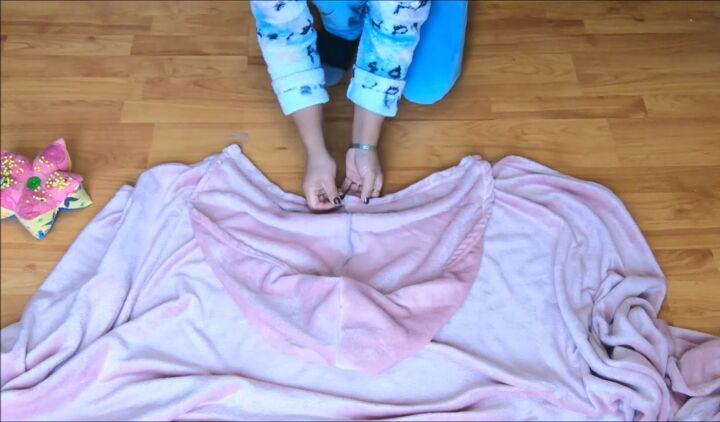
2. Mark and cut the neckline
On the folded side of the fabric, mark 6 inches (15cm) down along the length and the width as this will be the neckline. Then connect these marks with a semi-circle. Once done, cut out the neck hole and serge the neckline.
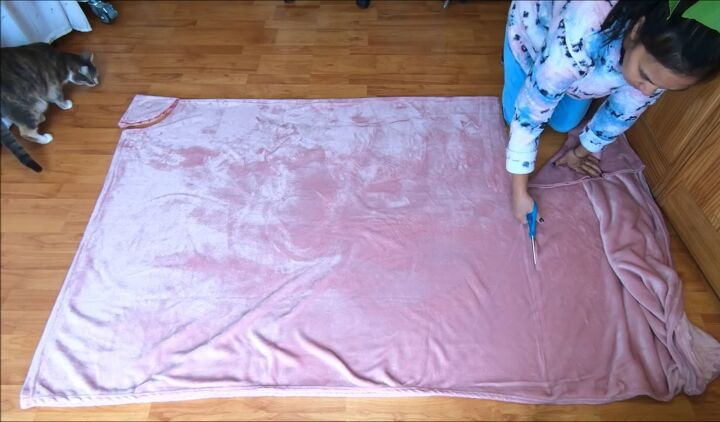
3. Sew the fabric
Next, cut the length of the fabric and then you can either serge the hem and sew it or double fold it and sew.

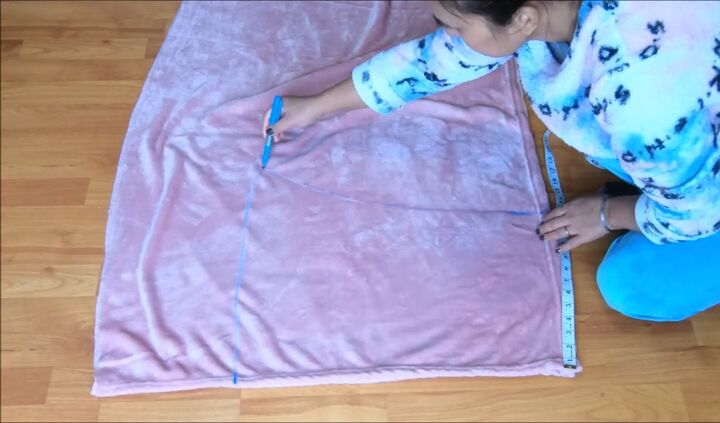
4. Draw the hood
Now we’re going to use the excess fabric to make the hood. Measure 22 inches (56cm) across. The neckline is 6 inches (15cm) on either side, which is 12 inches (30cm) plus ½ inch (1cm) seam allowance, making the total 12.5 inches (32cm).
Mark 12.5 inches down on the fabric. Then connect the two marks you’ve just made with a pointy shape as shown. This pointy shape is in order to make a pointy hood, but if you don’t want a pointy hood then just draw a regular rectangle.
5. Sew the hood
Proceed to cut along the lines you’ve made. Once done, place the two pieces one on top of the other with the right sides touching. Serge the edges.
6. Attach the hood to the cloak
Then pin the hood on the cloak and sew them together.
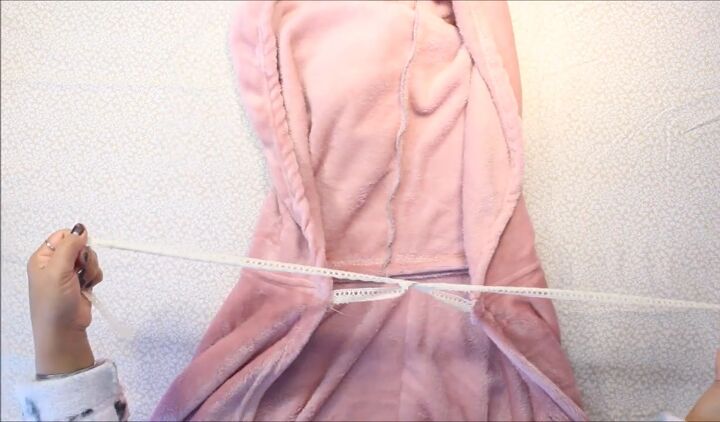
7. Attach the lace
We’re going to use lace as a fastener on this cape. Cut two pieces of lace that are the same size as one another and sew them on either side of the cape between the seams.

Sewing pattern cape with hood
And here we have our finished cape! There are so many wicked Disney villains that feature a cape in their outfit, simply take your pick for Halloween.
I love the fall of this cape; how it is shorter at the front and longer than the back, it sits really nicely on me when I’m wearing it.

This DIY cape was so easy to make and I hope it will feature in your Halloween costume as I know it will in mine.
The author may collect a small share of sales from the links on this page.


Comments
Join the conversation