Harlequin Crochet Slippers – Free Crochet Pattern
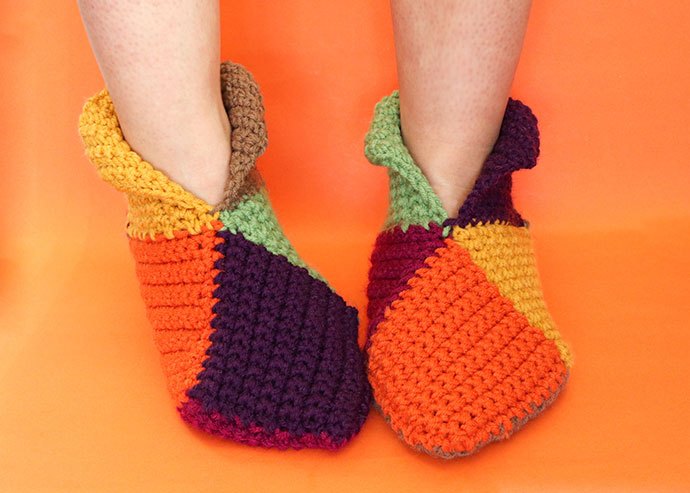
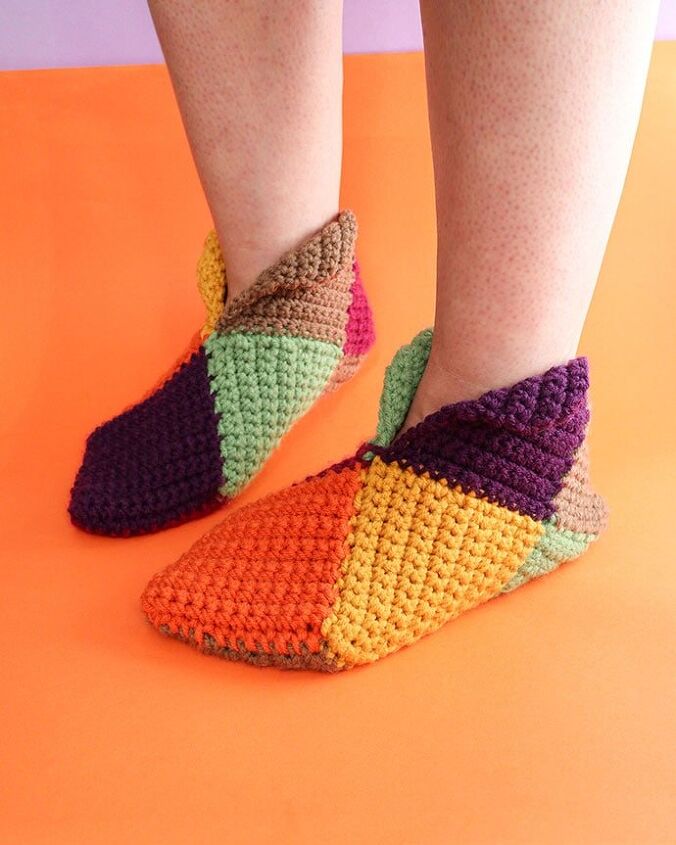
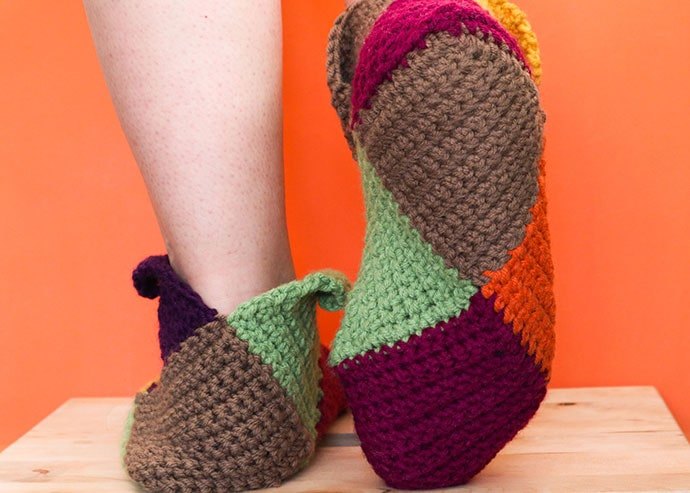
Keep your feet warm with these colourful crochet slippers. Made from durable, washable yarn and ingeniously constructed with no sewing required!

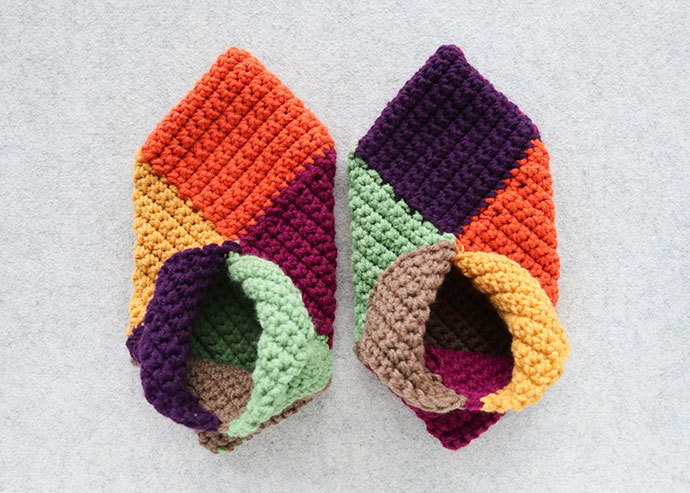
We’ve all been spending more time at home lately, so I thought it would be fun to crochet a pair of cosy, colourful slippers. The cheerful multi-colour diamond design and their bootie shape inspired their name – Harlequin Slippers !
This design is based on a classic Norwegian knitted house slipper which puzzles together to make these cute style of booties.
Instead of knitting and seaming, I thought I’d put my mind to devising a no-sew crochet version. (I hate stitching pieces together).
“Why crochet?” you ask. Crochet is ideal for making slippers because crochet creates a much denser, durable fabric.
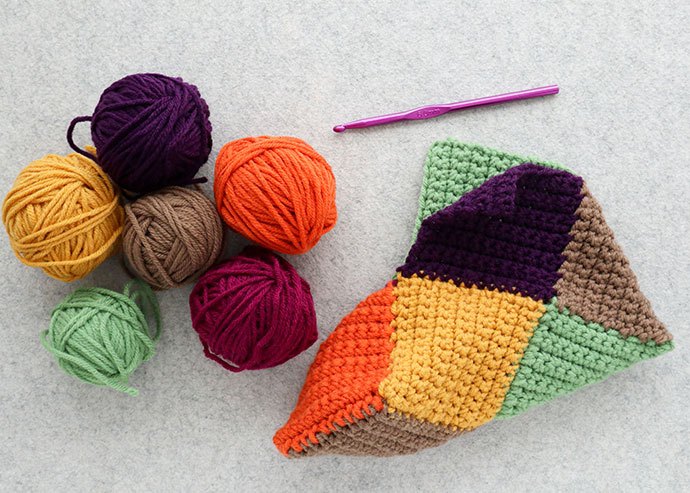
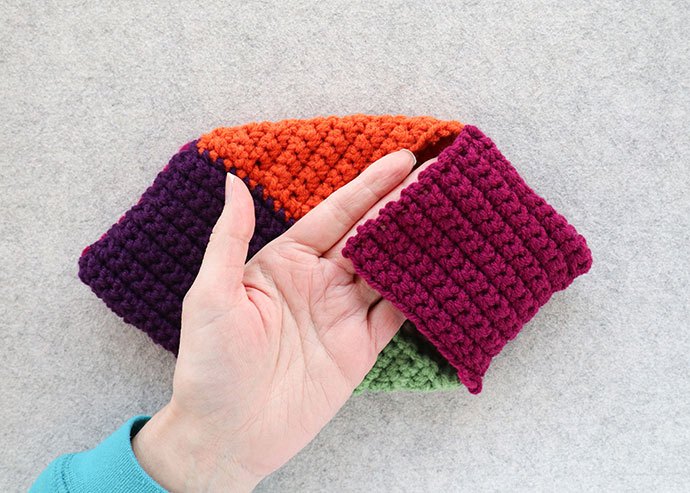
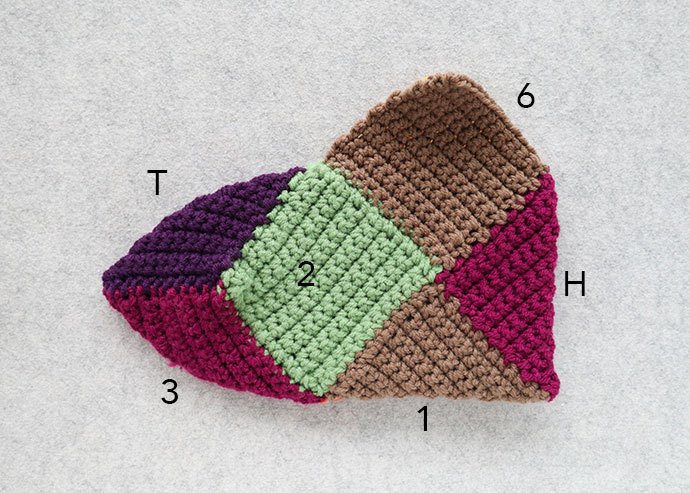
Assembled from just 8 crocheted squares, making these crochet slippers is really much less complicated than they look. I’ve even created a little ‘cheat sheet’ that you can print off to make this project a breeze.
Made from robust, machine washable acrylic yarn. These slippers will last a really long time.
The colors were easy to pick, in fact, all the hard colour combination work was already done. I just used a tube of Fair Isle Liberty Craft Colors from American Yarns.
I’d previously used the same yarn to make my Modern Crochet Advent Calendar which took advantage of the lovely ombre yarn colour selection.
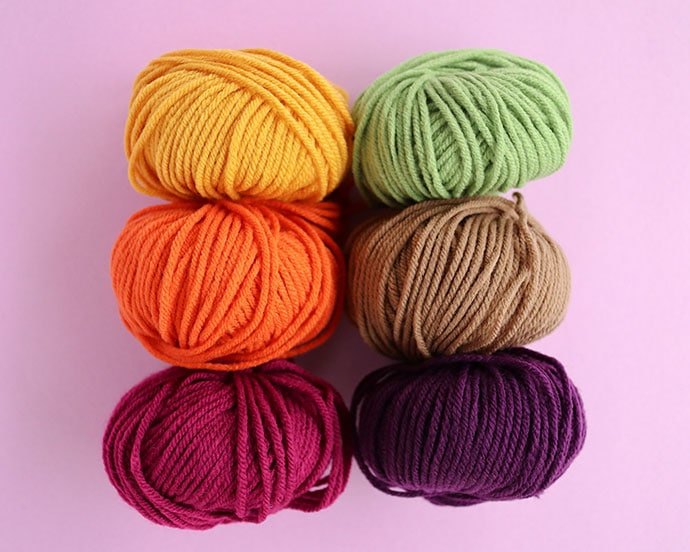
This time I chose the colourway called Eat Your Veggies, which is the perfect selection of cosy Autumn/Winter colours.
The yarns come in a reusable tube (which is great for storing knitting needles in), and contains 6 x 30g balls of medium weight acrylic yarn. Perfect for craft projects which require small amounts of assorted colours like these crochet slippers.
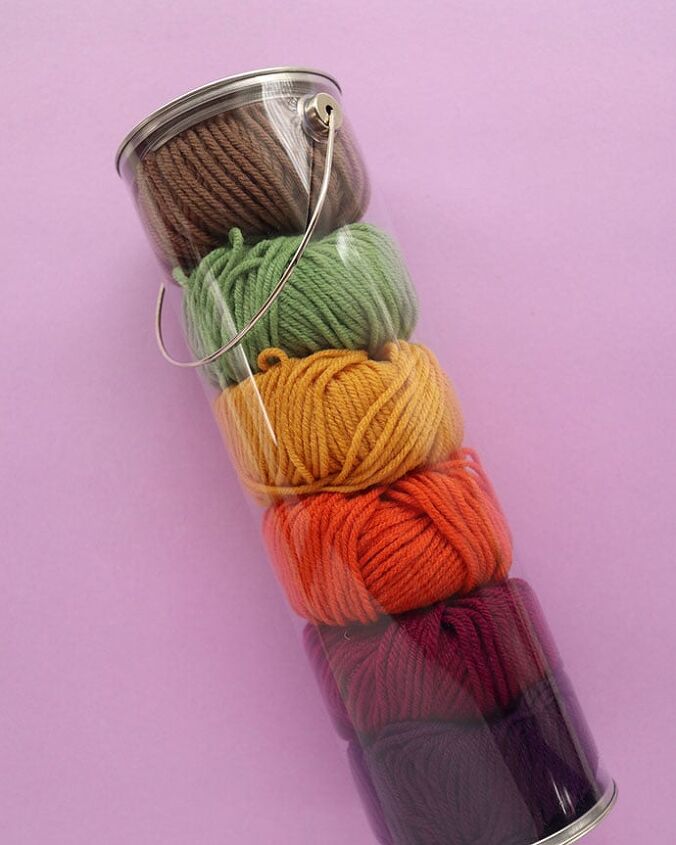
Six balls is enough to make 3 slippers. That’s a pair and a spare!
Top tip – Buy 2 tubes to mix and match colours and make 3 pairs of these easy crochet slippers.
You may also like:
How to make Harlequin Crochet Slippers
You will need:
- 1 tube Fair Isle Liberty Craft Colors yarn 6 x 30g balls colour Eat Your Veggies (about 52yd/68m per colour)
- 6 mm crochet hook
- Yarn needle
- Scissors
- Assembly instructions & colour planner PDF
Crochet Stitches used (US terminology):
- Ch – chain
- Sc – single crochet
- Sl St – Slip Stitch
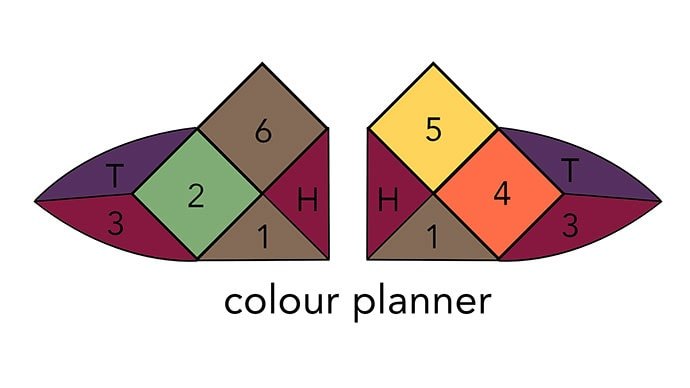
Plan your colours
To help plan the colour layout I’ve created a printable chart that you can colour in. It’s helpful to refer to while you are crocheting, especially to make sure your colours are separated and nicely balanced.
Download and print the chart – Assembly instructions & colour planner PDF
Here’s the one I coloured in for the slipper I’ll be making below.
Harlequin Slippers Crochet Pattern instructions:
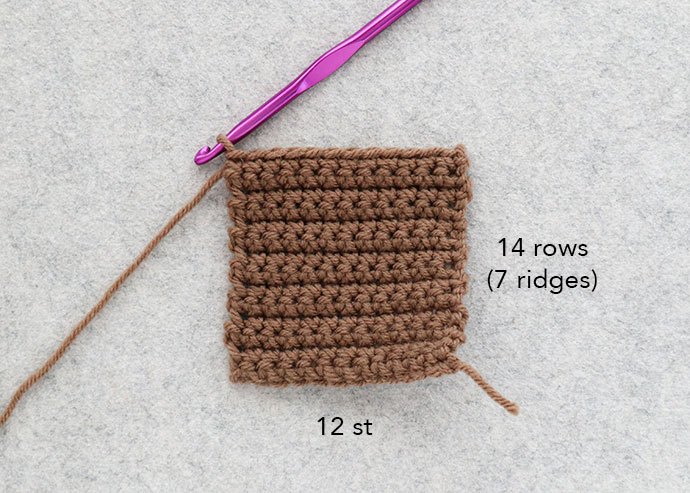
Gauge 10x10cm (4″x4″) sq = 14st x 16 rows in sc
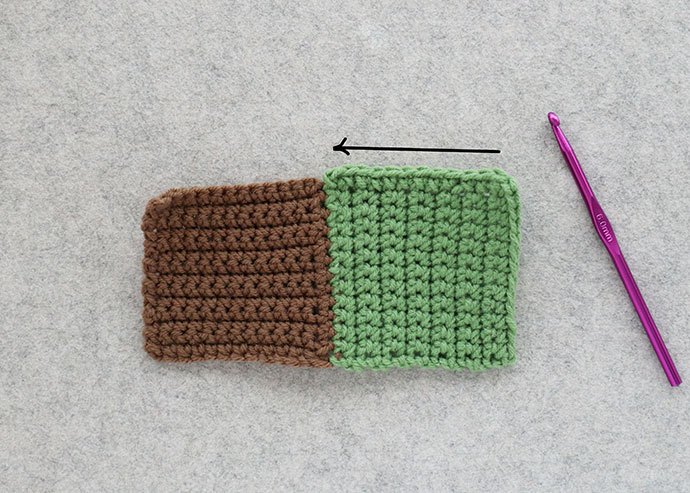
Each slipper is made up of 8 sc squares each measuring 9cm x 9cm. Each square is 12 st x 14 rows and is joined as-you-go to eliminate the need for any sewing.
The squares are crocheted and joined in a fashion so that the rows meet at right angles. If you find this confusing or a bit tricky, feel free to crochet 8 squares separately and sew them together as per the printable assembly chart.
Top Tip – Cut out assembly chart and match edges up with tape to understand how these slippers piece together.
Slipper Sizing
Slippers measure 25cm (10″) in length but are quite stretchy and will fit an average ladies size foot (7-10 US).
Size can be adjusted by increasing or decreasing the size of the squares.
Notes:
- Square is worked flat, back and forth. First turning ch in every row does not count as a stitch.
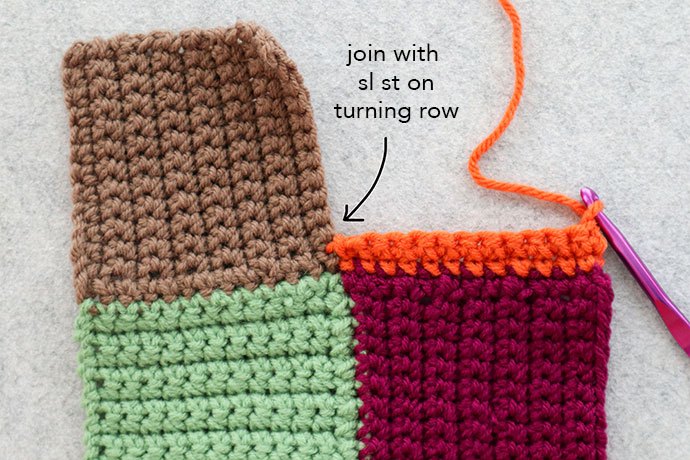
- When joining sides of squares, a sl st through the adjacent square replaces the turning chain at the start of row.
- Each 30g ball of Fair Isle Liberty Craft Colors yarn will make up to 4 squares.
- To keep colour delineation tidy, a foundation row, is added to the ridged side of each square before the next colour is added.
- Use ridges as a guide to how many rows are completed. Because a foundation row not counted, you may occasionally need to crochet an extra row for 7 ridges.
- Weave in ends as you go.
Read on for step-by-step instructions
To join squares using slip stitch
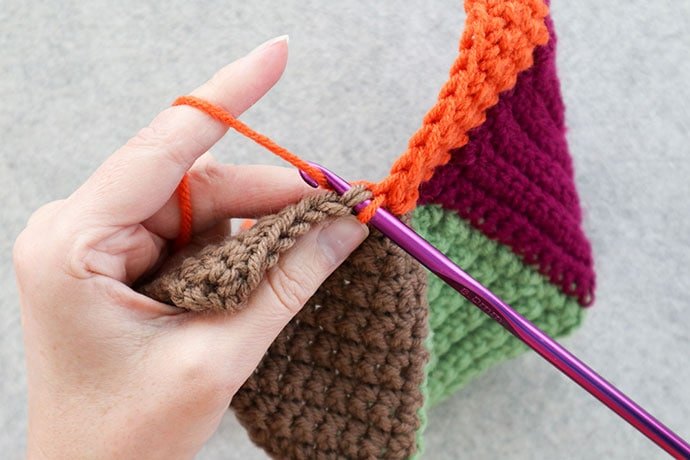
Insert hook though stitch of adjacent square, pull yarn though all loops. This replaces a ch, turn, at start of row when joining is required.
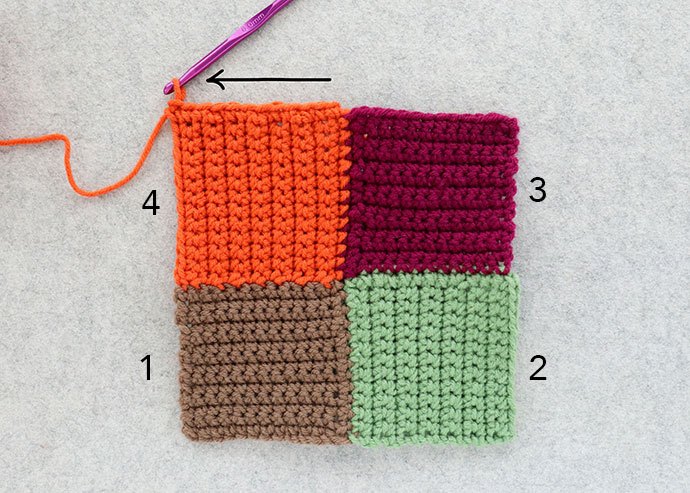
Making the Sole – Squares 1-4
Square 1
Set up row – ch 13
R1 – work 1 sc into 2nd stitch in chain, then work 1 sc into each ch. (12st)
R2 – R14 – ch, turn, work 1 sc into each stitch. (12st)

R15 – ch, turn square 90 degrees, sc 12 evenly down the ridged side of the square to create a foundation row in preparation for the next colour (square 2).
Square 2
Change colour
R16 – work 1 sc into each ch. (12st)
R17 – R29 – ch, turn, work 1 sc into each stitch. (12st)
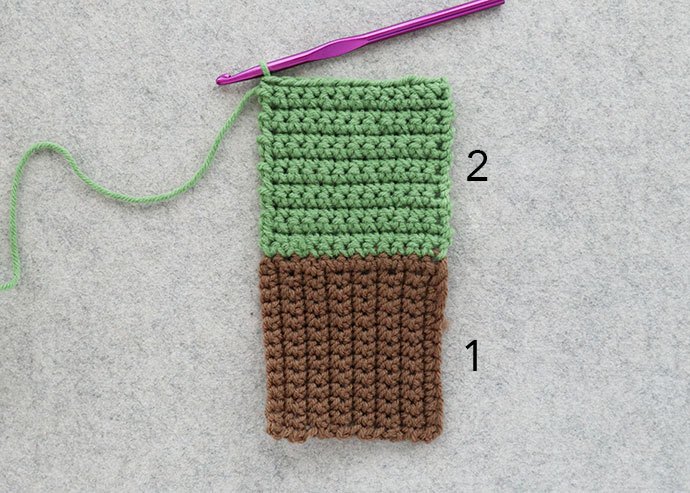
R30 – ch, turn square 90 degrees, sc 12 evenly down the ridged side of the square to create a foundation row in preparation for the next colour/square.
Square 3
Change colour
Repeat R16-30 as per square 2

Square 4
Change colour
Repeat R16-29 as per square 2 but replace (ch, turn) with sl st thought adjacent st in square 1 then turn.
Try to space the join stitches evenly along edge of square 1.
To join squares using slip stitch
Add a foundation row on the side closest to Square 3 to prepare for toe square.
Adding the Toe
Flip the sole so Square 2 is on the left, and the foundation row of Square 3 is on the right.

Change colour
Repeat R16-39 as per square 2 but replace (ch, turn) with sl st thought adjacent stitches in squares on each side to join toe to Square 2 & 3.
Try to space the join stitches evenly along edges.
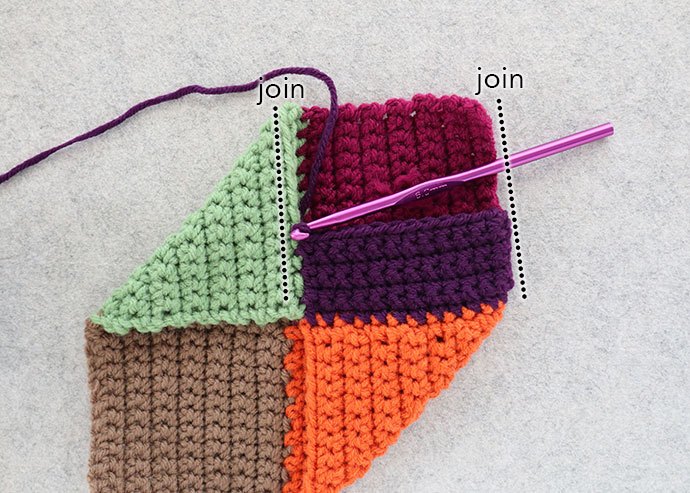
Turn inside out and sc opening closed.

Adding the Heel
Add a foundation row to edge of Square 1 (in matching colour).
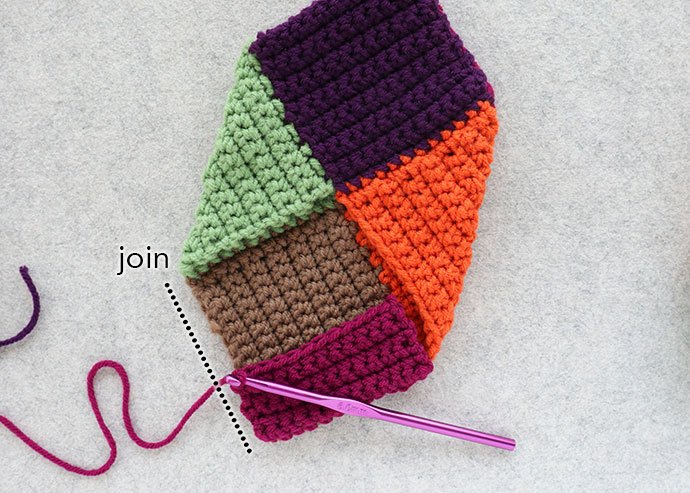
Change colour for heel
Repeat R16-29 as per square 2 but replace (ch, turn) with sl st thought adjacent st in Square 1 then turn.
Try to space the join stitches evenly along edge of square 1.
When joined it should look like this.
Adding sides – Squares 5 & 6
Add a foundation row to ribbed side of heel square (in matching colour).
Change colour for Square 5
Repeat R16-29 as per square 2 but replace (ch, turn) with sl st thought adjacent st in Square 4 then turn.

Repeat for Square 6 but add foundation row on Square 2 and work up from there, joining onto heel.
Weave in any remaining ends.
Make second slipper as per first.
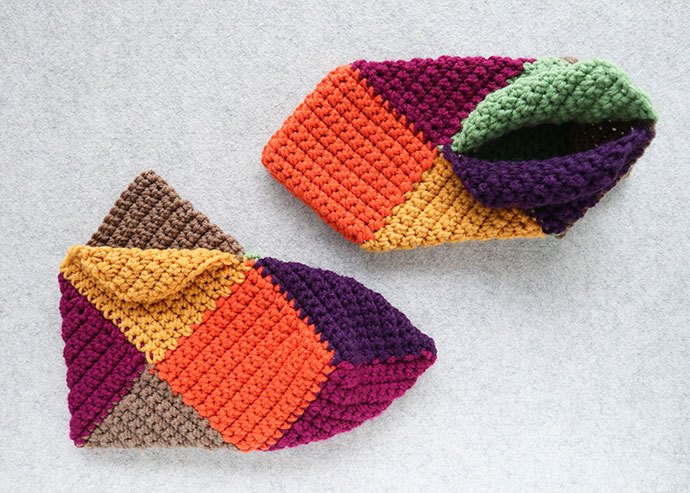
These slippers are super comfortable and warm.
Once you get the hang of them, they are super easy to make. After the first one, you’ll barely need to refer to the pattern.
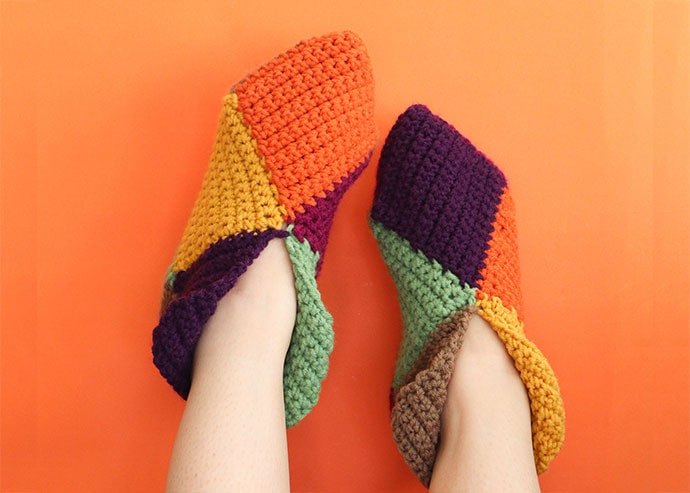
Have fun making a pair of these for the whole family. Have fun mixing and matching colours for a really unique pair of slippers.
I hope you enjoy this free crochet pattern – Tag me on Instagram @mypoppetmakes if you make your own, I’d love to see it.
Feel free to leave any questions or queries in the comment section below and I’ll answer as soon as practicable.
All yarns featured are available from www.americanyarns.com.au

The author may collect a small share of sales from the links on this page.


Comments
Join the conversation
How smart. Love the design and the colors.