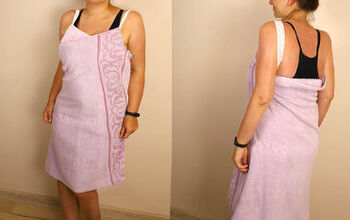
How to Upcycle Old Towels Into a Beach Coverup
What's better than towel clothes to keep you dry this summer? This project uses a vintage towel set to create a reversible beach or pool coverup and belt that can also stand in as a bathrobe!
Comfort lovers, rejoice. Terrycloth clothes are back in style.
Some of the most stand out terrycloth prints appear on vintage towels from the 60s and 70s. The best part is they typically look different on each side, meaning they're the perfect material to use for an easy reversible project that can create tons of different looks with one garment.
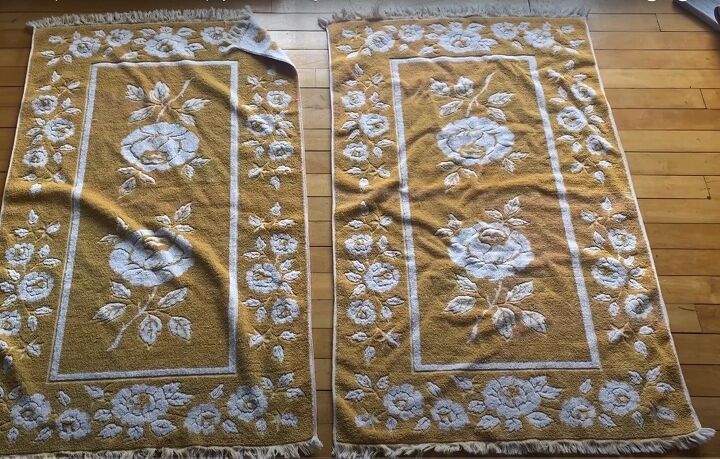
I’m so excited to share this tutorial because it’s a pattern-free sustainable fashion project made with fabric that already exists and was otherwise going to waste. I found these beauties in the back of an antique store in a big plastic bag full of towels for $7. The other towels were drab, but these made me quickly snatch up the whole bag.
Now they will be used again, serving a lot of different purposes. I plan on using wearing this as both a beach coverup and a bathrobe.
But, it was a rollercoaster to get this to completion, and I made a lot of mistakes along the way. Let's get into how I did it!
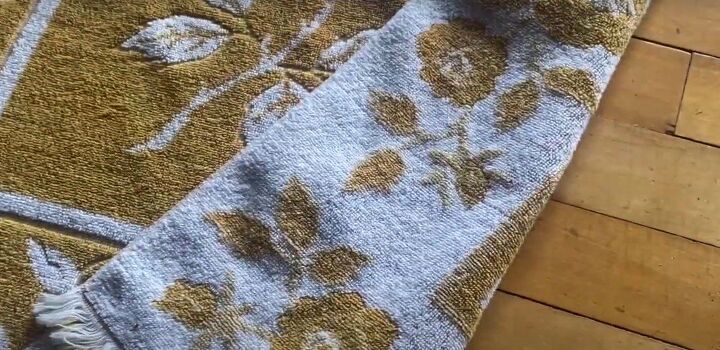
I started with two matching bath towels. One side was burnt yellow, the other was a cream hue. I couldn't decide which side I liked best so I knew I needed to figure out how to make this piece reversible.
I decided to make an open cardigan style, kimono-like beach cover up.
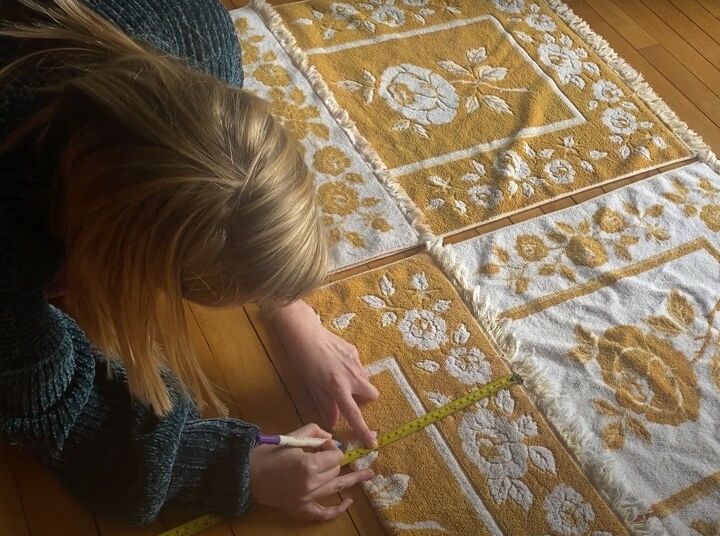
I decided to use one towel as the front, and the other as the back of the body of the piece. I knew the towels were longer than necessary so I decided to cut about 8 inches off the bottom of both to make into sleeves.
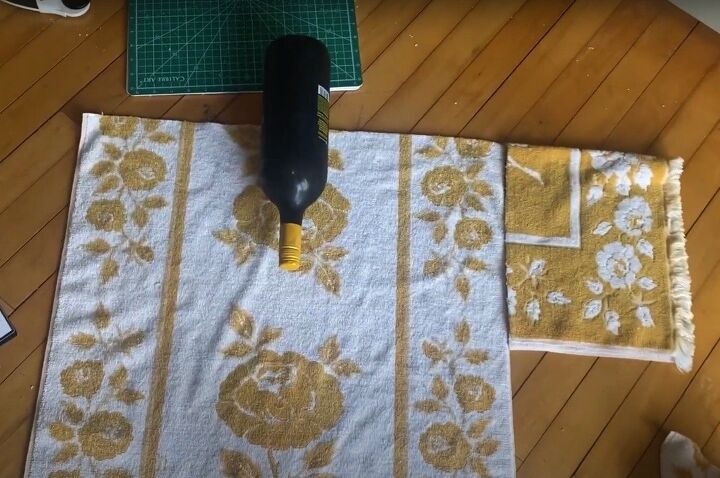
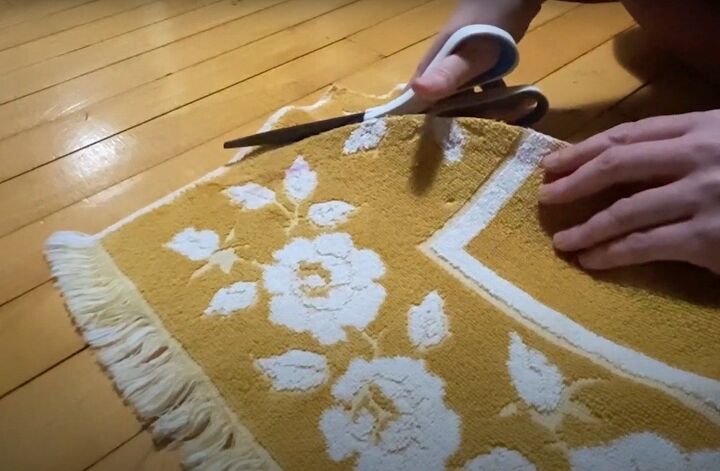
This is where things got interesting. I planned to cut down the middle of the front to create an open neckline, but wanted it to have a tapered curve for a more flattering shape. I am terrible at free handing these shapes without a pattern so I looked around my house for something that resembled the curve I wanted for my head/neck. I found a wine bottle did the trick very nicely.
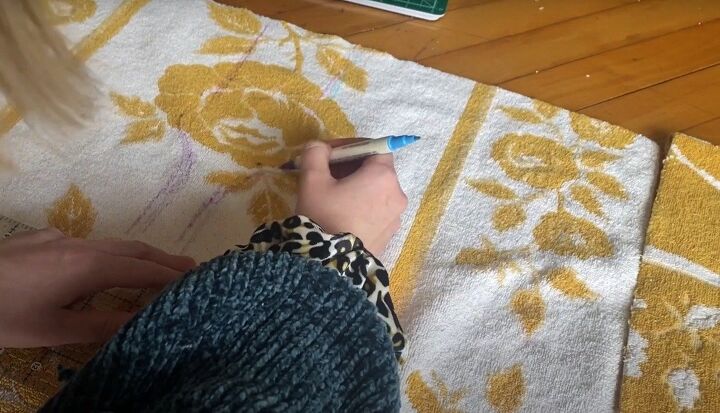
I traced around the neck of the bottle's shape with a disappearing ink pin for fabric. I then extended the tapered shape all the way down to the bottom hem of the front towel.
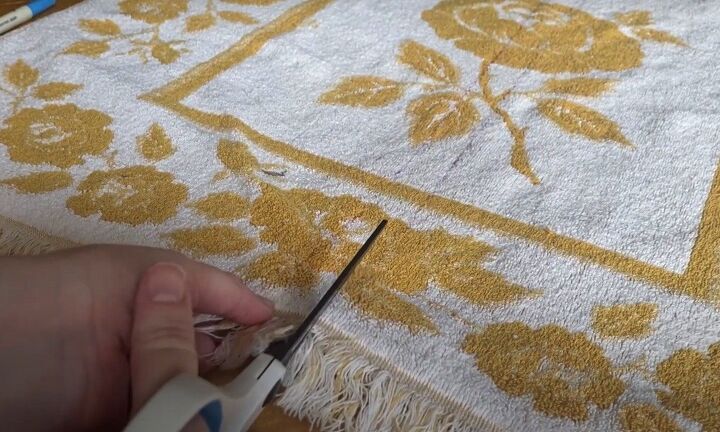
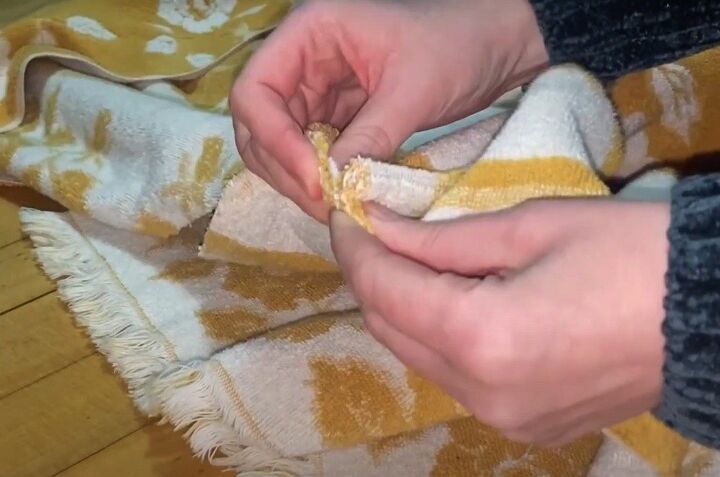
Once I had that neckline shaped, I cut it out — I was also sure to save all of the scraps from this project. I made a belt with them and each piece helped, no matter how big or small. This is a zero-waste sewing project!
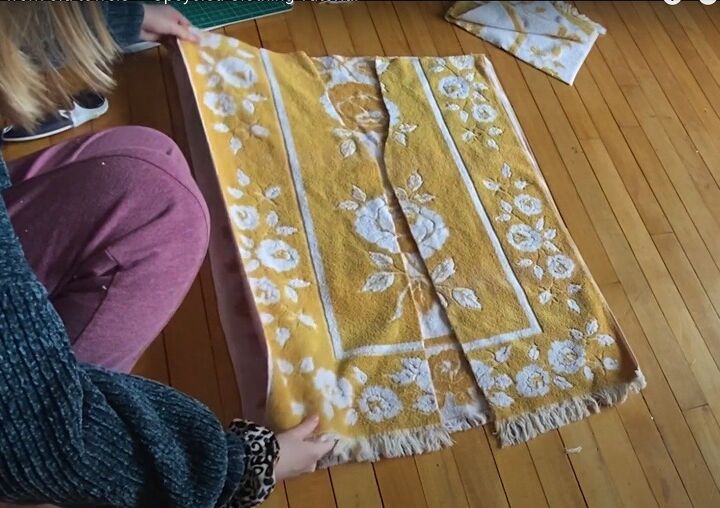
I then laid my two new front pieces on top of the back piece, being sure to line up the top edge perfectly.
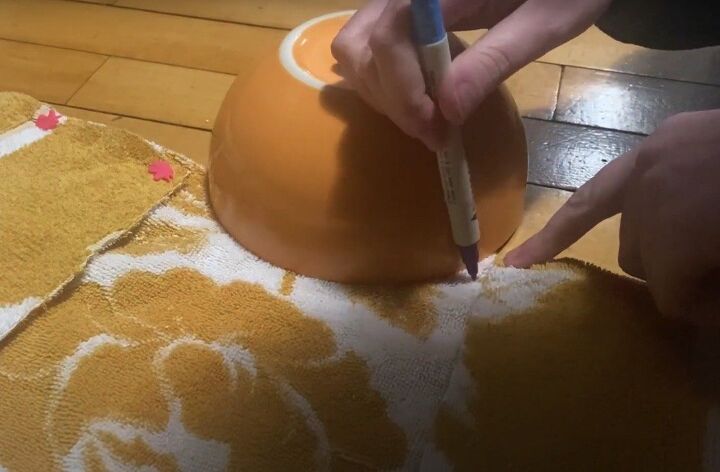
I knew the back side would also need some kind of neck curve to make space for my neck and prevent the garment from riding up oddly behind my head. I found edge of a cereal bowl worked perfectly as a pattern.
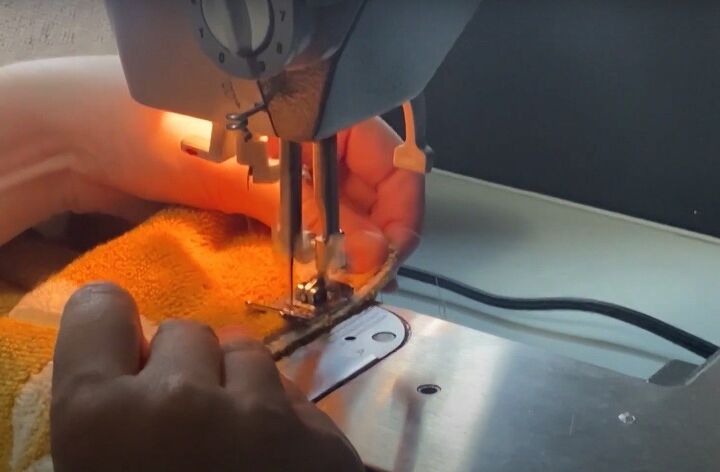
I then took the piece to the sewing machine and sewed a straight stitch along that top edge, making sure identical sides were touching on the inside of the garment.
That gave me something similar to an oversized vest with open sides to try on and see how it was looking. When I put it on, I noticed that the towel extended far past my shoulder bones. Because the terry cloth fabric is thick, it sticks out rather than drapes nicely, so I decided I was going to need to cut actual sleeve holes for this to be flattering.
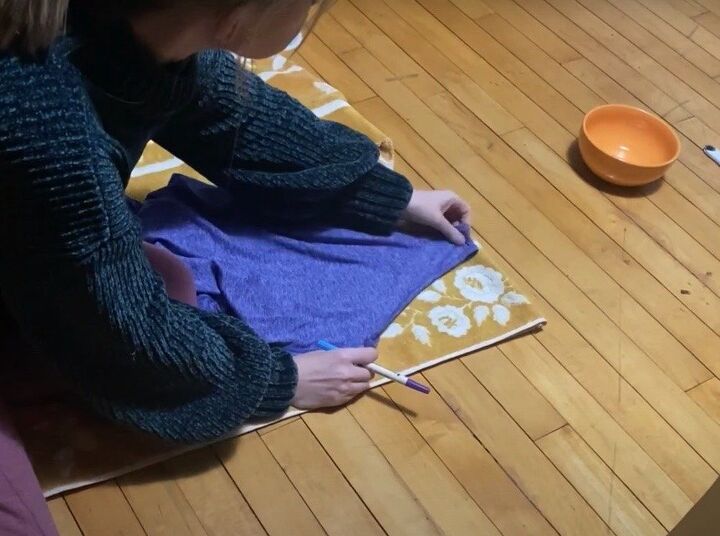
I did not do this step last year when I made a towel dress, and I think the piece was not as great because of it.I marked where my shoulder bone was on the towel so that I would know where the best place to cut a sleeve hole would be.
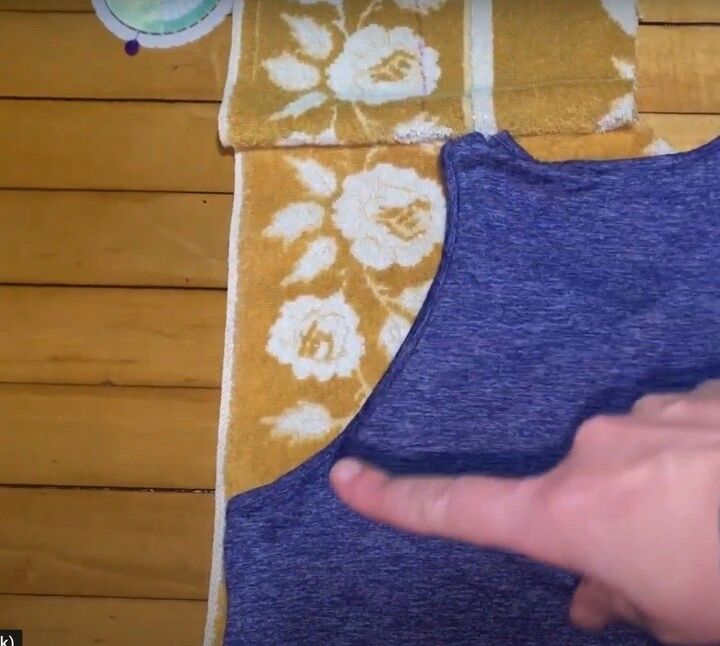
To trace the shape of the armhole, I used a tank top from my wardrobe that had a very lose-fitting cut. I then traced along that line with my marker.
I made sure flip the tank top over to it's backside to trace the sleeve hole on the back of the swim suit cover up. This is because the front and back of sleeves are usually cut slightly differently and I wanted to make sure to get that right.
I then used the piece of the towel I cut off at the start of the project as sleeve pieces. If you have questions about how I did this exactly, you might find the video at the top of this page helpful to see this in action.
Once I had an armhole and a sleeve piece cut out, I put matching sides together and sewed a straight stitch along those edges to attach the sleeve to the body. I did the same on the other side of the towel and I sewed closed all of the other seams.
This project left me with many exposed, raw edges. Due to the nature of the material I decided it would be best to finish the raw edges with double fold bias tape. I put the bias tape on the neckline, bottom of my sleeves and on my interior raw hems at the seams. Closing off all of these raw edges made the coverup reversible as raw edges became enclosed in the bias tape.
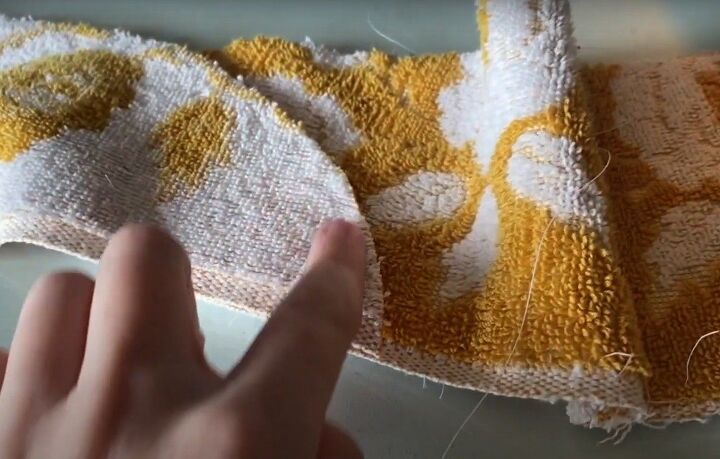
To make the matching belt I pieced together all of the scraps I had left over and pinned them together. I then sewed a zig zag stitch on the overlapping edges, which made the two pieces become one. I continued doing this with all of my scraps until I I formed a long strip.
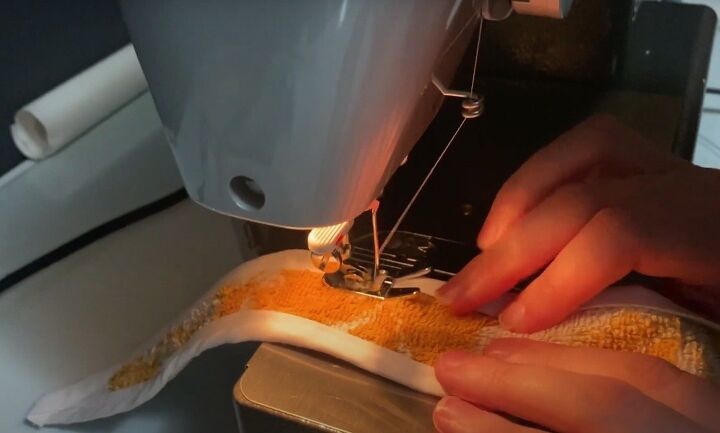
Once all of the scraps were fused together on both sides, I trimmed the excess so it was all just a two inch wide strip. I then added more double fold white bias tape to finish both edges and give the belt a clean look and stability to help it hold up over time.
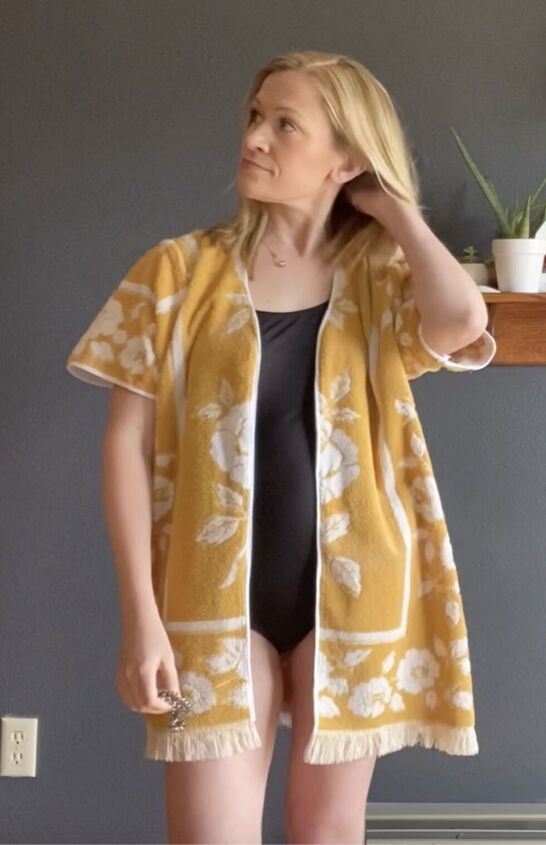
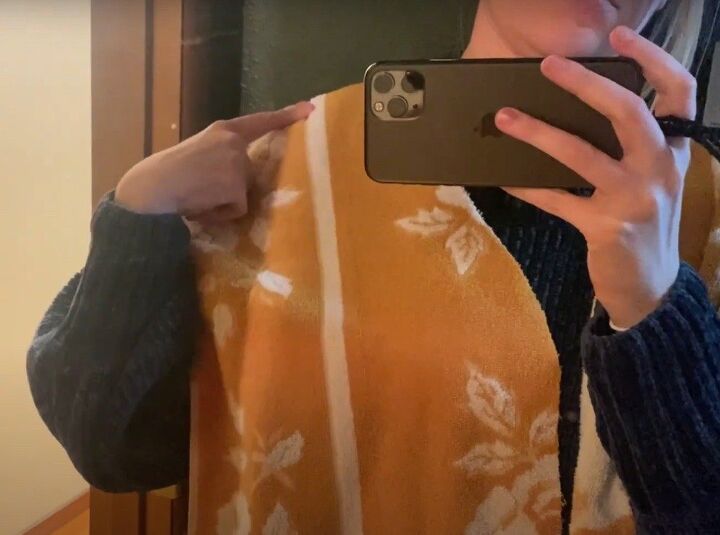
There are so many ways to wear this finished cover up! I can wear it open with the yellow side facing out ...
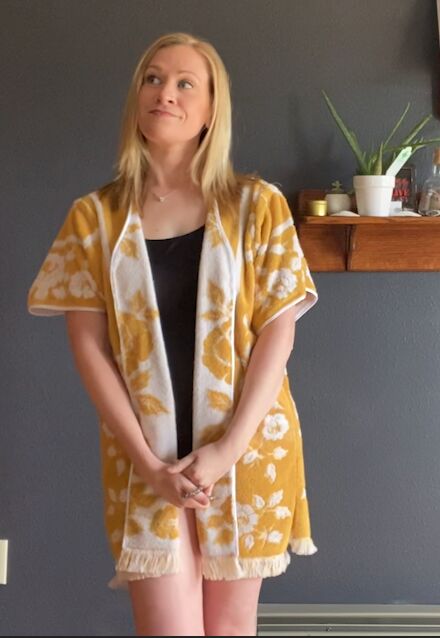
It also looks cute with the neckline flipped out in almost a blazer style.
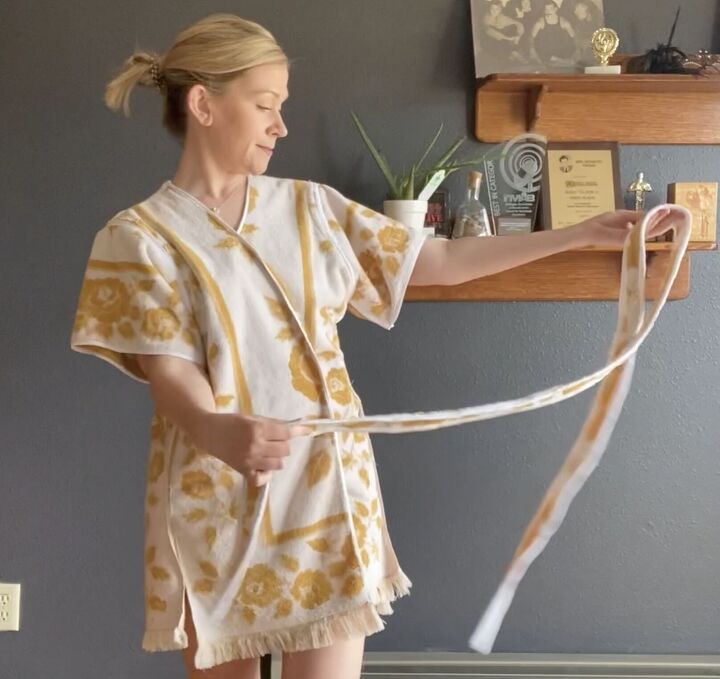

Then I can also flip it inside out, put on the belt, and wear it closed.
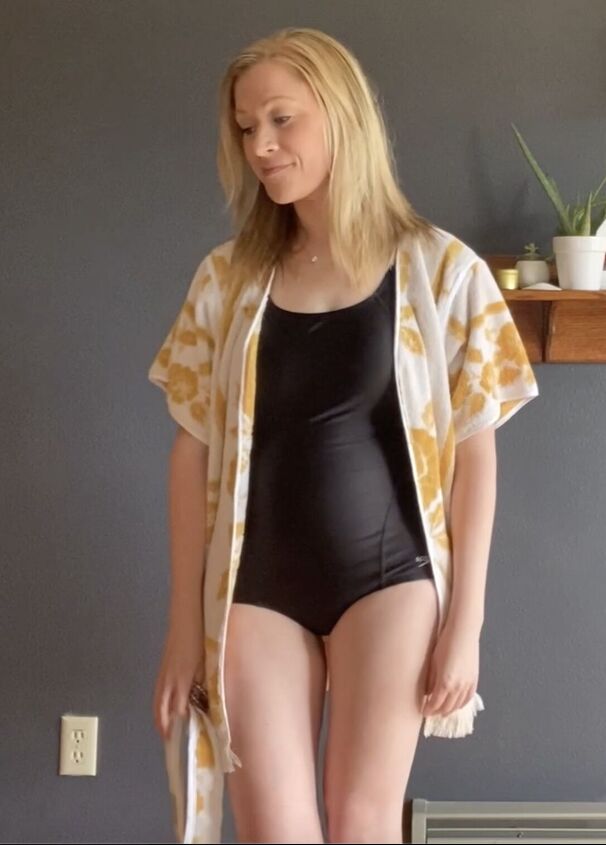
Or I can wear it open with the white side facing out.
I'm extremely surprised with how this came out considering my last towel project was kind of a bust. I see this as a huge improvement on my vintage towel dress, but let me know what you think?
Which of these old towel, terrycloth pieces do you prefer?
If you'd like to make a coverup of your own, but can't find vintage towels anywhere, you may be able to find them for sale on Poshmark. All you have to do is search "vintage towel" and some decent options come up.
*However* if you can't find any good towels in a thrift store or online, there are some pretty microfiber beach towels on Amazon that look like they would work well for this project even though they are brand new and not as sustainable.
Let me know if you try this project, and don't forget to connect with me on Instagram and Youtube to see what I'm going to be working on next!
If you'd like to see more easy refashioning ideas, please visit my YouTube channel, Sew Much 2 Wear.
Disclosure: Bear in mind that some of the links in this post are affiliate links and if you go through them to make a purchase I will earn a commission. Keep in mind that I link these companies and their products because of their quality and not because of the commission I receive from your purchases. The decision is yours, and whether or not you decide to buy something is completely up to you.
The author may collect a small share of sales from the links on this page.


Comments
Join the conversation
Very easy, practical and cute!!
Wow! So amazing! And thank you for the detailed instructions! Love this!!