Two Fun and Easy DIY T-Shirt Projects

Today, I’m trying the popular Instagram and TikTok trends of tie-dying and ruching t-shirts. I did these projects simultaneously, and they were both fun to do and super easy. Check out the tie-dying process and my results.
Tools and materials:
- 2 t-shirts
- Rubber gloves
- Bleach
- Rubber bands
- Scissors
- Measuring tape
- Fabric chalk
- Pins
- Safety pin
- Sewing machine
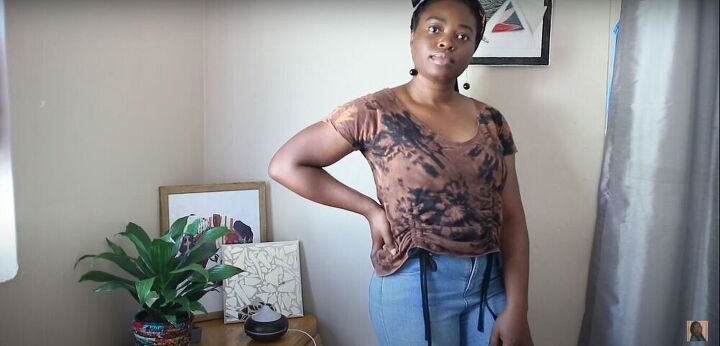
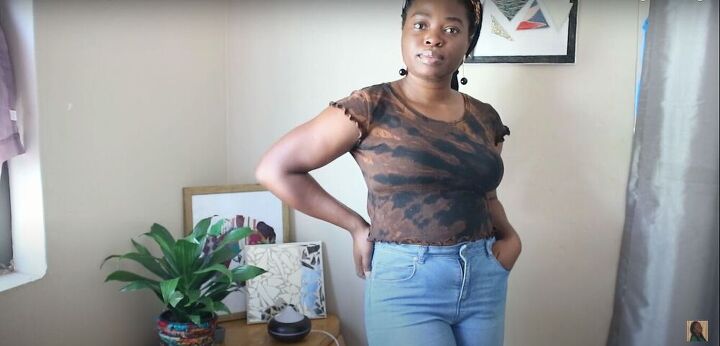
Lettuce Edge T-shirt
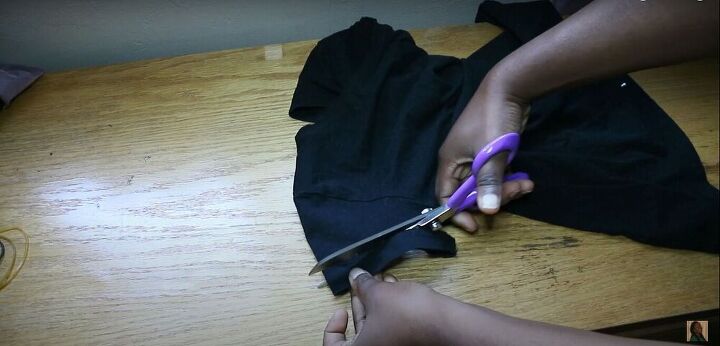
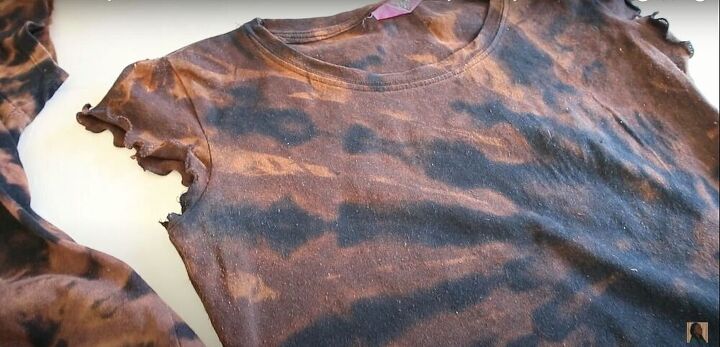
Cut the shirt
Before beginning the tie-dying process, I cut the hems off the sleeves.
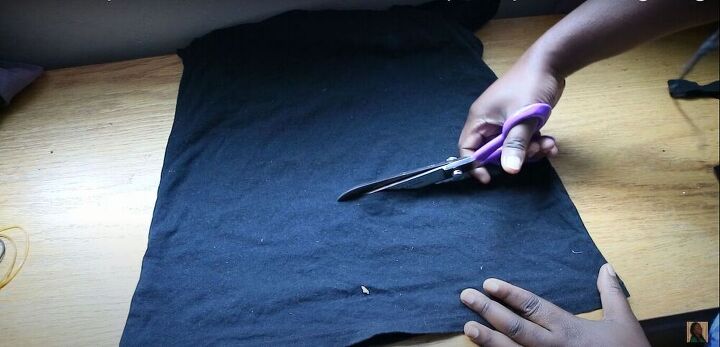
I also cut the shirt to the desired length. Later I will finish the edges to create the lettuce hem look.
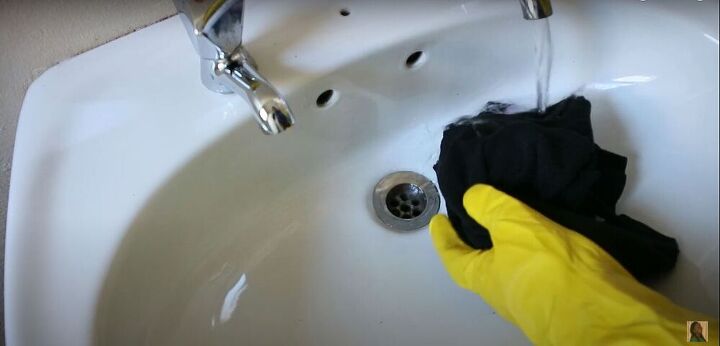
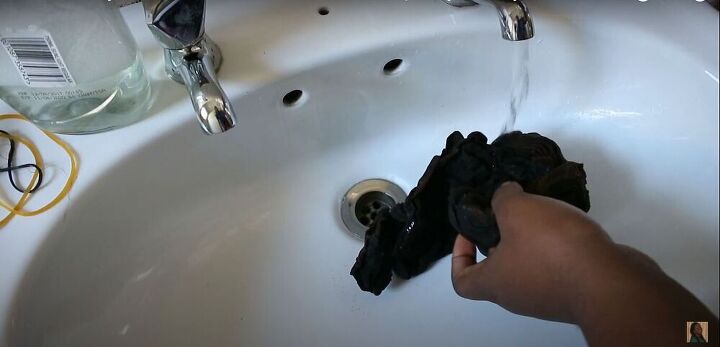
Wet the shirt
I ran the shirt under water in the sink until it was thoroughly soaked through, and then I wrung it out well.
Twist the shirt
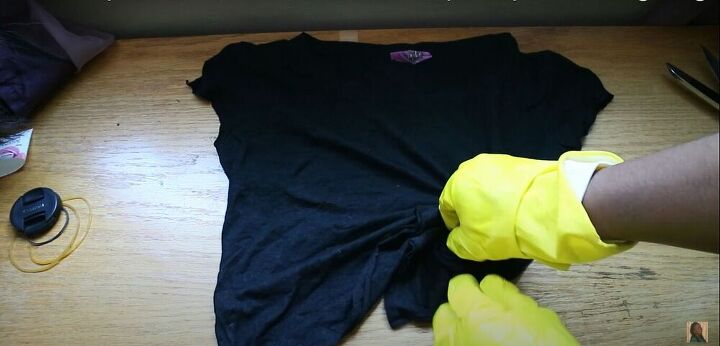
I pinched up a bit of the shirt and began twisting it.
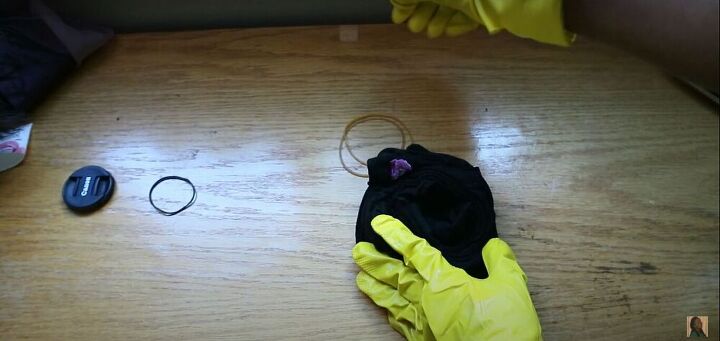
I kept twisting until the entire shirt had been twisted around that one point.
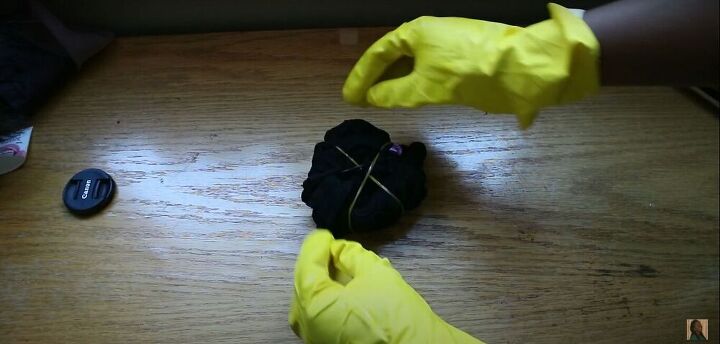
Place rubber bands around the twisted shirt
I used three rubber bands to hold the twists of the shirt in place. I placed the rubber bands so they divided the twisted shirt into six sections of relatively equal size.
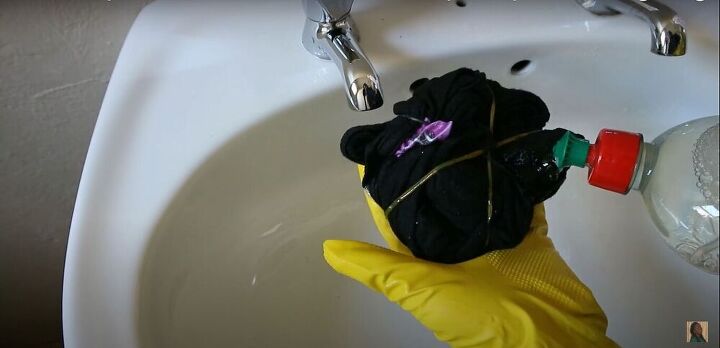
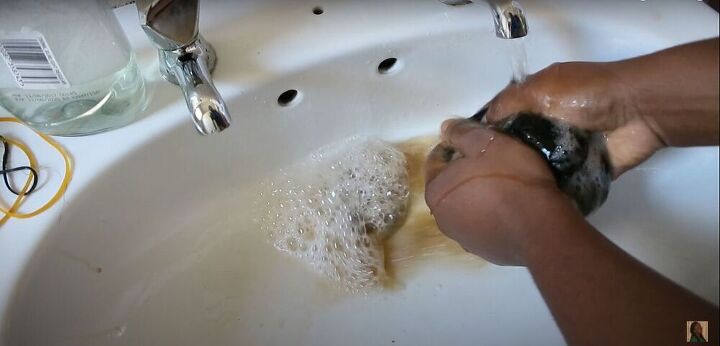
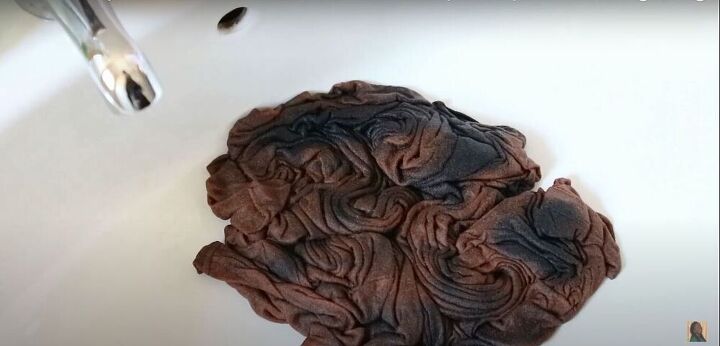
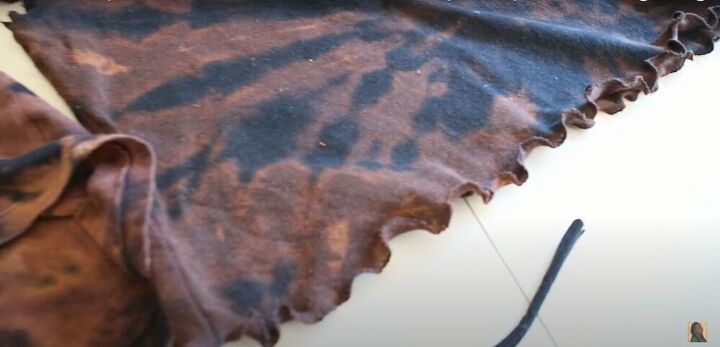
Apply bleach
I used a squirt bottle full of bleach to liberally apply the bleach on every other section of the twisted shirt.
Allow to rest
Next I let the shirt sit for about ten minutes to give the bleach time to work on the fabric.
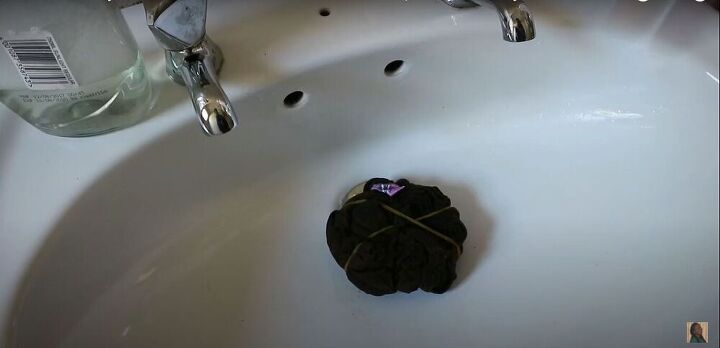
Rinse the shirt
I then removed the rubber bands, and rinsed the shirt thoroughly, making sure every part of the shirt was placed under the running water, and wringing it out well.
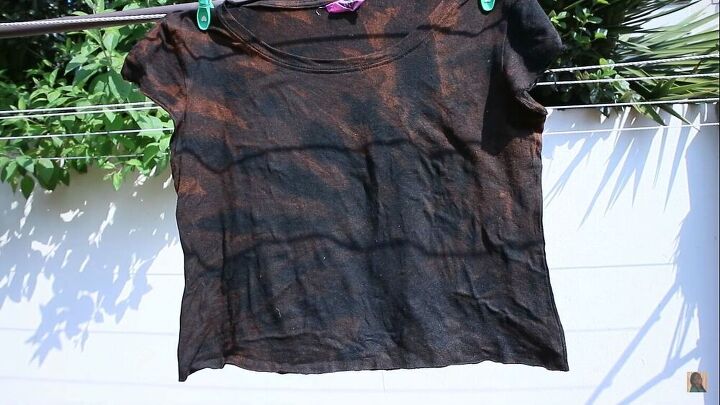
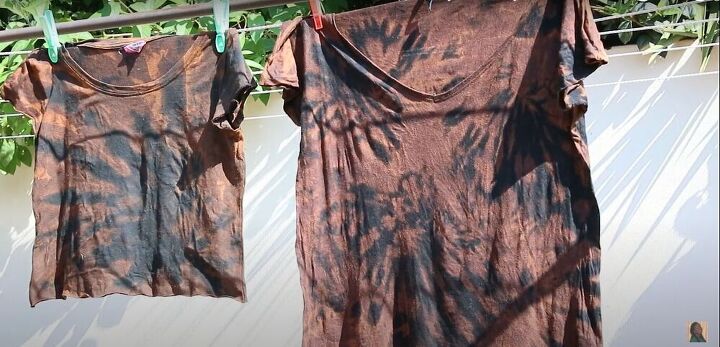
Hang the shirt to dry
Once it was rinsed, I hung the shirt to dry in the sun.
Ruched T-Shirt
Twist the second shirt
Next, I moved on to the ruched shirt. I made a few small twists in the shirt to create a different tie-dye pattern than the first shirt.
Apply bleach, rinse, and hang
For this shirt, I applied bleach over the whole shirt. After I let it rest for a few minutes, I rinsed the shirt thoroughly and hung it out to dry.
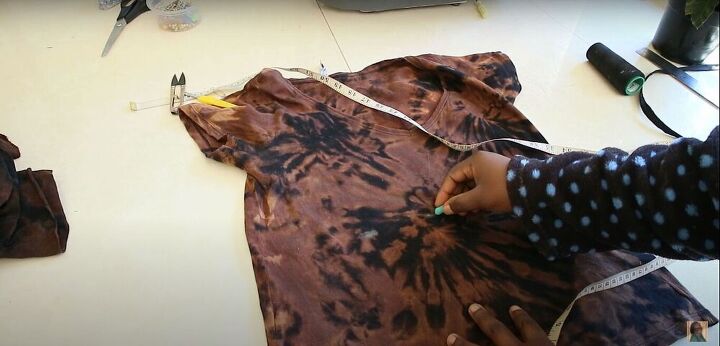
Mark the points for the ruching
I turned my shirt inside out. Then, I decided where I wanted the lines of ruching to be and marked the top of each point on my shirt with fabric chalk. To make sure they were evenly spaced, I first found the midpoint of the shirt and then measured an equal amount from either side of the midpoint.
Measure
I measured the space from the hem of the shirt until the point I just marked, which for me was 10 inches.
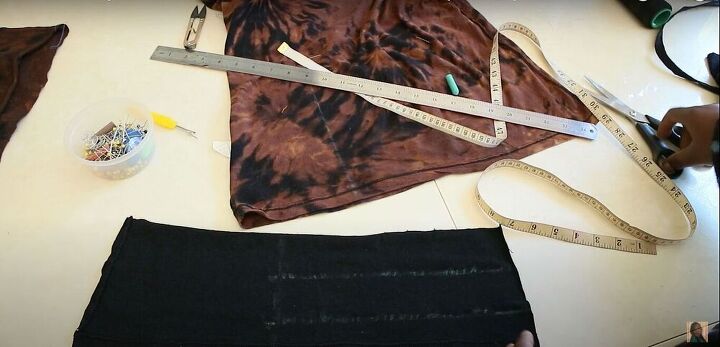
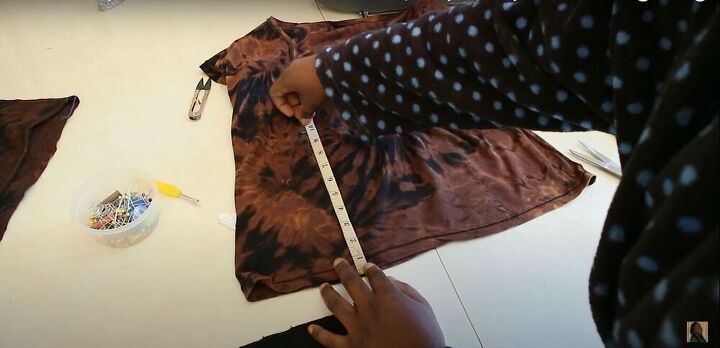
Measure and mark fabric for ruching channels
Using the offcuts from the first shirt, I measured and marked two strips of fabric that were 10 inches long and 2 inches wide.
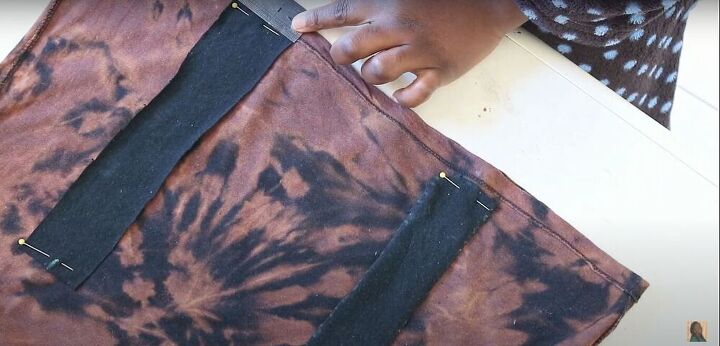
Cut the strips and pin them in place
Then I cut out the strips of fabric and pinned them in place on the wrong side of the front of my shirt, lining the top edges of the fabric strips up with the marks I had previously made on the shirt.
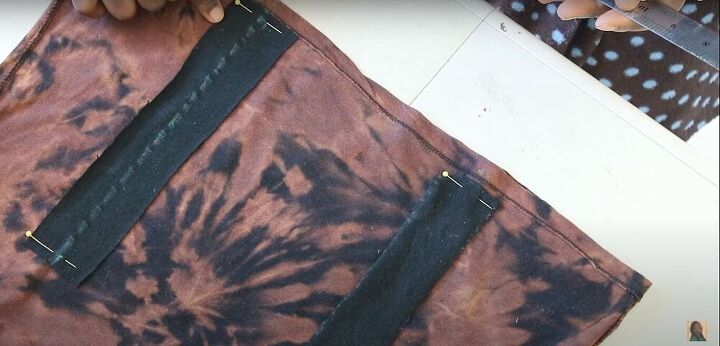
Mark where to sew
I drew a line down the center of each fabric strip as a guide for where to sew it down.
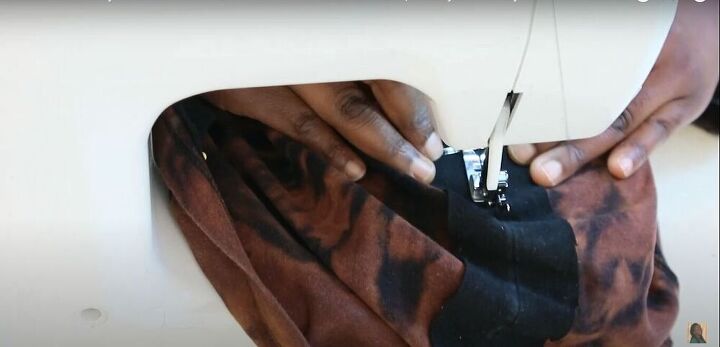
Sew down the strips of fabric
I sewed one line of stitching down the middle of each strip of fabric, as well down each long edge, creating two channels under each strip of fabric.
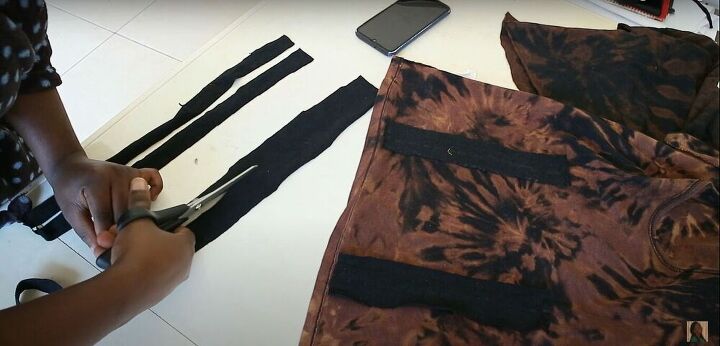
Cut strips for the ties
From the remaining offcuts, I cut four strips of fabric, each one inch wide.
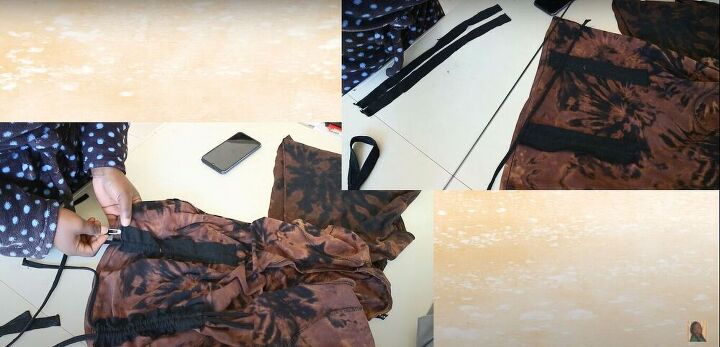
Insert the ties into the channels
I stretched each strip of fabric so it was long and thin, and then inserted each of the four strings into one of the channels in the strips of fabric I had sewn onto the shirt. To insert the strings into the channels, I attached a safety pin to one end of the string and worked the safety pin through the channel until it emerged on the other end.

Sew the ends of the strings down
Once the strings were all inserted into their proper places, I made sure a small amount of string was visible at the top of each channel. Then, I sewed along the top edge of the fabric strips to hold the strings in place.
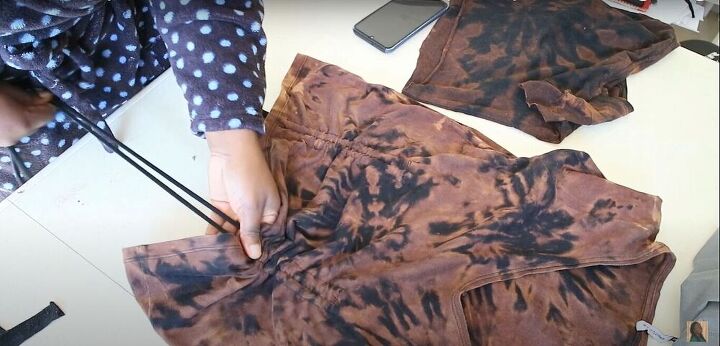
Pull the strings
To create a ruching effect, I pulled the strings down and pushed the fabric of the shirt up. I tied the strings at the hem of the shirt to hold the ruching in place.
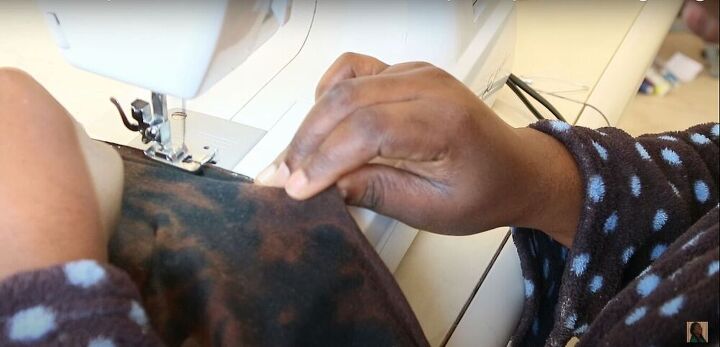
Finish the lettuce-edge shirt
To finish the lettuce-edge shirt, I set my sewing machine to a zigzag stitch, on the tightest tension and the shortest stitch length. Then, I zigzag stitched the bottom hem and around the sleeves.
This was a really fun project! Let me know in the comments which of these shirts you like best.
The author may collect a small share of sales from the links on this page.


Comments
Join the conversation