Turn Two T-Shirts Into a DIY Jumpsuit

Today, we’re going to be sewing an easy DIY jumpsuit made out of the fabric from two oversized t-shirts. In addition to being super cute, this jumpsuit is also a great way to reuse old t-shirts and reduce waste. So follow along, and let’s get sewing!
Tools and materials:
- 2 large t-shirts
- Pins
- Scissors
- Fabric chalk
- Button
- Elastic band
- Sewing machine

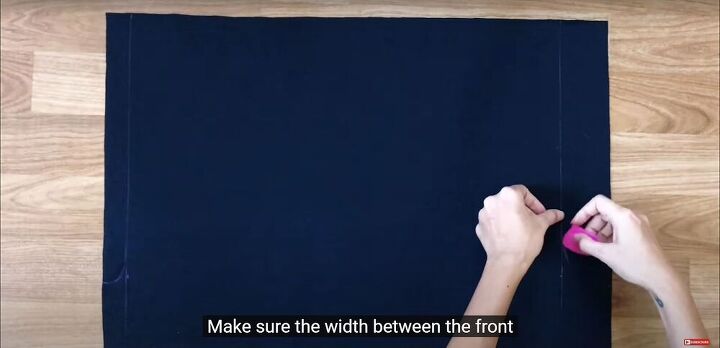
Measure, mark, and cut
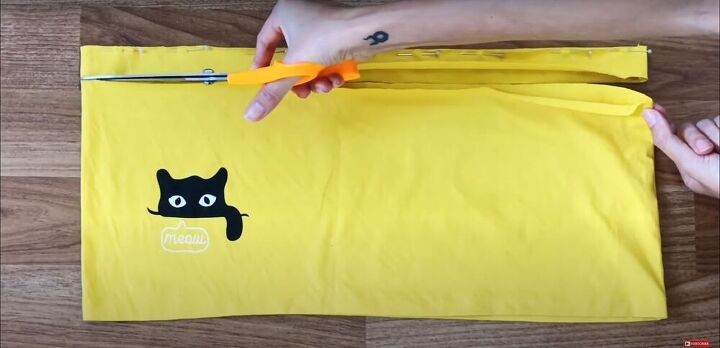
To begin, measure from your shoulder to your belly button, and then measure out the same amount from the top of the t-shirt you want as the top of your jumpsuit, and mark it. Then, draw a horizontal line across the shirt at that mark and cut across the line.

On the second t-shirt, draw the widest rectangle you can without crossing over seams. For me, this was 40 cm x 60 cm (15¾ in x 23½ in). Then cut them out. These rectangles will make the bottom half of the jumpsuit.
For instructions on how to draw the pattern for the bottom half of the jumpsuit, see the video from 1:56-3:06. Once the fabric is marked with the pattern, cut out the pieces.
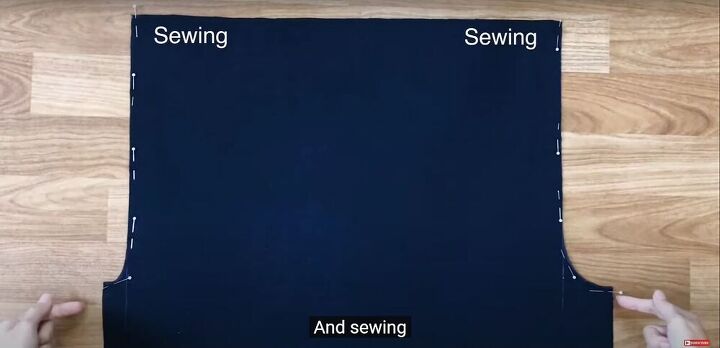
Pin and sew
Pin the two pieces together along the sides and curve, and sew them down.
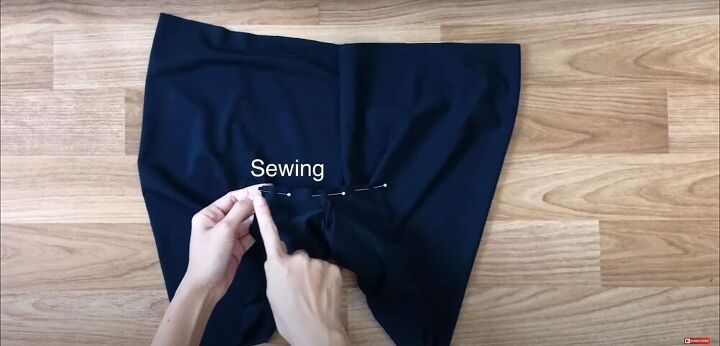
Turn the fabric so the seams are in the center front and center back of the shorts. Pin the crotch seam together, and sew it down.
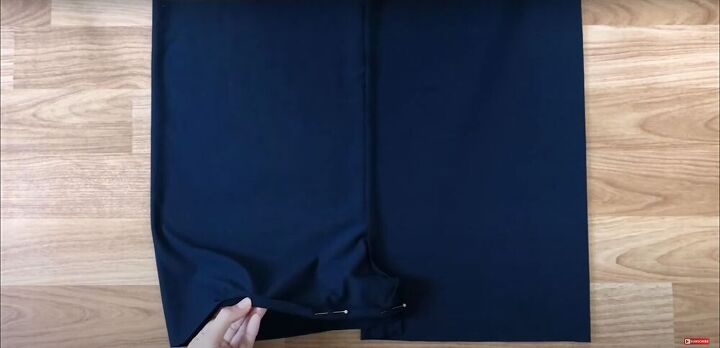
Hem the bottom of the shorts by folding up the bottom edges, pinning them all around, and sewing them down.
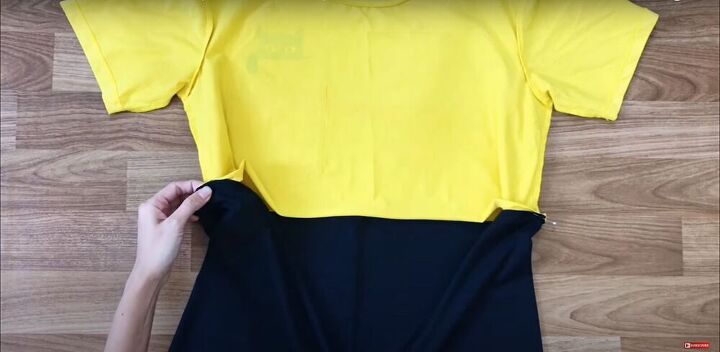
Starting with the sides, pin the top and bottom pieces of the jumpsuit together.
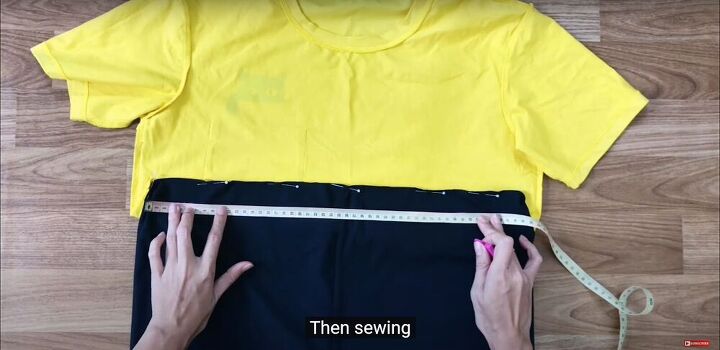
Mark and sew
Make a horizontal line across the top of the shorts, 3 centimeters (1 inch) down from the top edge, then sew along this line.
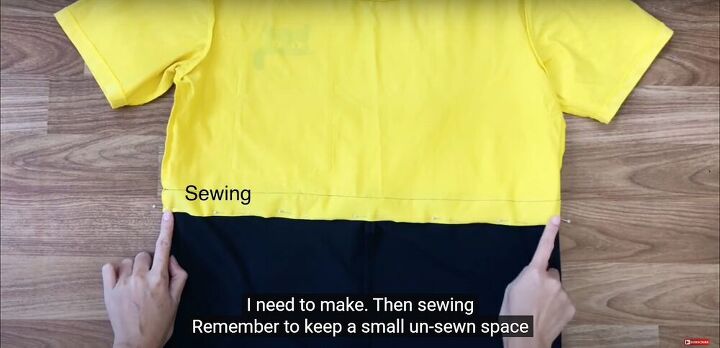
Pin down the seam allowance of the connecting seam between the top and bottom pieces. This will be a tunnel through which you will run an elastic band. When sewing it down, makes sure to leave a gap in the stitching so you will have a place to insert the elastic band.
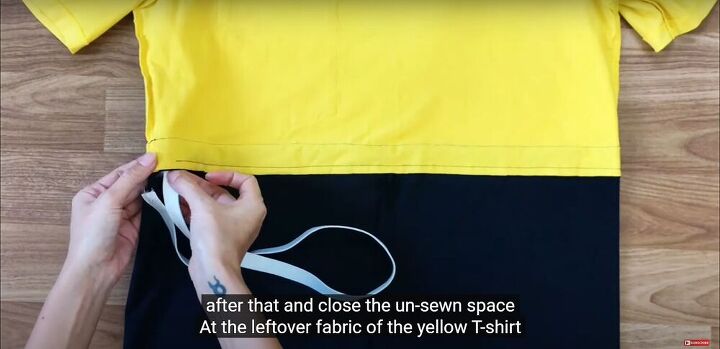
Insert elastic
Use a safety pin attached to one end of the elastic band to pull the elastic through the tunnel around the waistline of the jumpsuit. Once the elastic comes all the way around, sew the ends together, and close up the gap in the stitching.
Measure and cut
From the leftover fabric, measure and cut out a long strip of fabric that is 3 centimeters (1 inch) wide.
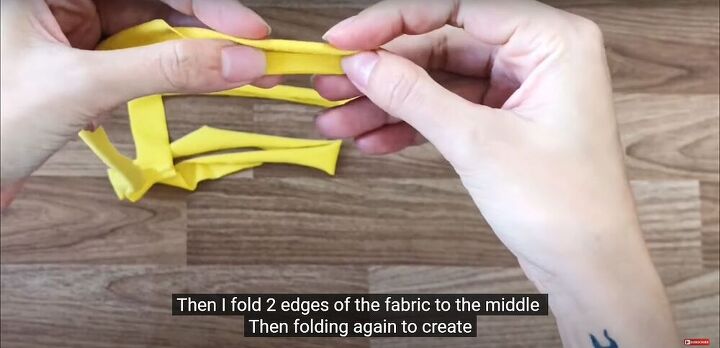
Fold, pin, and sew
Fold both edges of the strip inward to the center of the strip, then fold the whole strip in half so the raw edges are hidden. Pin everything down, and sew.
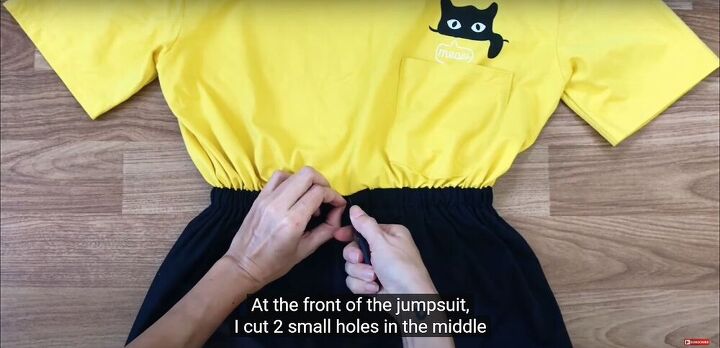
Cut holes and insert drawstring
Cut two small holes at the center front of the jumpsuit, and use a safety pin to run the drawstring into one hole, through the fabric, and out the second hole.
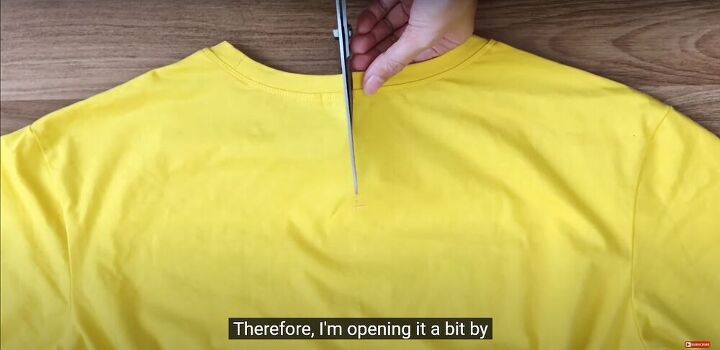
On the back of the jumpsuit, cut a 10 centimeter (4 inches) slit down from the center back of the neckline.
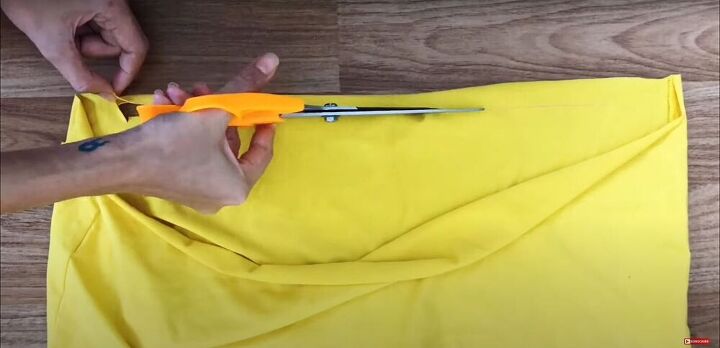
Cut out a strip of fabric 2 centimeters (¾ of an inch) wide and long enough to cover the edges of the slit you just cut in the neckline.
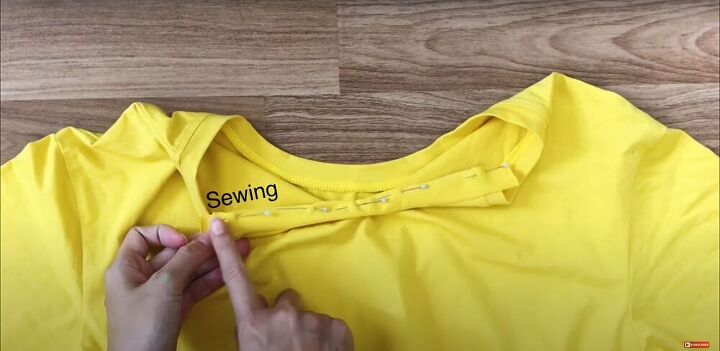
Pin and sew
Pin the strip along the slit in the neckline, and cut off any excess fabric. Then sew it down.
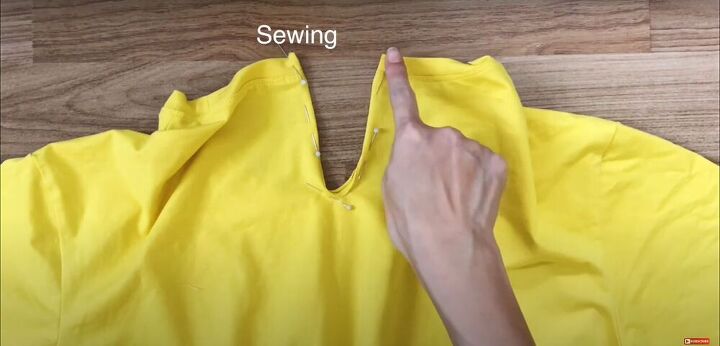
Fold the strip inward along the slit in the neckline, pin it down, and sew.
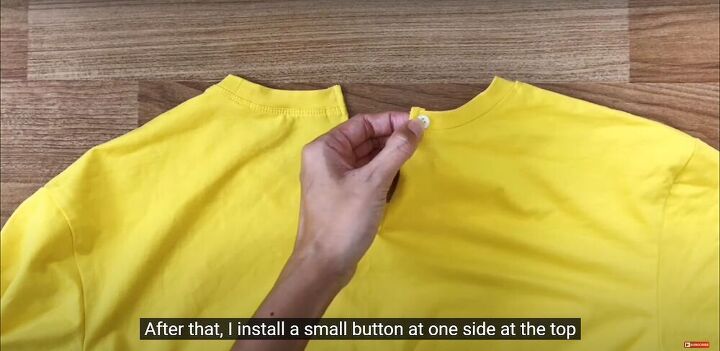
Button and buttonhole
Sew a small button onto one side of the slit, and cut a matching buttonhole on the other side.

And here is the final transformation!
This DIY jumpsuit tutorial is such a fun project because you can choose any color or patterned t-shirt to make it. It’s also adorable and extremely comfortable. If you sew a DIY jumpsuit of your own using this tutorial, I’d love to see the results!
The author may collect a small share of sales from the links on this page.


Comments
Join the conversation
Why would u cut the neck line even u can just wear it the way it is?
that is a cute and comfortable looking jumpsuit. love it. thanks for the idea