How to Distress a T-Shirt

In this tutorial, I'm going to show you how you can make a distressed t-shirt. I saw a nice distressed t-shirt online for $30, and I was not going to pay that price - nah-ah. Instead, I bought a t-shirt from Wal-Mart for only $5 and distressed it myself. Follow the steps to learn how you can too.
Tools and materials:
- T-shirt
- Pen
- Scissors
- P80 sandpaper
- Fray check

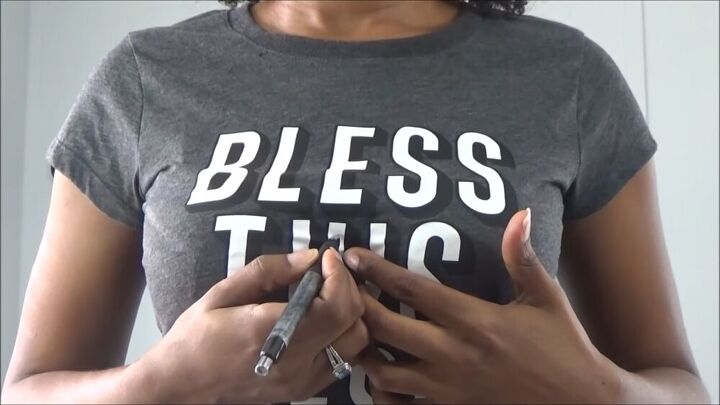
Mark your new neckline
Firstly, we are going to make a nice v-shaped neckline that shows some cleavage. To do this, mark on the t-shirt where your collar bone is; this is where the V will start. Then you need to simply follow the lines down and mark a point where you want the V to stop; for me, this is right above my bra.
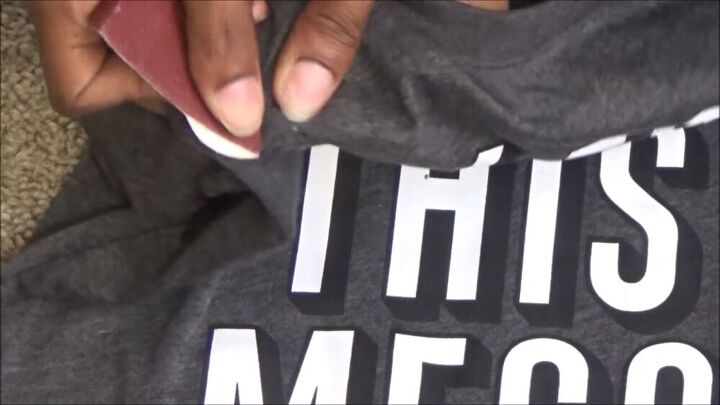
Distress the t-shirt
Then you're going to use some P80 sandpaper to distress the shirt. Simply put one of your hands inside the top, and with your other hand, rub with the sandpaper to create the distressed holes. Once you have the distressed holes, you can pull on them to make them bigger or leave them small. To make a few holes in one spot, put a few of your fingers underneath and rub the sandpaper across all of your fingers. Continue doing this until you get your desired amount of holes. If you have words on your top and want there to be holes on the words, pinch where you want the hole to be, then take a pair of scissors and cut a slit. Once you have the slit, you're going to put your fingers underneath and continue to cut a circular shape.
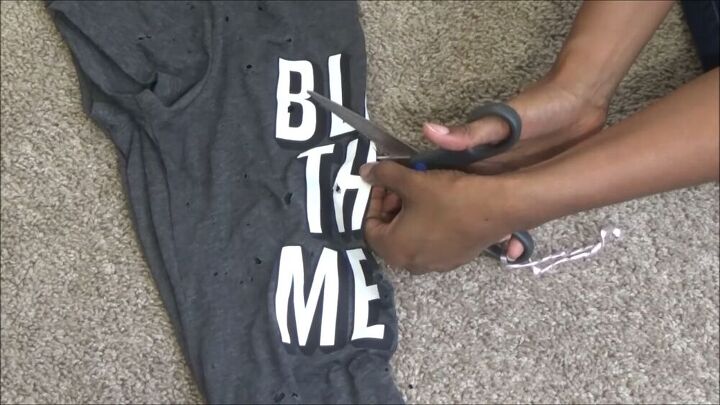
Cut the V shape
The next step is to fold your shirt in half evenly, find where you put your mark for the end of your V, pinch it, and then you're going to pull away the back part of your shirt so that you're only working with the top layer. (You don't want to by mistake, cut the V out on the back side as well!) Then you're just going to cut a slit into your shirt, and then you can start cutting at this point with the top folded in half, or you can open the shirt up if you think that it will be easier that way. Simply cut up to the marks that you made at the top and create the V-shape. Once you've done that, do any touch-ups that you need to do to make sure that your lines are as straight as possible because you don't want to have a crooked V.
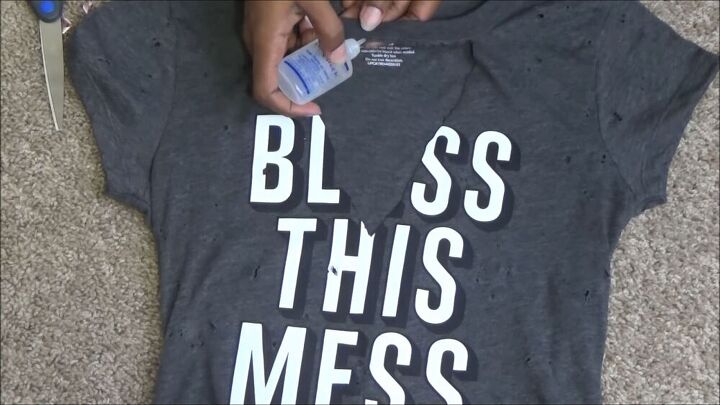
Apply Fray Check
Now you have a nice open neckline. You now want to use some Fray Check and put it all along the edges so that it won't start to unravel when you wash it. You want to make sure you let this dry before you put the top on. The last thing you have to do is look over your overall shirt to make sure that it looks the way you want it to look.
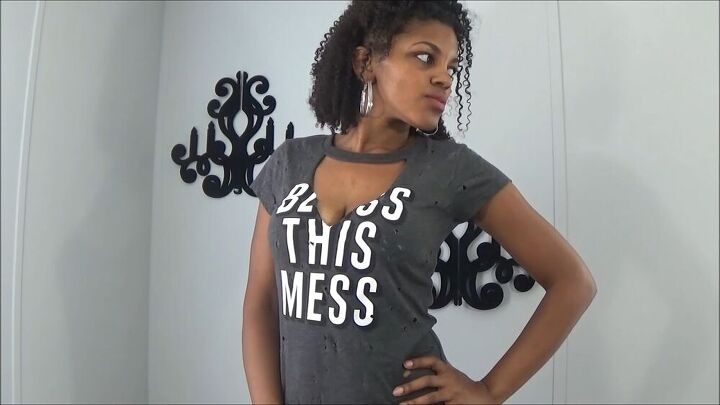
Here is the final look, and I love the transformation that we’ve made! As you can see, when I cut my v-shape neckline, I kept the circular neckband at the top of the t-shirt in place. It helps to keep some structure in the t-shirt so that it isn’t falling off my shoulders. I love how casual and trendy this t-shirt looks, and I’m going to get a lot of wear out of it!
The author may collect a small share of sales from the links on this page.


Comments
Join the conversation
Oh I definitely will give this a try
I really like the idea of doing the neck line the way you did. I really need to try this. Thank you for the good idea.
By the way, you said that you were going to make a shirt that will show some cleavage. You did that very nicely and not trashy. But what about those of us that don’t have any cleavage?? 😂🤣😂🤣