How to Make a DIY Valentine’s Day T-shirt With Sweetness and Lace
Today I’m showing how to make a quick DIY Valentine’s Day t-shirt.
This is a quick and easy sewing project because we’re starting with a store bought tee.
We’ll first do a little bit of deconstruction. Then we’ll add some sweet Telio stretch heart lace, some quick stitching, and finally put things back together. And in about 30 minutes, you’ll have a fast and easy Valentine’s t-shirt that’s ready for the 14th.
I’ll put it out there that if you can’t get your hands on oh-so-festive stretch lace with hearts, you can use this same process to make a stretch lace embellished t-shirt with any kind of stretch lace you like. I especially love the ones that have large flower motifs. This is definitely a project that’ll let you play.
Pretty cool, eh?
So find a basic t-shirt and let’s get into this project!
elizabethmadethis.com is a participant in the Amazon Services LLC Associates Program, an affiliate advertising program designed to provide a means for sites to earn advertising fees by advertising and linking to Amazon.com.’ As an Amazon Associate, I earn from qualifying purchases. If you purchase a product through one of them, I will receive a commission (at no additional cost to you). I only ever promote products that I use and love and I think you will love too. Thanks for supporting this blog!
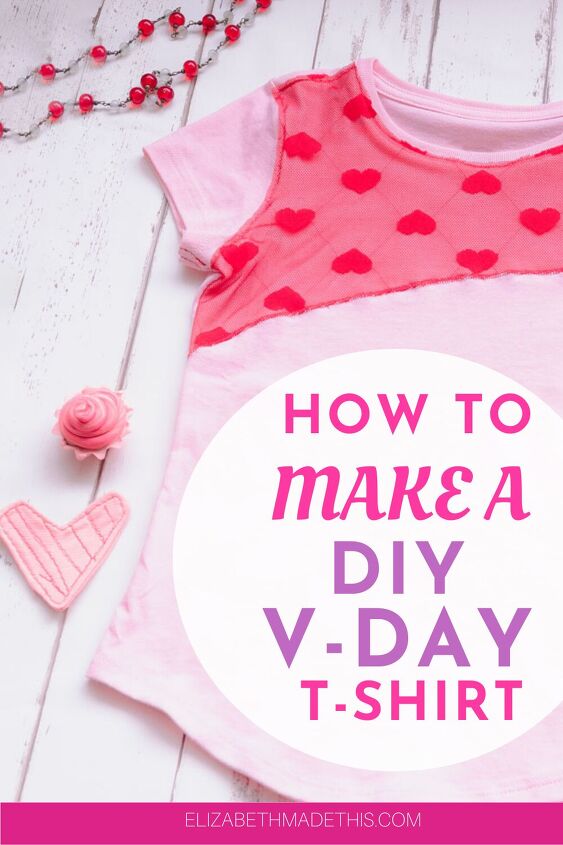
Table of Contents
DIY Valentine’s Day T-shirt supplies
- T-shirt that fits you
- Telio stretch cupid heart lace (The red that I’m using is sold out, so the link is for the white: 1 yard will make multiple shirts)
- 75/11 stretch needle
- Matching thread
- contrast thread for basting
- sewing pins
- hand needle
- Washable fabric marker
- seam ripper
- fabric scissors (find the best sewing scissors for you)
- small embroidery scissors (optional)
Deconstruct your t-shirt
The first thing you need to do to make a DIY Valentines t-shirt is to take your t-shirt apart.
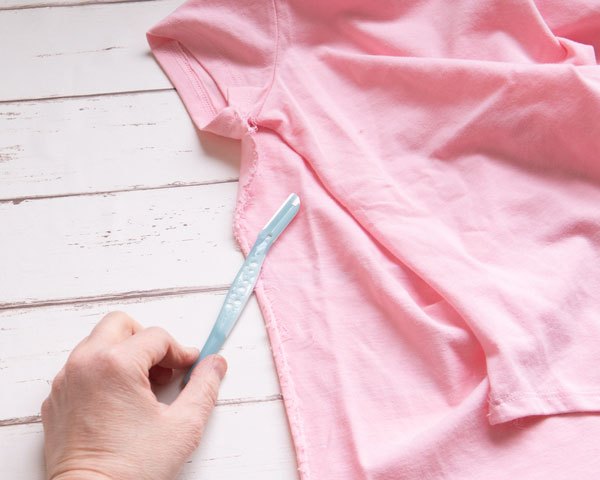
Using your seam ripper, open up the side seams and underarm seams on the t-shirt.
I like to use a pair of embroidery scissors to clip out the threads in the side seam at the hems to get started. From there, use a seam ripper to rip out the stitches in a seam.
Pick up must see tips on how to use a seam ripper.
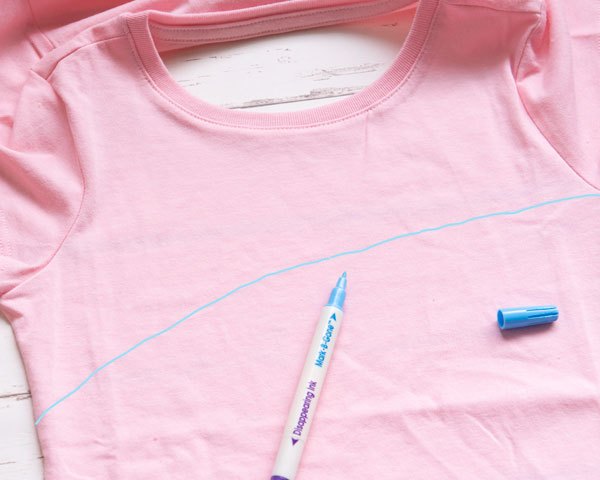
Figure out where you want the lace
Next, use your fabric marker to draw a line where you’d like the lace to be on the front of your t-shirt.
Draw a nice gentle curving line from armpit to armpit. It’s okay if the line is slightly asymmetrical, but you do what you want. If you want to use a ruler here, that’s okay too.
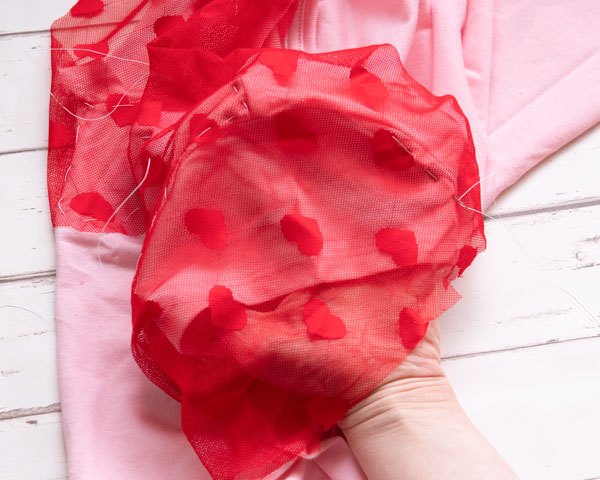
Cut the stretch lace
Cut a small piece of lace that’s big enough to cover the area you marked.
Fold open the t-shirt at the neck so that the front is not on top of the back.
After that, drape the lace to the front of the t-shirt.
Baste the lace to your future DIY Valentine’s Day t-shirt
Pin the lace to the t-shirt in a few places. Since I’m using a child’s t-shirt, I skipped this step.
Thread up a hand needle with contrast thread. There’s no need to knot the thread.

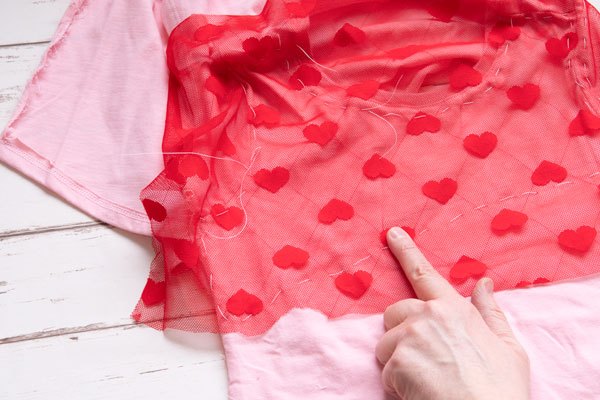
With your needle, make big stitches in and out of the lace and t-shirt with your thread. Baste the lace to the t-shirt just under the line you drew. Also baste the lace in place at the shoulder seams, neckline, arm seams and sides.
If your lace piece is big enough, also baste the lace to one of the sleeves.
You could also cut a separate piece of lace to cover one of the sleeves. Either way, baste the lace in place.
Stitching the stretch lace
You’ll do the stitching in two parts. On the front of the DIY Valentine’s Day t-shirt, you’ll treat the t-shirt as an underlining to the t-shirt. This means, you’ll stitch the lace in place and then treat the lace/t-shirt fabric like they’re one piece of fabric.
After that, you’ll stitch the lace to the sleeve and treat it like it’s an applique. You’ll stitch around the hearts (or other motifs if you’re not using heart stretch lace), then cut away the extra mesh between the motifs. It’s a bit of a texture change to show off both these things lace can do.
If you’re not sure how if you’ll like how the applique looks, I encourage you to practice on a scrap of fabric.
Stitching the lace to the t-shirt front
Switch your machine to a zigzag stitch with a 0.5mm width, 2.0mm length.
Stitch through the lace and the t-shirt along the line you drew. Because the lace is sheer, you should be able to see the line without too much trouble.
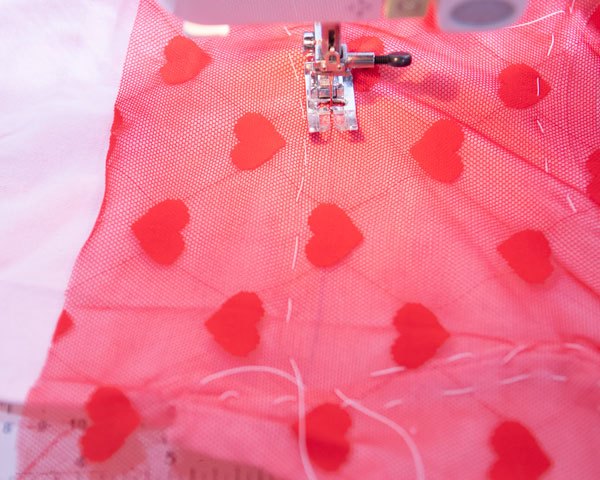
When you get to the side, stitch the lace to the t-shirt near the edge.
From there, stitch along the sleeve seam, then shoulder seam, and neck seam as close to the original seam lines as you can.
Continue stitching around the seams and sides until the lace on the front piece is securely stitched.
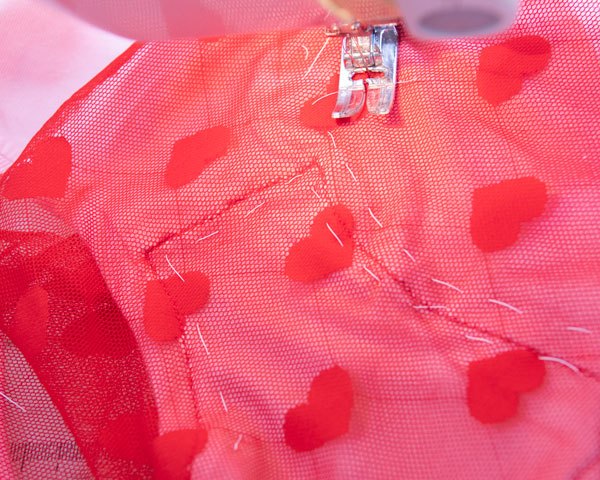
Stitching the lace to the sleeve
Next, stitch around each of the hearts (or other motif if you’re using a different stretch lace). Keep your stitches close to the motif’s edge.
Don’t backstitch at the beginning or end of your stitching. Once you’ve stitched around one heart completely, simply overlap your stitches by stitching over where you started stitching by a few stitches. This will lock the stitches in place just like a backstitch, but without the danger of the thread getting sucked into the machine.
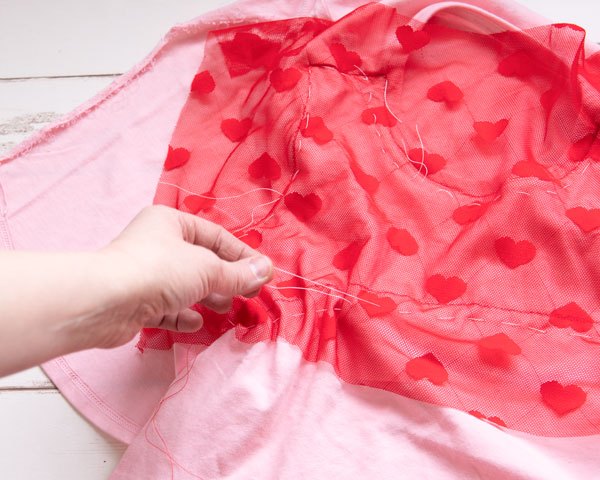
Taking out the basting threads
Next, pull out all of the basting threads.
Cut away the lace
Cut away any excess lace past the sides of your project.
After that, carefully cut away the lace only about 1/4″ past the bottom stitching line on the front.

Once you’ve done that, cut away the lace 1/4″ past the stitching line on the sleeve seam, shoulder seams and neck seam.
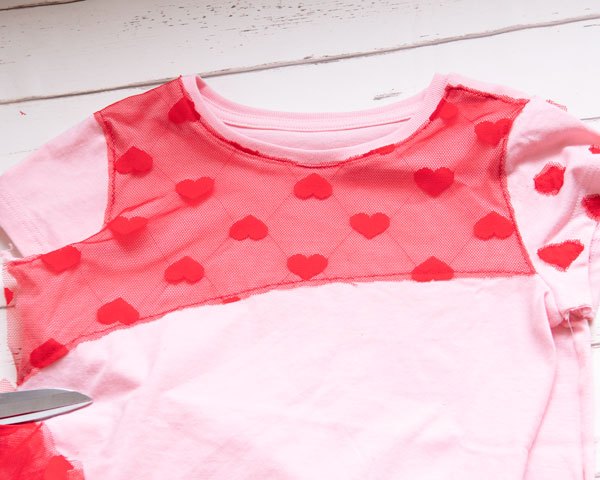
On the sleeve, cut around each heart about 1/8″ away from the stitching line.
Do your best here cutting and don’t rush it. A pair of small embroidery scissors work really well for this job.
Finishing the lace edges
To finish off the lace, change your zigzag stitch to 4.5mm width, 1.0mm length.
Stitch over the bottom cut edge of the lace on the front of the t-shirt. The goal here is to cover the raw edge with this wider, narrow zigzag.
Look at the other edges along the neck, shoulder, and sleeve seams.
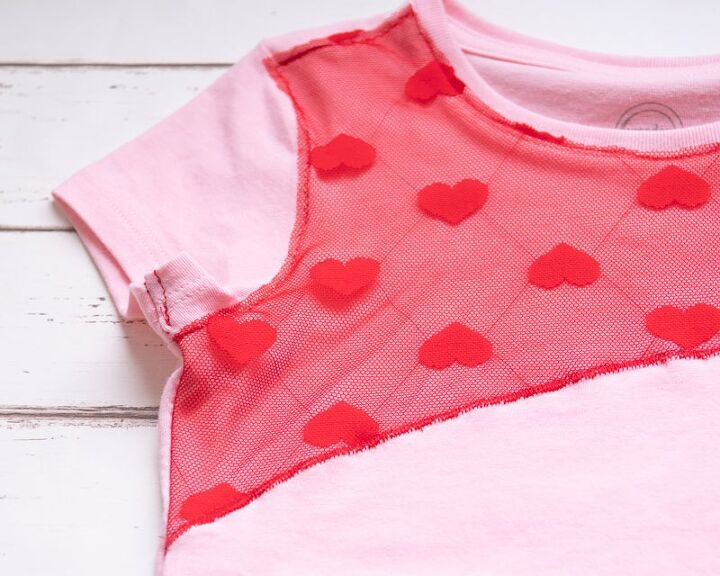
If you like the look of the raw edge of the lace along these edges, go on to the next step.
If you’d rather, you can use the same wider zigzag stitch to stitch down the raw edges of the lace along the neck, shoulder and sleeve seams. It’s up to you. You know I’m always about choose your own adventure sewing here, so you decide what you like.
I personally like the delicate raw edge of the lace everywhere except that lower edge of the lace.
Put the t-shirt back together
Your Valentine’s Day tee is almost done!
To finish off the tee, put the front and the back right sides together, matching up the underarm seams and the raw edges.
Set your zigzag stitch to 0.5mm width and 2.5mm length.
Sew the side seams and underarm seams back together with a 1/4″ seam allowance in one long seam.
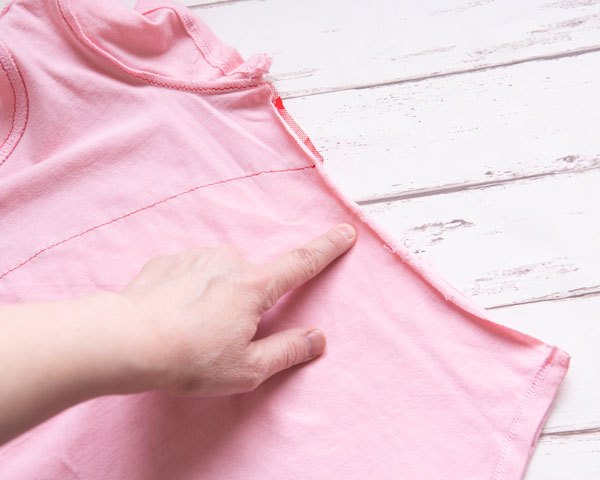
Press the seams towards the back. Stitch near the end of each hem from the well of the seam down at an angle through the hem. Backstitch at the beginning and end of this stitching. It’ll look like a little triangle, and this will anchor the seams in place.
And that’s all there is to making a DIY Valentine’s Day t-shirt! I hope you have fun making your own.

Elizabeth Farr is the writer behind the Elizabeth Made This blog where she shares helpful sewing tips, step by step sewing tutorials and videos to help you explore your creativity through sewing. She has written sewing Eguides and patterns, been a featured teacher at Rebecca Page’s Sewing Summit and Jennifer Maker’s Holiday Maker Fest and her work has appeared in Seamwork and Altered Couture magazines. She also created a line of refashioned garments for SEWN Denver. When her sewing machine isn’t humming, she’s playing and teaching violin, and hanging around a good strategic board game with her husband and 4 kids.
The author may collect a small share of sales from the links on this page.


Comments
Join the conversation