Need More Tips for False Lashes? Here Are All Your Questions Answered

My recent tutorial on Applying, Removing & Reusing False Lashes for Beginners was a great start, but there’s more to know!
After I posted that tutorial, I got a lot of questions about using false eyelashes. So, I thought I would create this follow-up to answer them.
Here, I'll go over things I didn't cover in the first video, explain things in more detail, and answer some of the questions you had.
Tools and materials:
- False eyelash kit
- Eye makeup remover
- Cotton swab
- Tweezers
- Small scissors
1. Removing false eyelashes
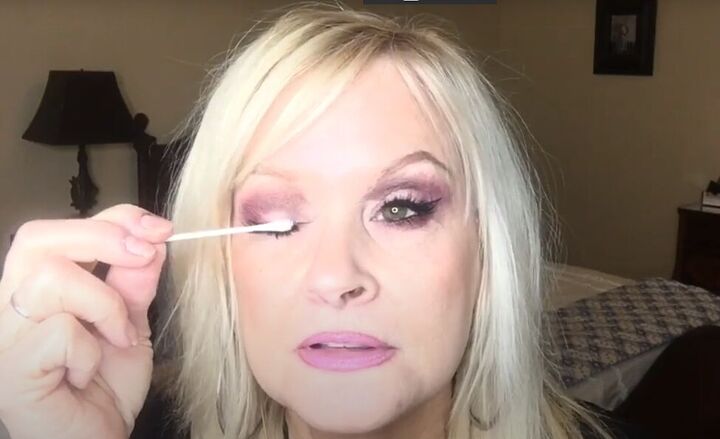
Use your favorite eye makeup remover with a cotton swab to remove false eyelashes.
Gently rub the cotton swab, dipped in eye makeup remover, back and forth over the base of your false eyelashes. This will both loosen the eyelashes and clean them.
Tip: don’t try washing your eyelashes with water in the sink after you remove them, because they will lose their shape.
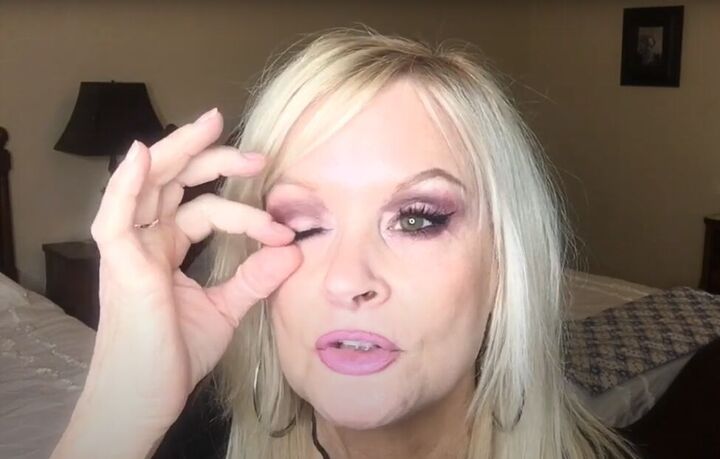
Let the eye makeup remover sit for a minute or two and then gently start to pull the false eyelashes off your eyelids.
If the eyelashes don’t come off easily, don’t tug at them. Just apply another coat of eye makeup remover, wait, and try again.
2. Removing glue from false eyelashes
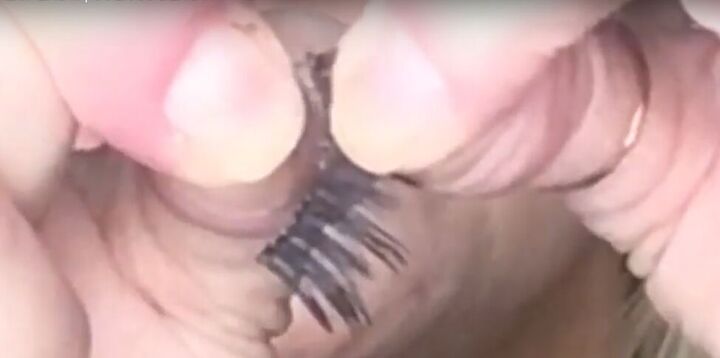
After you have removed your eyelashes with eye makeup remover, let them sit overnight to completely dry before trying to remove the glue.
Hold your eyelashes on the lash part at the end you’re going to start removing glue from. With your other thumb and forefinger get a hold of the glue on the lashes band and start to draw it away from the lashes.
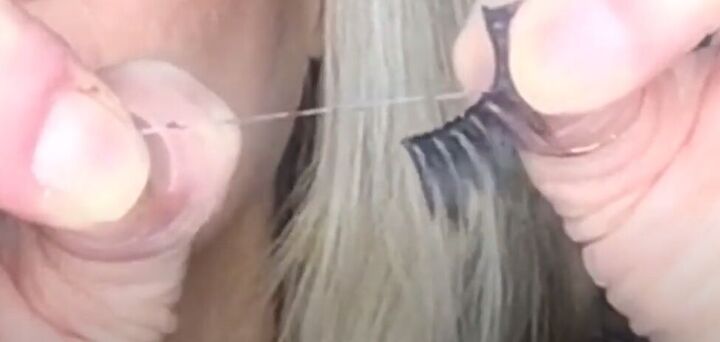
As you pull you will see the glue lifting and peeling away from the lash band.
Now, you can reuse those lashes again.
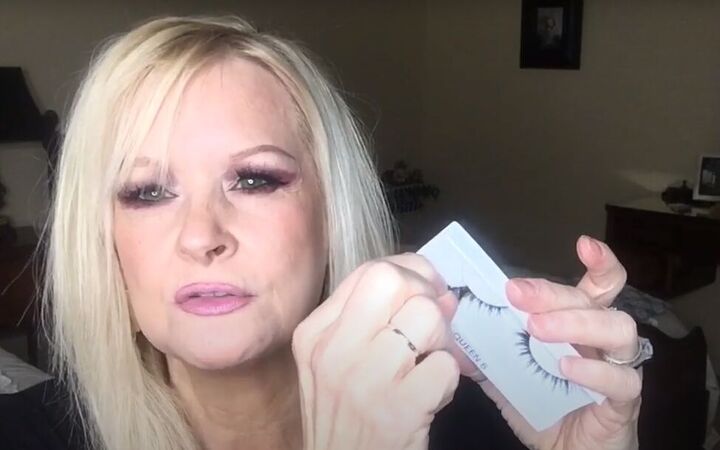
3. Removing new false eyelashes from the packaging
The first thing to consider before you remove your false eyelashes from the packaging is which end of the lashes you are going to cut if you have to trim them.
That is the end that you will hold onto when removing them from the packaging because if they tear when you remove them, that’s where they are most likely to tear. If you’re cutting off that end anyways, then it’s not a big deal.
Use tweezers or your fingernail to start lifting the end of the eyelashes from the packaging. Continue to lift and pry gently until the whole eyelash has been removed.
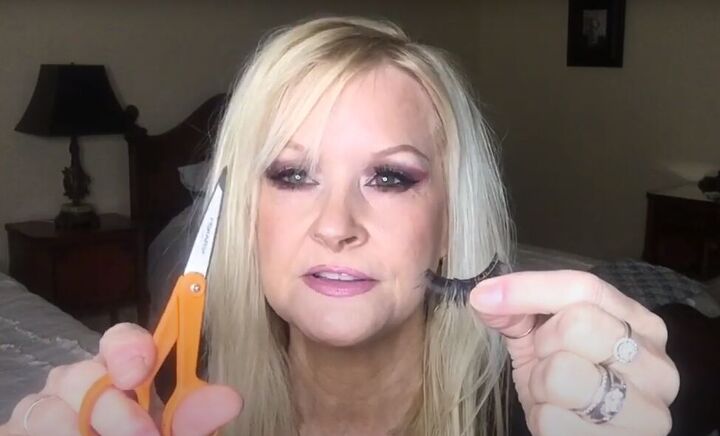
4. Trimming false eyelashes
Typically, you will want longer lashes on the outside of your eye and shorter lashes on the inside corner.
Think about how long you want your lashes as well because that might determine where you want to cut.
Of course, if your new false eyelashes are replacing old ones, you can just use your old ones as your template for cutting the new ones!
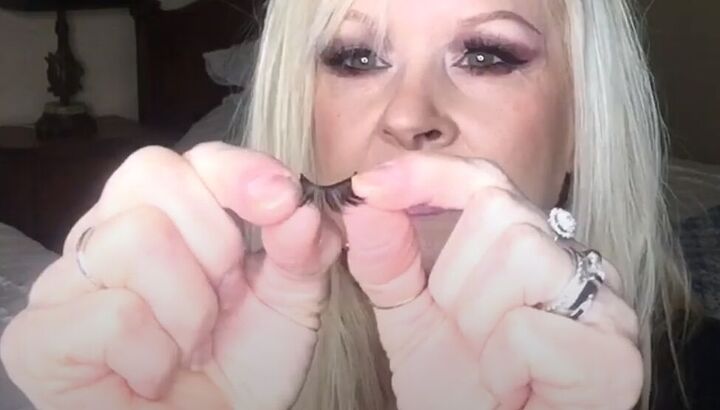
5. Prepping false eyelashes for application
If you are applying a new pair of eyelashes, start by holding both ends with your thumb and forefingers and gently rolling the eyelashes back and forth to loosen the band and create a bit of a curve.
That will make the eyelashes curve to your eyelid and sit better.
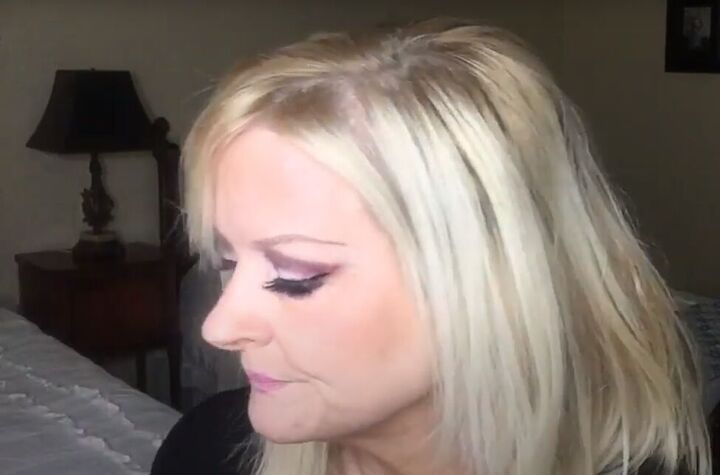
More tips for false lashes
Here’s a side view to show you how full and natural false eyelashes can look.
I hope this tutorial provides answers to some of the questions that I left out of my previous eyelash tutorial.
If you have more questions, or suggestions of your own, please leave a comment below and I’ll get back to you!
How to apply magnetic lashes
The author may collect a small share of sales from the links on this page.


Comments
Join the conversation
I cant get my lashes to stick well. It's so difficult to put them on and when I think I have them on ....I find that the corners are not sticking or the middle pops up. Can you help me?