3 Super-Easy DIY Accessories You Can Make for the Summer

Welcome! In this tutorial, I’m going to show you how to make three different DIY accessories that are perfect for summer. I love making my own clothing and accessories as it feels so rewarding to wear something that you made. Let’s get into it.
Tools and materials:
- Strappy sandals
- Black ribbon
- Scissors
- Fabric glue
- Chain
- Wire cutters
- Jump rings
- Pliers
- Chain embellishment
- Jewelry clasp
- Square silk scarf
- Necklace chain
DIY lace-up sandals
1. Cut the ribbon
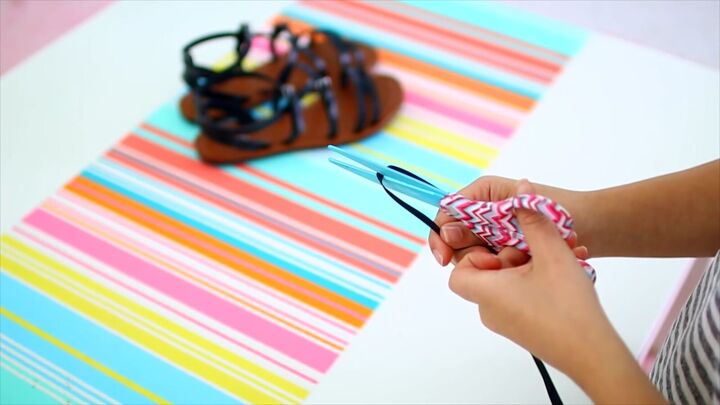
First, get yourself a pair of strappy sandals, and then cut four very long pieces of black ribbon to about 3 feet (90cm) long. I recommend going for the thin kind of ribbon.
2. Glue to shoe
Apply a dot of fabric glue to the end of the ribbon and glue it to the back of your shoe. Preferably to the inside of the shoe, so you don’t see it. Proceed to glue the second piece of ribbon next to the first one.
Don’t worry if the glue looks a little bit messy as it will dry clear, and when you’re wearing the sandals, it won’t be seen anyway. When finished, repeat with your second shoe and leave the glue to dry overnight.
And that’s it! To wear them, just wrap the ribbon around your legs, and you’ve now transformed your strappy sandals into gladiator ones.
I also really like how the ribbons look when tied up at the back.
DIY chain headpiece
1. Measure the chain
Measure the chain around your head to get the length you want. As you can see, I didn’t put it all the way around my head but left some space at the back because I’m going to add something else to the headpiece.
2. Cut
Then take some wire cutters and cut the chain to length.
3. Attach the jump rings
Next, take your jump rings, open them up with the pliers, and attach one to either side of the chain.
4. Attach the embellishment
Between the two jump rings, I decided to attach this braided chain embellishment to add a decorative element to the headpiece. Attach it to either end of the chain and then use the pliers to close up the jump rings.
5. Add another chain
To take it a step further, open up another jump ring and put it on the end of another small chain. Then, attach the other end of the jump ring to the center back of the headband and close it up with pliers.
Take a jewelry clasp, attach a jump ring to that, and then attach that to the other end of the middle chain.
Lastly, attach the clasp to the embellishment.
Now you have a snazzy and stylish headpiece.
DIY scarf halter top
1. Fold and glue the scarf
Take your silk scarf and fold it into a triangle. Next, take the top corner of the scarf and fold it back so that you can see the bottom layer of it. Put a little bit of fabric glue there and then fold it back, so the two corners are stuck together.
2. Attach the necklace chain
Next, place an old necklace chain over the corner. Apply a little bit of fabric glue to the corner, fold it down over the necklace and let it dry.
To wear it, all you have to do is put the necklace around your neck and then tie the two ends of the scarf at the back, and you have a really cute halter top.
This was super easy to make, and the finished result is really cute.
DIY accessories for the summer
That brings us to the end of the tutorial; I hope you enjoyed it. We made three easy DIY accessories that are great for summer. Each one of them is very easy to do, and you can do it by yourself or make an activity of it and do it with some girlfriends.
Let me know which you're planning to try out first in the comments below.
Enjoyed the project?
Suggested materials:
- Strappy sandals
- Black ribbon
- Scissors
- Fabric glue
- Chain
- Wire cutters
- Jump rings
- Pliers
- Chain embellishment
- Jewelry clasp
- Square silk scarf
- Necklace chain
The author may collect a small share of sales from the links on this page.








Comments
Join the conversation
Yuck, no. Unless you have skinny legs this looks awful.