How to Make a Pretty DIY Corset Tank Top With Old Tees & Zip Ties

In this tutorial, I'll be showing you how to make a DIY corset tank top. It's super easy to make a corset top using zip ties for boning. I’m using an athletic shirt that’s got a bit of stretch to it. Let’s get started!
Tools and materials:
- Shirt (could be button-down or tee)
- Another t-shirt for lining
- Zip ties
- Sewing machine
- Ruler
- Measuring tape
- Scissors
- Pins
- String or ribbon
- Needle and thread
- Superglue
- Old corset as a pattern (optional)
1. Cut the shirt
Cut the shirt open. I used my previous corset as a pattern, but you can also follow the pattern below to your own measurements.
Measure your chest and waist so you can adjust the measurements. You want the top of the shirt to fit snugly across your chest and the bottom to tightly hug your waist.
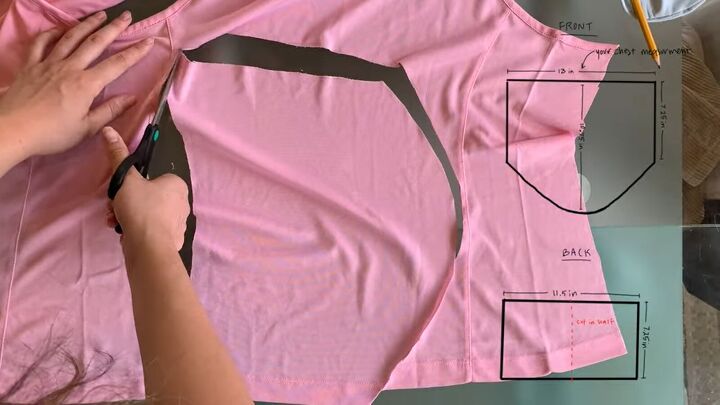
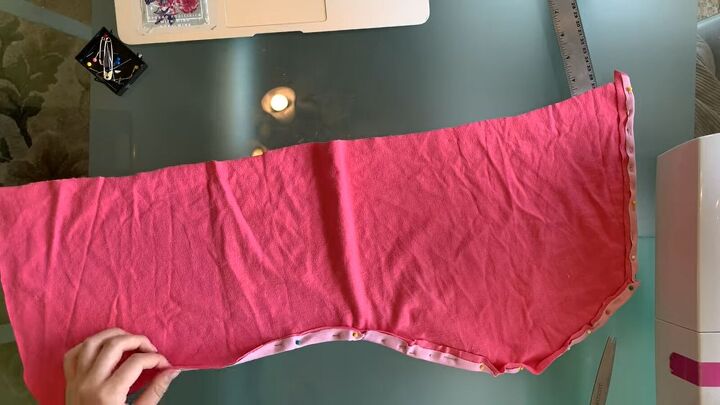
2. Cut the pieces of the corset
After I cut the front piece out, I used that piece to cut out the back piece.
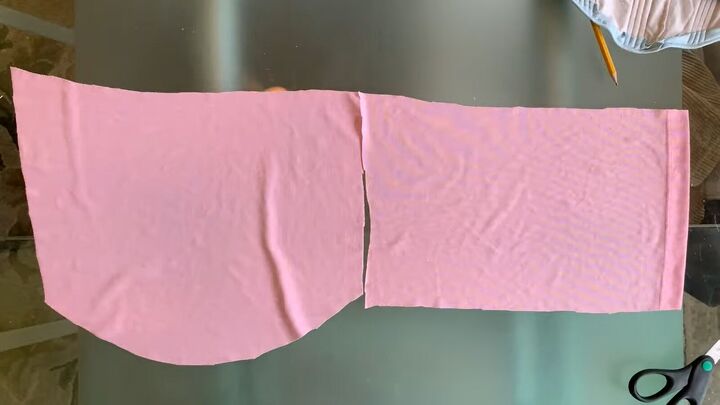
It should be a similar shape except without the “U”.
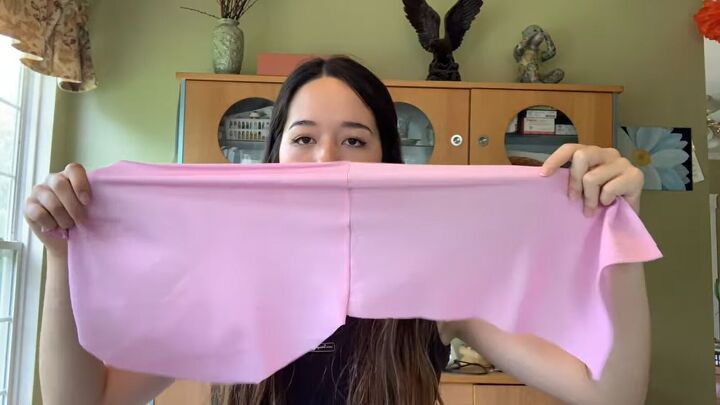
3. Sew the corset
Pin the two pieces with right sides together on one side. Sew it using a straight stitch.

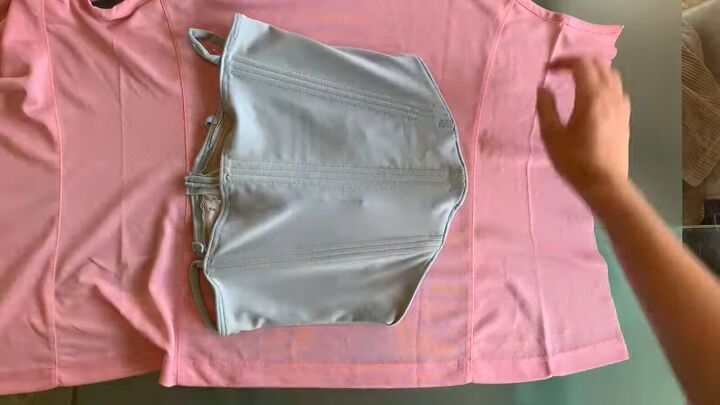
4. Make the lining
If you have enough material, you can use it for the lining. If not, use an old t-shirt. I used this bright pink soccer tee. I cut the t-shirt open and used the sewn corset as my pattern to cut out the exact same shape.
5. Sew the corset lining
Fold the edges of both pieces and pin them together, except for the top edge. That part needs to stay open for now. Make sure the fold is equal all around the shirt, but especially in the U-shaped part. Sew the hem with a straight stitch.
Then, sew the open side seam by pinning the right sides together and sewing with a straight stitch.
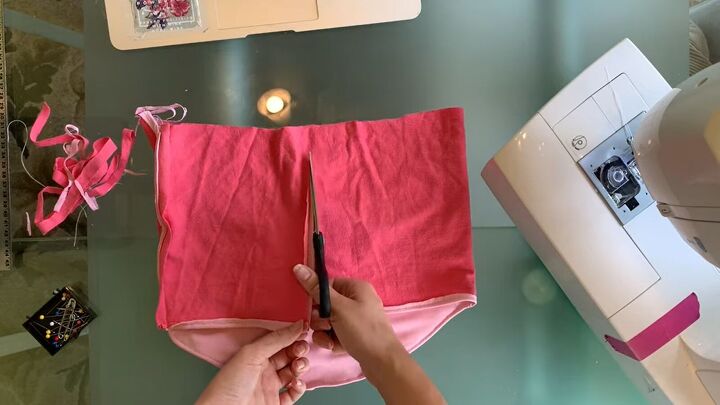
6. Open the back of the corset
Lay the corset top down with the back part facing towards you. Measure the exact center and cut it straight down. This is where the lace-up detailing will go!
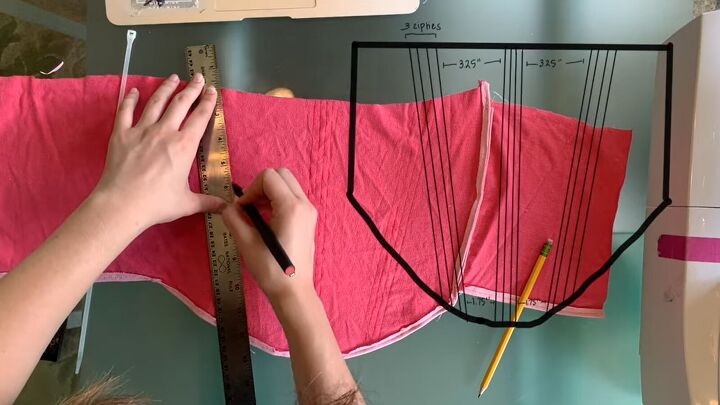
7. Add the boning
It’s up to you how many zip ties you want to use and where you want to place them. I’m going to put them in the center and then 2 diagonal lines on either side in the front with 3 channels in each area.
Draw the sewing guidelines in the lining with a ruler and use a zip tie to determine how wide to make the channel.
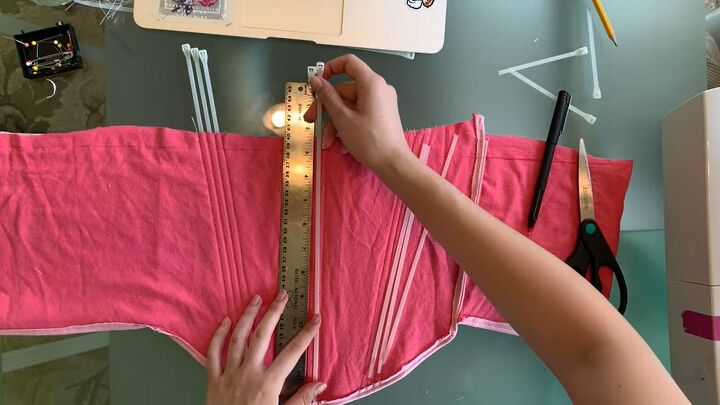
Sew these lines down. Go slowly so they are straight and the perfect width for the zip ties. Once they’re sewn, insert the zip ties. They should slide in easily and be nice and snug.
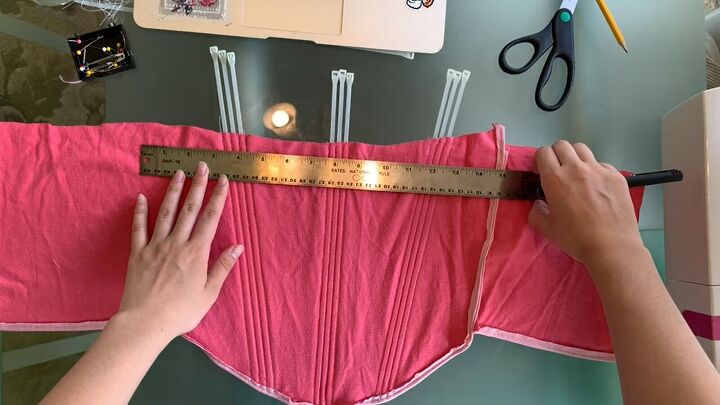
8. Sew the top of the shirt
Keep the zip ties in and measure where you want the hem of the shirt to be. This all depends on how cropped you want it or how much cleavage you want to show. Use the ruler to draw a straight line to mark where you should fold over the fabric.
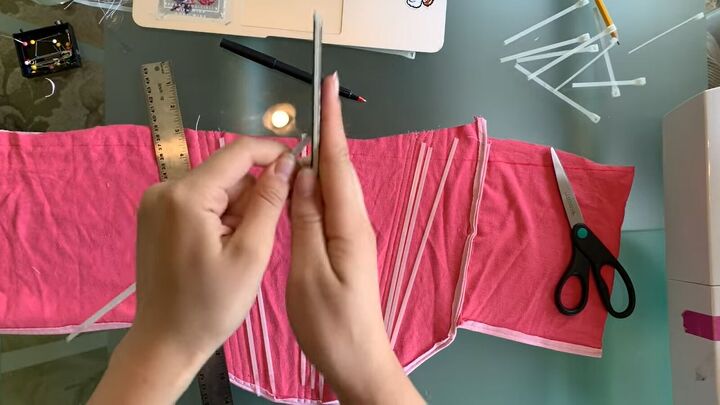
Remove the zip ties and mark them where they need cutting. They should be just below the hem. Once they’re cut, use a nail file to smooth the sharp edges. This takes a while but is necessary so they don’t tear the fabric.
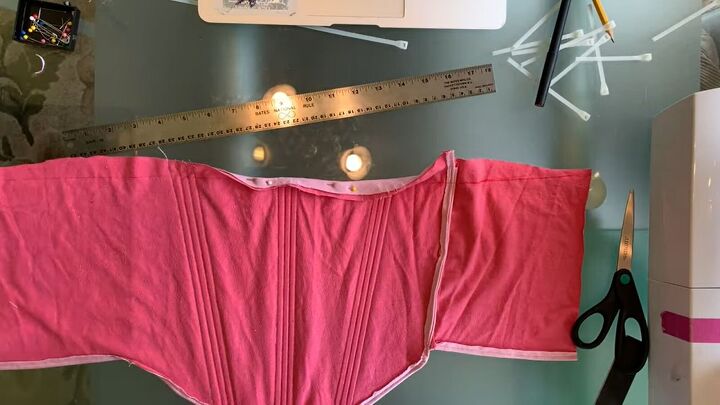
Once they’re smooth, place them in their corresponding channels. Then, fold the top hem inward toward the lining. Pin and sew along the pins. Do not sew over the zip ties. They will break your sewing needle.
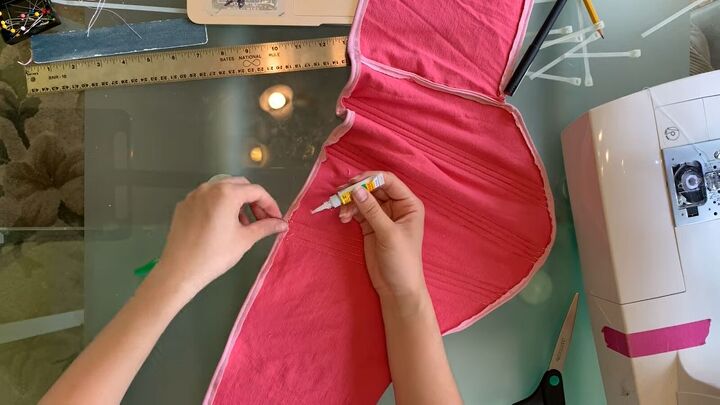
Once sewn, use superglue to hem the openings where the zip ties are. Make sure they are as straight as possible, so they look sewn in place.
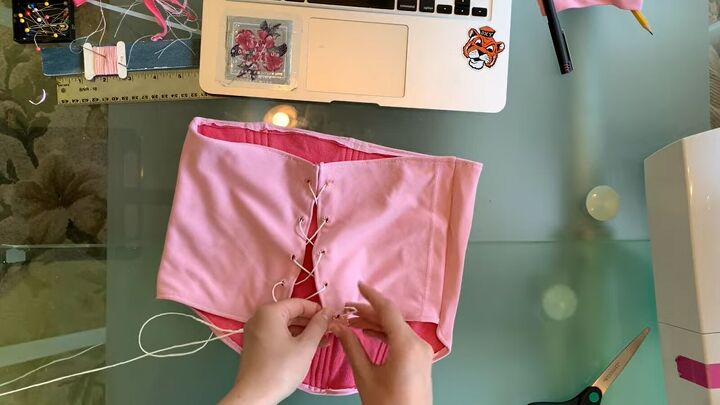
9. Make the back closure
You could do buttons, a zipper, or a lace-up back, like this. First, fold in the raw edges in the back, pin, and sew with a straight stitch.

Use a sharp pair of scissors to make 5 tiny holes in both layers of fabric on both sides of the back pieces. Make sure the holes line up with another.
I hand sewed the buttonholes, but you could use the button foot on your sewing machine if you have one. Once they’re done, I laced them up with string. You could use ribbons or even an old shoelace.
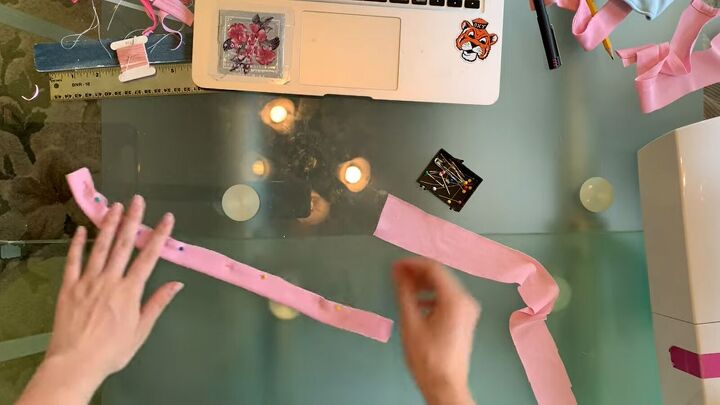
10. Make the straps
I measured where I want the straps to go when I have the corset on and put a pin in the right spot.
Cut 2 long rectangles from the excess fabric. Fold each strip in half, right sides together, and pin in place. Sew along the pins. Backstitch for strength. Before flipping the straps right sides out, trim any excess seam allowance so the hem is really close to the edge of the fabric.
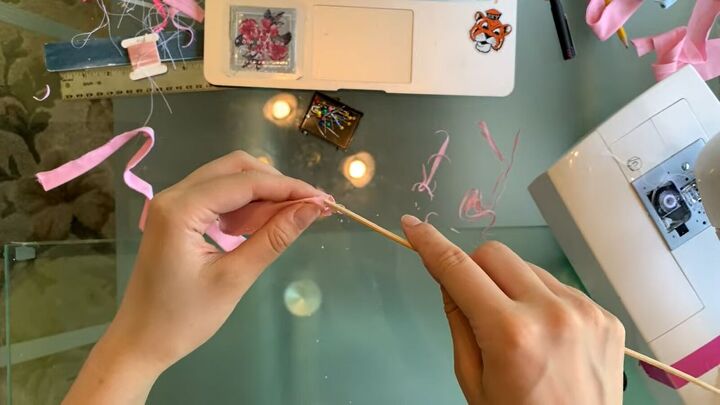
Use a chopstick or skewer to flip the fabric. Attach both straps to the front and back pinned areas with a simple straight stitch going back and forth several times so it is secure.
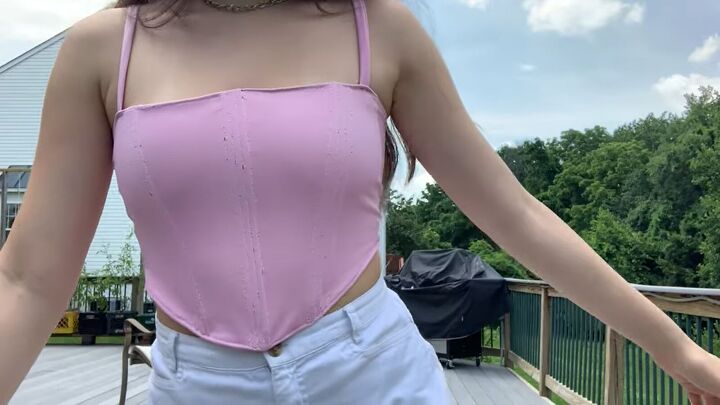
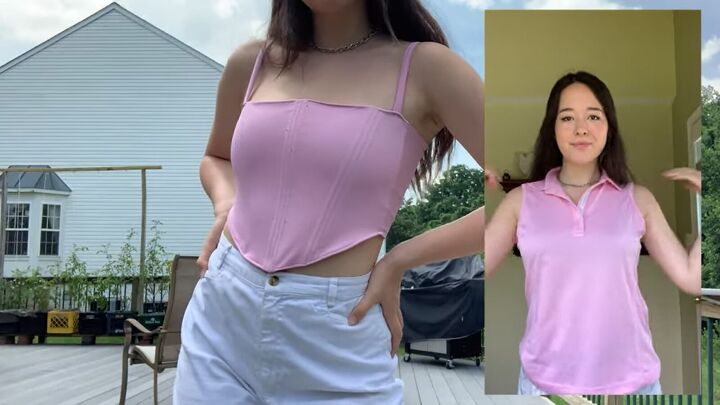
DIY corset tank top tutorial
I love the way this came out! I hope this helped you learn how to sew a corset top. Let me know what you think or if you’re going to try sewing this!
The author may collect a small share of sales from the links on this page.


Comments
Join the conversation