Make a Trendy Lace-Up Top - Thrift Flip Edition

I found some inspiration for a lovely lace-up top and I decided that doing a DIY lace-up top on a thrifted shirt would be amazing! I found this mesmerizing pastel green top at my local thrift store- there’s nothing else to it except for the lovely color. I will be making this easy lace-up top and I’ll show you how you can easily pull off the same look at home. Let’s get to it!
Tools and materials:
- Loose-fitting top
- Grommets
- Sewing machine
- Pins
- Grommet tools and hammer
- String

Mark your folds
First thing's first, fold some fabric over and see how it looks. Wear your top and down the center sides, fold your fabric and see how you think the folds should go. Pinch around an inch of fabric inside and fold.
My top was actually a little too loose, and when I tried folding in the center sides in front, the fabric would bunch up. So, if the same happens to you, simply take in the shirt on the sides.
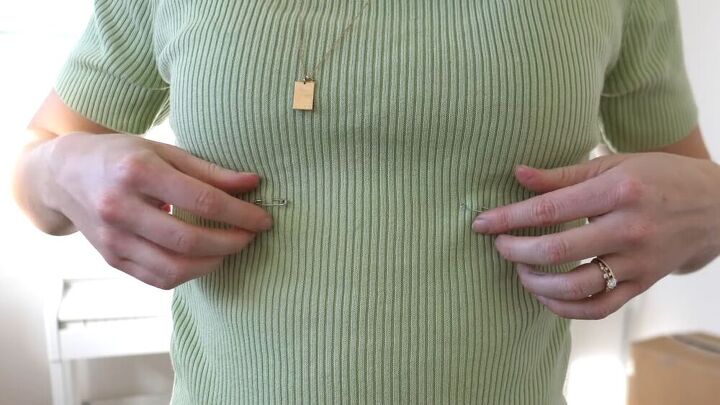
Now that my top is more of a tight fit, I basically pinned the fold's starting points on top. Pin this on your body so that you have a concise idea of where the fold should start.
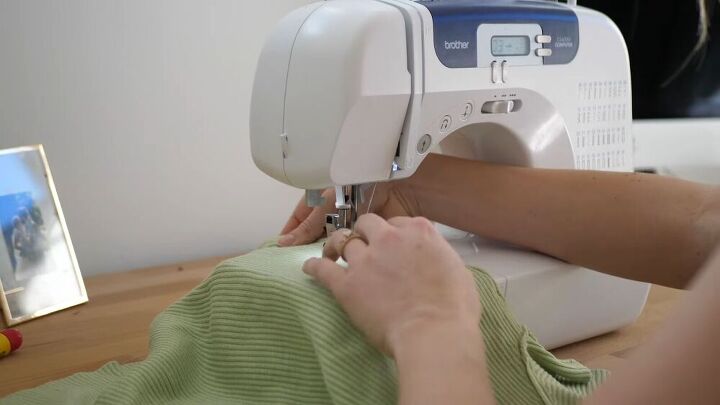
Next, lay it on the table and neatly fold it in an inch, using the top pins as your guide. Make sure the folds are as straight as possible. Pin the fold accordingly.
Stitch alongside the two edges of the fold so that you have a flap.
Install the grommets
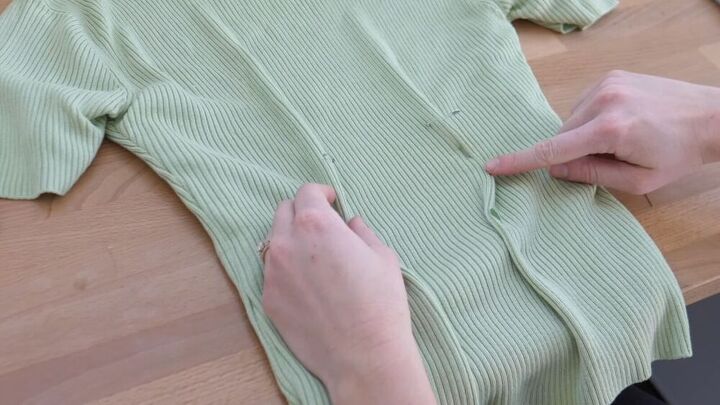
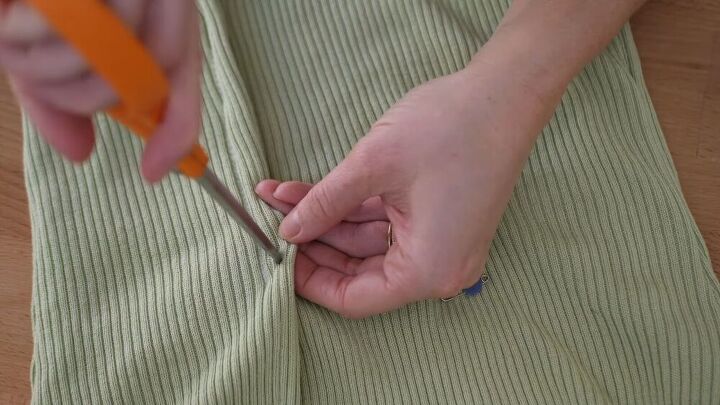
Ok, so I suggest that if you have never installed grommets before, go ahead and practice on a scrap piece of fabric. Once you get the hang of it, return to your DIY lace-up top and start installing grommets along the flap of fabric. Get your tools out and start by piercing a hole through the folded layer with a sharp pair of scissors.
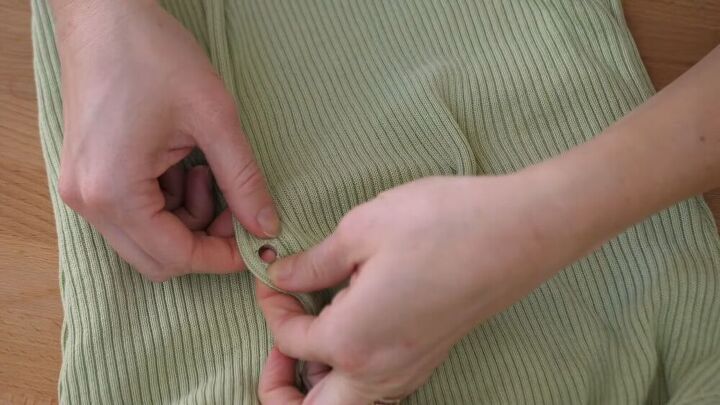
Stretch the hole open and stretch it around the bottom side of the grommet.
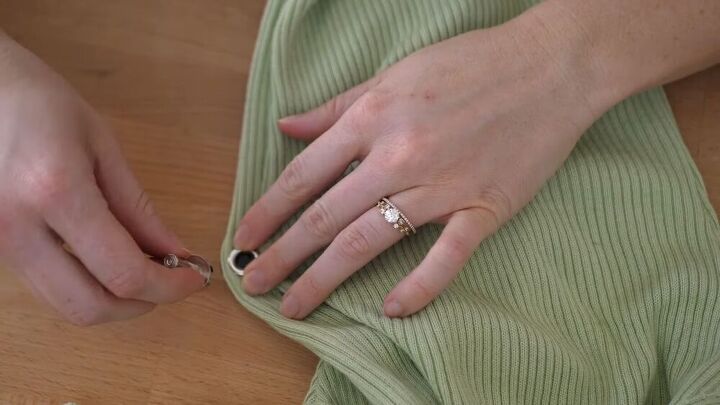
Then, take the top grommet piece and lay it on the other side of the fabric.
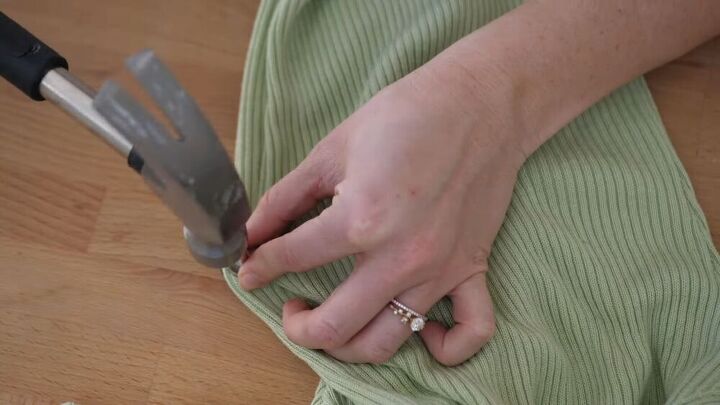
With the hand tool centered in the middle of the grommet, hammer it down with a few firm slams. Once you are happy with the first result and you feel confident enough to carry on, go ahead and install more grommets alongside the flaps.

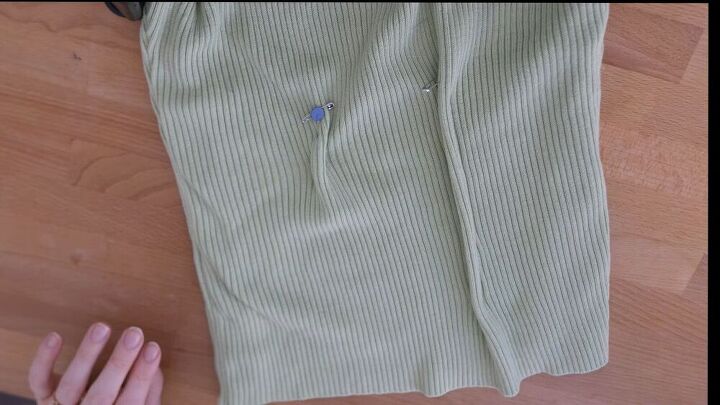
Repeat for the other side
Remember to repeat the process on the other side, sewing a flap and installing grommets aligned symmetrically adjacent to the other side. Happy hammering!
TIP-
I added 3 grommets to each side, but then I tried it on and realized 4 grommets wouldn't harm the look. So if you feel you may need more, go ahead and add more grommets where necessary.
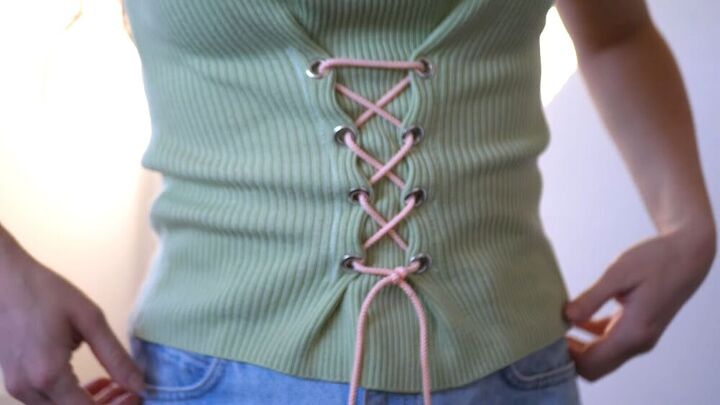
Add the lace tie
Now that your grommets are on, simply feed through your lace tie. I opted for a zigzag stitch with a cute, loose tie at the bottom.

Wow! I'm so happy with the result! That was a unique DIY lace-up top project, and it went smoothly and even easier than I thought. I love how it looks, and it really gives the top a whole new meaning. I'm so chuffed, and I know you will be, too! I hope you enjoyed this fun tutorial, and good luck on your upcycled, lace-up top DIY project!
The author may collect a small share of sales from the links on this page.


Comments
Join the conversation
Great idea and inspiration....thanks for sharing
Looks fantastic!!!