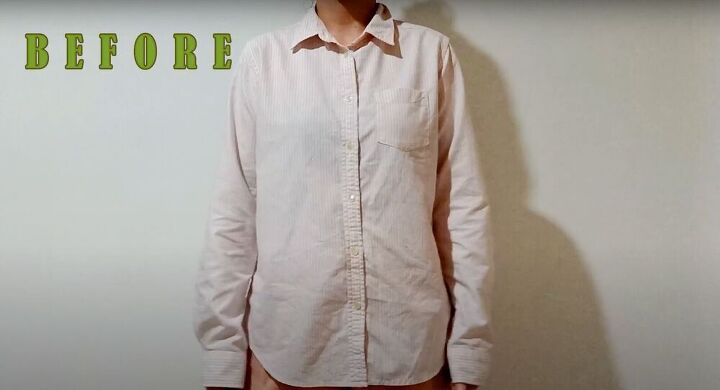
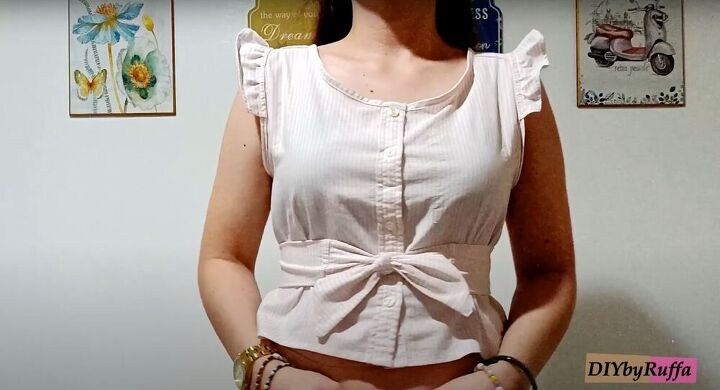
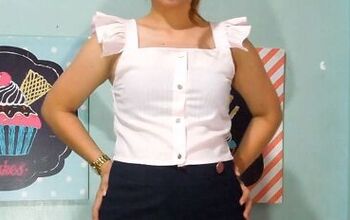
Button Down Upcycle: Ruffle Crop Top

Today’s tutorial will show you how to take a regular, button-down shirt and transform it into a basic ruffle crop top. This shirt is the perfect thing to have for the upcoming spring and summer seasons, so grab your old clothing and let’s get started.
Tools and materials:
- Button-down shirt
- Seam ripper
- Tailor’s chalk
- Rotary cutter
- Scissors
- Sewing machine
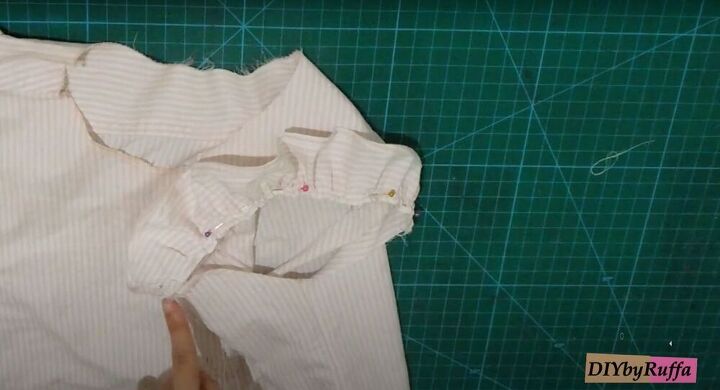
Cut your shirt
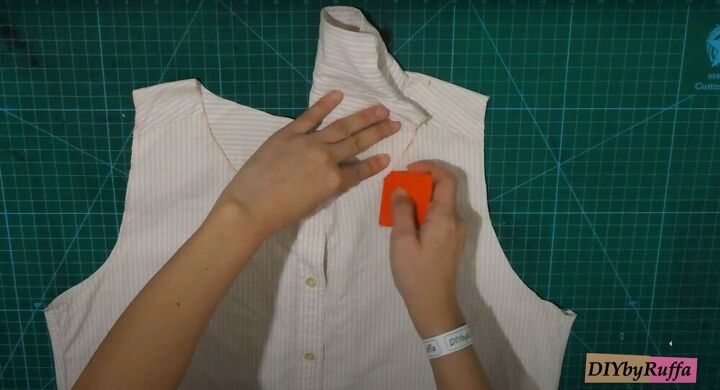
The first step is to remove the pocket using a seam ripper and to cut the top to your desired length. Next, take a top that you like the fit of, place it over the shirt and trace out the sleeves and neckline. Use a rotary cutter or some scissors to cut off the sleeves. For the neck, trace and cut it out until the halfway point and then fold it over and use the first half as a guide for the second.
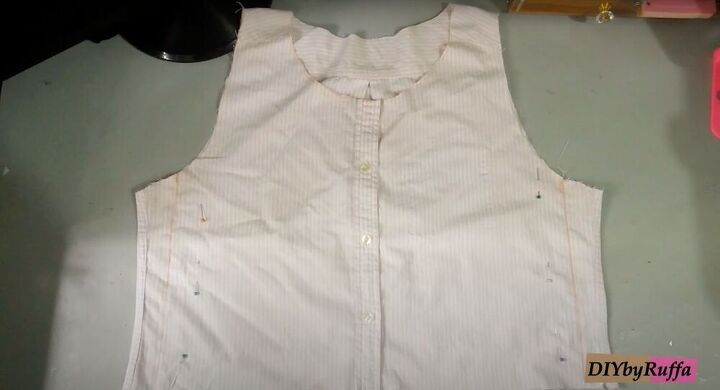
Adjust the sides
Once you have cut the top down, try it on to check the fit. I wanted to make the sides a little tighter, so I measured out the amount I wanted to remove, marked it, and stitched it down using a topstitch. After sewing, cut off the extra fabric, leaving a quarter-inch seam allowance. Turn the shirt inside out, iron down the sides seam, and add a second topstitch on the wrong sides of the fabric about half an inch away from the seam. Finally, double fold the bottom seam and sew it down to the hem.
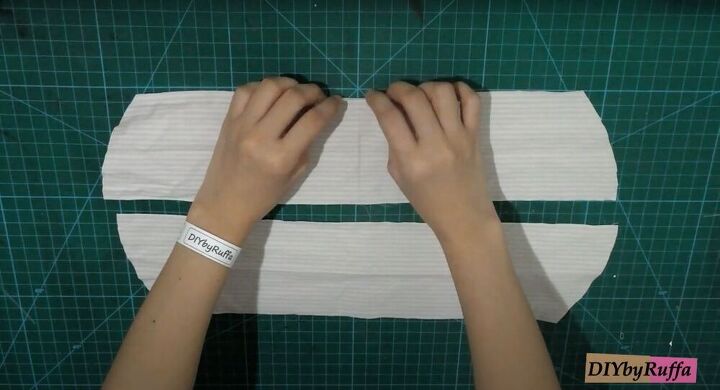
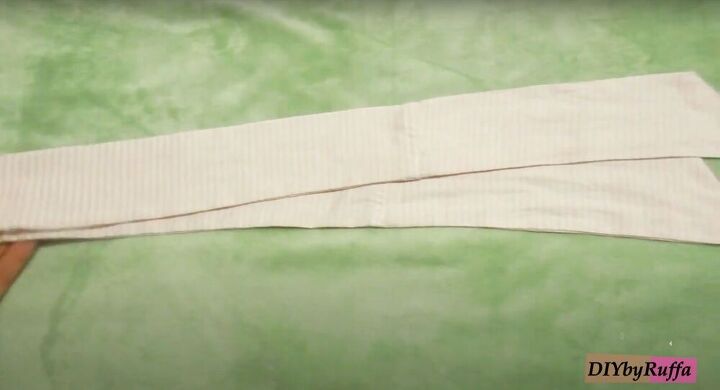
Make the ruffles
Cut two rectangles that are about eighteen inches long (and as thick as you want the sleeve to be) and shape the sides (pictured above). Next, double-fold the short side of the ruffle, as well as the sides, and sew it down. On the other side, weave your thread through and pull at your fabric to gather it - this will create the ruffles.
Attach the ruffles
Mark the placement of the ruffle on the armhole and place the ruffle along those markings - make sure the right sides are facing each other. Pin the ruffle in place and sew it down. Next, make a bias tape from any excess fabric and fold the sides inward. Fold the bias tape in half and wrap it around the raw edge of the armhole. Topstitch it in place. To finish the ruffles, hem it once more on the inside.
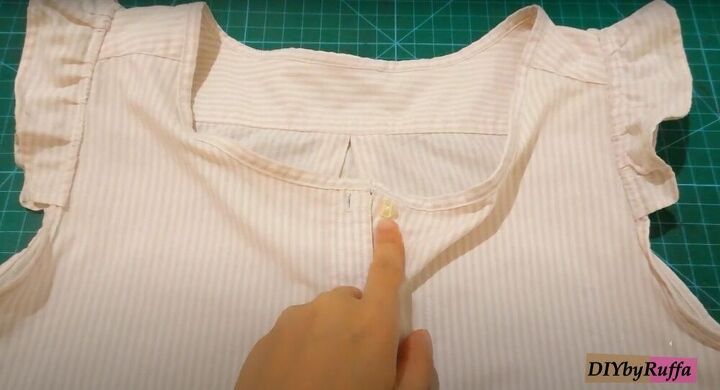
Finish the top
To finish the top, repeat the same process with the raw edges of the neckline and add one button and buttonhole to the top of the shirt.
Make a belt - optional
With the excess fabric, I made a belt to go around the shirt. I simply cut out the fabric, folded it in half, right sides together. Hemmed the fabric, leaving one short edge open, flipped the belt right side out, and hand sewed the last edge shut. Make sure to turn the raw edges in before sewing. Then, I pressed the belt down with an iron and finished it with a top stitch all around.
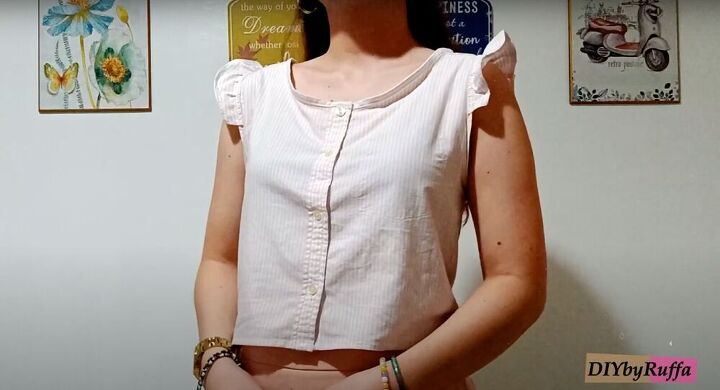
I love a good upcycle, you’ll love this tutorial! This easy ruffle crop top is the perfect answer to any of those old button-downs you have in the back of your closet. And don’t forget to show me your creations.
The author may collect a small share of sales from the links on this page.


Comments
Join the conversation
Super cute!