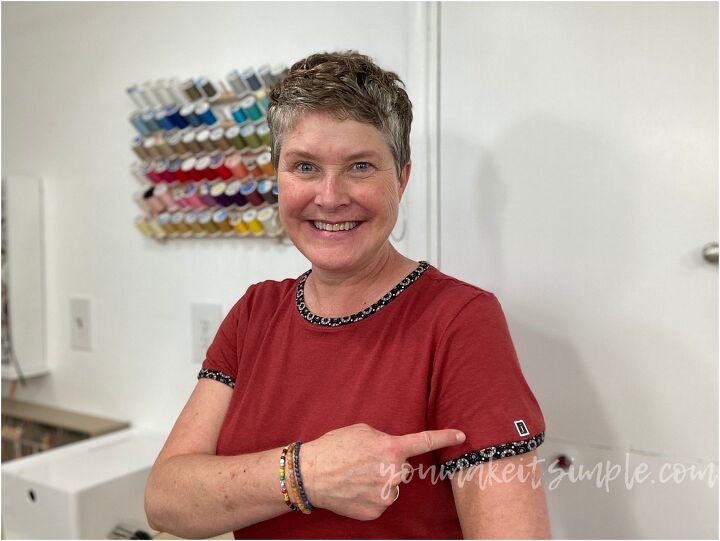
T-Shirt to Tank Top | Binding Tips and Tricks


It’s summertime and wearing a cool tank top can be very inviting. In this tutorial, I am going to show you how you can easily take a t-shirt and make it into a tank top. This post is full of great tips and tricks for adding binding to the armholes and neckband. This is such a fun way to upcycle an ordinary t-shirt into a unique tank top.
Most of you know how I love upcycling t-shirts. The simple stretchy fabric of a t-shirt can come in handy for making so many other things.
- Face masks
- Tank tops
- Stretchy t-shirt yarn
- Face mask ties
- Grocery bags
- Shoelaces
- Blanket binding
- Clothing binding
- Baby clothing
- Headbands
- Baby beanies
So if you have a t-shirt that has some good stretch to it, fun colors, or cute print, don’t throw it out. USE IT.
Here is a post with some good tips for upcycling t-shirts.
HOW TO MAKE A TANK TOP FROM A T-SHIRT
I am going to go over several different styles and ways to make a tank top.
- Basic work-out tank with cut armholes
- Rolled hem method
- Knit binding method
BONUSES: How to add binding to t-shirt sleeve edge, and how to apply a tag or label.
There are so many options and the variety and the color combinations are limitless. So get out your creative bones and have fun making tank tops.
TANK TOP ITEMS AND MATERIALS NEEDED
- T-Shirt
- Scissors
- Measuring tape
- Pins/ fabric clips
- Sewing machine
- Chalk pen/ erasable pen (optional)
- Interfacing (optional for labels)
If you have an existing tank top that you like that fits well, you can use that as a template of where to cut the armholes and neckband. If you don’t, start cutting the holes bigger and then try it on. You can always cut off more, but you CAN’T add fabric back after you cut.
BASIC CUT ARMHOLE TANK TOP INSTRUCTIONS
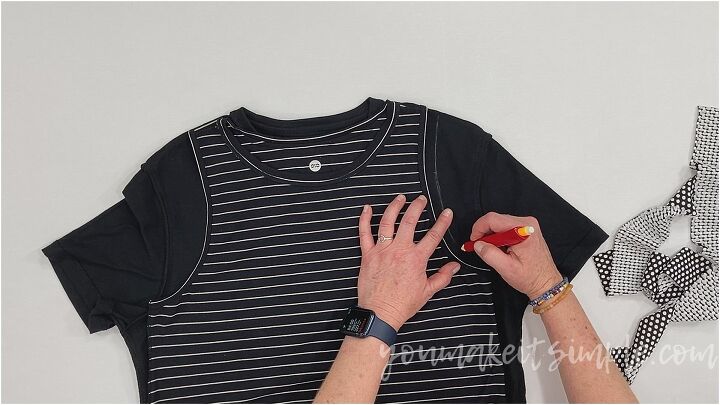
Turn the t-shirt wrong side out.
If you’re using an existing tank top as a template, lay the tank on top of your t-shirt. Line up the shoulder seams. Most likely the armholes of the tank will be smaller than the t-shirt. No worries.
Using the chalk pen or erasable pen, trace the armhole of one side of the shirt. You can just eyeball where you want to cut.
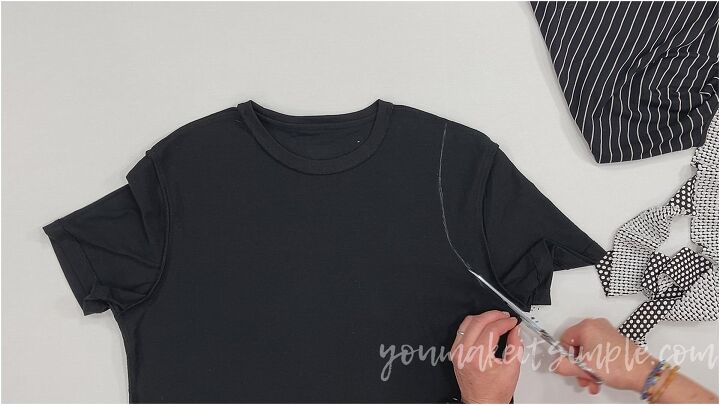
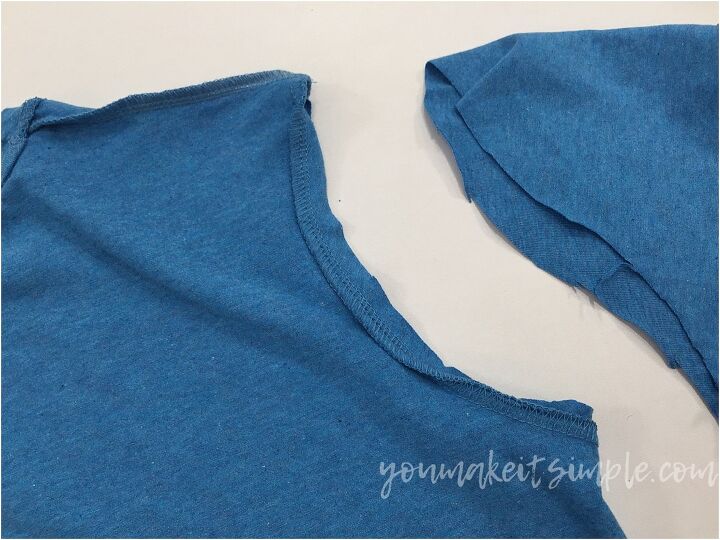
Cut out that armhole. Fold the shirt in half, lining up shoulder and side seams, and cut out the other armhole using the previous cut as a guide.
You can leave it like this, BECAUSE KNIT FABRIC WILL NOT FRAY.
TANK TOP ROLLED HEM METHOD
If you want to finish the armholes with a rolled hem, I recommend cutting the sleeve off OUTSIDE THE SLEEVE SEAM, leaving about a ¼ “ from the seam. (This will give the armhole a little reinforcement and feel like you’ve added binding to it). But if you want a deeper cut, you can do that as well and it will still work out fine.
I RECOMMEND TRYING ON THE SHIRT BEFORE CUTTING, JUST TO MAKE SURE IT FITS WELL AND CUT WHERE YOU WANT IT TO BE! (If the armholes are a little gappy and loose, just note that after you hem or add binding, it will pull and be more fitted).

Once the sleeves are cut off, all you need to do is fold the fabric edge over the sleeve seam (1/4 inch) and then fold it over again.
Thread your sewing machine with the same color of thread as the t-shirt. Starting at the underarm seam, sew all the way around using a straight stitch. Sew just inside the outer fold to hold in place.
Do this for both tank top armholes.

GATHERED SHOULDER TANK TOP
If the shoulders seam too wide and you want to bring them in a little, you can add a little gather to the shoulder seam as I have in this photo.
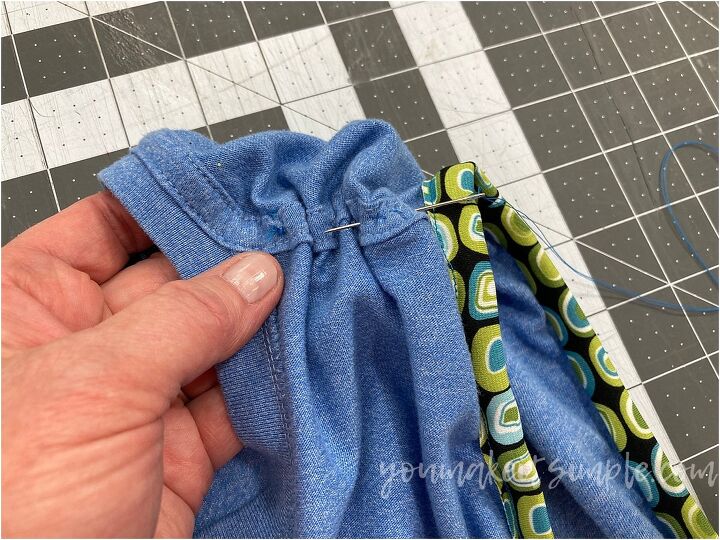
Simply take a needle, double the thread, knot the end, and take two rows of big gathering stitches to gather to your liking. Knot to secure in place.
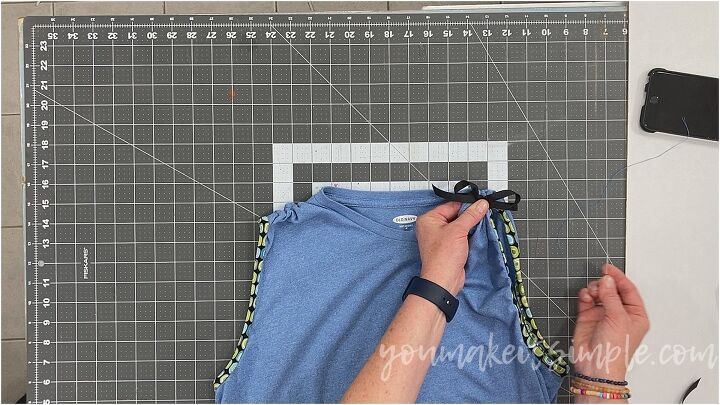
You can also use a ribbon to gather the shoulders by tying a bow around the shoulder top and tacking in place with a needle and thread.
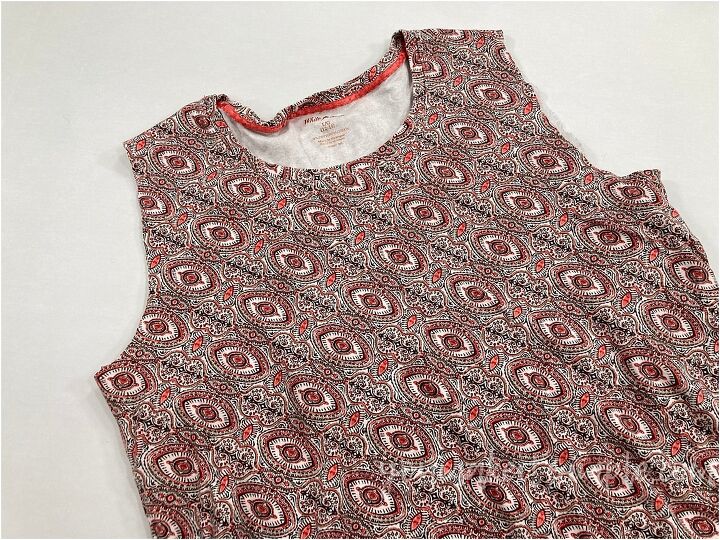
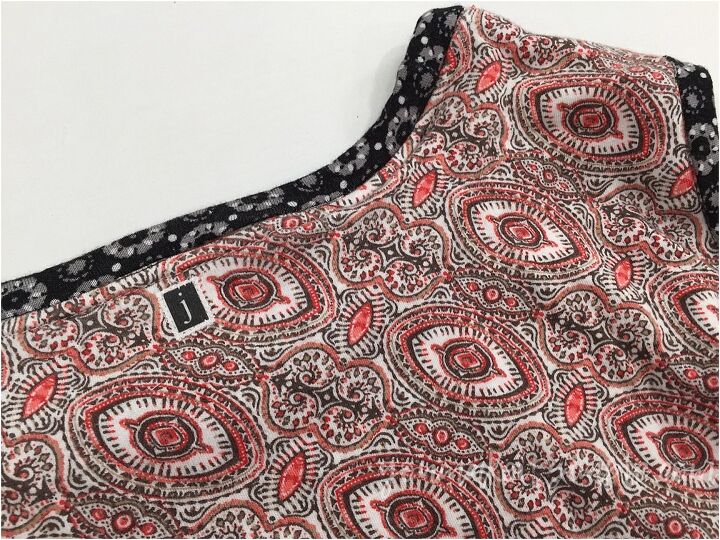
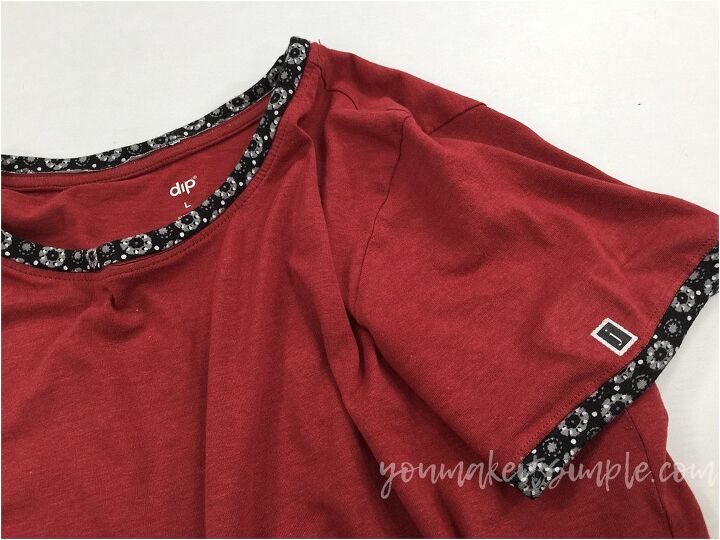
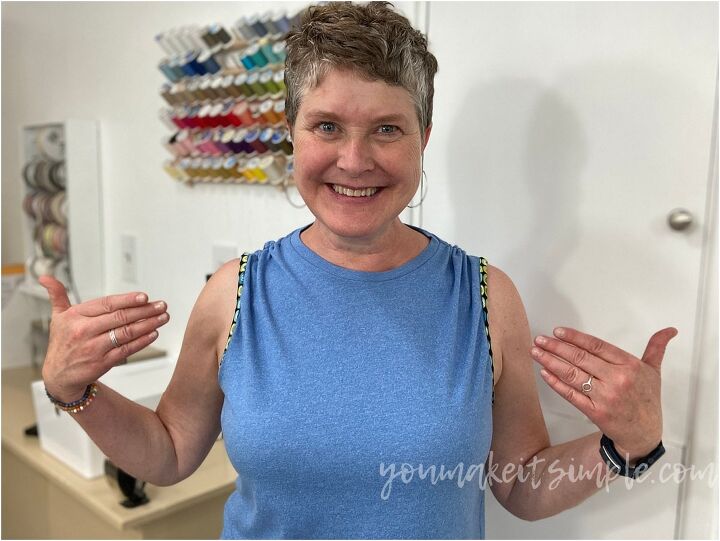
HOW TO ADD BINDING TO THE TANK TOP ARMHOLES AND NECK
Using stretchy knit fabric strips from other upcycle knit clothing can add a lot of character to your tank tops. CHECK OUT MY POST AND VIDEO ON BINDING.
Decide where you want to cut the armholes.
Cut out and try the tank top on to make sure that is where you want things to be.
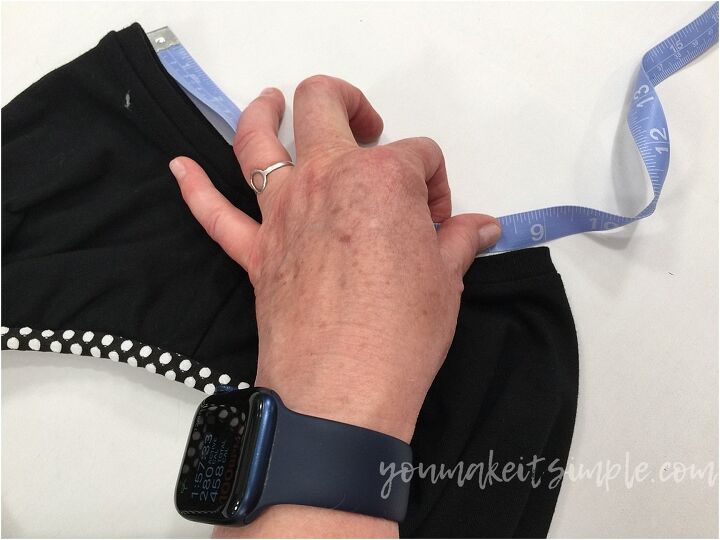
Measure the armhole, starting at the shoulder seam and go down to the side seam. DOUBLE THAT MEASUREMENT AND THEN SUBTRACT 1 INCH. This will be the length to cut the armhole binding.
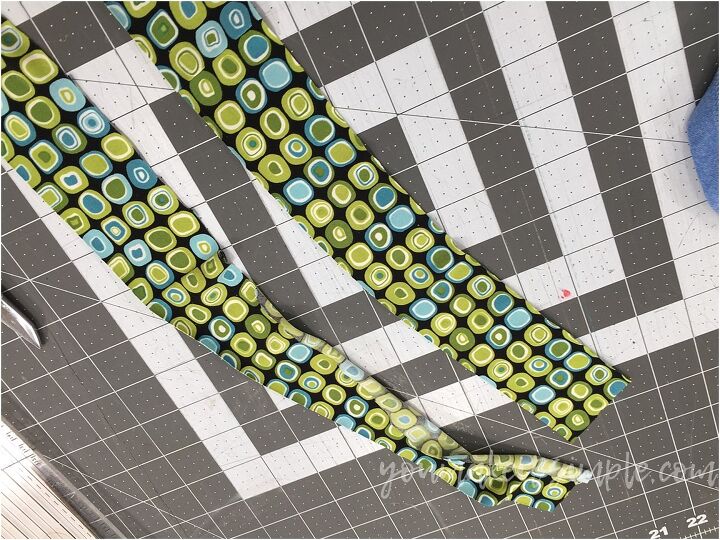
Cut 2-inch strips, on the stretch of your binding fabric. Cut them to the armhole measurement. (If you don’t have strips long enough, you can piece them together. WATCH MY TUTORIAL ON HOW TO DO THAT HERE.
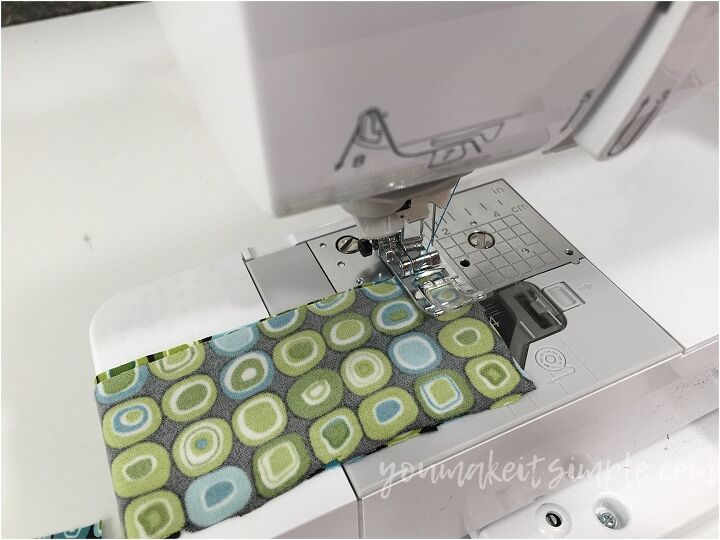
Place the strips RIGHT SIDES TOGETHER and sew the short ends together using a ¼ – 3/8 inch seam allowance to form a ring. Do this for both strips.
Fold the rings in half to find the halfway point and mark with a pin.
Do the same thing with the armholes. Find the halfway point from the side seam and mark with a pin. It’s not always going to be the shoulder seam. Most likely it’s a little off to the side.
Now you’re ready to sew the binding to the tank top.
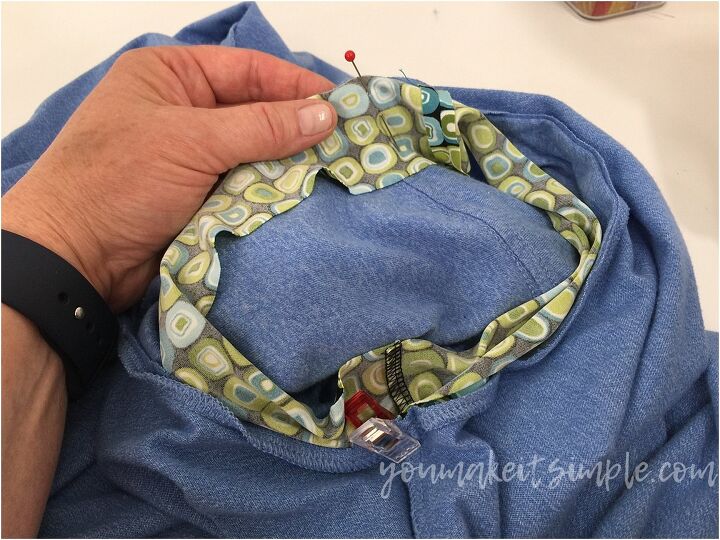
With the shirt WRONG SIDE OUT, line up the binding seam with the side seam. Pin that in place. Line up the halfway points and pin them in place. The binding piece will be shorter than the tank top piece, so you will be stretching the binding slightly as you sew.
You can pin ¼ points, but I usually don’t. Take it to the sewing machine and starting at the underarm seam, sew all the way around. Use a 3/8 inch seam allowance and a regular straight stitch. Backstitch at the beginning and end of the seam.
I LOVE USING THIS TECHNIQUE TO BIND ALL KINDS OF PROJECTS: blankets, slippers, and other clothing items.
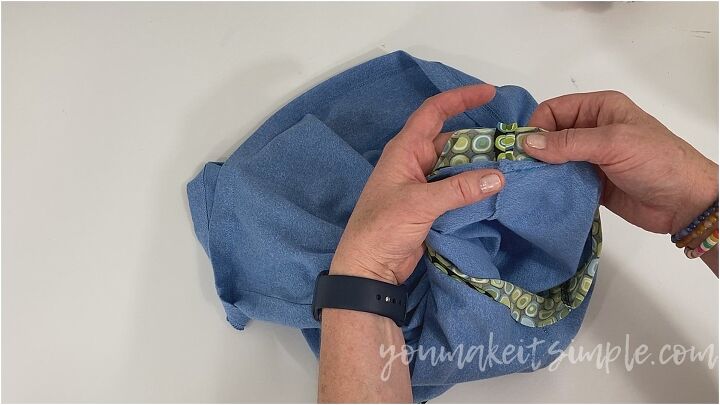
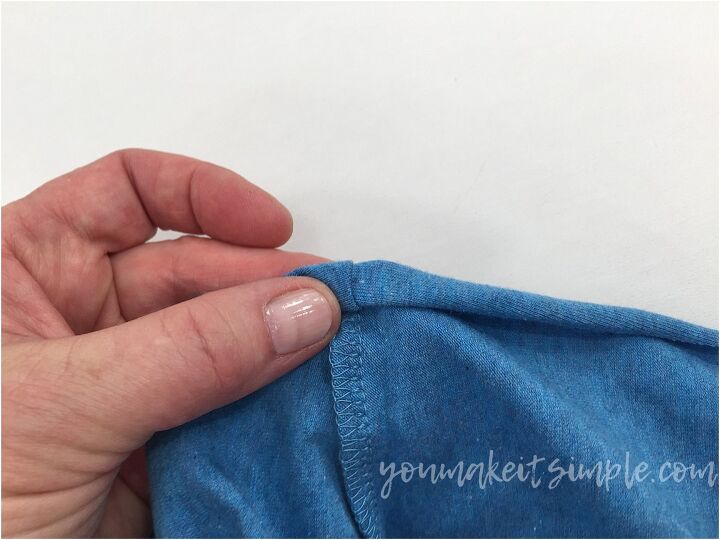
Fold the binding over to the WRONG side with the seam finger pressed outward and toward binding. Pin or clip in place all the way around. (Make sure the seam is enclosed in the binding).

On the TOPSIDE, stitch in the ditch, which is the point where the shirt meets the binding. Turn your sewing machine handwheel toward you, bringing the needle down to make sure it is placed in that crevice. Start sewing. Ease and stretch the fabric slightly as you sew. Backstitch at the end.
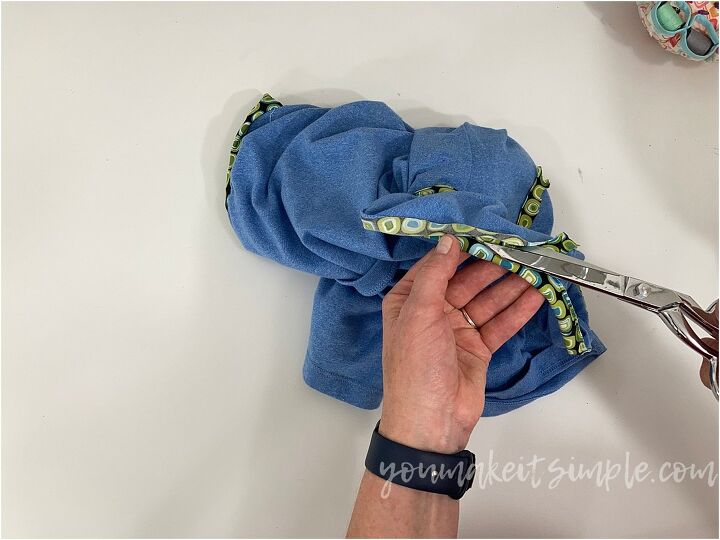
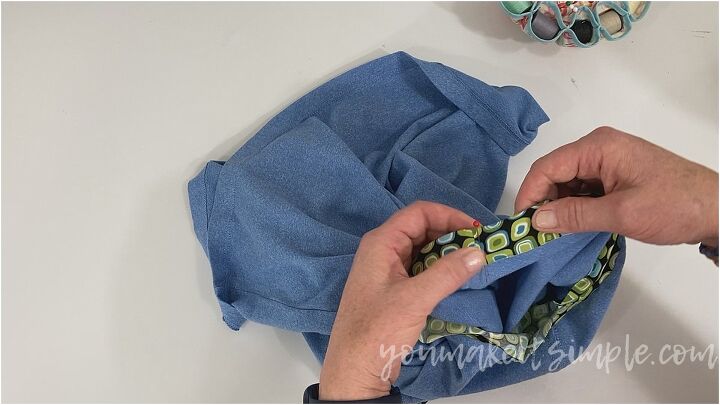
There may be a lot of excess fabric, no worries. (Better to have too much fabric than not enough).
VERY CAREFULLY take your scissors and trim the excess fabric close to the seam. Be careful NOT to cut the fabric underneath! No need to worry, the fabric will not fray.
Tadah! There you have a nice professional-looking finish to your armhole.
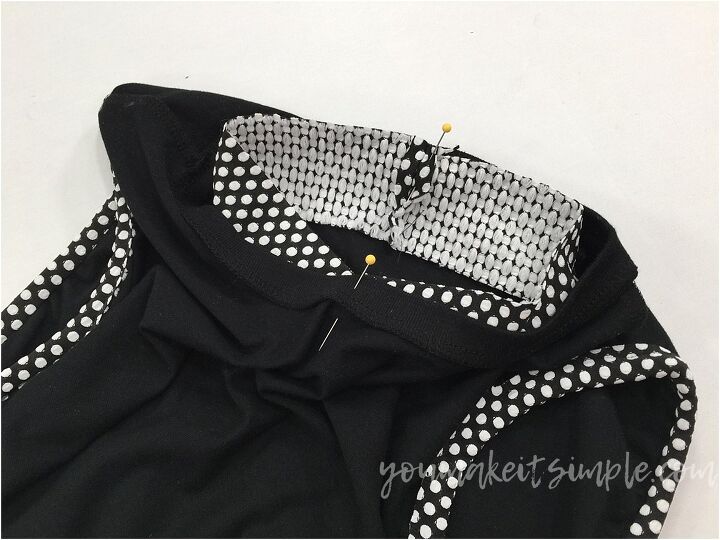
You can do this in the same manner for the neck if you want.
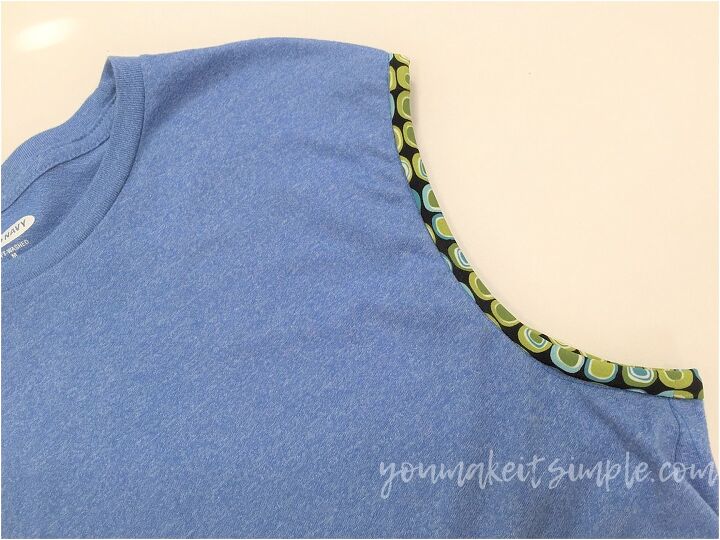
ADDING BINDING TO A SLEEVE EDGE
You can add binding to a t-shirt sleeve edge to give character and contrast. This really adds a lot of charm to a basic t-shirt and something you don’t see every day.
You pretty much just follow the same procedure that you would for an armhole.
- Measure the sleeve opening, x 2, subtract 1 inch. Cut the binding 2 inches x length.
- Find halfway points
- Pin in place.
- Sew
- Wrap binding around seam
- Stitch in-the-ditch
- Trim binding
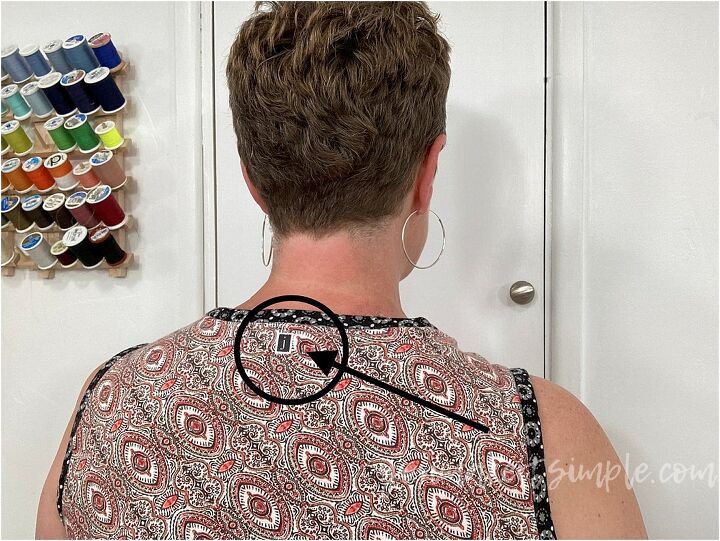
BONUS: HOW TO ADD LABEL OR TAG
Adding a cute little tag is optional of course, but another way to customize your clothing. Get more information about how to make your own labels HERE.
Cut out the label and decide where you want to apply it. Some recommended places would be.
- The outer bottom center of the sleeve
- Just under the neck binding on the back of the tank top
- The bottom hem of the tank top
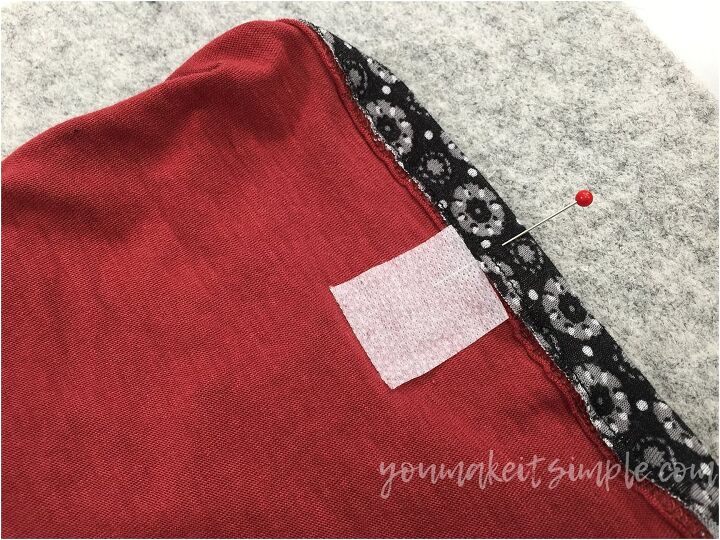
Unless the knit fabric is really thick, you’ll want to reinforce the knit fabric by applying a little piece of INTERFACING, on the backside of the fabric where you want to apply the label. (Follow instructions on stabilizer).
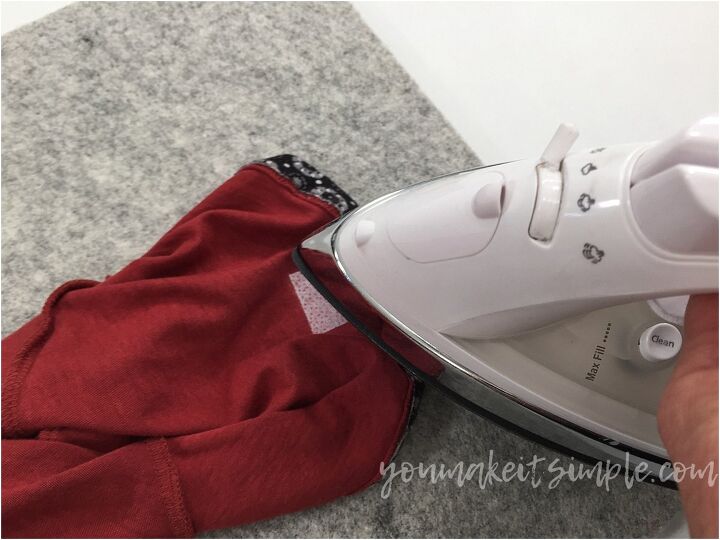
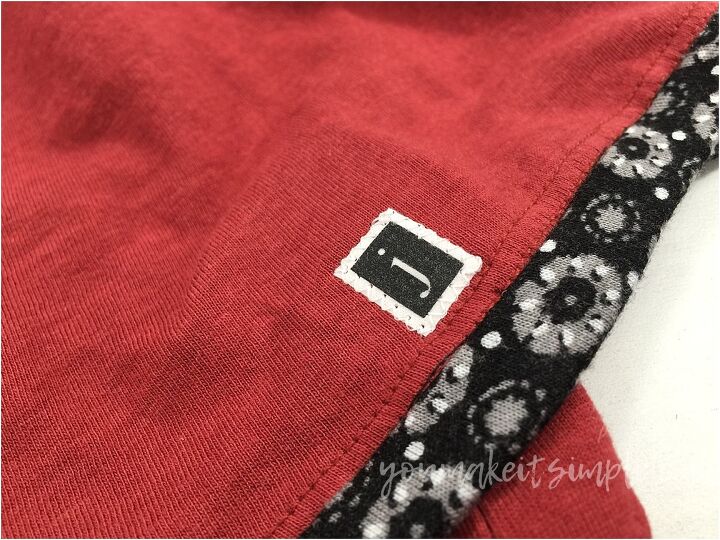
Using a narrow, short zigzag stitch, sew around the label to secure it in place.
I hope you enjoyed this tutorial. Be sure to reach out if you do have questions.


How To Make Adorable DIY Shoelaces With Fabric and Recycled T-Shirts
/
Clothing and Accessories, Craft Video, CRAFTS, Free Sewing Patterns, SEWING, Sewing Videos, Tutorials, Upcycling, VIDEO AND AUDIO LIBRARY
/

DIY Top Knot Headband | Easy Sewing Tutorial
/
Baby, Clothing and Accessories, SEWING, Sewing Videos, Upcycling, VIDEO AND AUDIO LIBRARY
/

DIY Upcycled T Shirt Bags | Sew and No-Sew Methods
/
Clothing and Accessories, DIY HOME, Free Sewing Patterns, Recycling, SEWING, Sewing Videos, Upcycling, VIDEO AND AUDIO LIBRARY
/

The author may collect a small share of sales from the links on this page.


Comments
Join the conversation