Three Awesome Thrift Flip Projects for Those Clothes You Never Wear

I’ve been going through my closet, and I’ve come across so many old clothes that are no longer in good shape, so I decided to try my hand at giving them a new life. I think I’ve done a pretty good job, and I’d love to share a few of my ideas with you on how to upcycle clothing.

I hope these ideas have given you some inspiration for how to give some of your old clothes a new lease on life. If you try any of these thrift flips, let me know how they turn out!
Tools and materials:
- Pins
- Scissors
- Sewing machine
First project:
- Wide-strapped tank top
Second project:
- Old sweatpants
- Large bucket
- Bleach
- Elastic
Third project:
- Satin shirt
- Old hoodie

First project
For this thrift flip, I decided to transform an old red tank top that was very plain and a little too long into a cute top with fun details.
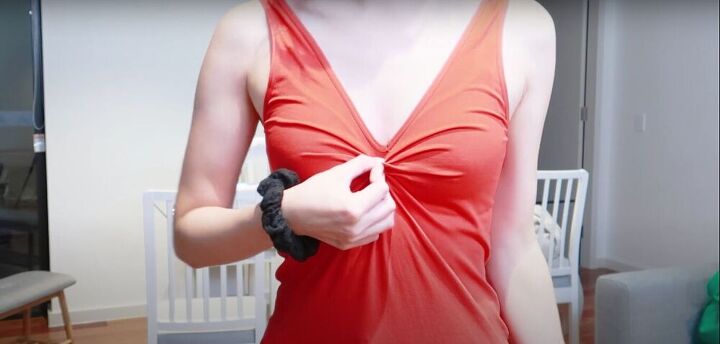
Mark the bottom of the pleats with a pin
I scrunched up my top until I created a shape I was happy with.
Then I put a pin in to mark how much of the fabric will be pleated.
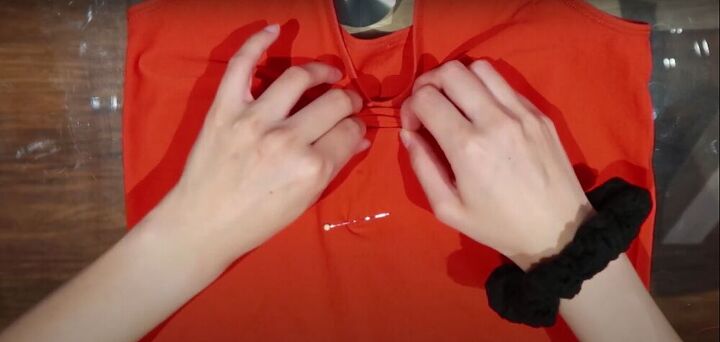
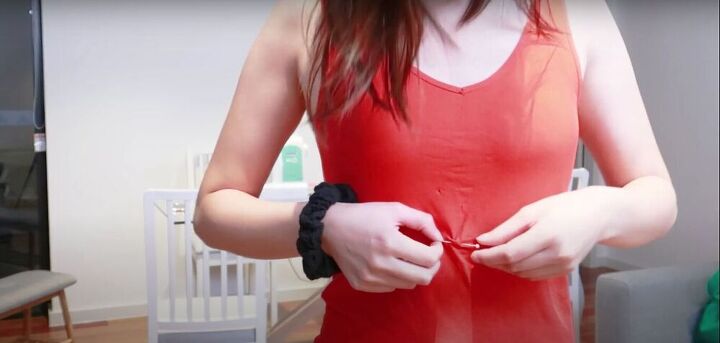
Pleat the fabric
I made pleats in the fabric below the neckline, working downwards until I reached the pin.
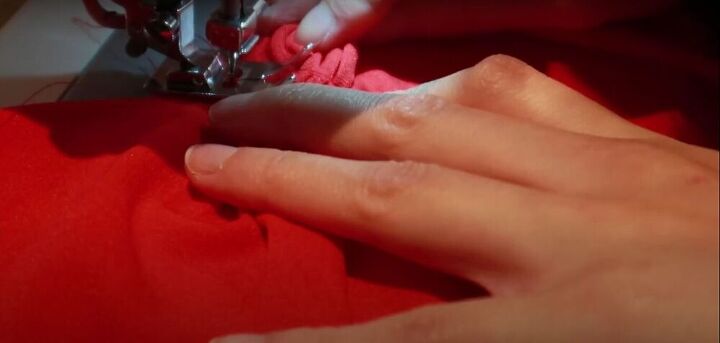
Sew it down
Once I was happy with the shape of the pleats, I sewed them down using a straight stitch.
Cut and hem the bottom
I cut about an inch off the bottom of the shirt, folded the raw edge over, and hemmed it with a straight stitch.
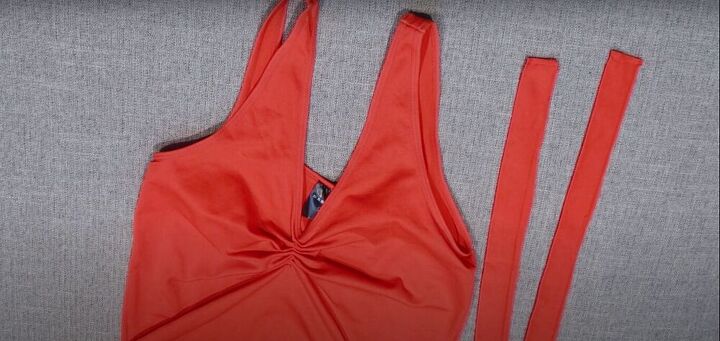
Prepare strips for bows
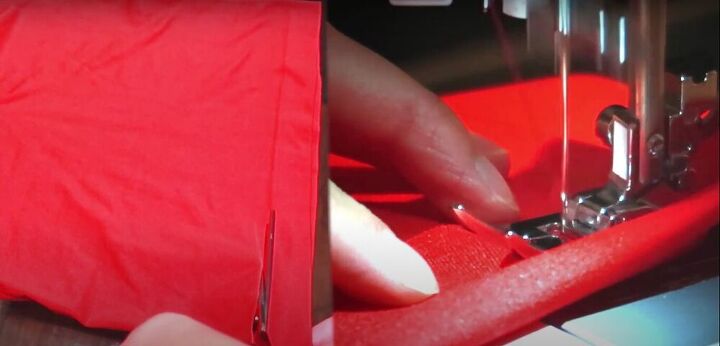
I cut the strip that I trimmed off the bottom in half and hemmed the raw edges of each strip.
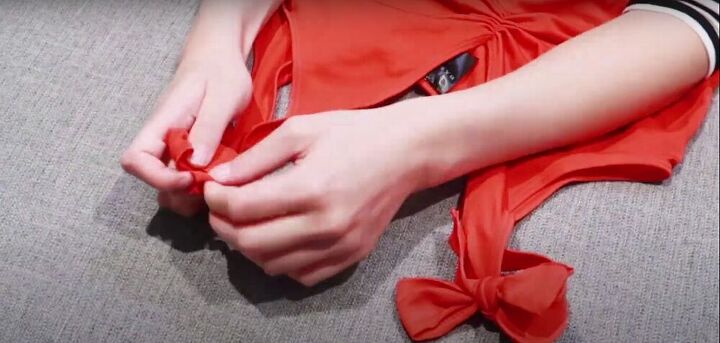
Then I tied a bow with the strips of fabric on both shoulder straps of the shirt.
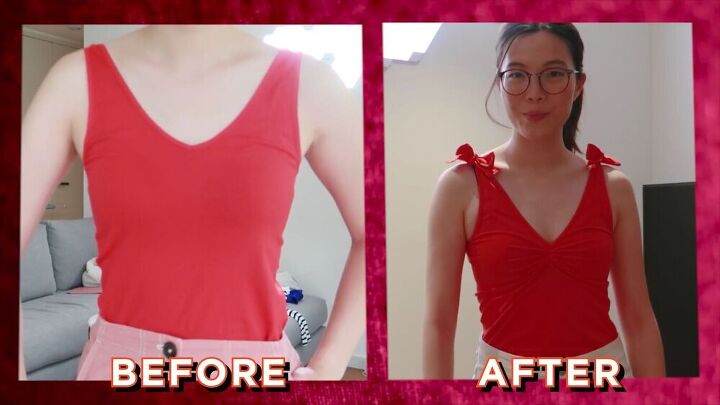
My boring shirt was transformed into a super-cute top with ruching and knotted shoulder details.

Second project
I had these old, faded low-rise sweatpants that I wanted to try to turn into those cool scrunched-up sweats that Kim Kardashian wears.
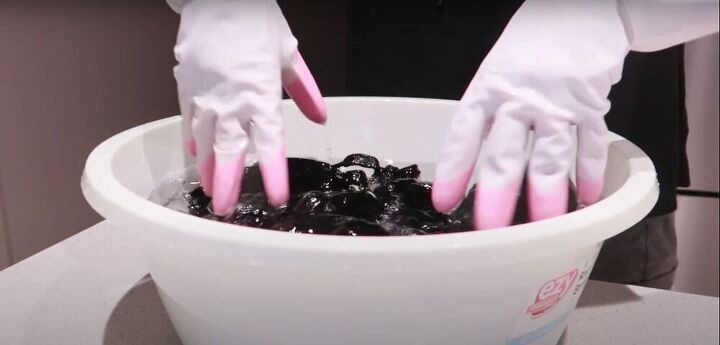
Bleach the pants
First, I filled a tub with bleach and left the pants in there to soak overnight.
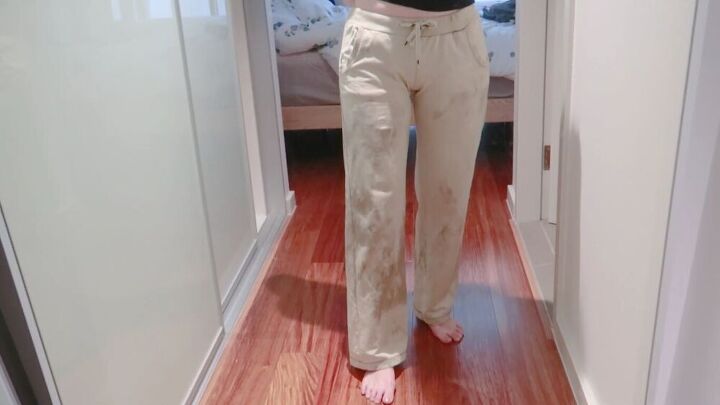
Once I drained and rinsed the bleach out and washed the pants, this was how they looked. My bucket must not have been big enough, because there were a few areas where the pants did not bleach completely, and I was left with a few tan-colored spots.
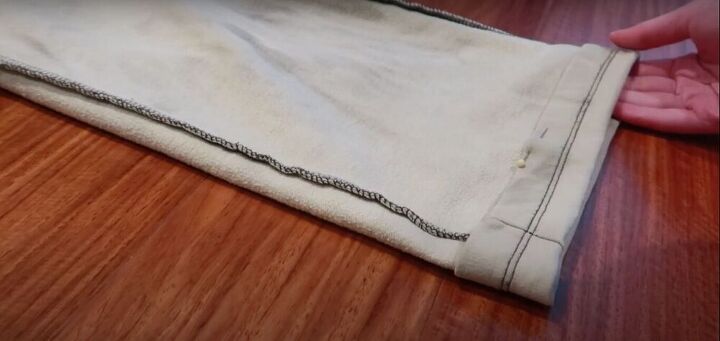
Create a tunnel for the elastic
Next, I turned the pants inside out, and flipped the hem up on the bottom of each pant leg, leaving enough space to be able to pull my elastic through, and pinned it down.

Sew the hem
Then I sewed the hem on both pant legs, leaving a gap in the stitching where I could insert the elastic.
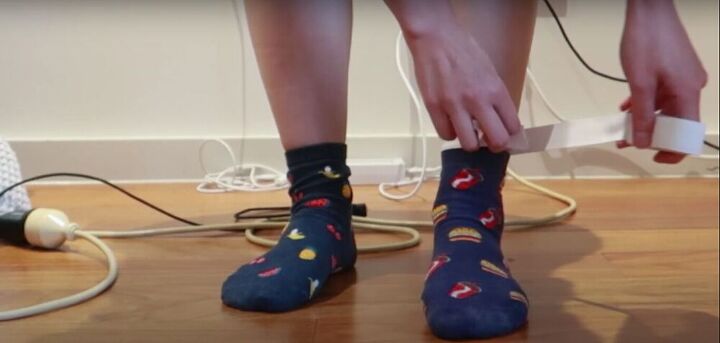
Measure the elastic
I wrapped a length of elastic around my ankle so it was snug, but not too tight, and cut the elastic at the desired point.
Insert the elastic
Then I ran the elastic through the tunnels I had created at the hem of the pants.
Sew the elastic down
Then I sewed the elastic into place.

I have to be honest. This thrift flip is definitely not “bomb dot com,” but they’re okay. It’s not the best project I’ve ever done, but they’re better than they were, and I would still wear these around the house.
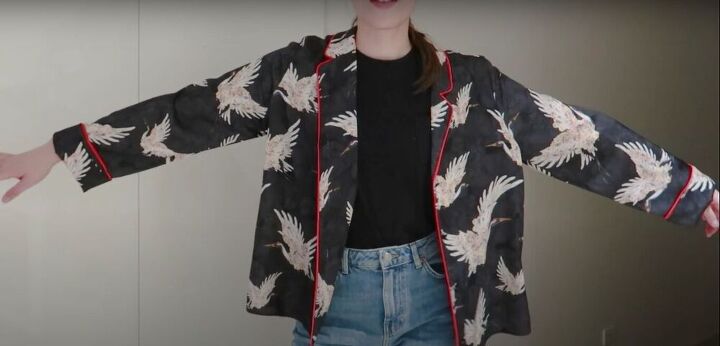
Third project
I’ve had this beautiful satin shirt with a crane pattern for a long time. I love the pattern on it so much, but I’ve never been able to style it in a way that doesn’t make it look like a pajama top. So I decided to turn it into a jacket, using the hip band of an old hoodie.
Flip the collar inward
One stylistic element that I really wanted this jacket to have was a Nehru collar. To make this, I first flipped the collar inward and pinned it down.
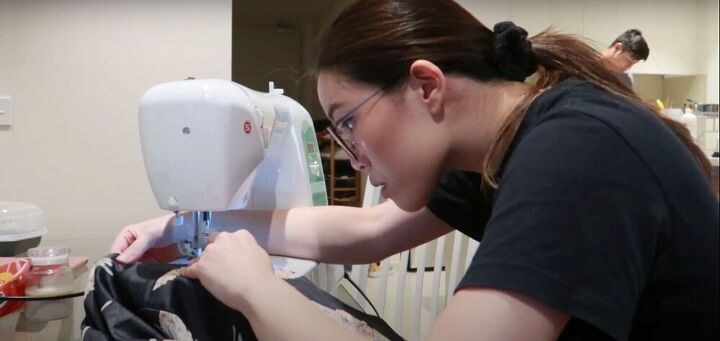
Sew the collar
Then I topstitched around the whole collar. This gave the collar some structure and kept it from flopping over.

Decide the length of the jacket
I put the shirt on and figured out how long I wanted this jacket to be, added a couple of centimeters, and marked that spot with a pin.
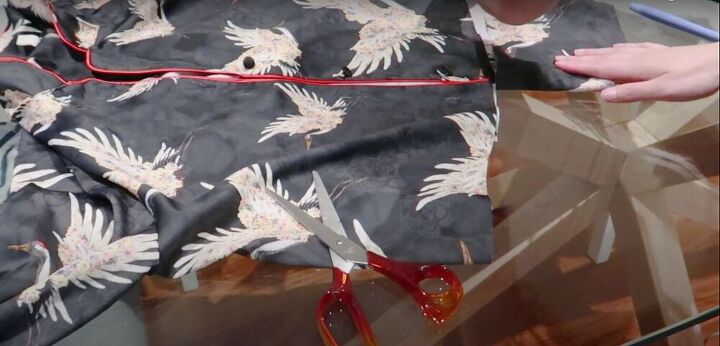
Cut the shirt to the desired length
Then I cut across the shirt at the height of the pin, removing the excess length.
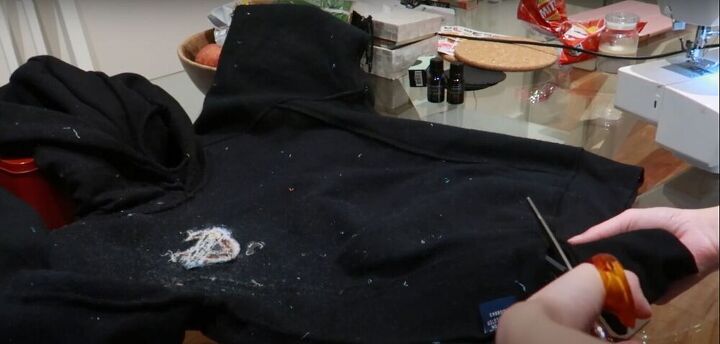
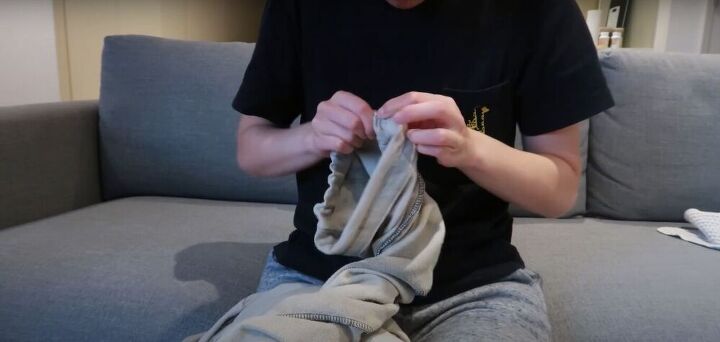
Cut the bottom band off an old hoodie
Next, I took an old hoodie that I never wear because it’s itchy and uncomfortable, and cut the band off the bottom.
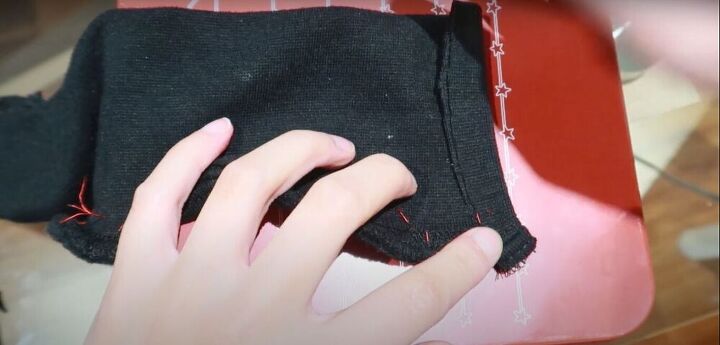
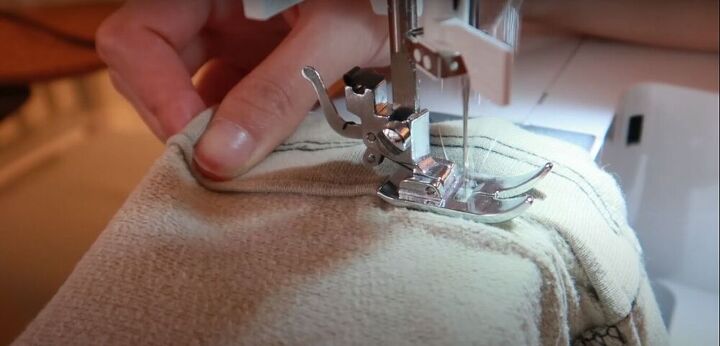
Cut the band and hem the edges
I cut the band from the hoodie in half and hemmed all the raw edges.
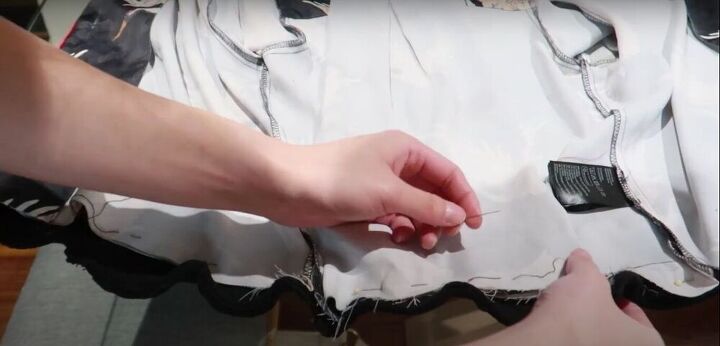
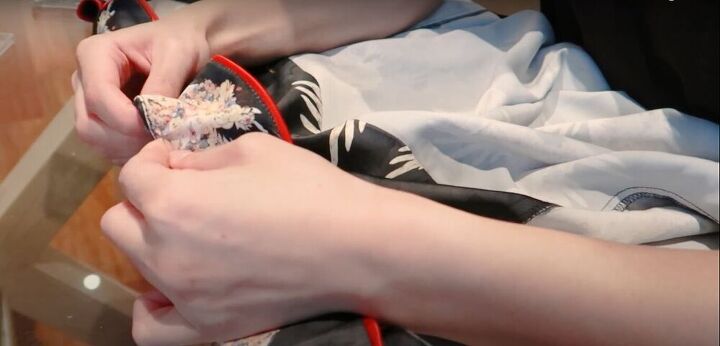
Pin the band in place
Once the band was hemmed, I pinned each end of the band to the ends of the bottom edge of the shirt. The hem of the shirt was longer than the bottom band, so as I was pinning the rest of the shirt to the hip band, I created a few pleats along the bottom edge of the shirt.
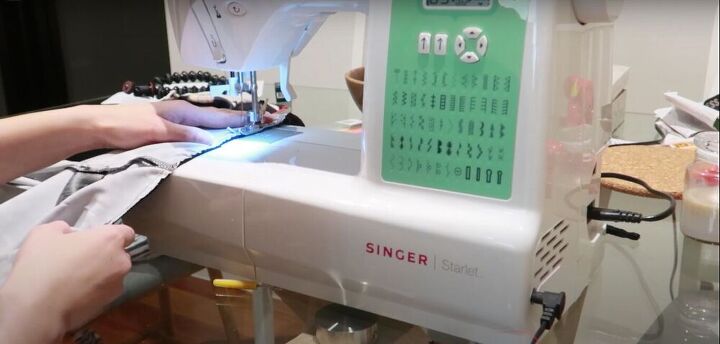
Sew the band in place
Then I sewed everything down with a zigzag stitch and then went over it again with a straight stitch to reinforce it.
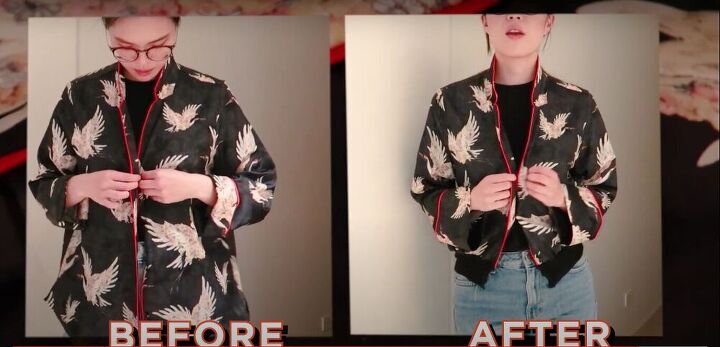
I’m so happy I found a way to use this shirt because I love it so much. This jacket is so cool, and I know I’m going to get a lot of use out of it now.
The author may collect a small share of sales from the links on this page.


Comments
Join the conversation
The silk jacket is bomb! And you’re the only one who has one! Super cute
Your jacket turned out great. I would say it’s a keeper!