DIY Cecilie Bahnsen Inspired Puff Top

I recently felt very inspired by the Danish designer Cecilie Bahnson and her gorgeous pieces! The style inspo got me thinking about a new sewing project. I decided to DIY a puff top that I made from fabric scraps. Check out this sewing project in my tutorial below!
Tools and materials:
- Fabric
- Lining fabric
- Measuring tape
- Scissors
- Pins
- Sewing machine
- Needle and thread
- Buttons
Plan
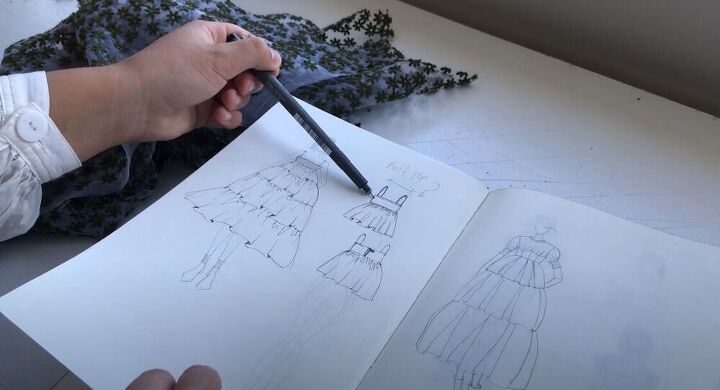
I have this little sketchbook of designs from uni. I’ve always loved the aesthetic of puffy and oversized dresses and so I decided to adapt one of my old designs and drew a puffy top that I couldn’t wait to make! I decided to make a front bandeau panel and two panels at the back because I want the bandeau to be tight. The rest of the top would be gathered onto the bandeau to make it really full and puffy and fun!
Here is a sneak peek at the pattern pieces I would be using in this DIY. As I would be using scrap fabric I had to make sure I had enough to gather for the peplum of the top. To check this, I measured my bust and multiplied that by 1.5.
First, I had to figure out how I would sew all my pieces together to make the peplum. I trimmed the pieces to make everything nice and square and ready for the sewing machine.
I also cut out my front and back bandeau pieces so that they were ready to be sewed as well.
Make the peplum pieces
In this step, I sewed my scrap pieces into nice long pieces of fabric that I could make my peplum pieces out of for the front and back of the top. I decided to construct this top using French seams.
Next, I measured the peplum pieces and cut them to size. I realized that my maximum width could be 31cm (12 inches) and my maximum length could be 75cm (29.5 inches).
Sew the bandeau
I then went ahead and French seamed the side seams of my bandeau top.
Join peplum seams and gather stitch
I attached my front and back peplums together with a French seam.
I then sewed two rows of gather stitching across the top and pulled the thread to gather the peplum piece nicely.
Attach bandeau to peplum
I spread my gathers nicely and evenly and then went ahead and attached the bandeau to the peplum with a French seam.
Sew and attach straps and button loops.
To sew the straps, I folded them as small as I could and sewed them with a really tiny edge stitch to make them as narrow as possible.
I made the button loops the same way, so I went ahead and attached them to the center back of the bandeau just as I had planned. I then sewed the straps onto the top. I made sure to try on the top so that I could see if I needed to make any adjustments to the straps.
Attach the lining
In this step, I pinned and sewed the lining onto the bandeau. If you didn’t use a see-through fabric, you can skip this step.
I hopped over to my iron to press the lining and then moved back to my sewing machine to understitch the lining.
Edge stitch the center back seams
Next, I edge-stitched down the center back seams as I would be leaving the back open for a feature.
Hand sew on buttons
For the final step, I grabbed a needle and thread and hand sewed on buttons to the back of the top.
I adore this Cecilie Bahnsen inspired top! It is the perfect puff piece and I’m so glad I could make it out of fabric I already had! How would you style this top? Let me know in the comments!
Enjoyed the project?
Suggested materials:
- Fabric
- Lining fabric
- Measuring tape
- Scissors
- Pins
- Sewing machine
- Needle and thread
- Buttons
The author may collect a small share of sales from the links on this page.


Comments
Join the conversation
I love it!
Beautiful, I wish I could sew. No time or patience....