How To: Boxy Minimal Sleeveless Crop Top
How To: Boxy Minimal Sleeveless Crop Top with Geometrical Square/Mini V Neck

This project features some of the most amazing fabric I've ever found. It's a 100% linen from the 60's or 70's, made in Finland, and it came from a blanket I found at the thrift store. It has a beautiful weight to it, and just a bit of stretch to make it so comfortable in a garment. I first made a pair of basic elasticated shorts from it (a lot like these here), and let the matching top brew for a bit.. Until I (validated by a very close IG story vote) decided on a boxy style with a geometrical neckline. This was the first time I did a neckline other than the standard crews, Vs, Us, and I love how clean it turned out! I got so many questions about this method, lots of people asking what kind of facing I used - And believe it or not it's just the most basic cotton (actually from a pillowcase I cut up).
I've included the full guide for the top, but this would be a nice detail to hack a top or dress pattern with!
TOOLS:
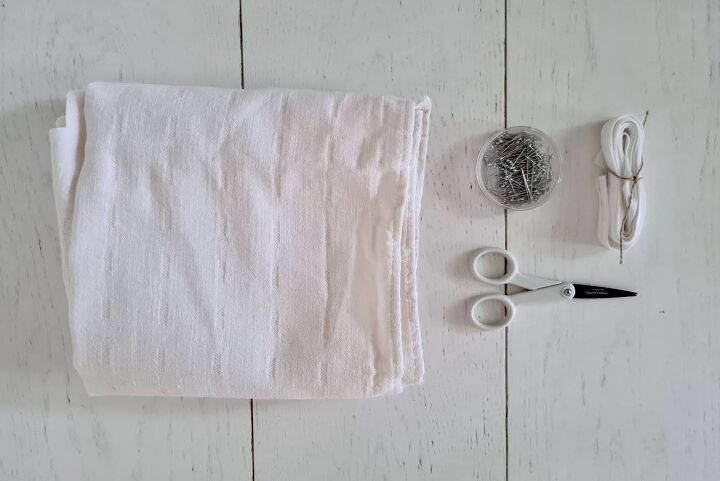
Fabric (I used a thick vintage linen) 0.5m (110cm wide) + you also need matching fabric for the facing, a basic cotton will do, or something else that presses easily | Scissors | Pins | Bias tape | Thread & Sewing machine
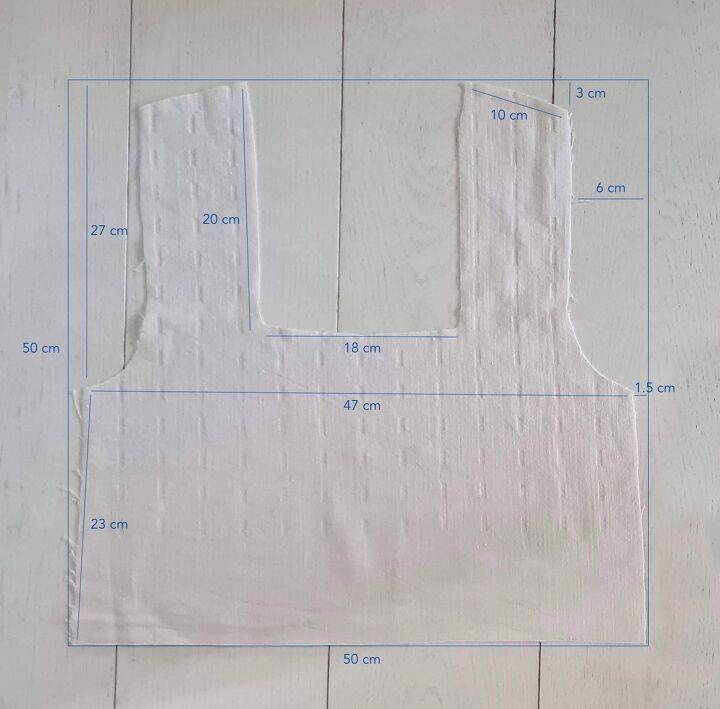
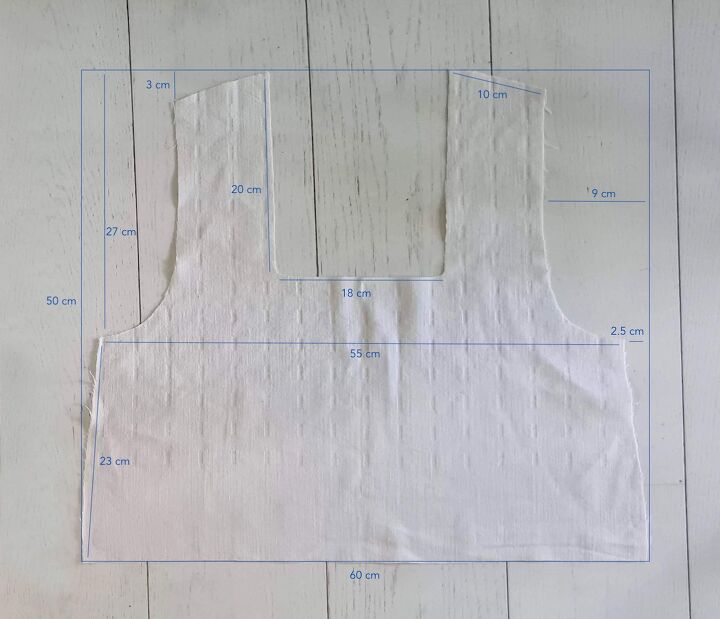
I. I keep getting requests for patterns, but that's still not in the cards. I'm all about selfdrafting, and with my tutorials want to encourage everyone to give it a go.. But for this one I've hopefully made the drafting process easier by giving more measurements in the form of a reference square around the front and back pieces. For sizing: I'm EU36/US4, but as this is a boxy fit, it would fit with these same measurements for up to EU40/US8 (obviously the fit would be a bit closer then). If you have a very large bust you would just want to adjust the dart a bit.
Front piece:
Back piece:
II. First step was to sew the shoulders together, right sides facing. Then I added darts, which decided to place on the arm hole instead of the bust since that's where I expected to have some gaping. My darts were about 1.5 cm wide at the start.
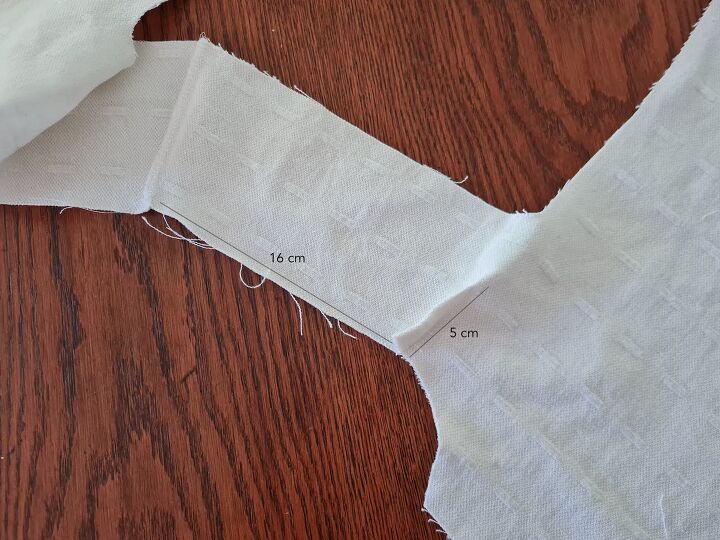
Dart done and pressed. After this I pinned the sides together right sides facing and sewed those.
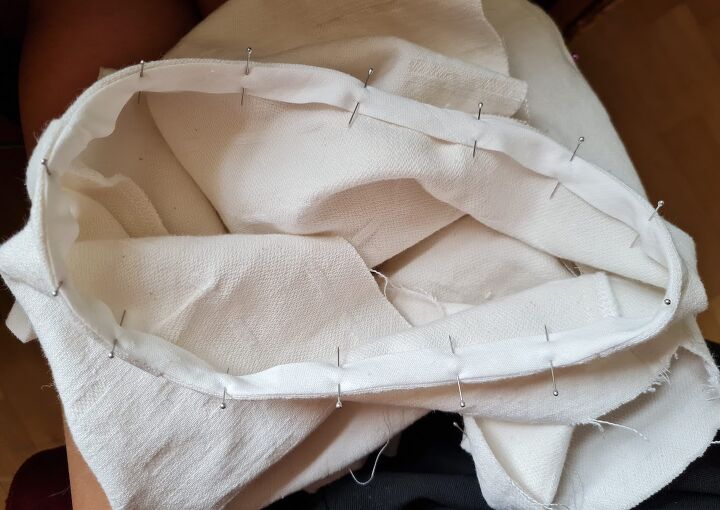
III. Then moved on to arm holes where I did a bias tape finishing. First pinned by bias all around the arm hole on the right side (starting from the side seam)...
.. Making sure to overlap the bias like this at the start/end. At the start fold the end of the bias, and overlap the other end by about 1 cm. Then sew all around in the fold.
As I was working with quite a thick fabric, I removed some bulk by clipping out the seam allowance at the shoulder and side seams.

Before turning the bias tape onto the reverse, I like to stitch the point where the ends meet.
And then you can turn it onto the reverse and pin down.
From there you can of course stitch the bias tape down with your machine. I usually hand sew these so I don't have a stitch visible on the right side.
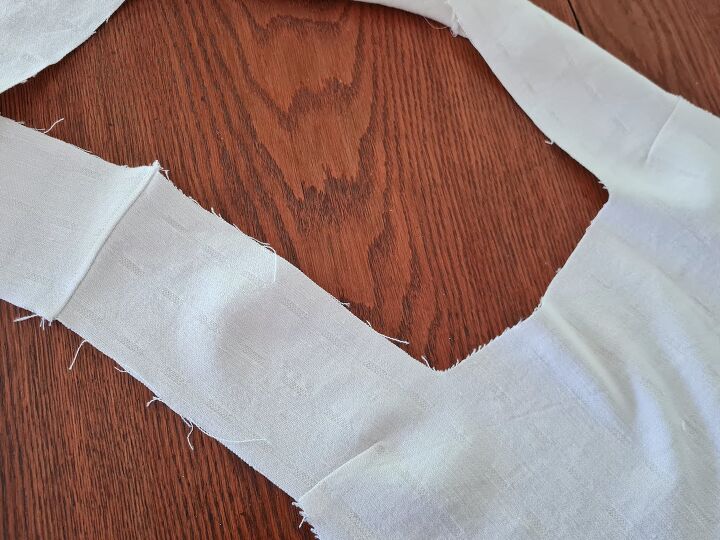
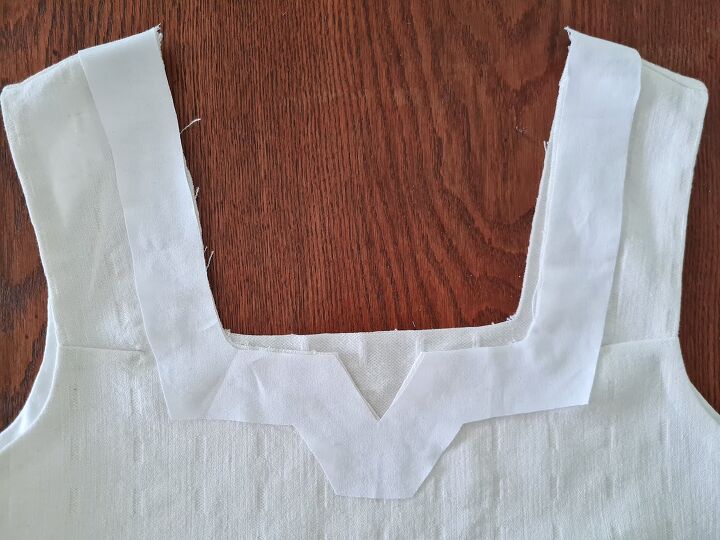
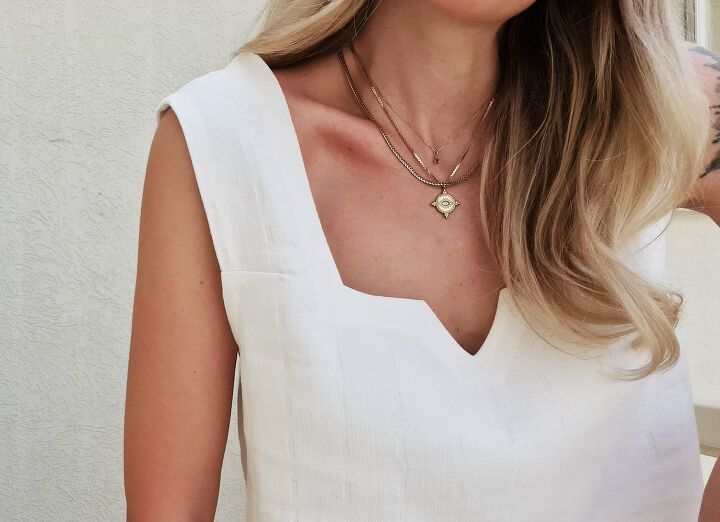
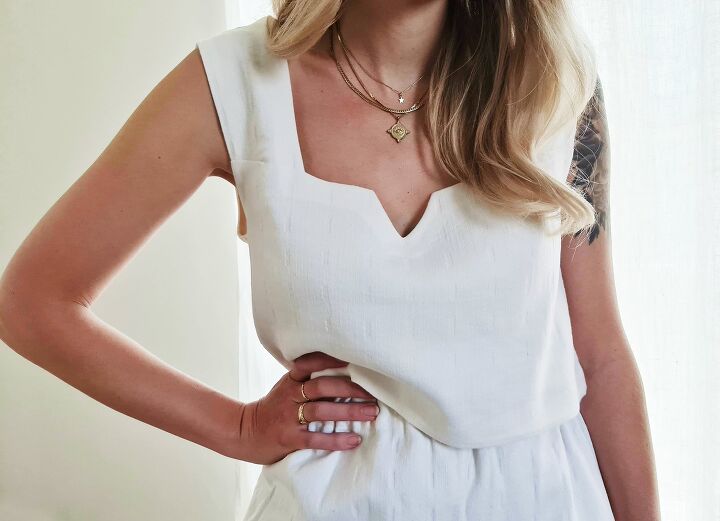
IV. Moving onto the neckline! Cut out the mini V at the center of the front piece neck (easiest by just folding in half and cutting at diagonal line. I cut mine about 4 cm deep.
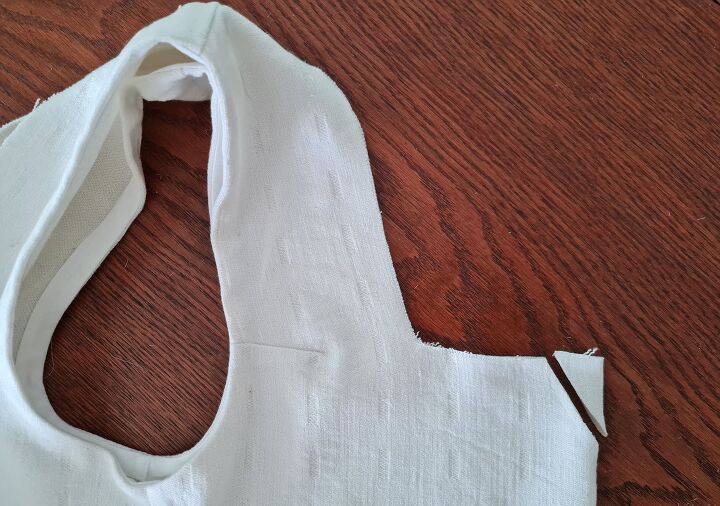
Opened up:
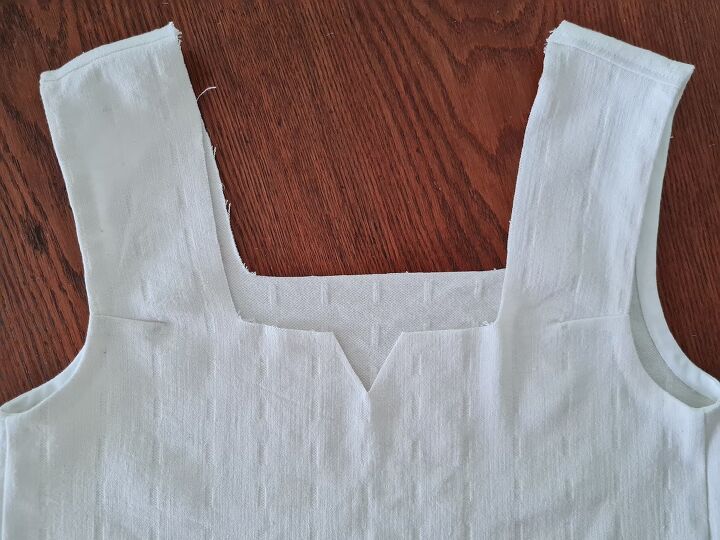
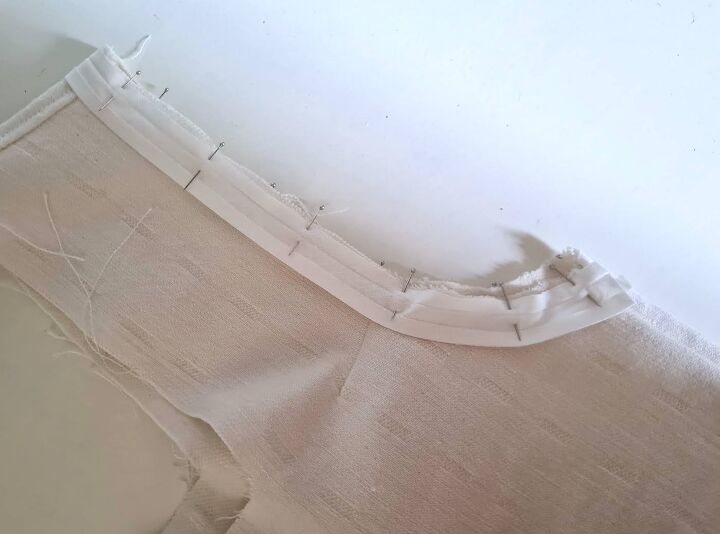
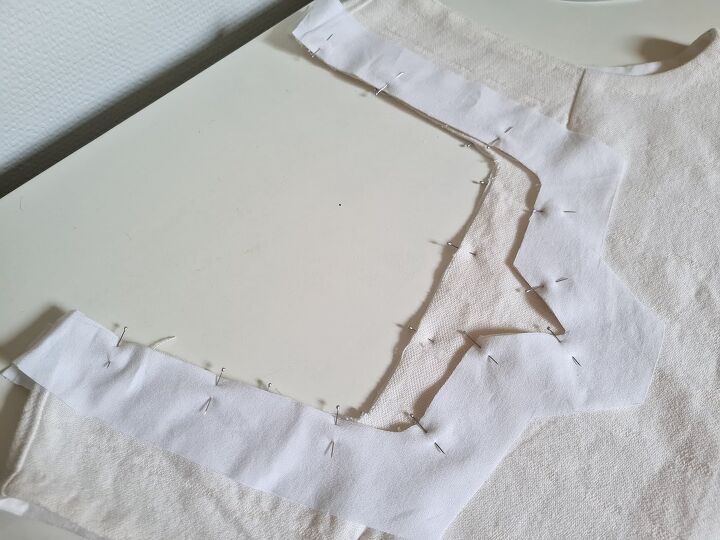
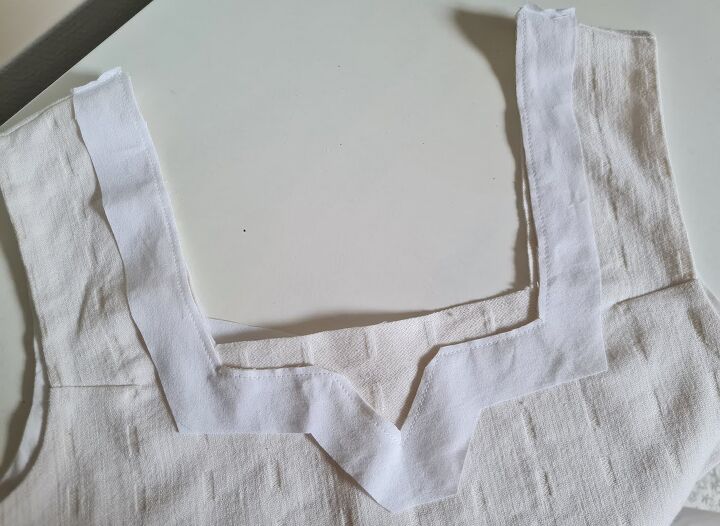
V. Now take your facing fabric and slot it inside the top, folding a couple cm at the top. Trace your neckline shape onto the fabric.
After tracing, take the fabric out and trace another line at a uniform distance out from the first one (I did about 4 cm). Then cut out your facing. Repeat for the back piece and you should have two pieces of facing that match the front and back necklines, and are just a bit long to go over the shoulder seams (where you'll attach them together).
Now pin the facing on both sides (on right side):
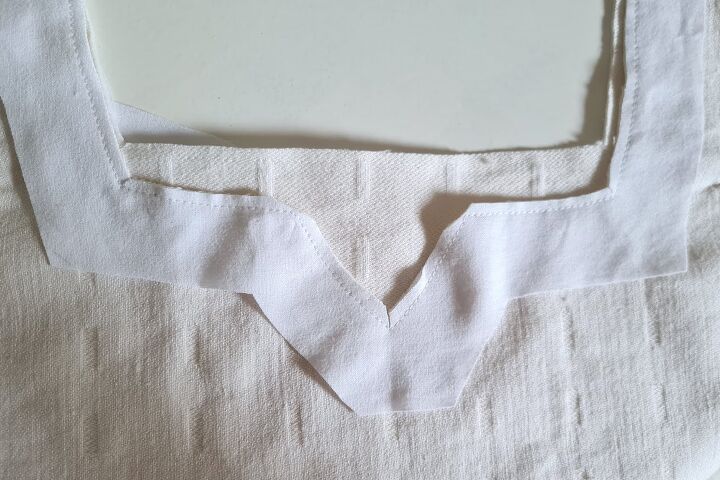
Here's my trick for attaching facing at the shoulders so it ends up perfectly the right size. I first fold the ends of the facing pieces down like this, so they meet exactly at the shoulder seam, pressing with my iron to create strong creases.
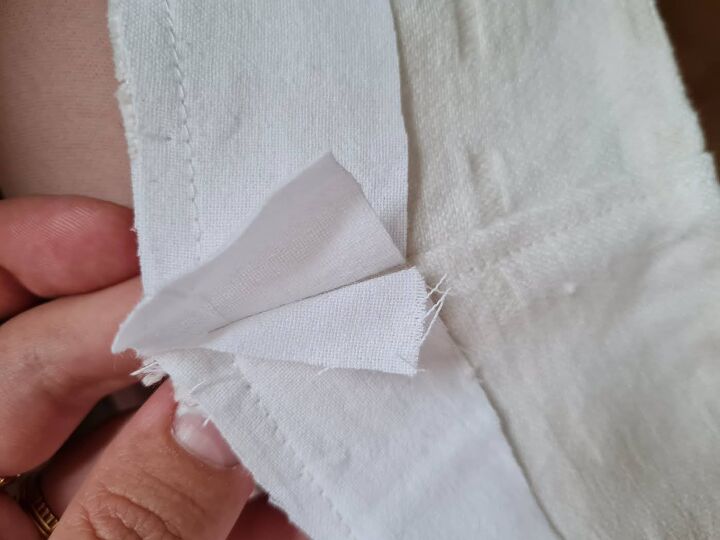
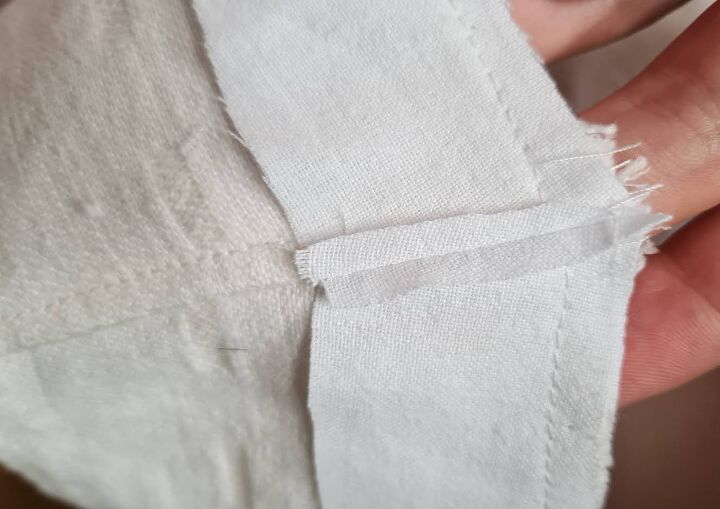
Those creases then act as your sewing line. Stitch the two pieces together there...
.. Then trim the excess fabric and press open with your iron.
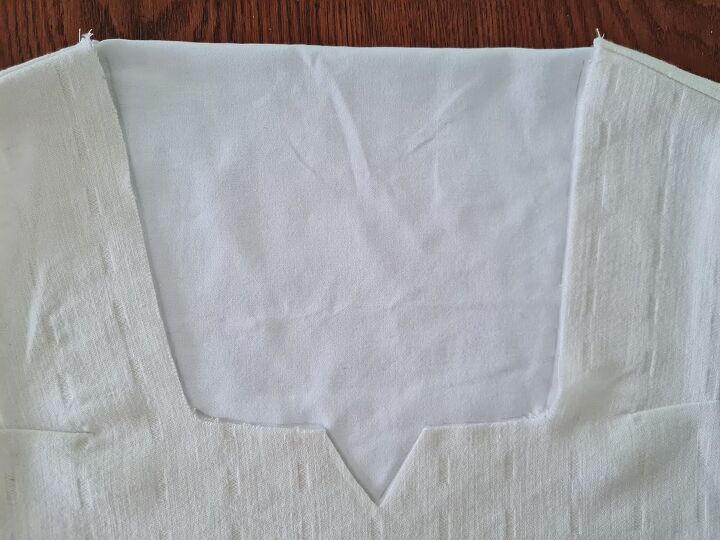
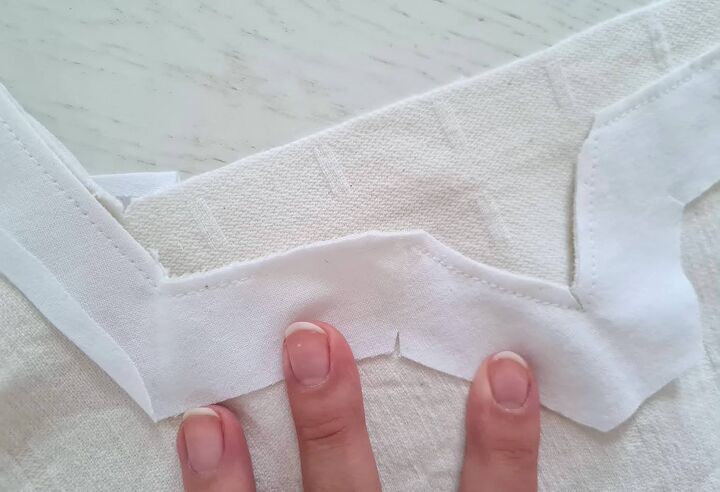
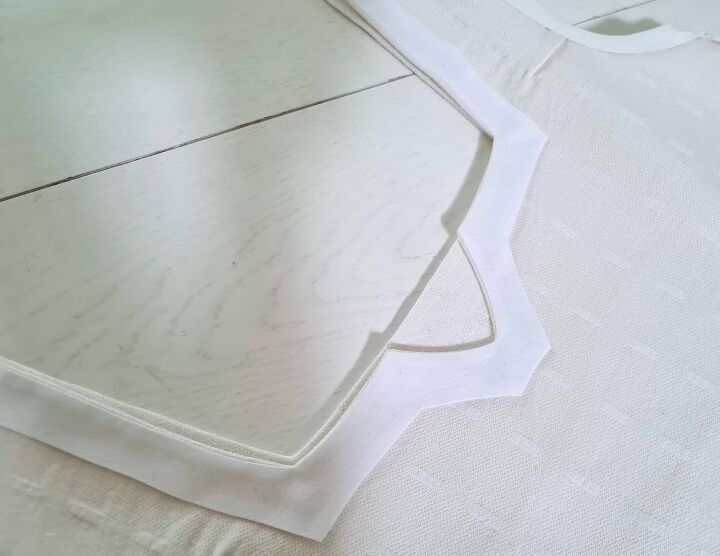
VI. Now for the important prep before turning the facing over. Clip all the inside corners (careful not to clip into your stitch) and cut excess from outside corners. I also trimmed the seam allowance to about 0.5 cm at this point.
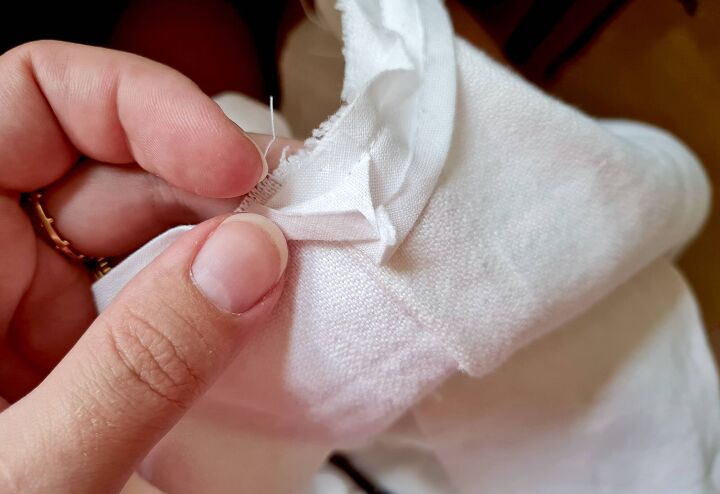
Don't forget to clip the bottom of the mini V. Especially if you plan to machine stitch the facing, make sure it's exactly the same width all around - I cut mine a bit more narrow at this step, 3 cm or so.
Now you can start folding the edges of the facing. When you get to the mini V area, you need to clip into the corner the amount of your fold.
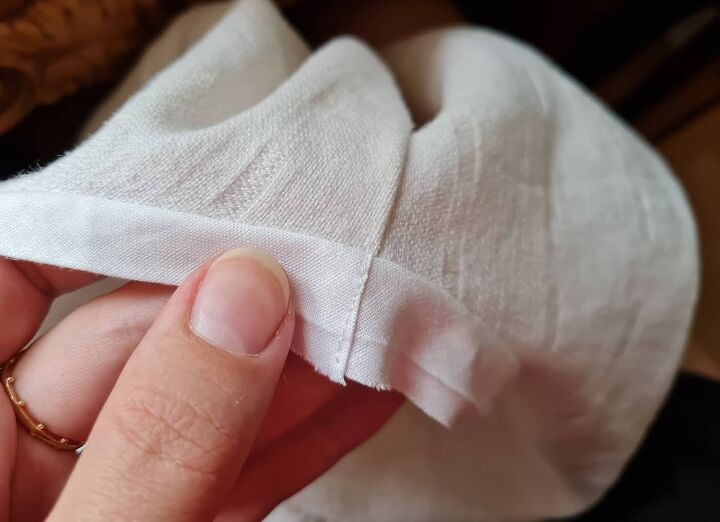
Once folded all around, you'll have this.
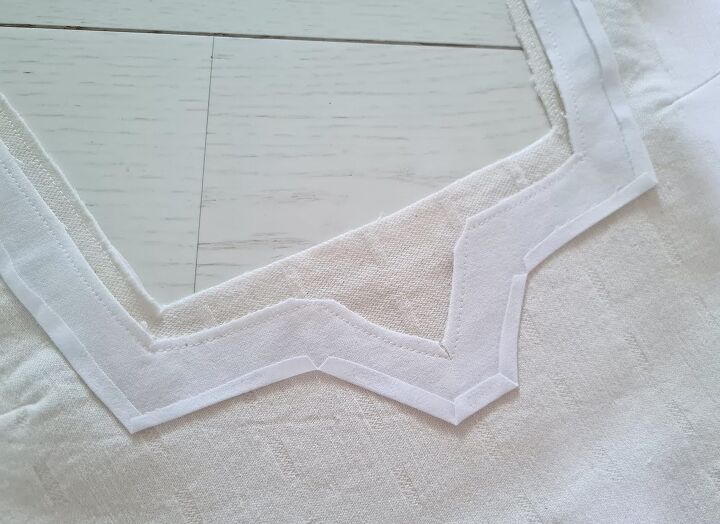
VII. The most exciting part! Flipping the facing onto the reverse & pressing down. As long as you clipped your corners well, it will lie flat nice & neat. All that's left is hand stitching the facing on the reverse (or using your machine if you don't mind the stitch), and hemming the top.
I feel a phase of experimenting with different neckline shapes starting..

xo,
Julia
The author may collect a small share of sales from the links on this page.


Comments
Join the conversation
I think you've done the best tutorial I've seen in ages! And made a very lovely top! Thanks!
This top is so pretty. Love that notch neckline!