Summer Top With a Twist - Literally!

I love unique outfits, and there is no more unique than one of a kind. Come join me on this tutorial teaching you how to make a summer top (or two!) for the perfect warm-weather outfit.
Tools and materials:
- Seersucker fabric - one yard
- Scissors
- Pencil
- Interfacing
- Sewing machine
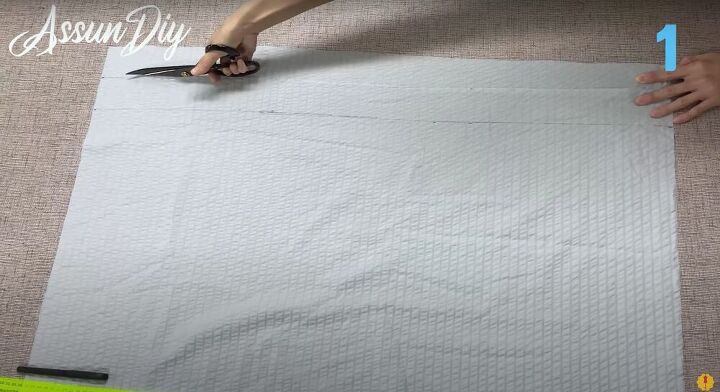
Cut out your fabric
Measure 21.5 inches from the corner of your fabric, marking it off on both ends (top and bottom). Draw a line connecting both markings and cut it out. Now, take the bigger half of the fabric and trace two lines that are 2.5 inches wide. Cut out both strips. Next, measure a 12 by 12-inch square and cut it out followed by another piece of fabric that is 21.5 by 36 inches. Cut out pieces of interfacing that are the same size and iron them on.

Cut corners
Sew your two 2.5 inch strips of fabric together by the short edge to make one long strip. Next, fold your big rectangle into four and measure three inches in front of the corner. Draw a quarter circle around the corner and use some scissors to cut that corner out. Unfold the rectangle. Now take the smaller (12 by 12) rectangle and fold it the way we did the previous one. Mark off two measurements by this corner, one that starts 1.5 inches from the edge and the other that’s three. Cut both of these out to make your neckline. Secure its edges with a zigzag stitch.
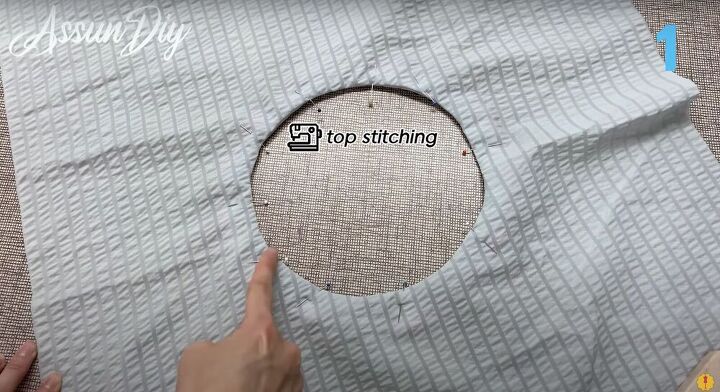
Make the neckline
Place the neckline onto the larger fabric by the hole we cut out, right sides together. Cut notches into the edge of the neckline to help it fall flat and then fold the neckline inwards so the wrong sides are touching. Pin it down and use a top stitch all around the opening.
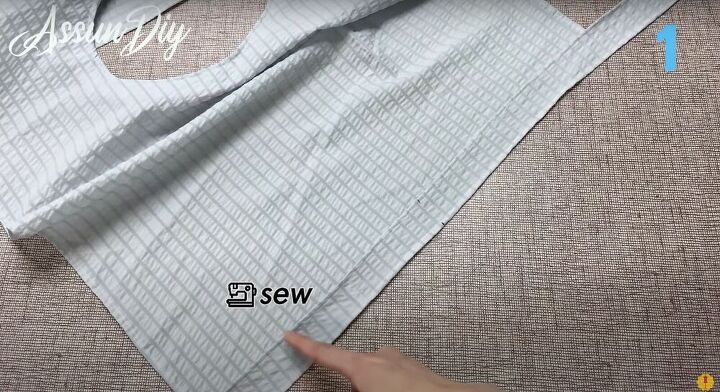
Add your strap
Roll the hems up (so they are right side to the wrong side) and then sew the rolled hems. Next, take your long strip (63 inches by 2.5 inches) and roll the hems there too. Sew them down. Once that's done, fold the strip of fabric over and mark the center. Do the same with the body of the shirt (marking only one edge) and then connect the two pieces with a zigzag stitch.

That marks the end of your first DIY summer top. Slip the shirt on with the strip in the back and then tie it up front. This will form the sleeves, secure the fit and provide it shape.
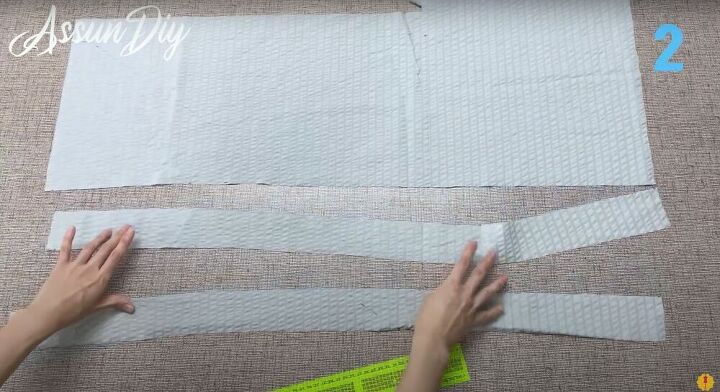
Cut out your fabric
For the second top, we are going to start with measuring out fabric that starts one inch away from the edge and is 21.5 inches long. Next, continue from the corners to form a box, with the sides being 15 inches long. Draw a diagonal line to connect two corners. Cut out your square and then cut along the diagonal line to make two triangles. Once that’s done cut out two strips of fabric that are six inches wide and as long as the base of the fabric.
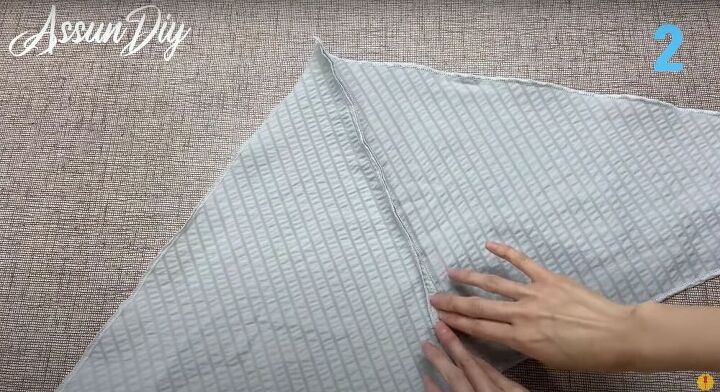
Sew your fabric
Sew a zigzag stitch on the edges of the two triangles to keep the raw edges from fraying. Next, connect the two long strips by sewing the short edges together (together, your new length should be 53 inches long). Place the triangles together and sew along the edges to make one larger triangle, finishing the seam with a topstitch.
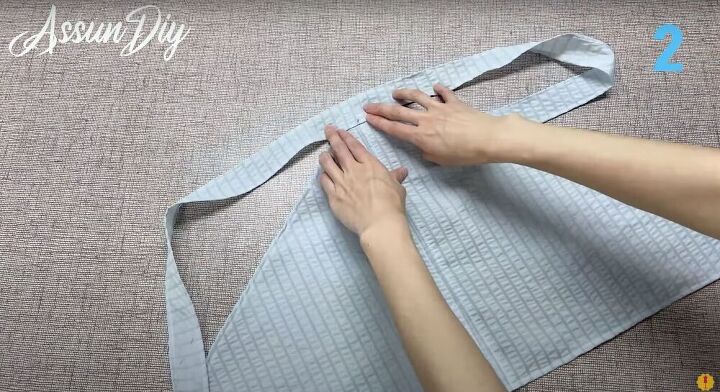
Finish the top
Roll the edges of the larger triangle and pin them down. Sew to secure. Next, cut a diagonal line on both short edges of the long strip and then roll the edges of the strip too. Pin and sew it down. Find the center of the strip and match it with the point of the triangle. Sew together to finish this summer top tutorial.

This tutorial on how to sew a summer top will give you two great ideas for the upcoming warm weather. Simple and pretty, both of these shirts are beautiful, one-of-a-kind designs!
The author may collect a small share of sales from the links on this page.


Comments
Join the conversation
simple, yet elegant
Great idea but only works well for those of you with a flat stomach and waist 😜. Looks great on you.