Learn 15 Different Ways to Transform and Customize Your Shoes

I am just obsessed with shoes! Rather than buy more pairs to add to my collection I decided to let my creative juices flow! Using a gorgeous black pair of stilettos, I came up with 15 amazing DIY high heel ideas. Each look totally transformed and customized the shoe. By the end, I had a shoe for every possible occasion! If you want to learn how I upgraded and restyled a pair of heels, this tutorial is for you! Follow my steps and learn how I found 15 gorgeous ways to refashion my shoes.
Tools and materials:
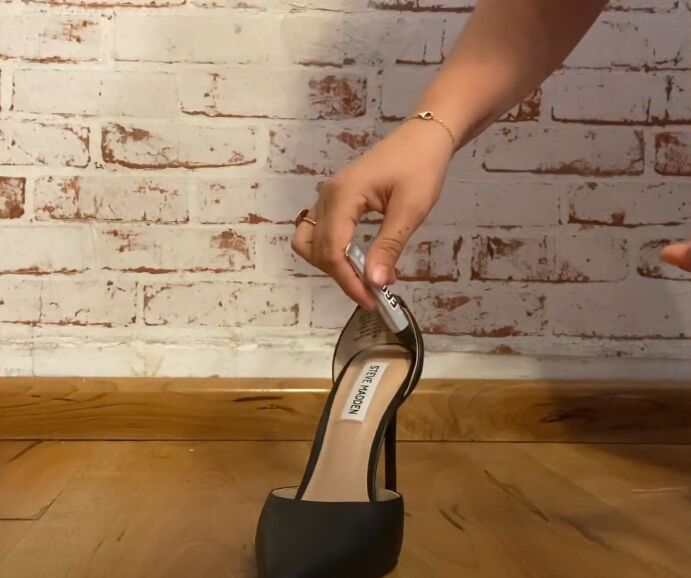
- Black heels
- Black string
- Black ribbon
- String of pearls
- String of diamantes
- Beaded fringe
- Feathered fringe
- Pearls
- Glitter socks
- Buckle
- Glue
- Scissors
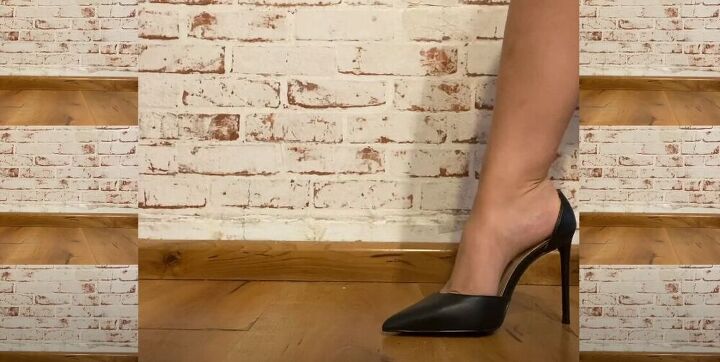
I had a pair of gorgeous black stiletto heels. I decided to get a little bit creative and I found 15 ways to totally glam up the heels. These different looks totally upgraded and customized my shoes and I am so obsessed with every last transformation!
For this first fashion upgrade, I tied a string of pearls around my foot to create a gorgeous pearl strap effect.
This look is so incredibly classy and I just love it!
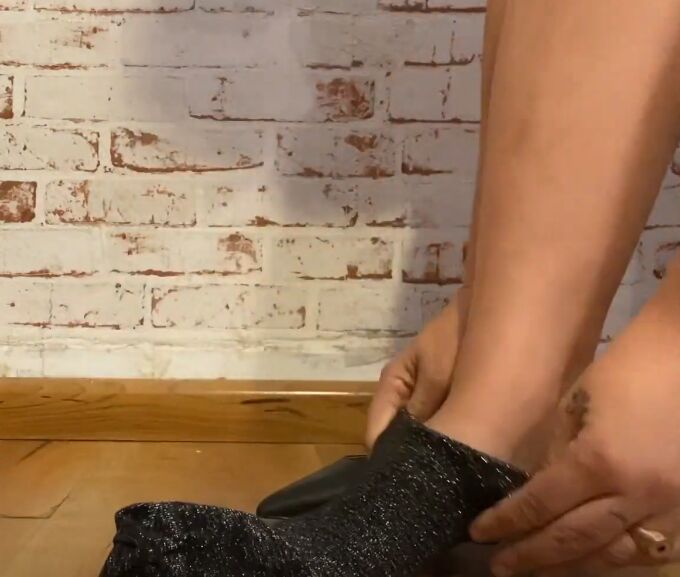
For this next style, I cut a small hole in the heel of a super-cute and glitzy sock. I pulled the sock over my shoe, with the heel coming through the hole I had just cut.
I was left with an amazing DIY pair of sock boots that are so in right now!
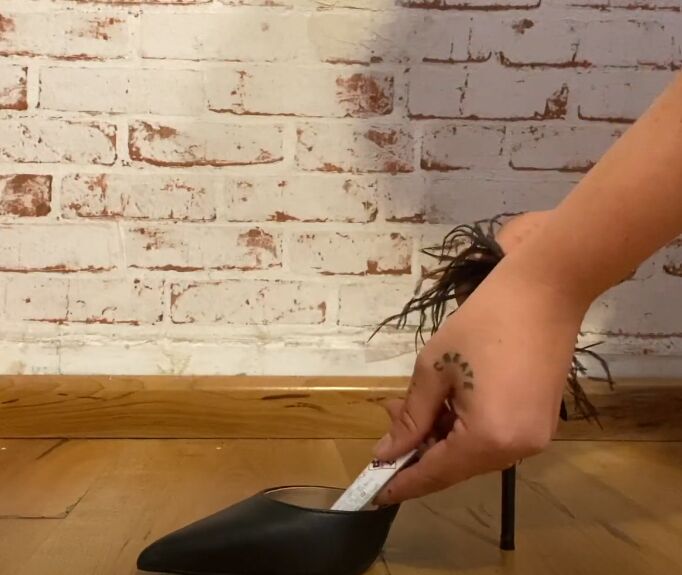
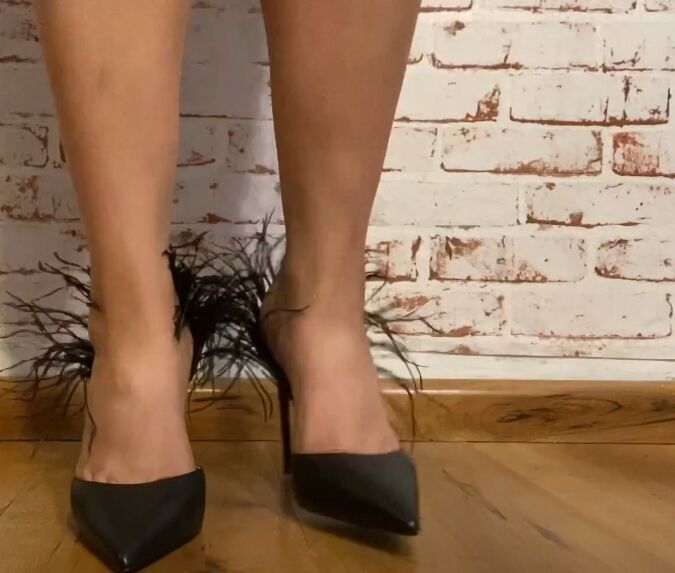
To create the next, amazing shoe style, all I used was a feathered fringe and some glue. I put the glue on the inside of the shoe and stuck on my fringe. I couldn’t wait for the glue to fry so that I could try on my refashioned heels!
I love the texture this fringe adds to the shoe! It totally creates an elegant look!
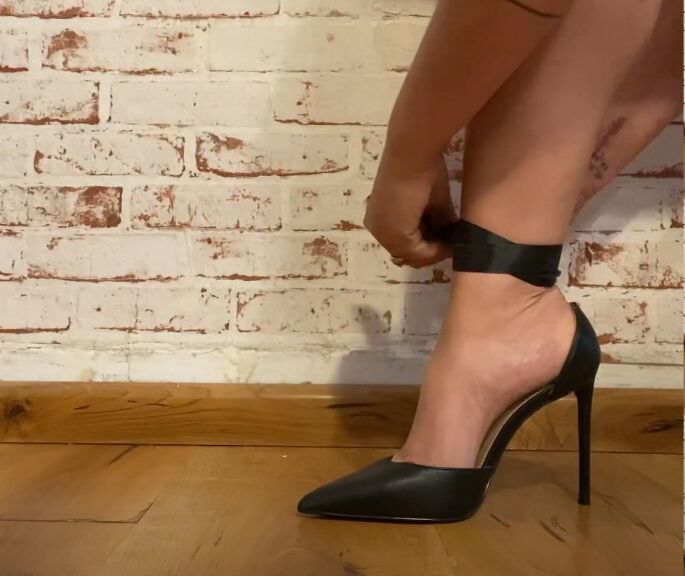
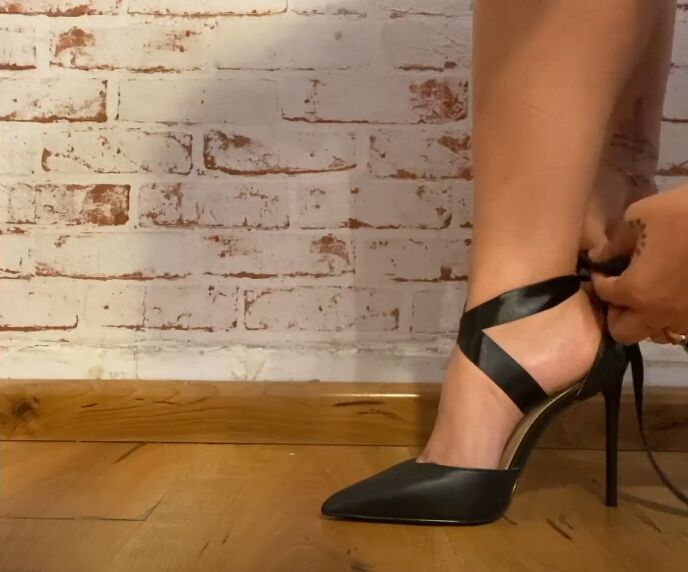
For this next style, I added a black silky ribbon to complement the black heel. You can always choose a different color to contrast the shoe. I tied the ribbon around my ankle to create the desired effect.
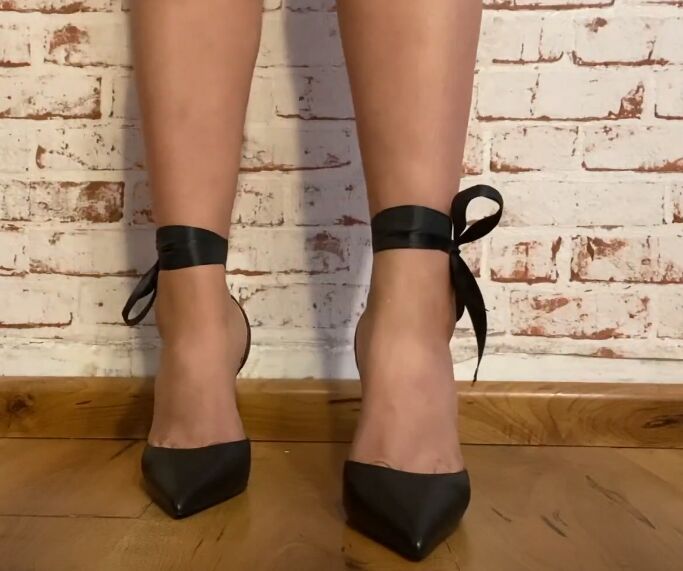
I adore this classic look! These stunning shoes are so easy to pair with any outfit!
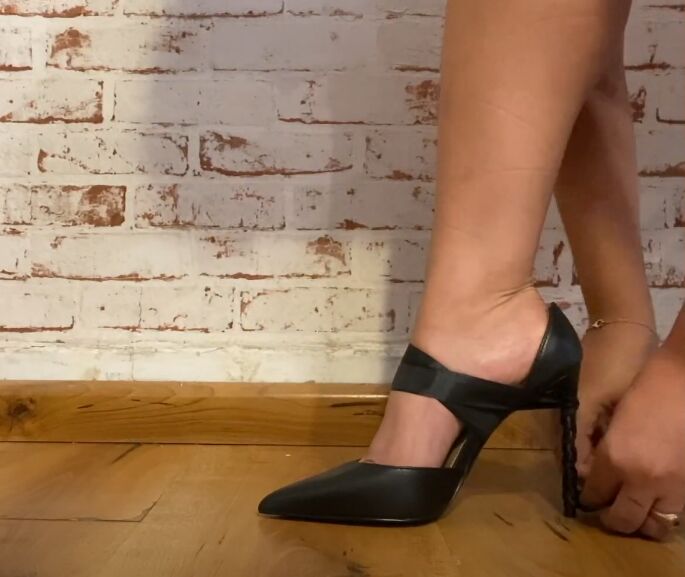
In this next look, I used my black ribbon and tied it around my foot, and then wrapped it around the heel of the shoe.
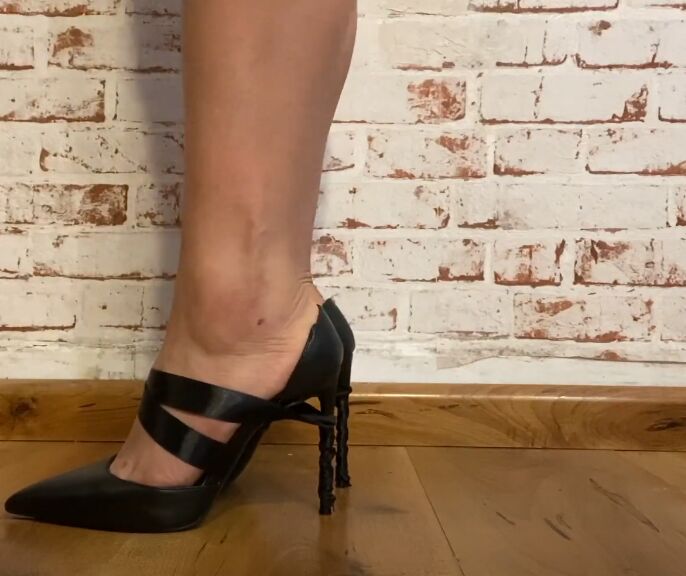
I love the small detail of wrapping the ribbon around the heel of the shoe. It makes this look absolutely gorgeous!
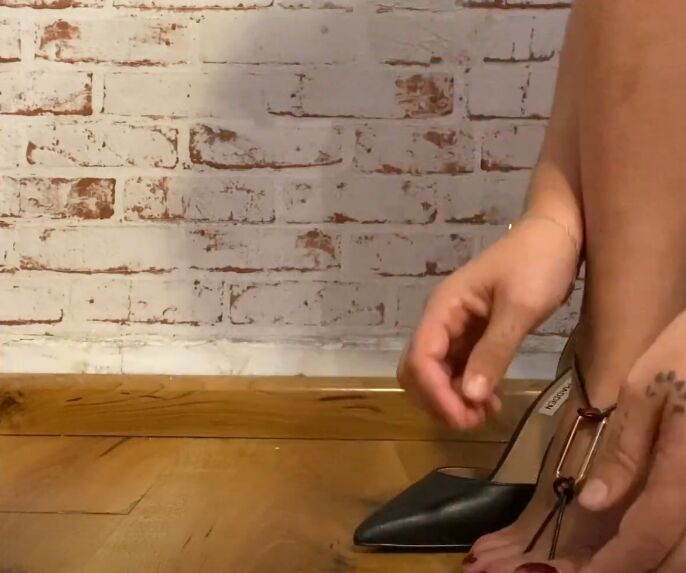
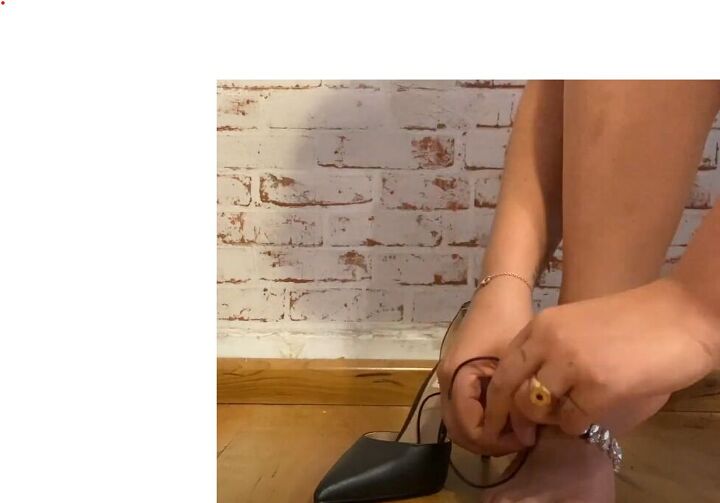
For his next shoe style, I tied two pieces of black string onto a buckle. One piece of string I tied around my ankle like a strap and the other I actually tied around one of my toes.
This look is totally stunning! You would never know my toes are holding it all together. It’s the perfect trick!
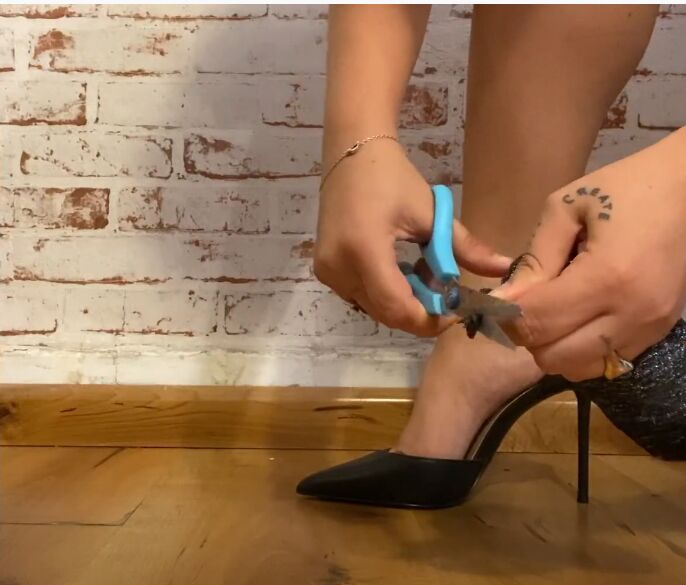
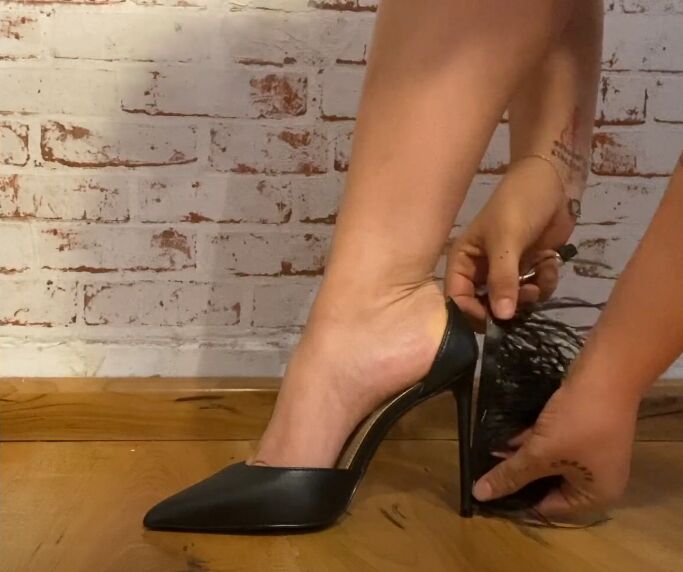
The next look I created was just amazing. I added some glue to the back of my shoes and stuck on a gorgeous beaded fringe. I trimmed the fringe a little so that it wouldn’t be too long.
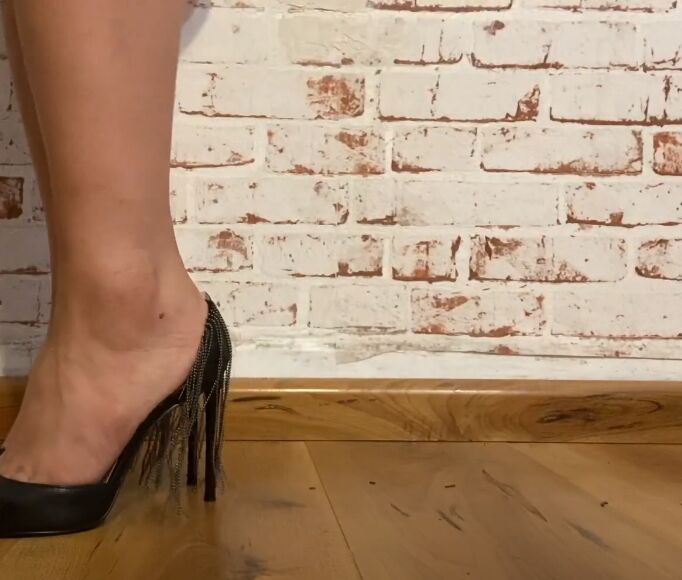
I absolutely adore this fun fringe look! It adds a 20s flapper style to any look.
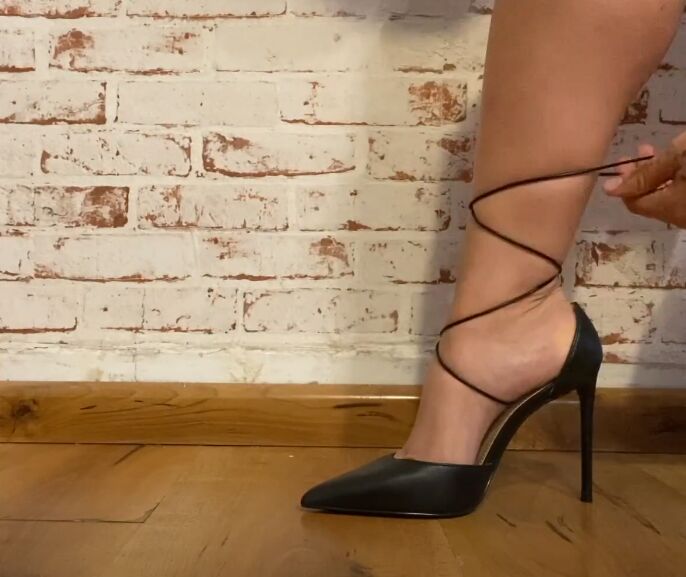
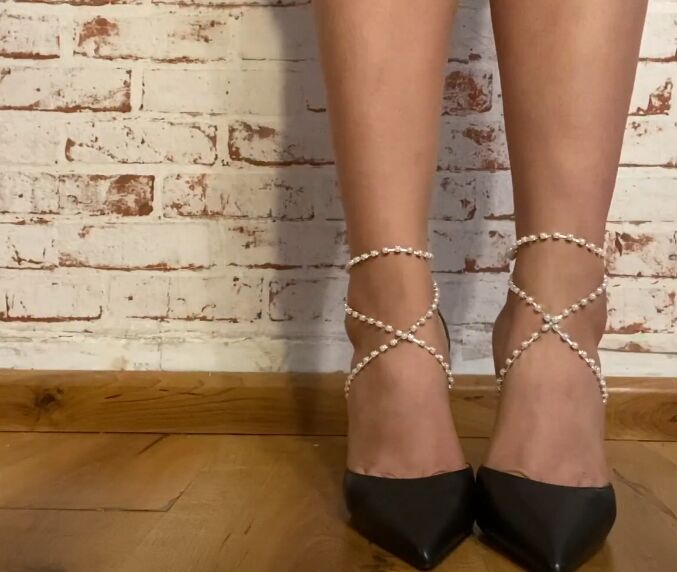
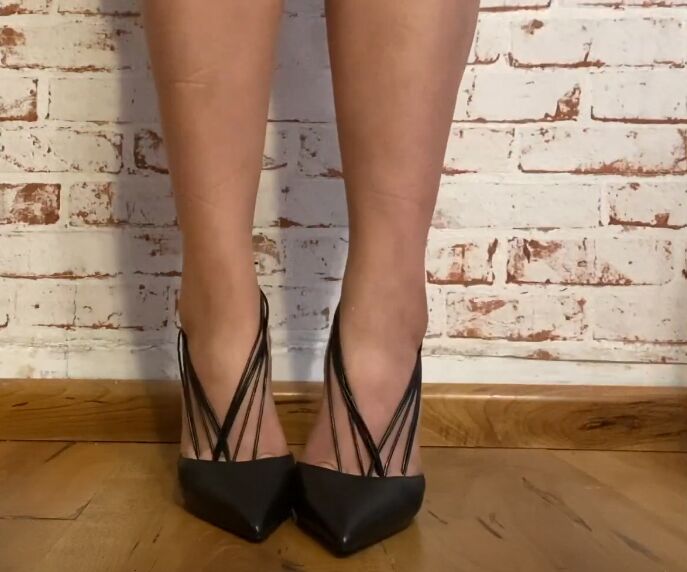
For this next look, I recreated the super popular criss-cross strap by tying a piece of black string under my foot and crisscrossing it on my leg.
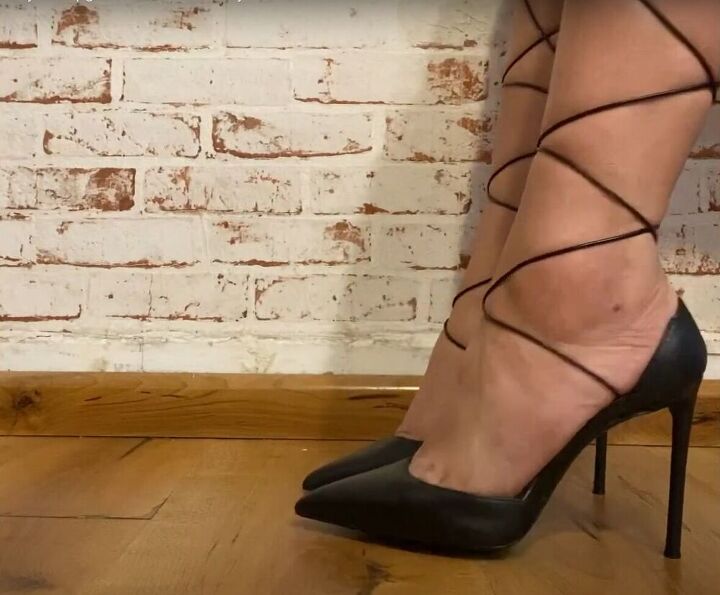
I love this criss-cross style! it’s the perfect balance between class and edginess.
For this next, elegant look, I crisscrossed a black ribbon around my ankle and tied a bow at the back.
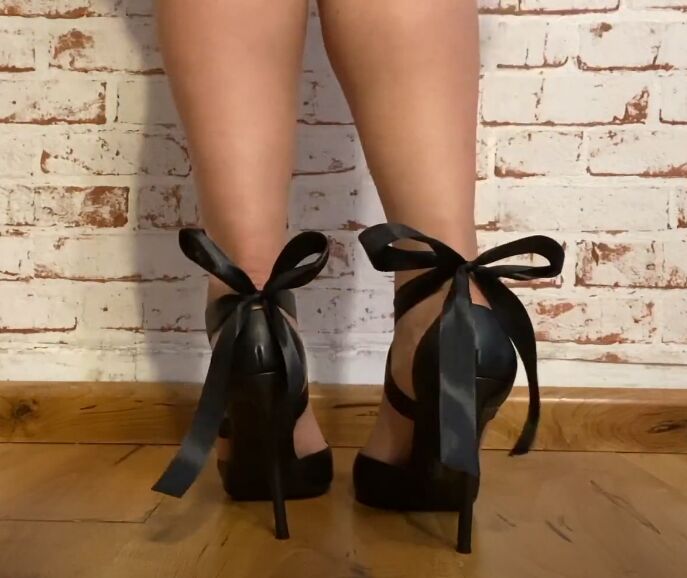
This style is seriously perfect for any elegant evening out!
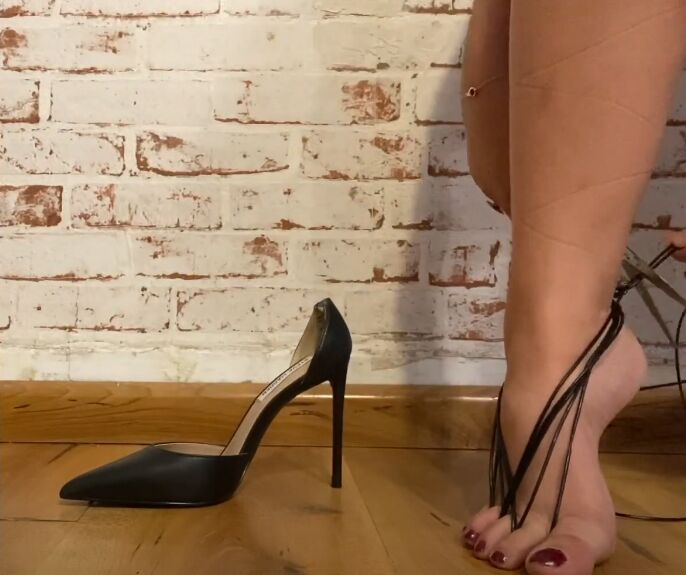
For this next, amazing heel style, I simply wrapped black string around my toes and angled them to create a multiple string strap effect.
This style is awesome! It totally gives a modern edge to the gladiator design. I just love this look!
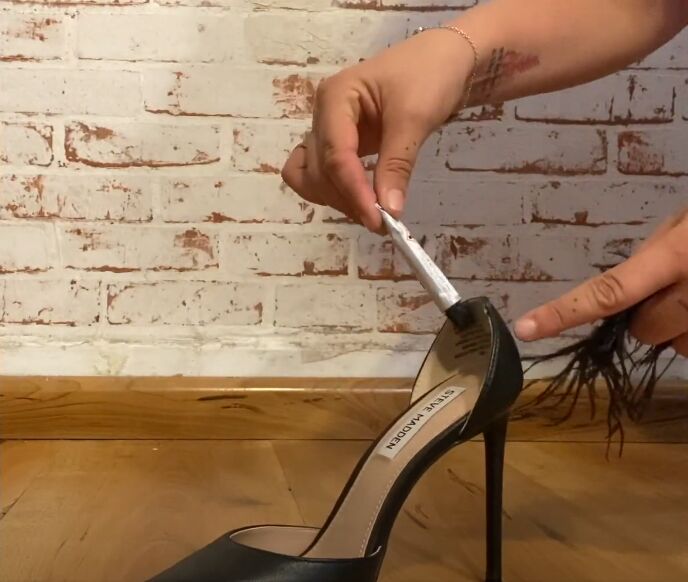
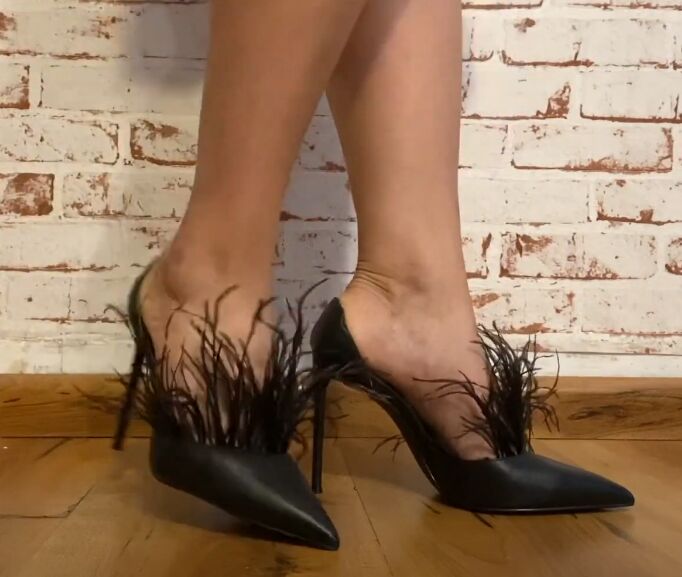
For this next style, I once again used a feathered fringe. This time I added glue to the inside, back of the shoes, and then stuck on the feathered piece.
This peacock inspired style totally gives me the confidence to strut my stuff!
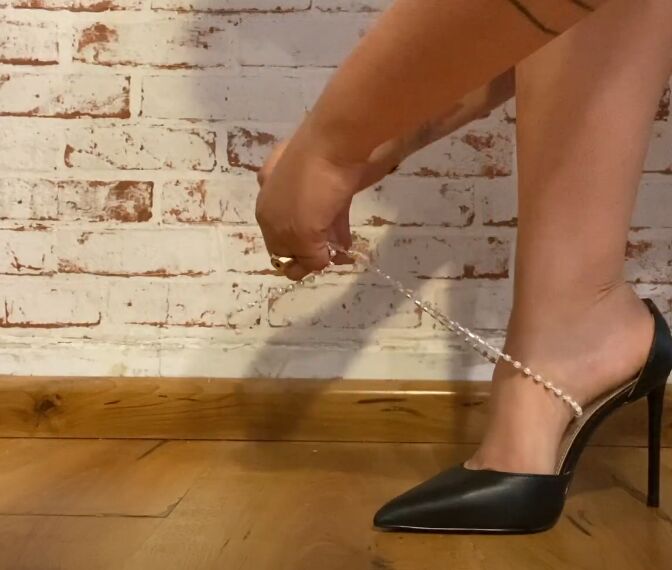
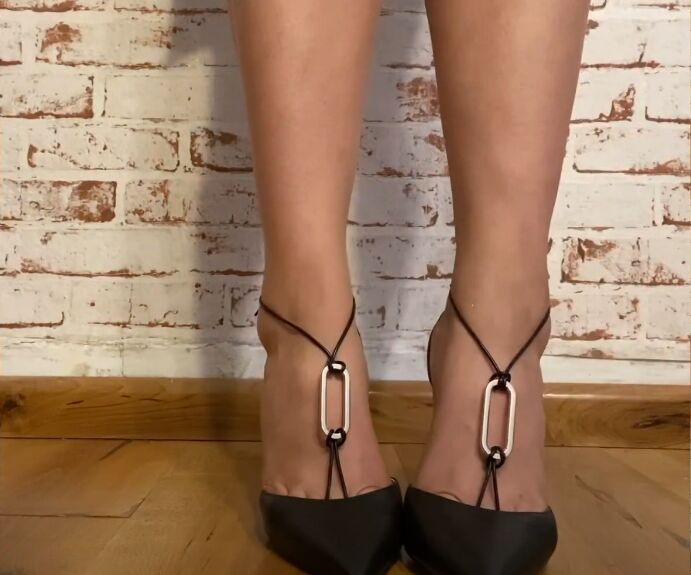
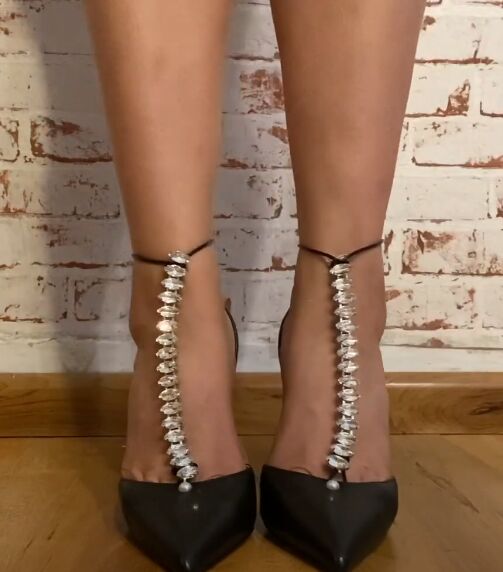
This next shoe style takes glam to another level. I tied black string to a string of diamantes which I then tied around my foot.
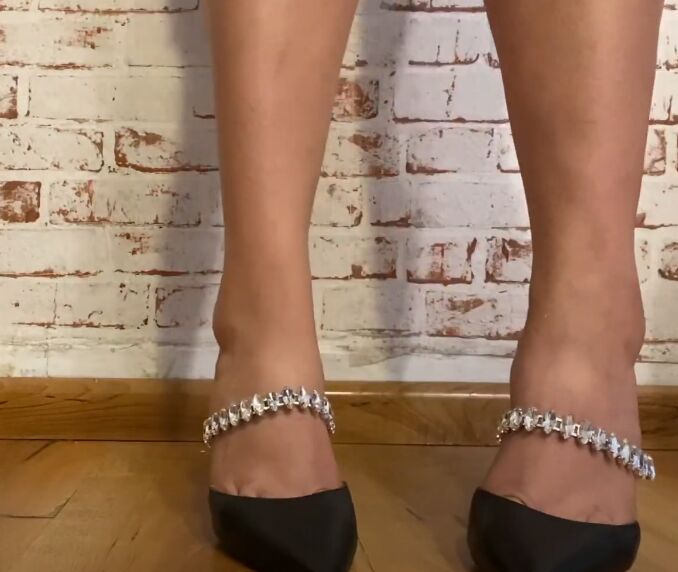
I am totally obsessed with the shine and glamour this style has to offer!
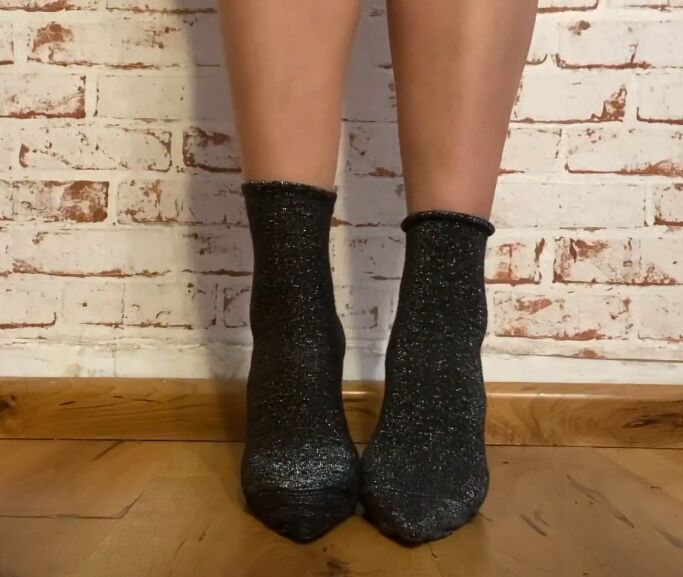
This style is so easy to recreate. All you need to do is put on a pair of black glittery socks.
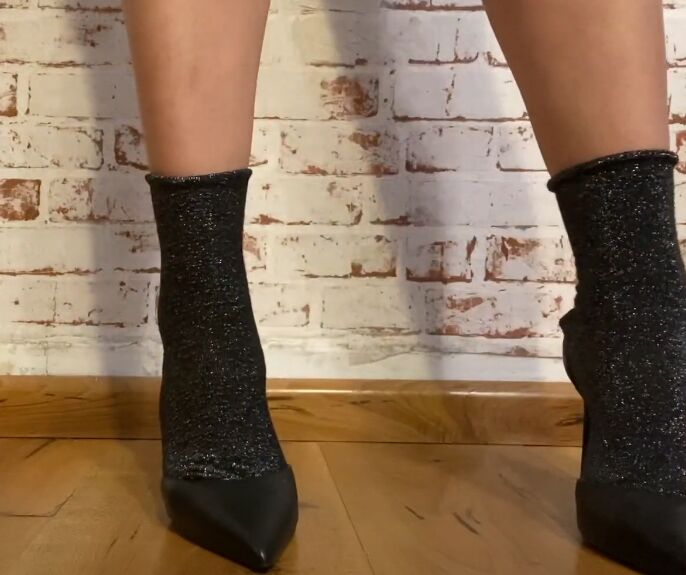
This simple shoe upgrade is so on-trend and out of the box!
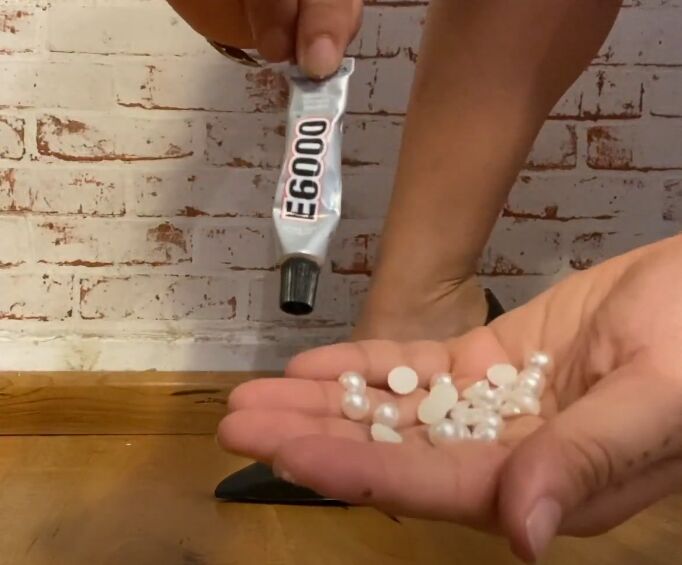
This next transformation is so much fun! I took some pearls and a bit of glue and totally bedazzled my stiletto heels. You can add as many or as little pearls as you want to recreate this look.
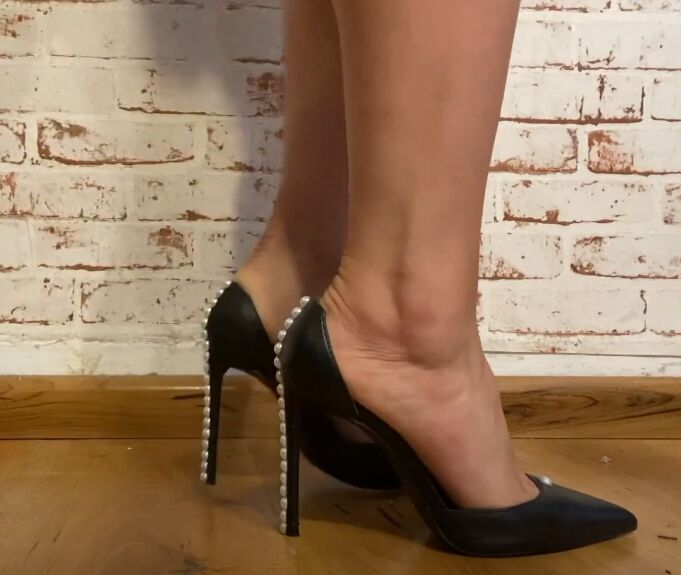
It’s amazing how such a small detail can add so much to the shoe. I just love this look!
This look reuses the stunning feathered fringe. I applied glue to the heel of my shoe and stuck on the feathered piece.

This look is so different and I just adore it! The feathers on the heel add some extra depth, creating a gorgeous, customized shoe.
As a bonus, I decided to mix up two styles. I added my diamante string piece to the bedazzled pair. Rather than tie it around my foot, I tied it around my toe and ankle. I totally love these two styles together. They are all the glitz and glam I could want!
I love how easy it is to customize a pair of shoes! Which style is your favorite? Let me know in the comments below!
The author may collect a small share of sales from the links on this page.


Comments
Join the conversation
You could do this on any size heel. So creative! Thanks for all the ideas.
Really cute ideas! Clever!