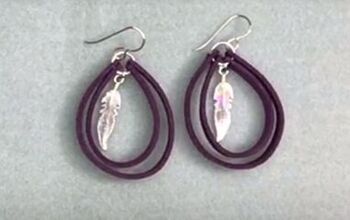
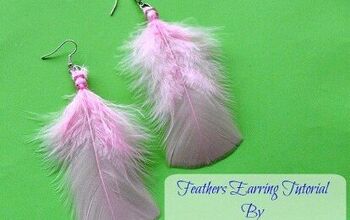
Make Paper Feather Earrings

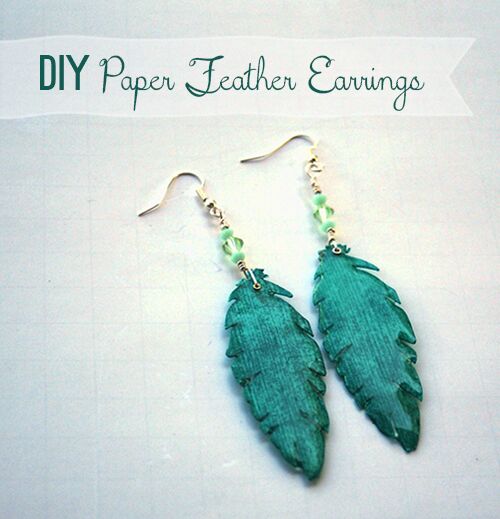
I heart paper and I heart feather earrings. It was only a matter of time before the inspiration to make paper feather earrings hit. That time is now. You can make your very own with just a few supplies…

So you may have heard me and my creative bloggy friends mention SNAP!, a conference that took place last month in Utah. It was amazing to meet these ladies face to face, and share ideas, laughs, even some dance floor moves. We get into the details, us creatives. You should have seen the business cards all dressed up with washi tape, glitter, clips, candies and on and on… Rebecca at the Crafted Sparrow embellished hers with little aqua paper feathers to hers.
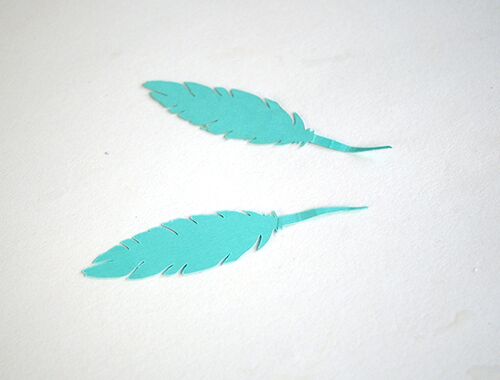
In all the room chaos, I must have ended up with my roommate’s Crafted Sparrow business card, but no fear. I put it to good use. When I got home and started sorting through my stash, I saw the 2 paper feathers and knew earrings were necessary. You can make them too, no problem. If you didn’t happen to get 2 of Rebecca’s cards with feathers, you can die cut your own, or just download this free feather template and use it to hand cut your feathers from pretty paper!
SUPPLIES:
- 2 Paper Feathers
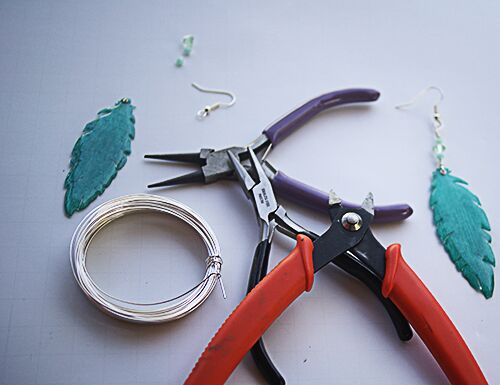
- 20 gauge jewelry wire
- Ear wires
- Beads or crystals of your choice for feather stem
- Tiny eyelet and setter
- Flat nose and round nose pliers
- Magic Glos Resin or Mod Podge Dimensional Magic
- Awl
- Wire cutter
TUTORIAL:
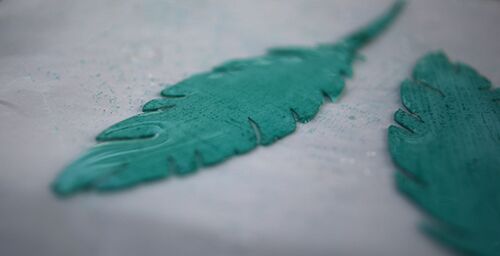
Apply resin to paper feathers. I did both sides (when one side dries, flip it over and do the other). For my thoughts on Magic Glos resin, check out my patriotic sprinkle earrings tutorial. You can also use Mod Podge Dimensional Magic or 2 part resin, but you will have to wait overnight for these to dry before moving on to the next step. With Magic Glos the wait is 20 minutes in sunlight or under a UV lamp.
Poke a hole in the tip of your feather where the stem starts, and set your eyelet. For the best explanation of how to do this with tiny eyelets, go to Retro Cafe Art Gallery’s post on DIY acrylic tags. That is how I did it, but I used a the pointy end of an aluminum crochet hook because I didn’t have an eyelet setter tool.
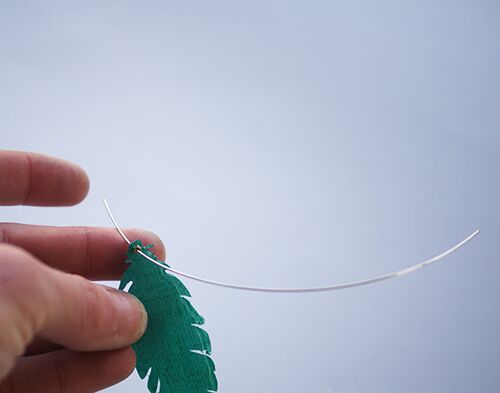
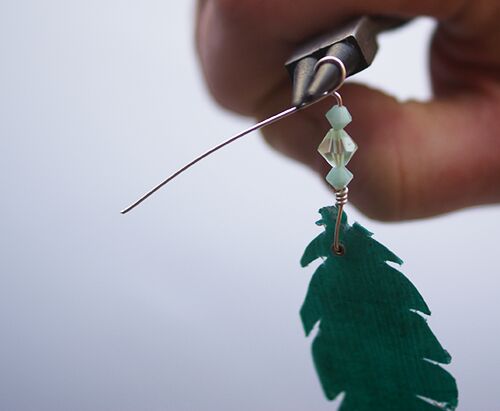
Cut about 5 inches of wire and insert into eyelet from front to back of feather.
Bend wire up with a one inch tail as in photo.
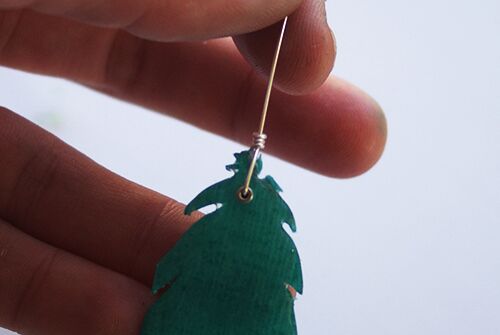
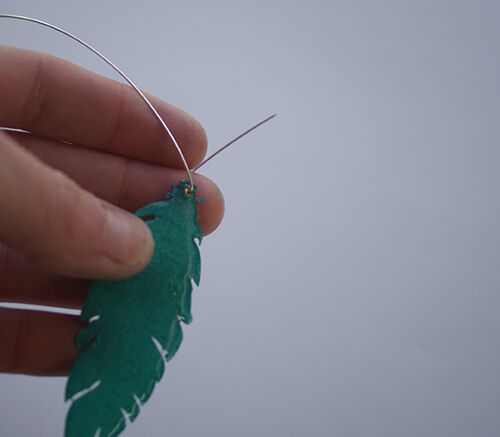
Loop tail around to form coil as shown. I wrapped four times. Cut off excess wire from tail if necessary.
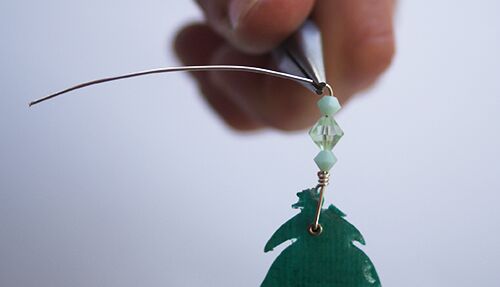
String beads onto wire on top of coil. I used 2 small faceted beads on either side of a larger crystal. Bend wire at 90° as shown. Leave a space between the bend and the top bead for coiling the wire (see below).
Loop wire around round nose pliers as shown.
TIP: When making earrings, I like to mark with a sharpie where on the pliers I wrap the wire so that I can make the loop on the next earring the same size.
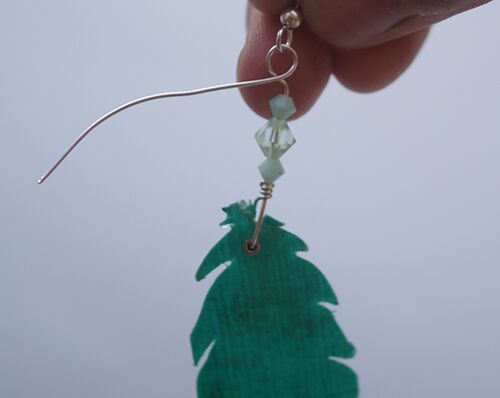
Slide ear wire finding onto loop, making sure you have it oriented so that when you put it in your ear, the side of the feather that you want to be the front is facing towards the front.
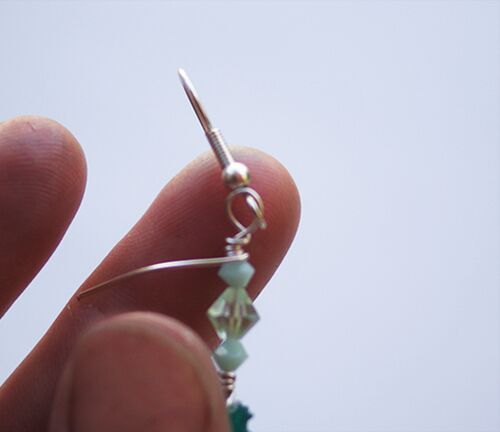
Wrap the wire to the top of the bead, forming a coil as shown. Clip the excess wire off with the wire cutter.
The author may collect a small share of sales from the links on this page.


Comments
Join the conversation
I have a couple of white skirts I want to do this to. Maybe even a couple of t-shirts! I love turquoise, so that will probably be my go to and instead.of black, I might use a navy blue for the bottom area! Thank you, I love it by the way!