A Beginner’s Guide: How To Make Lotion From Scratch (With Photos)
Hello, my lovely DIYers! Today I have a guide for you; we’re getting into homemade lotion, we’re taking it one baby step at the time and I’ll show you the entire process and all equipment that you need.
Just recently it was pointed out to me by one of our regulars, Mara (thank you!), that we have lotion formulations on the blog and articles about ingredients that can do wonders for your skin, but there are no guides on how to combine all that into a lotion/cream!
So, it’s a high time for a detailed guide here. Now, let’s get to it. I’ll take you through the entire process of how to make lotion at home. It will seem a bit much at first, but it’s not as complicated as it seems. Promise!
Let’s get one thing clear: the following method can be used to formulate all types of lotions; as soon as you’re combining water with oil, this method is what you need. With this method, you can make:
- All sorts of body lotions, moisturizers, and creams
- All sorts of facial moisturizers (such as gentle lightweight one), serums, skin creams that target specific problems
- Hair conditioners and masks
- Hand and foot creams
- Lotions/creams that target a specific area of the body
WE'LL TALK ABOUT..
1. Know this before you beginBefore you begin gathering ingredients and cooking up your DIY lotion, focus on the following:
- Think about the recipe: what do you want your cream to do?
- Write a recipe and leave enough space for notes
- Gather your equipment
- Clean and disinfect your equipment
- Prepare and disinfect your working area
- Clean and sterilize containers for the final product
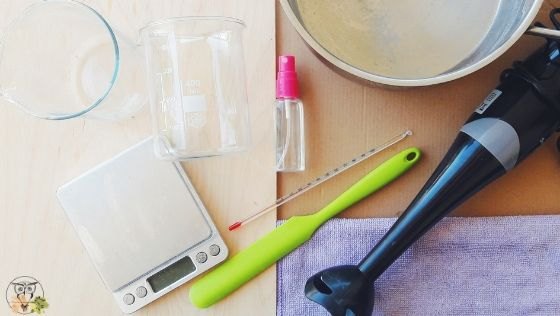
2. Equipment you needHere’s what I use every time I make a facial cream or a body lotion:
- 2 heat-resistant 400ml glass beakers
- A 0.01g scale
- A silicone spatula
- Rubbing alcohol
- Tiny measuring spoons
- Hand blender
- A wide pan
- A thermometer
- A cloth to wipe the beakers
3. A word about a scale and why it mattersThe scale is more important than you may think. You need to know the exact amount of ingredients you’re using or the final products can result in a mess. You can’t expect a successful final result if you add ingredients in tablespoons and ounces. Formulating requires precision and all ingredients, from distilled water to preservative play a role in your recipe. It’s important for them to be added in the correct amounts every time you make something.
Yes, making a simple face mask with 2 ingredients and some water doesn’t matter that much when it comes to measuring. But when making lotions and creams, it’s very important. Otherwise, you’ll have to deal with messy results and unstable products that you’ll be throwing out the window. According to MakingSkincare,
Professionals always measure by weight as opposed to volume. This means a scale must be used to measure all ingredients. Formulas listing drops, cups, teaspoons are a sign that the writer is not aware of basic scientific principles. Measurements in volume result in inaccurate, inconsistent batches and the specific gravity of each ingredient is not taken into account. For example, one cup of one type of oil will weigh differently from a cup of different oil due to specific gravity differences. On top of this, drop sizes, and therefore the weight of those, vary greatly. Professional formulas should always start in percentages and then are converted to the required batch size (weight). Percentages allow formulators to make sure the ratios between the ingredients are as desired, be able to scale up and down accurately and know how much of an ingredient is appropriate. For example, we know that for most people if glycerin is added at more than 3% it can feel sticky.
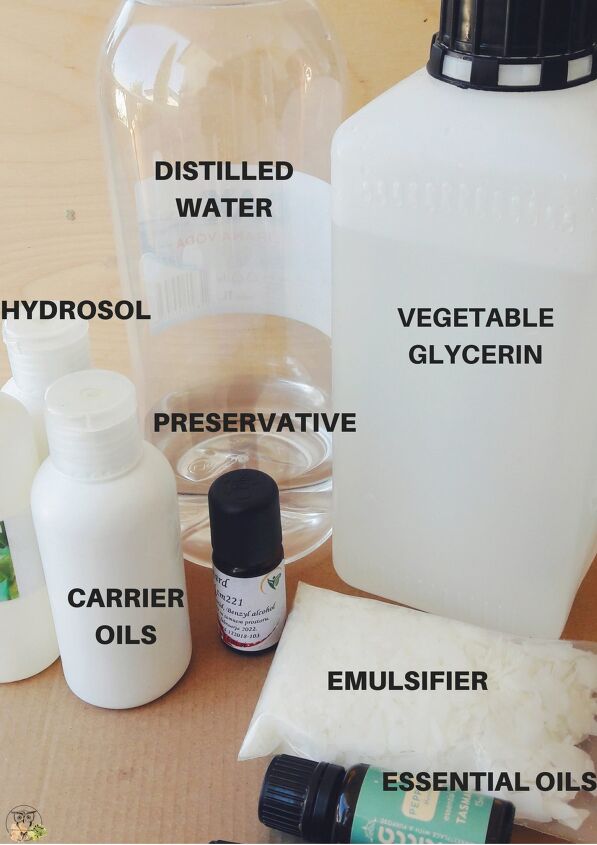
4. Gather your ingredientsBefore you begin whipping anything up, think about your lotion-to-be: what’s its purpose? What do you want it to target?
Do you want to make a light facial moisturizer? A light body lotion? Cream for dark circles? An easy hair mask or a nourishing hand cream?
Before you start formulating, do your research. Into the recipe, include the ingredients that will all work together to improve whatever you’re trying to soothe, heal, or hydrate.
The ingredients are there for you to use in your favor and make the most of them!
Preservatives
I’ve extensively talked about preservatives and why to use them here. But in short, preservatives are a must in water based recipes. They help to prolong the shelf-life of a product and keep all the nasty organisms out of your lovely facial creams.
Which one to choose? That’s up to you. I recommend you use a broad-spectrum preservative that will help to shield your product from a number of nasties. I use cosgard (geogard 221), but if you’re comfortable with a different one, feel free to use it instead.
A word of wisdom: glycerin, essential oils, rosemary extract, and other similar things are not preservatives. They won’t keep those organisms that spoil your products away.
Emulsifiers
Okay, emulsifiers are a good reason in DIY skincare to give anyone a headache especially when you’re first starting out. You can read an article from Formula Botanica on how to choose the right one. But read on before you do that!
Emulsifiers are basically agents that help to combine water with oil. You know that oil and water don’t naturally mix with one another. So, think of emulsifiers as “glue” or negotiators that help to smooth things out and make it all work well.
Some emulsifiers can be used on their own, others need a backup. They can get that backup in the form of a co-emulsifier. That means, if you want a great final product, you need to use two emulsifiers as one can’t stand on its own.
What’s more, it’s great that you add a thickener ( there’s so many of them!) to your formula to help stabilize an emulsifier. I normally use xanthan gum to help my emulsifier a bit. It’s also in the recipe below.
Now, when it comes to emulsifiers, I use Phytocream 2000 (INCI:Potassium Palmitoyl Hydrolyzed Wheat Protein, Glyceryl Stearate, Cetearyl Alcohol), which I adore to bits. It leaves the skin smooth, it’s easy to work with, and my emulsions are gorgeous.
But! I’m not sure it’s available in the USA (you can get it in Europe, though), so alternatively I also use Olivem 1000 (INCI: Cetearyl Olivate, Sorbitan Olivate). It’s lovely as well and it’s accessible in the States as well as Europe. You can read more about three natural emulsifiers for skincare here.
PS: beeswax is not an emulsifier
5. Understand how it’s done and write it downFirst of all, when you write a recipe, this is how you do it:
The amount of ingredients used has to come up to 100. For best effect, that’s 100%. Because when you’ll want to make different amounts of the recipe, it’s easier to relate to the percentage used than to grams. Trust me, I’ve tried!
Okay, so keep this 100 % for now somewhere in the back of your mind. You’ll need that in a moment or two.
Write down everything: big and small changes to the recipe, notes on how it works (or doesn’t) and all other info. You can’t believe how fast can you forget whether the amount of water you added was 10gram or 25!
Secondly, you have to know about the three phases of formulating. Think of it this way: when you list all the ingredients, separate them between the following three “stages” based on their properties:
1st phase: water phase(this is where you list all your water-based ingredients. In other words, here, list all the ingredients that are soluble in water)
For example, the following ingredients all belong to this first phase:
- Distilled water
- Different hydrosols
- Green tea extract, cucumber extract, peppermint extract…
- Urea, caffeine powder, vitamin B3…
- Humectants, such as glycerin
- Aloe vera juice, hyaluronic acid…
You can find out whether an ingredient is water-soluble by checking the info sheet from a supplier. If it says water-soluble, it can be used in this phase.
2nd phase: oil phase (this is where you list all your oil-based ingredients. All ingredients that dissolve in oil fall into this phase)
For example, the following ingredients all belong into the second phase:
- Carrier oils (almond, macadamia, grapeseed, argan, castor oil…)
- Butters of all sorts (shea, mango, avocado…)
- Emulsifiers and (some) waxes
- Cetyl alcohol, Cetearyl alcohol
You can find out whether an ingredient is oil soluble by checking the info sheet from a supplier. If it says oil-soluble, it can be used in this phase
*note that some carrier oils are heat sensitive and should be added to the final phase of the formulation. If they’re exposed to heat, they lose the components and benefits.
3rd phase: cool-down phase(there are ingredients that are heat sensitive. These always go into the last, cool-down phase of your formulation. When making an emulsion, you wait for it to cool down to 40 degrees or less before you add any heat-sensitive ingredients.)
For example, the following ingredients belong to the final phase of crafting:
- Essential oils
- Certain carrier oils (rosehip, hemp, …)
- Preservative
- Other ingredients that are heat sensitive
*And how do you know what’s heat-sensitive? Well, you should get a paper with information when you purchase an ingredient from a supplier. If you don’t have that info, browse online)
6. An example: body lotion formulationNow, let’s combine all that you’ve learned so far. Here I’ve prepared a basic DIY lotion recipe to give you an idea on how and why and when.
Remember, we want to stick to a magic number of 100 when designing a recipe! So here we go. For a 100g body lotion we’d need:
Water phase (83%)
- 50.6g Distilled water
- 30g Peppermint hydrosol
- 2g Vegetable glycerin
- 0.4g xanthan gum
Oil phase (16%)
- 5g Emulsifier (Olivem1000)
- 5g Mango butter
- 6g Grapeseed oil
Cooldown phase (1%)
- 0.5g Preservative (Cosgard)
- 0.5g Essential oils (half lemongrass and half cedarwood)
Notes:
- always use distilled water, never filter or tap water
- hydrosol in the recipe is optional. It adds a lovely scent and a touch of variety (so that it’s not just all water), but you can omit it in certain recipes if it has a role of improving scent/appearance and not for its properties/benefits
- xanthan gum is here as a support for the emulsifier. It helps to keep the emulsion more stable.
- Oil and butter choices are optional: I went with easy and lightweight ingredients but you can change those to your likings (shea butter, apricot kernel oil, sweet almond oil and no butters…). More oils you add to the recipe, the thicker/richer the final product will be
- Essential oils are also optional. You can substitute my choices with your preferences or omit them altogether
- If you omit an ingredient from the recipe, you have to substitute it with a different one (essential oils with more carrier oil, hydrosol with more distilled water…)
- Before you add a preservative, you have to test your product for pH. This can have an enormous influence on the final cream as many ingredients are actually pH-sensitive. You can test pH with test strips.
When you count the amount of all ingredients that you’ll include, you come up with a number 100. This is the best way to formulate any recipe. Wondering why percentages? Marie from Humblebee&Me explains:
Percentages (by weight!) are a universal language. Working in percentages is the first step to understanding how different types of formulas are structured.
For example: say you find a recipe that calls for 4g polawax, 12g shea butter, and 4g argan oil for the oil phase, and you want to know roughly how thick/rich the cream will be. You have no way of knowing with that information.
However, if it was listed as 4% polawax, 12% shea butter, and 4% argan oil, now you know a whole lot more. You know the oil phase is 20%. That’s a decent sized oil phase, and with the bulk of it being shea butter you know that this will be on the thicker, richer side of things—but likely not too thick as we typically have to go upwards of 25% oil phase to get very thick, rich feeling end products.
7. How to make lotion from scratch: a photo guide
- Gather your equipment, disinfect it, prepare and clean your working area
- Prepare a pan, fill it with water and place on a low-medium heat
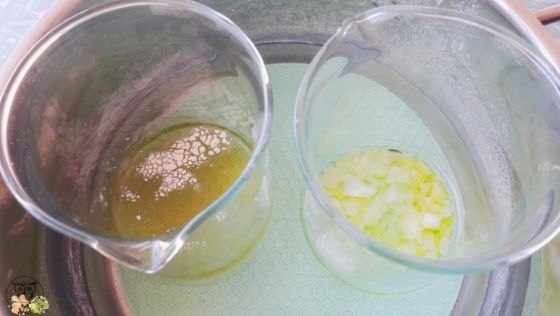
- Take a heat-resistant cup, place it on the scale and begin adding and weighing water-based ingredients into the cup
*after you prepare your water base, weigh the beaker with its content on the scale. Why? Once you pop it into the water bath, a certain amount of water will evaporate. Before you make your lotion, you have to return that lost water into the cup. Don’t forget to write that number down, you’ll need it in 20 minutes!
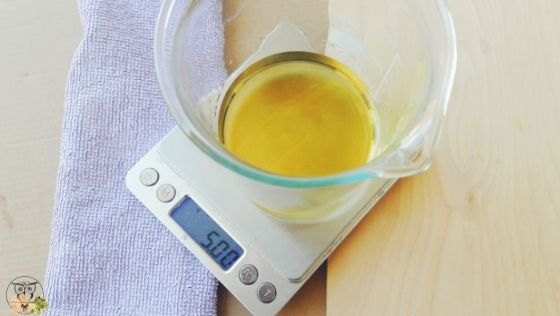
- Take another heat-resistant cup and do the same with oil-based ingredients (you don’t have to weigh anything after, these won’t evaporate!)
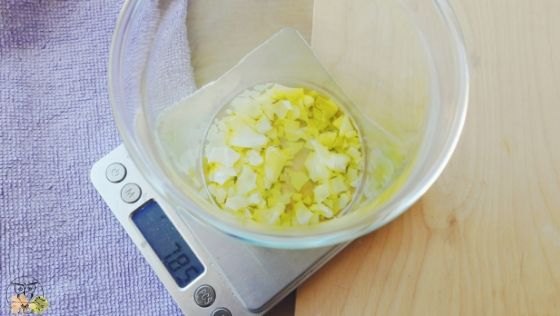
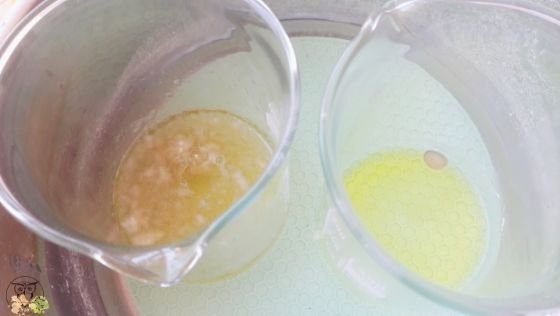
- Place both beakers into the pan
- Wait 15-20 minutes for all the ingredients to fully melt
- In the meantime, prepare your hand blender and ingredients that you’ll include in the final phase
- Remove both beakers from the pan; gently wipe them with a clean cloth
- Pour water-based mixture into the oil mixture and begin mixing
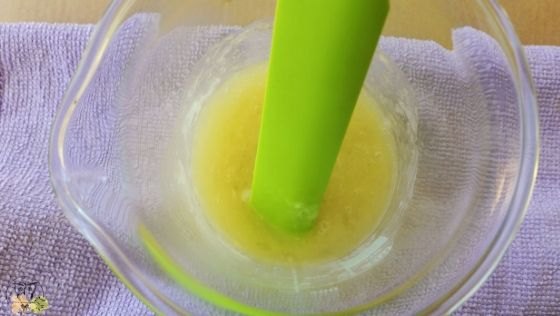
- With a hand mixer, mix for 2 to 5 minutes
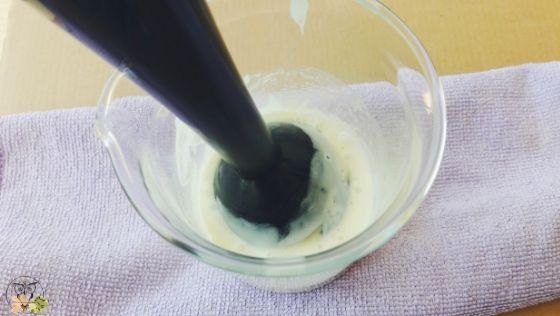
- Let the emulsion cool down to 40C (this may take up to 30 or more minutes, depending on the amount of cream you’re making)
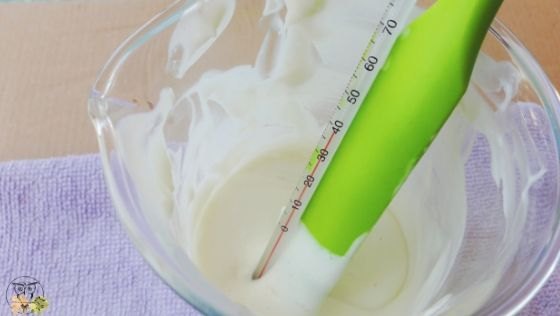
- Once cool, add all ingredients (apart from a preservative) and whisk the emulsion well
- Add preservative, stir well
- Transform your cream/lotion into a container
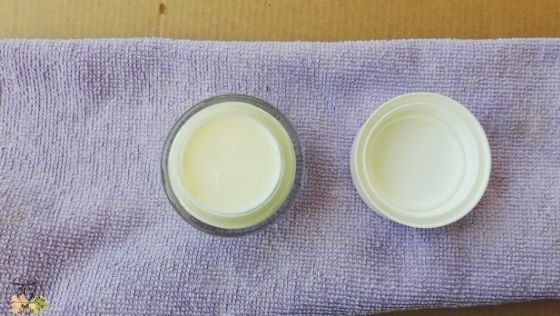
And there you go! You’ve just made your first lotion from scratch! How do you feel about that? It’s pretty awesome, right!
Hopefully, you’ll find this guide helpful enough! Feel free to leave comments below. If you make anything Wild-for-Nature based, post to Instagram and tag! We want to spread our
Help support Wild for Nature
Many of you have asked if there’s a way to help support Wild for Nature. I’ve signed up for Buy Me Coffee. If you love what I do, learn from me, sell anything you made from my recipes, and want to see Wild for Nature grow even more, I’d be thrilled if you’d consider buying me a coffee! It works as a one-time or a monthly donation of $3. You can also get beautifully designed PDFs with a series of recipes and other resources I publish there, to help you learn and get creative at home! I can then use that money to further develop and grow Wild for Nature and you can help me continue with wild creations and resources!
The author may collect a small share of sales from the links on this page.


Comments
Join the conversation
I'm impressed but probably won't do this.