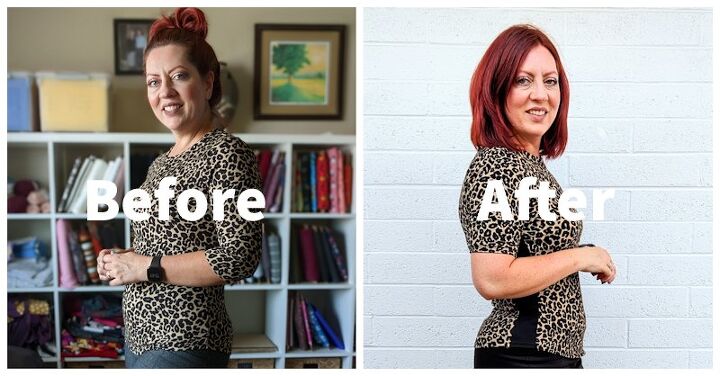
Adding Inches to Your Favorite Stretchy Shirt!

We all know that feeling, when you have a shirt you love but never wear cuz it’s a smidge too tight. I have several shirts like that. When they are too tight they ride up which can be uncomfortable for some people. Just a couple extra inches can make a huge difference. Keep reading to see how you can add a little more room and some cute contrast to those stretchy tops we all love.
The Shirt!
This top fit just fine a few years ago. However, over the last couple years it has gotten a little tighter. Not that I’m opposed to a tight shirt, I just don’t like the way it rides up now. If it was just a couple inches wider it would still look nice, but stay in place better. So this is what I did and I plan on doing it to a few other shirts very soon too.

Measure the Sides!
With this shirt I wanted the sleeves to be a tad shorter. So I cut the sleeves first. Then I measured from the edge of the sleeves to the armpit and then down to the shirt hem. It measured 21.5 Inches. To account for the hem I added 1 inch to that measurement. This is for the strip of fabric that will be inserted into the side of the shirt. It needs to be at least 22.5 inches long.
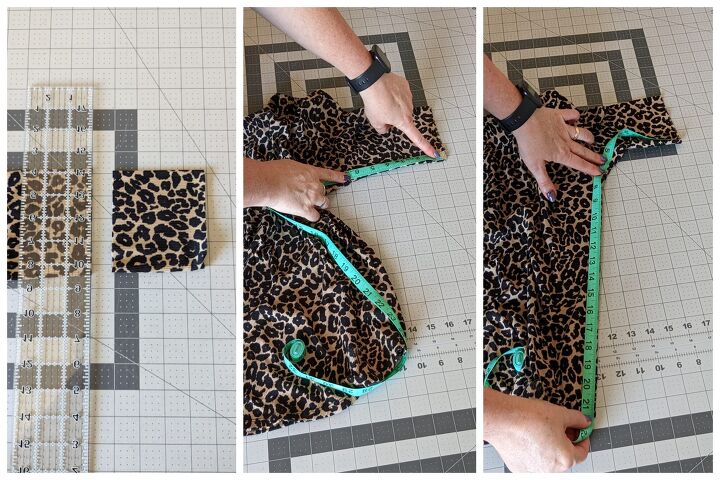
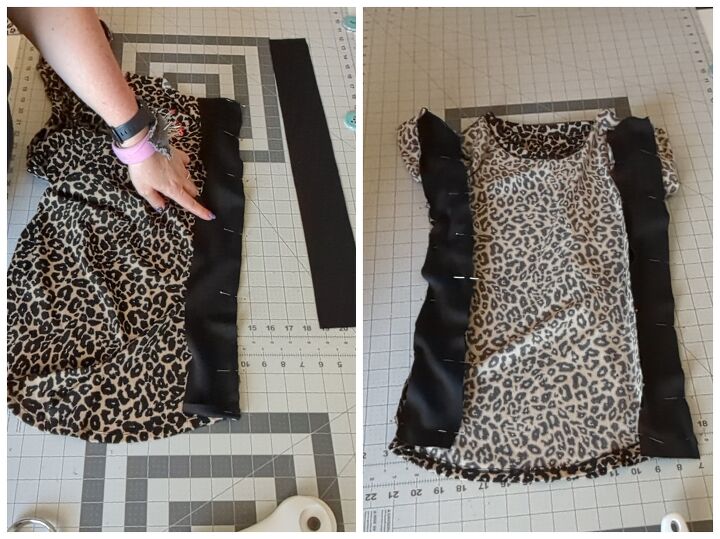
Open the Sides!
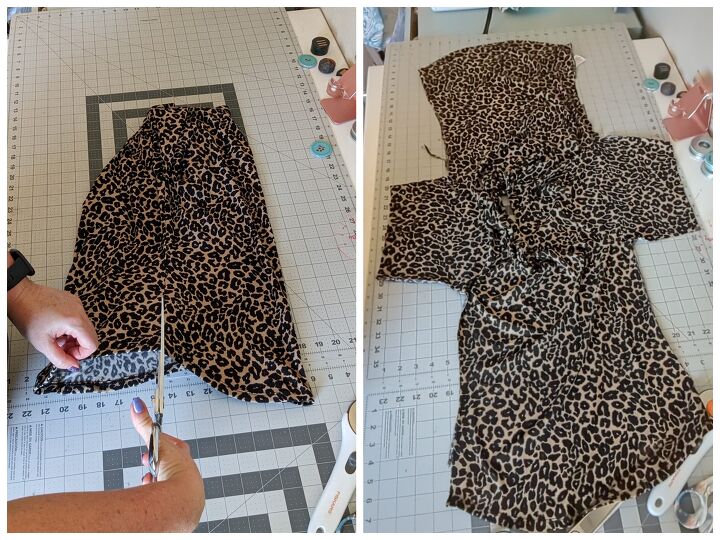
You can either use a seam ripper or scissors to open the shirt sides from the shirt hem to the end of the sleeve. The seam ripper will help you keep as much width as possible. You lose a little width when you use scissors. I used scissors because I hate seam ripping and I planned to make the strip of fabric wider to account for the width I lost by using scissors.
Grab Some Knit Fabric Scraps!
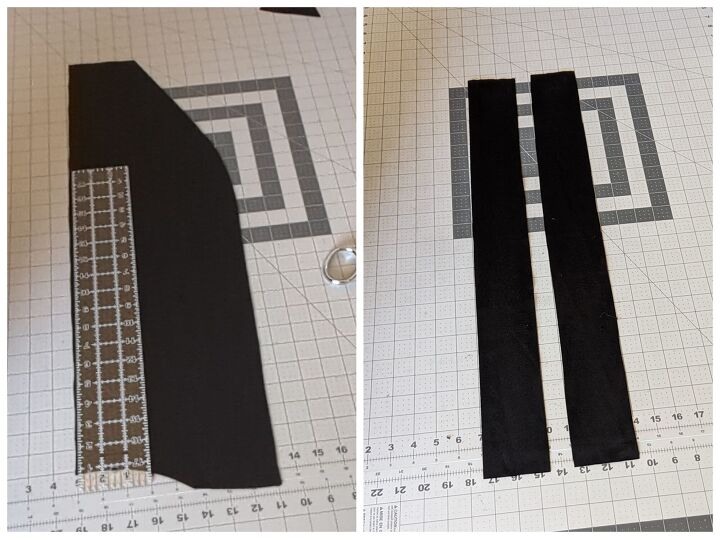
Now you can really have a lot of fun with this part. You can mix prints or use a bright solid knit. I grabbed some black knit fabric from my scrap selection because I knew I would wear it more if it was black. Then I cut a 3in x23in strip of fabric. Make sure you cut the fabric so the stretch will stretch “around” not lengthwise. If you used a seam ripper to open the sides you could probably get away with a 2 inch strip of fabric. It all just depends on how much width you want/need to add to your shirt.
To pin the strip of fabric into the side make sure you account for the hem allowance. Then pin it in place evenly all the way to the sleeve. Once you have it attached to both sides of the shirt, sew it on using a narrow zig zag or lightening stitch so that it can stretch.
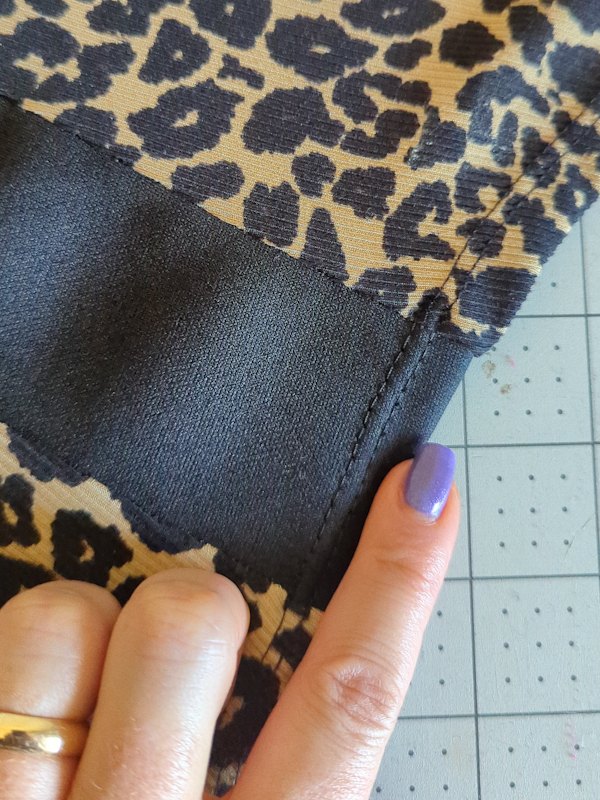
Hem the Side!
Then you can use a twin needle to hem the stripe so that the stitching matches the previous hem stitch. If you need help using a twin needle check out my YouTube video here.
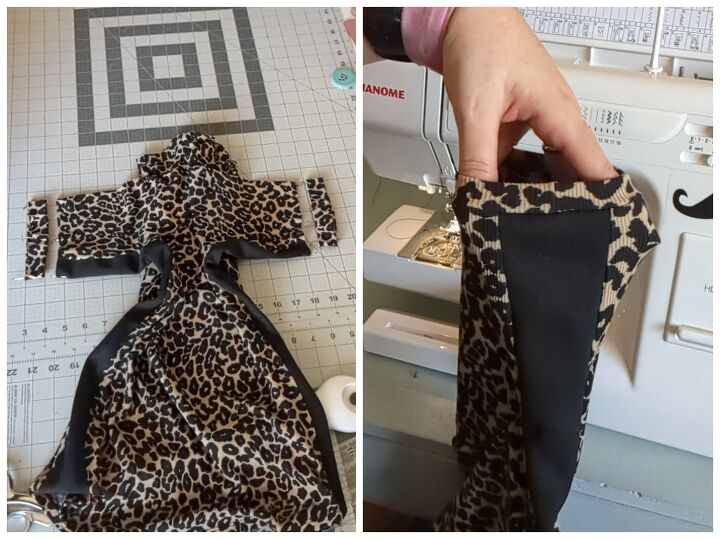
Optional Sleeve band!
This next part is optional. Because I used kit fabric I didn’t really need to hem the sleeves. This fabric doesn’t fray or roll, but I wanted a nice finished look. So with the fabric I cut off the sleeves to make them shorter, I made a two inch band. I folded it over and attached it to the bottom of the sleeve. I really like the look of a sleeve with a band so this was what made it feel finished for me.
ALL DONE!!
That’s it! This took 35 min to do. Even though it doesn’t look like it has a lot more room, it feels a lot better when I wear it. I’m less self conscious about it staying in place and riding up throughout the day.

I have no worries about wearing it with pretty much any style of bottoms I have

The author may collect a small share of sales from the links on this page.


Comments
Join the conversation
great im gone try it. i love the different styles that one top made.
Last week I was cleaning my closet and found some blouses, that don’t fit anymore and I have the same idea. I bought some black stretch material (for my curves), know with your tutorial, help me to got better looking of the project. Thanks!😃