COLOR BLOCK SWING TEE TUTORIAL


white plum sweater, c/o
swing tee made by me (similar here)
similar jeans ( splurge or save)
glimmer lane clutch, c/o (on sale!)
PHOTOGRAPHY BY JANA LAURENE
Happy Halloween!! I don’t know about you, but the weeks here are flying by and somehow it’s already time for another DIY Friday — I can hardly keep up! But today I’m excited to show you a fun and easy refashion to make a shirt that is perfect for the Fall. The mix of fall colors in this top combined with this big chunky cardigan just screams Autumn to me!
(And if you’re looking for some Halloween inspiration for tonight, you can see all my Halloween projects right here!)
Find the full tutorial after the jump!

Materials:
T-shirt (mine was a basic tee like this one)1/4 yard orange silky fabric
1/8 yard maroon silky fabric
1/8 yard green silky fabric
matching thread

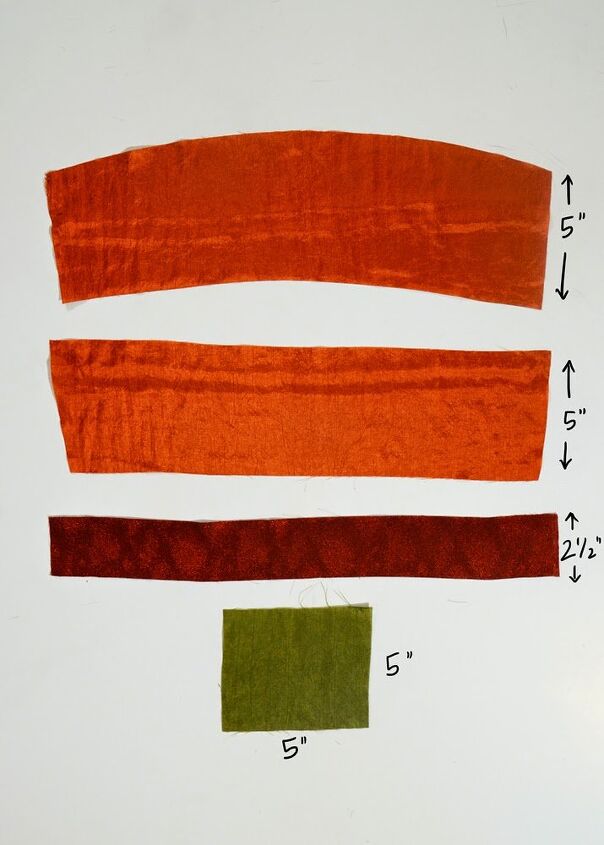
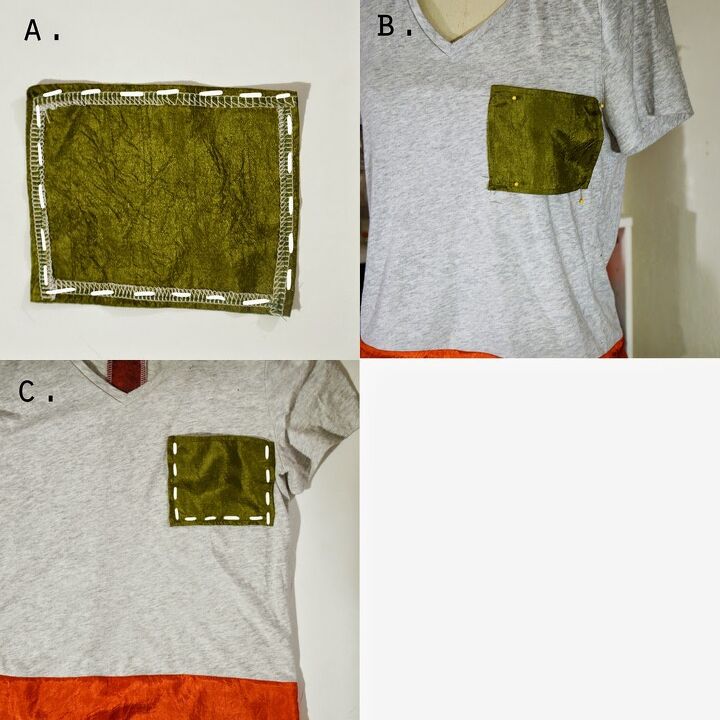
Step 1. Cut your materials first. Measure the hem width of your t-shirt and add one inch to that length. Cut two strips of your orange silky fabric in that length, and 5 inches in length (add more length if desired), making the back piece slight rounded. Measure the length of your t-shirt, down the back, from the neckline to the hemline. Add one inch, and then cut a strip of fabric in that length, and about 2 1/2 inches wide. And finally, cut a pocket to your desired size. Mine was about 5″x5″.
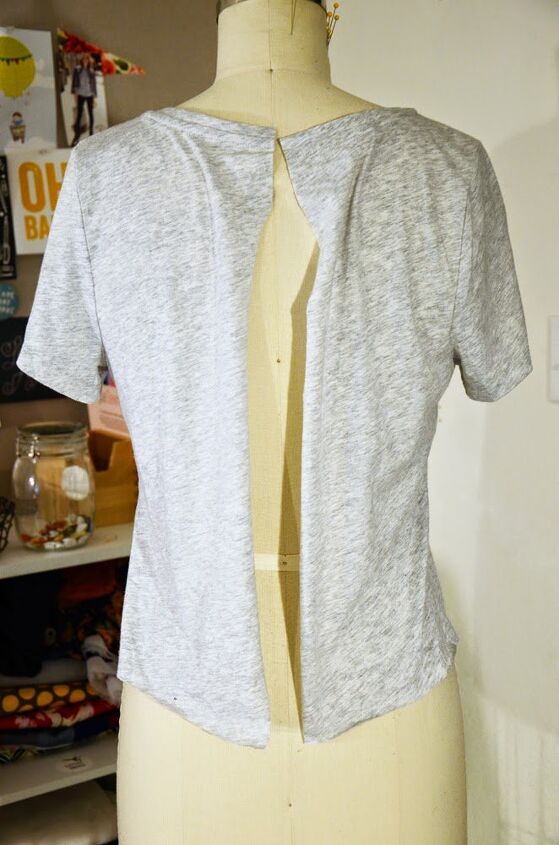
Step 2. Cut the back of your shirt open from neckline to hemline with a straight cut.
Step 3.
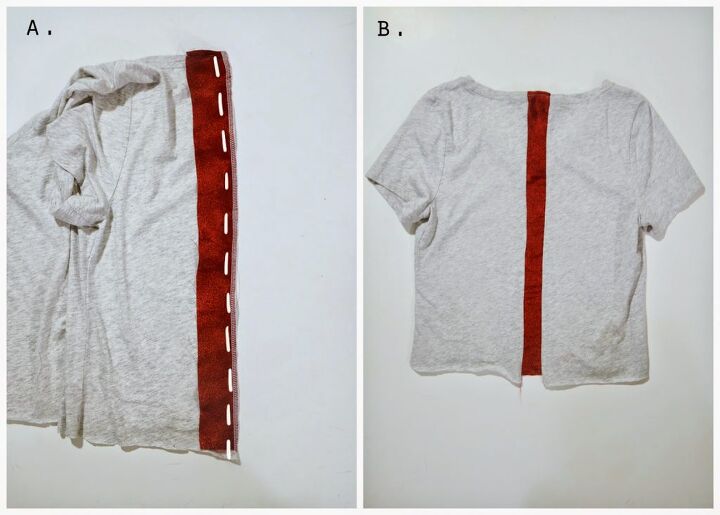
A. Hem the top of the maroon strip of fabric, and then with right sides together, sew it to the t-shirt with a straight stitch.
B. Repeat for the other side of the strip, so the strip runs down the middle of the shirt. Press flat.
Step 4.
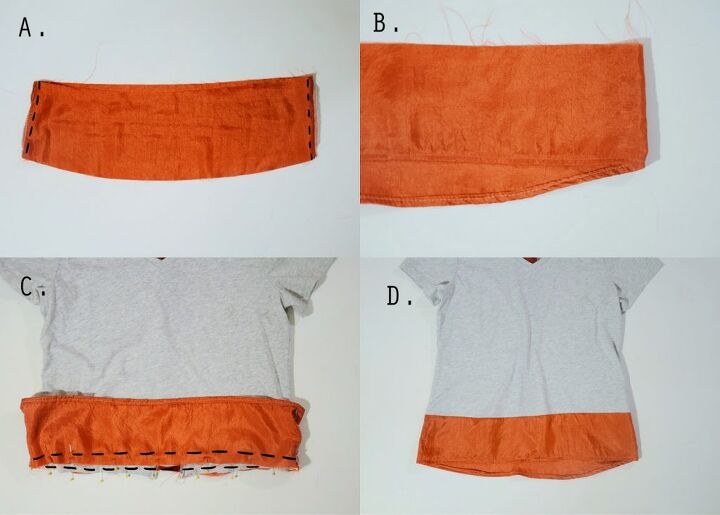
A. Take your two orange pieces and, with right sides together, sew them up on the sides.
B. Fold the hemline twice and hem around the entire thing.
C. Once the orange fabric is sewn in place, pin it around the hemline of the shirt, with right sides together.
D. Press in place.
Step 5.
A. Time for the pocket! Press in the seam allowances for your pocket and then sew completely around the pocket to secure.
B. Try on your shirt and determine your pocket placing, then pin in place.
C. Now sew around the pocket (except for the top) with a straight stitch, attaching the pocket to the top. Press, and you’re done!


The author may collect a small share of sales from the links on this page.


Comments
Join the conversation