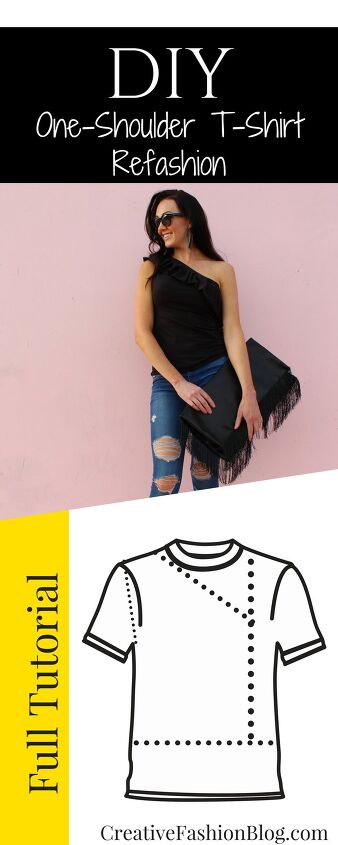
Make This DIY Ruffle Shirt From An Old TShirt
This post may contain affiliate links for products I love and recommend.
Guys! I have been soooo excited to show you this Ruffle Shirt DIY. Today’s tutorial is a more feminine, pretty take on your basic t-shirt refashion. Is it just me or often, do t-shirt refashions start to look a little unfinished and sloppy? With this DIY, I’ll walk you through each step to create a polished, more finished look you’ll be excited to wear every day.
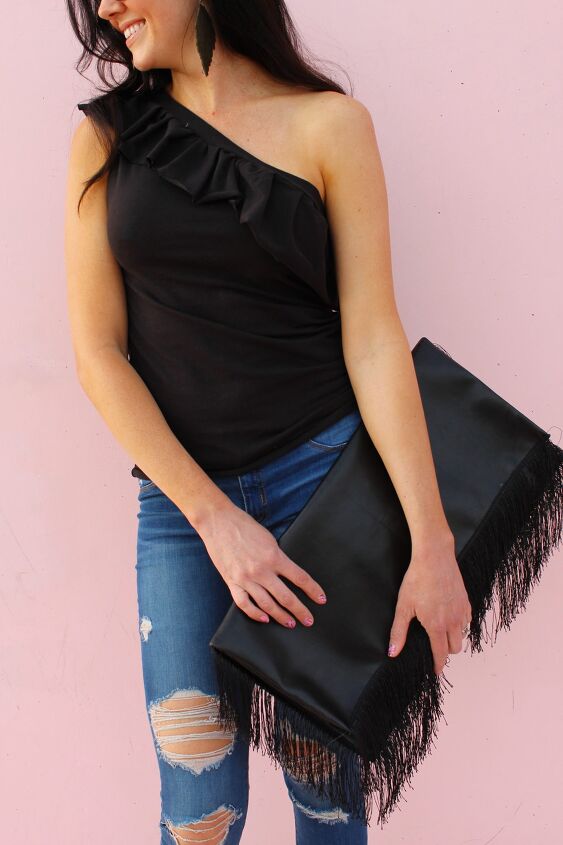
The more cute little projects I complete, the more fun it is to get dressed each morning. Today, I wore this ruffle shirt with the leather earrings from THIS POST and the Oversize Fringe Clutch in THIS POST. There’s a level of fun that you just don’t experience from standard store-bought clothes. Maybe I’m alone here but I’m guessing since you’re reading this blog…. you feel the same way too. 😉

Supplies:
My supply lists are completely shoppable for your convenience! Just click any aff. link below to get everything you need to complete this project without adding extra errands to your day.
- Black XL Men’s T-Shirt
- Basic Sewing Machine
- Grid Ruler
- Fabric Shears – these are my favorite!
- 5/8″ Fold Over Elastic (optional)
- Hand Needle & Thread
The Process:
Get your supplies ready and set aside about a half hour to complete this project.
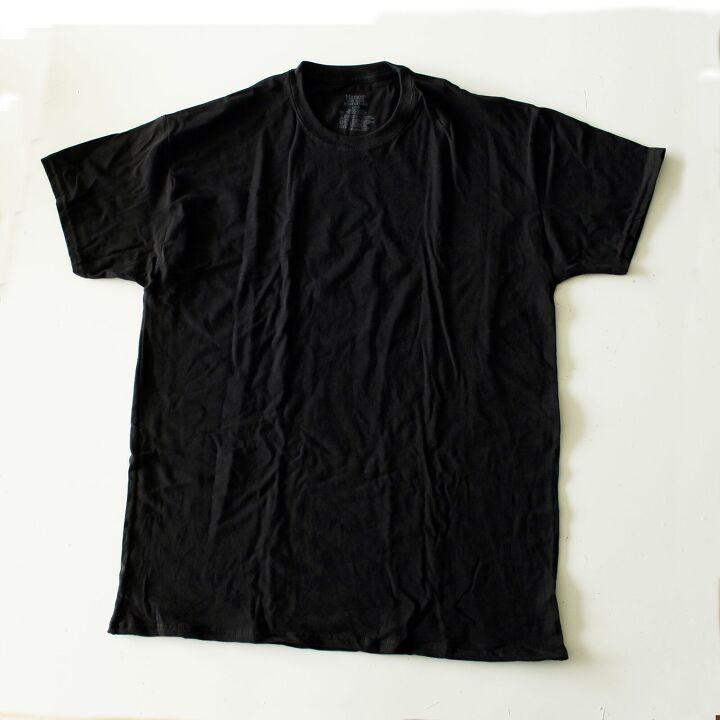
Start out by laying your t-shirt flat on a table. For this DIY, you’ll want the biggest shirt you can find since the scraps are going to create the ruffles.
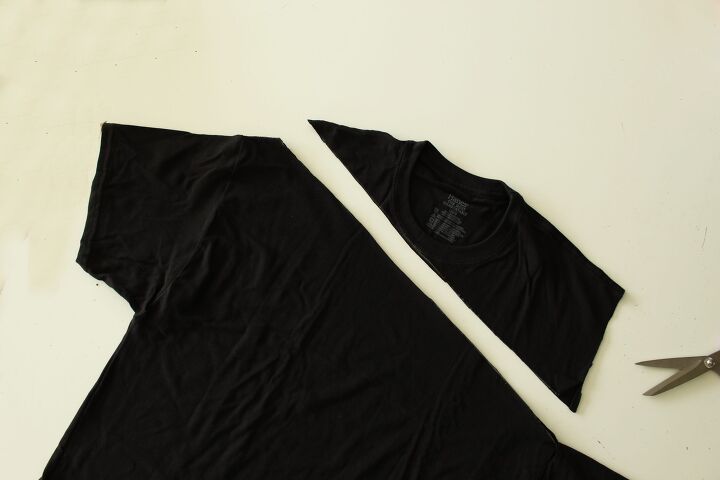
Cut a diagonal line that begins 1″ from the shoulder seam on one side and ends in the middle of the sleeve on the other. This way, your diagonal angle isn’t vertical enough to cause any wardrobe malfunctions. Nobody wants that!
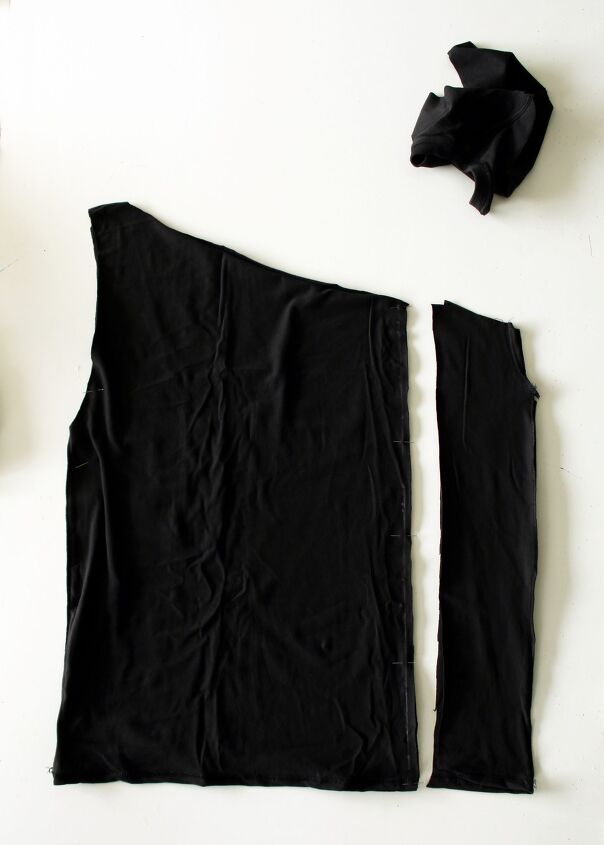
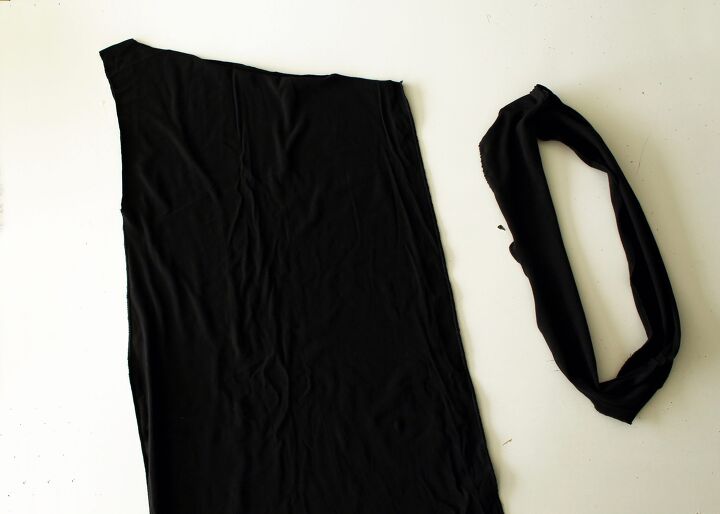
Next, cut the sleeve on one side off, cut a 4″ section off the opposite side and trim another 4″ off the bottom hemline of the t-shirt. Save the 4″ strips fabric. They will create the ruffle that runs across your new neckline in just a minute.
Now, use a standard sewing machine or a serger (this is the one I have) to close up your new side seam and shrink your armhole if you need to. Take all 4 strips of 4″ wide fabric and sew them together to create a big circle. It should be about twice as long as the opening of your neckline.
Now, gather that strip of fabric using a hand-needle and pin into place around your neckline.
Sew into place.
Your shirt is nearly complete! If you’d like to make the finished piece a little more polished around the neckline and armhole, you can make your own binding by slicing the leftover t-shirt sleeves into 2″ strips. Another option is to use 5/8″ Fold Over Elastic and sew it onto any raw edges for a more professional look.
I genuinely was excited to wear this shirt! It’s just as comfortable as an old t-shirt but feels pretty at the same time. Just in case you missed it, the Fringe Clutch tutorial can be found here and these Leather Feather earrings can be found here.
Thanks for checking out this DIY Ruffle Shirt with me! As always, if you have any questions at all while completing this project, don’t hesitate to let me know in the comments below and I’d be happy to help out!

Loved The Post? Please Share It!


The author may collect a small share of sales from the links on this page.


Comments
Join the conversation
Very pretty!!! Great job and it looks wonderful on you!!!