DIY Off The Shoulder Top
This post may contain affiliate links for products I love and recommend.
Learn how to make your own DIY off the shoulder top with this simple tutorial with video sew-along and printable sewing pattern. This beginner project off shoulder blouse pattern is great if you are just getting started sewing or working with printable sewing patterns.
This year I’m so excited to finally create a cohesive, complete handmade wardrobe. By now, I’ve sewn who-knows how many individual pieces and my closet is bursting with lovingly-made handmade projects but I’ve never taken the time to plan pieces in advance that work well together.
That’s where today’s off the shoulder top comes in.

I designed this printable sewing pattern to go with everything and be as comfortable and easy to sew as possible.
Who doesn’t love a good layering piece? Especially one that can be dressed up or down. Tuck the front of this top into some boyfriend jeans for the weekend or pair it with a pencil skirt for a polished look.

Plus, this printable sewing pattern is so fast to put together. You can literally complete this project about in an hour with a spare yard of fabric you have lying around. Yay for reducing your fabric stash!

To make this sewing project even easier, this instant sewing pattern includes a sew-along video as well as written instructions that walk you through every step with real-life, detailed photos. I don’t know about you, but nothing frustrates me more than complicated, unclear images in some sewing patterns. If you can’t tell what’s going on, how are you supposed to put the project together correctly?
That’s precisely why when I design a sewing pattern, I include real-life photos of each step as well as a video sew-along. That way, you can see each step and eliminate any future frustration.
By the time you complete this off the shoulder top, you’ll have learned how to add bias binding to a curved neckline, how to add sleeves to a shirt, and how to hem raw edges. You’ll also pick up some handy sewing tips on how to work with slippery fabrics and follow a printable sewing pattern.

WHATS INCLUDED IN THIS PRINTABLE SEWING PATTERN:
- Printable sewing pattern in sizes extra small to extra large
- Step by step written instructions
- Video sew-along tutorial (you can also watch the video below)
- Measurement chart
SUPPLIES YOU’LL NEED:
- Basic Sewing Machine or Serger
- Universal Machine Needle
- 1 yard woven, non-stretch such as crepe, satin, cotton, or batiste
- Twin Sewing Machine Needle
- Single Fold 1/2″ Bias Tape
- Universal Sewing Thread
- Basic at-home printer, printer paper, tape, and scissors to assemble your sewing pattern
Off Shoulder Blouse Video Sew-Along
How To Sew This DIY Off The Shoulder Shirt
Start out by printing and cutting out your pattern using an at-home printer. You will need one “Off Shoulder Top” piece and one “Off Shoulder Sleeve” pattern piece. Assemble your pdf sewing pattern by using the page numbers, notches, and table included in these instructions.
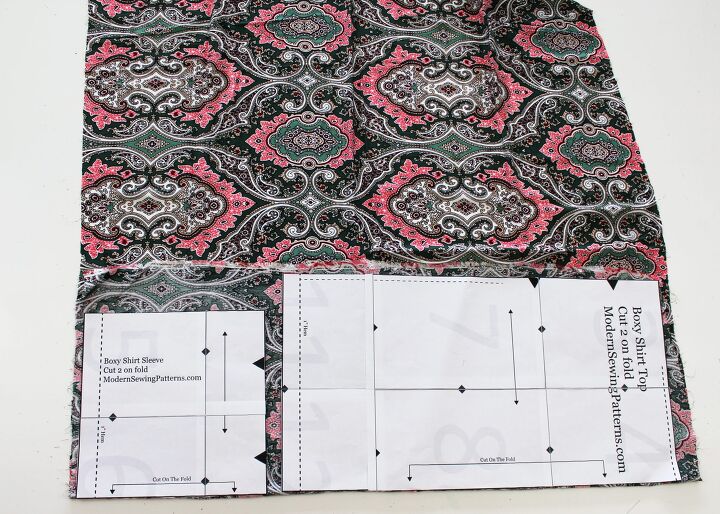
Fold your fabric so you have enough space to place your pattern pieces on the fold line. Cut out one bodice and one sleeve pattern before folding the other side and repeating on the other side. It’s helpful to cut one side at a time when working with slippery fabrics like silks and sateens. This method will also help you save fabric and get the most out of your yardage.
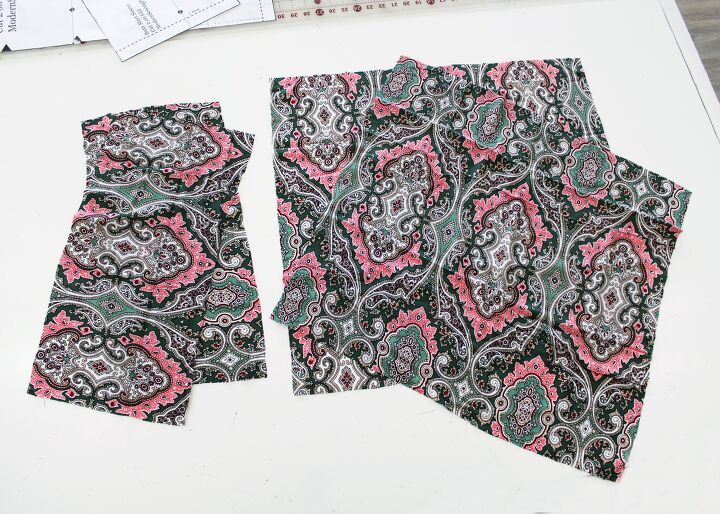
When you are done, you’ll have two bodice pattern pieces and two sleeve pattern pieces.
Add pattern markings to all of your pattern pieces before setting your paper pattern aside. Mark stitch lines, notches, and hemlines.

Since hemming a straight edge is so much easier than hemming a circular edge, let’s hem your pattern pieces now. Use a seam gauge to measure a 1” hem and iron and pin into place for sewing. Use a twin needle to topstitch on the right side and then iron to set your stitches.
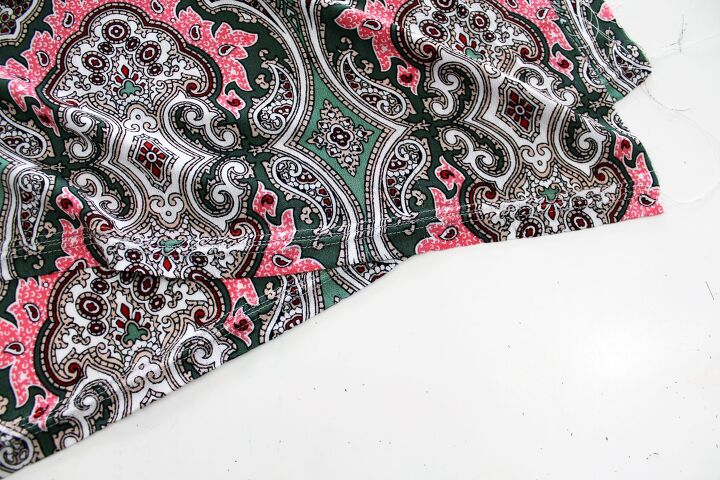
Repeat on the long edge of both sleeve pattern pieces as well as the bodice front and back.
Next, fold your sleeves in half (short sides together) with the pretty side of your fabric facing each other and sew. Repeat on your other sleeve and set aside.
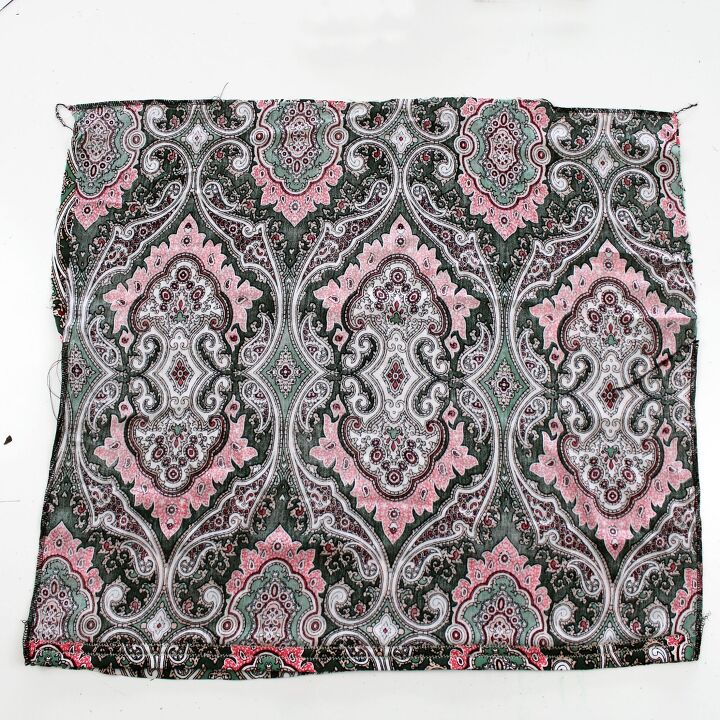
Now lay your bodice front and bodice back pieces on top of each other, with the pretty sides (the “right sides” together.) Pin along the side seams and the shoulder seams, making sure not to close up the sleeve opening. Sew together.
Now that the base of your bodice is complete, pick up a sleeve and pinch the seamline and spread to find the exact opposite edge. Mark with a pin.
Insert your sleeve into the bodice of your top with the right sides together. Line up the seam of your sleeve with the side seam of your bodice and pin together. Then, pin the opposite edge of your sleeve (the side we just marked with a pin) to the shoulder seam of your bodice. Make sure the right sides of your fabric are together.

Work your way around the circumference of your sleeve pinning every few inches to hold in place. Sew.
From here, your shirt is nearly finished. The last thing to do is add bias binding to your neckline to finish. Start out by Stay-stitching 1/4″ away from the raw edge to prevent the fabric from stretching as you work with it. You’ll want to do this especially if your fabric has any stretch to it!
Open your bias tape and place the top edge against the raw edge of your fabric, with the right sides together.
Sew the fabric to your bias tape using a straight stitch inside the crease of your bias tape.
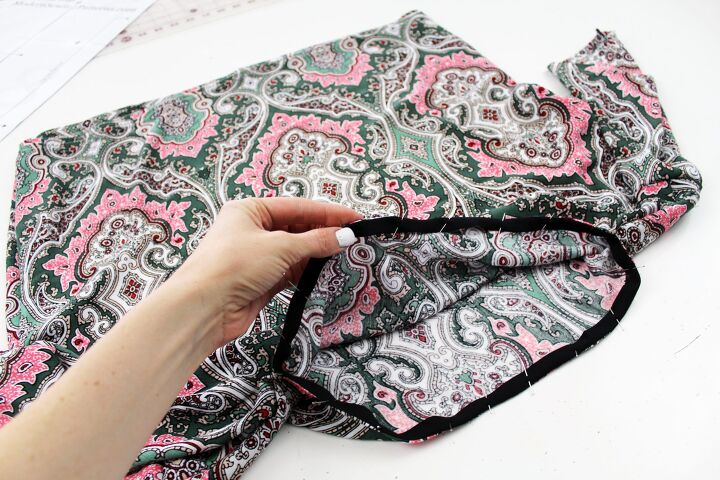
Since we want your neckline to be able to curve and lay comfortably across your chest, we’re going to add some notches into the seam allowance of your fabric and bias tape. Use sharp scissors to make tiny cuts into the seam allowance of your bias tape, making sure not to trim your stitch threads themselves.
Fold the seam allowance up so it’s encased in your bias tape onto the inside of your project. Pin into place.
Topstitch through all layers of your fabric and bias tape to secure in place. Your raw edge should be fully encased and your project now has a beautiful decorative trim on the inside.
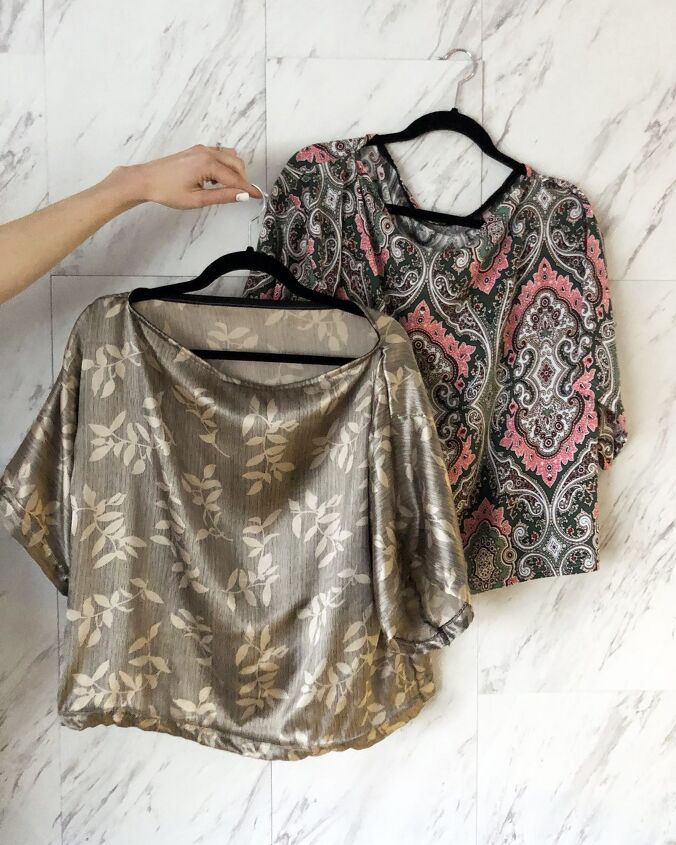
Now your DIY off-shoulder top is ready to try on! This is my favorite part of every project and is always so much fun. All of your seams are finished, you’ve learned a few new sewing tricks, and you have a brand new off the shoulder blouse pattern to make again and again.
Just in case you missed it, you can snag this printable sewing pattern HERE.

I plan on stocking my closet full of this DIY off the shoulder top in different fabrics and textures. I plan to make it in lace as a sheer, layering piece and then again in all of my new capsule wardrobe colors. It’s so quick and easy to complete that creating a few at a time isn’t an overwhelming task.
How did your project turn out? Don’t forget to share it on Instagram and tag me @CreativeFashionBlogger so I can check it out!
You can also buy the pattern HERE and get started making this DIY off the shoulder top right away! I can’t wait to see what you make and how it turns out!
The author may collect a small share of sales from the links on this page.


Comments
Join the conversation