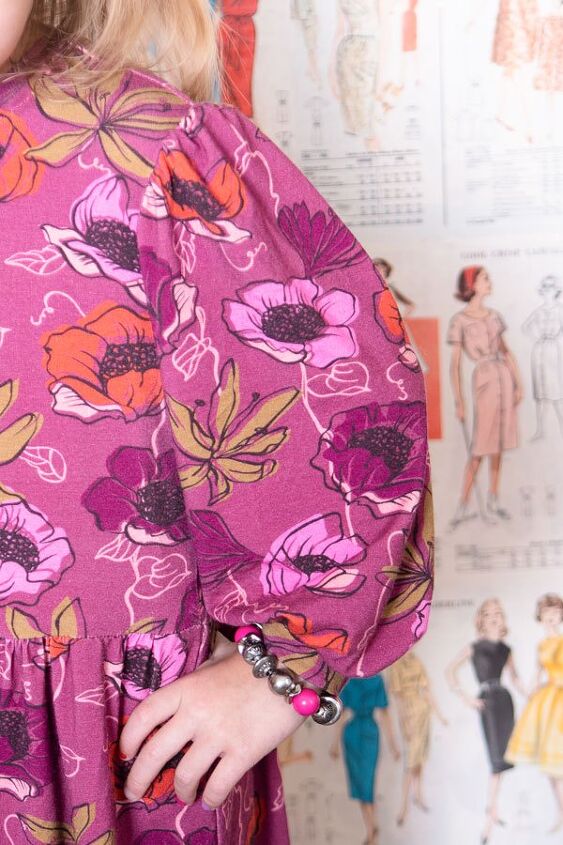
How to Sew Puff Sleeves That’ll Make You Swoon
Today I’m showing you how to sew puff sleeves and add some more girly in your tops and dresses.
Puff sleeves are a classic style that is having a little bit of a comeback these days. Make them up in a drapey fabric, and you’re sure to add some elegance and classic style.
Did I mention that it’s so so easy to adapt any knit or wo
ven pattern to include a puff sleeve? So if you’ve got a favorite pattern that just needs a little bit of a variation, give this a try.
In this post, you’ll learn what a puff sleeve is and what fabrics are best for them. Then I’ll show you how to make a puff sleeve pattern using a basic sleeve pattern 3 ways.
I’ll finish up by showing you how to sew puff sleeves step by step.
So comb through your 80s patterns and let’s create some glorious puffs Anne Shirley would approve.
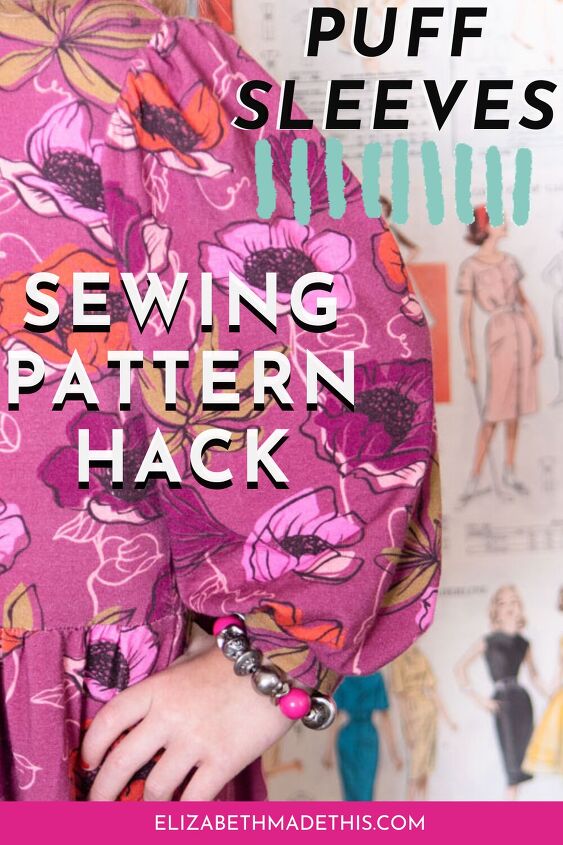
Table of Contents
What is a puff sleeve?
This page contains affiliate links. If you purchase a product through one of them, I will receive a commission (at no additional cost to you). I only ever promote products that I use and love and I think you will love too. Thanks for supporting this blog!
elizabethmadethis.com is a participant in the Amazon Services LLC Associates Program, an affiliate advertising program designed to provide a means for sites to earn advertising fees by advertising and linking to Amazon.com.’ As an Amazon Associate, I earn from qualifying purchases. If you purchase a product through one of them, I will receive a commission (at no additional cost to you). I only ever promote products that I use and love and I think you will love too. Thanks for supporting this blog!
elizabethmadethis.com is a participant in the Amazon Services LLC Associates Program, an affiliate advertising program designed to provide a means for sites to earn advertising fees by advertising and linking to Amazon.com.’ As an Amazon Associate, I earn from qualifying purchases. If you purchase a product through one of them, I will receive a commission (at no additional cost to you). I only ever promote products that I use and love and I think you will love too. Thanks for supporting this blog!
A puff sleeve is a variation on a basic sleeve that adds volume either at the cap, at the hem, or in both places.
The extra volume gets gathered into the sleeve seam or at the hem. If a puff sleeve has extra volume at the hem, it can be gathered into a facing, band, cuff, or even with elastic.
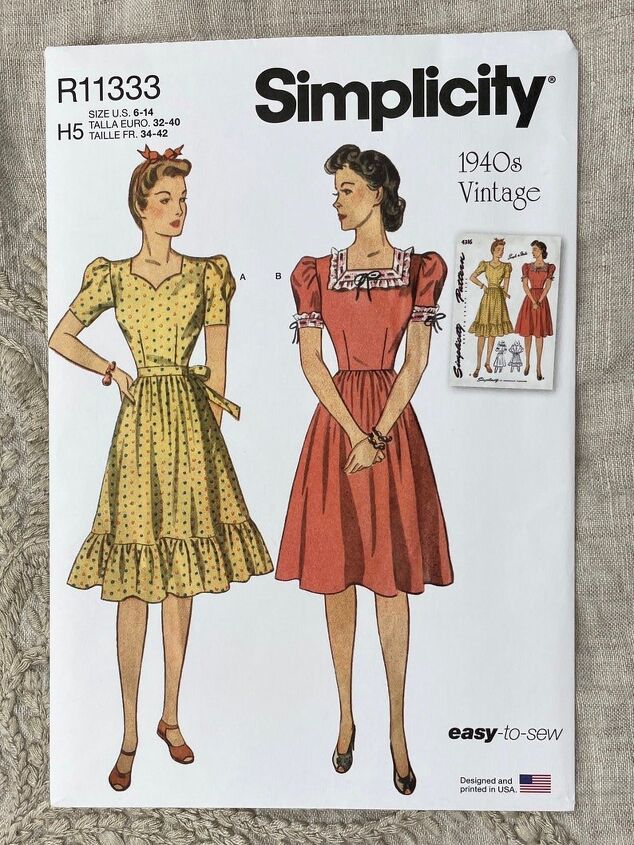
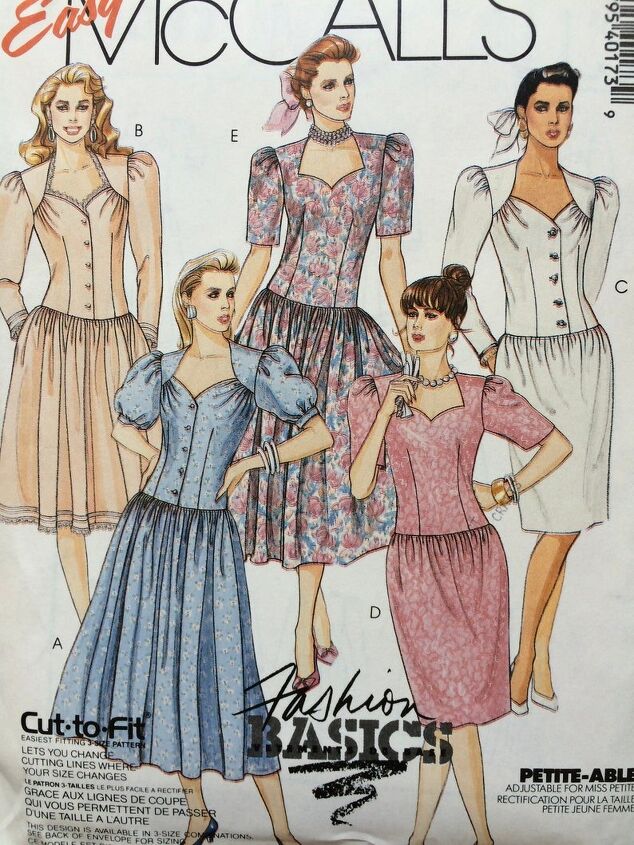
Historically, they’ve come in style off and on. You can spy them in 15th century portraits, in the Victorian era, in one shape or form in every decade of the 20th century. Really it seems like every time period has its own poofy sleeve. There’s the delicate soft puffs of the 1940s all the way to the 80s with its in your face face gigantic awe inspiring shoulder padded to the max puff sleeves that are are probably burned in your mind. Go big or go home, right?
But just because the ladies of the 80s could stuff whole rolls of toilet paper in each sleeve doesn’t mean your puff sleeves need to be EXTREME. An understated puff in a soft fabric can be just the thing to add a little bit of feminine charm to your next top or dress.
What fabrics should you use when you sew puff sleeves?
All the gathering in a puff sleeve can make for a lot of bulky fabric. Too much bulk in a sleeve, and you’re going to be doing battle with the fabric when you’re sewing. Plus a sleeve with too much bulk can be uncomfortable to wear.
For the best puffy sleeves, pick lightweight fabrics, either knit or woven. Lightweight cottons like voile, lawn, some shirtings, linen rayon blends, rayon challis, lightweight silks, and lighter weight knits are all good choices.
How to make a puff sleeve pattern (3 ways)
You can adapt pretty much any standard sleeve pattern into a puff sleeve pattern. I think a lot of people hear “draft a pattern” and the terror of God settles on them. In reality, you don’t have to start from ground zero with a ton of measurements to make your own puff sleeve pattern.
First thing: find a pattern whose sleeve you like. Any plain set-in sleeve will work here.
Next, figure out what kind of puff sleeve you want to make. There’s 3 choices:
- Puff sleeve with gathering in the cap only
- Puff sleeve with gathering at the hem only
- A puff sleeve with gathering at the hem and the cap
Let’s see how to adapt a standard sleeve into each of these different puff sleeve types.
When you do this, you’ll need a French curve ruler, tape, tracing paper, pen/pencil and some paper scissors.
Puff sleeve pattern with gathering at the cap
Trace off a copy of your sleeve with all the markings.
Draw several lines parallel to the grainline between each of the notches.
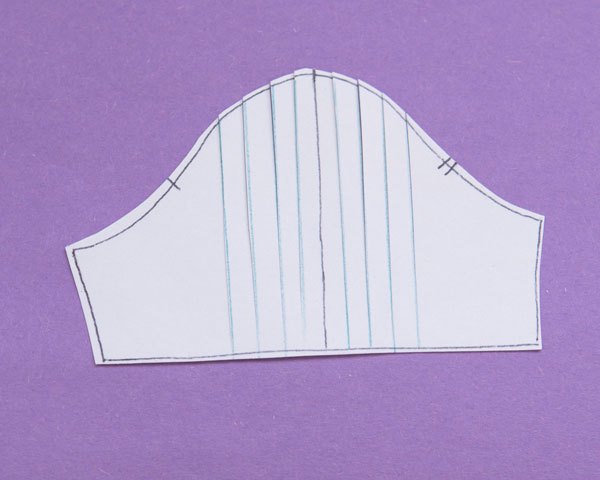
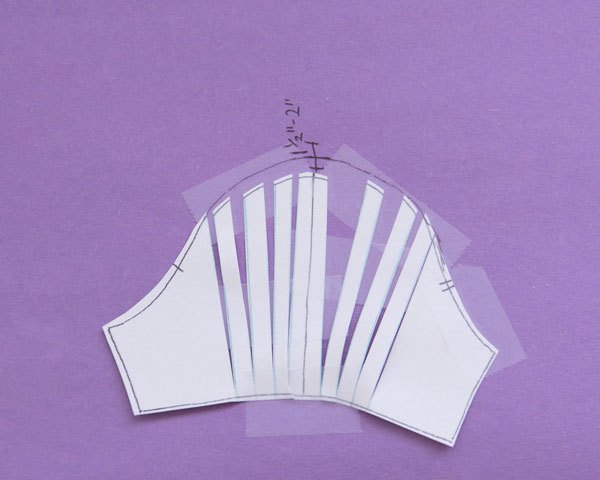
Cut along the lines starting from the cap down towards the hem. Stop about 1/4” from the hem on each line.
Spread the lines open to make a new curve. Try to be even in adding space between each set of lines. The wider you spread the lines, the more gathering you’ll get. Spreading the lines 1/4”-1/2” apart is a good place to start, but you can also just eyeball the thing.
When you’re happy with how your puff sleeve pattern looks, tape it down in place.
Use your ruler to make the curve even. Cut along this line for your new pattern.
For gathering at the hem only
Here you’ll follow the same steps as you would for the gathering at the cap with one difference.
Instead, cut along your lines starting at the hem going up towards the cap. Stop about 1/4” from the top of the cap on each line.

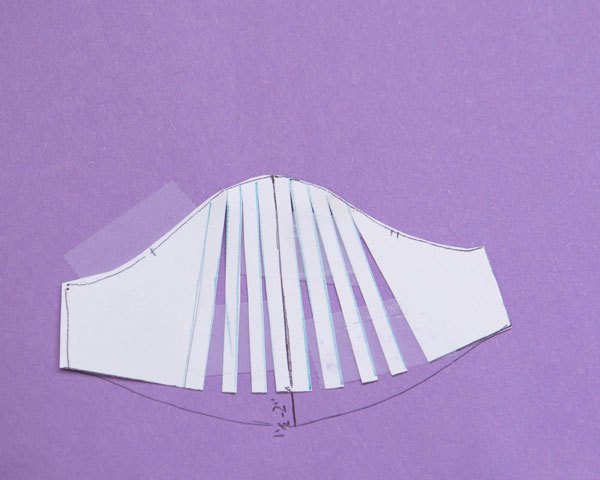
Spread your lines apart, tape them down, then use your ruler to true the curve.
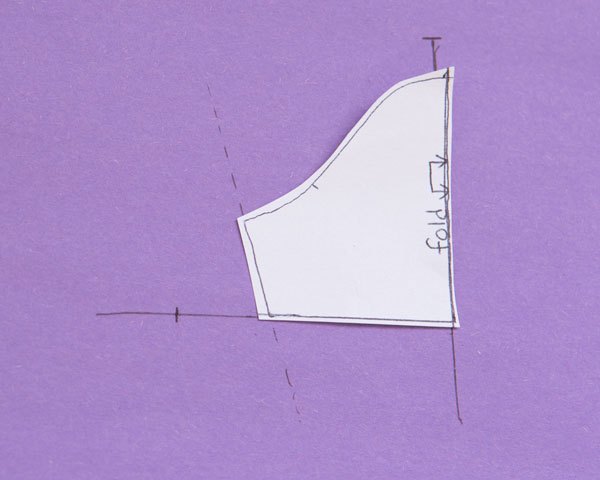
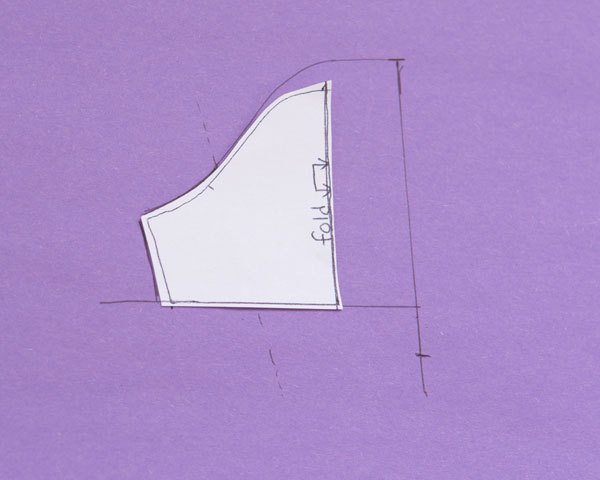
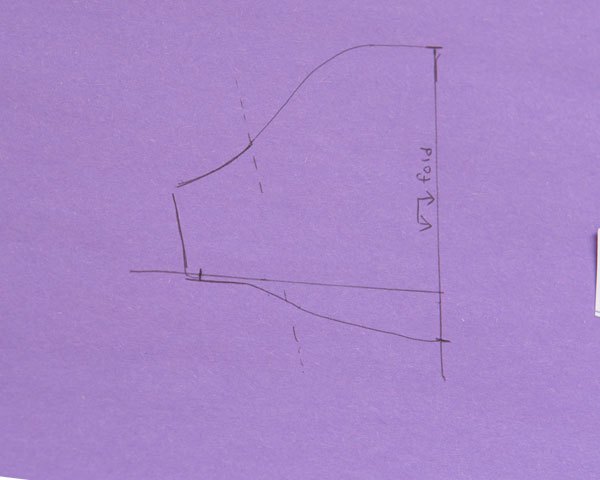
Making a puff sleeve pattern with gathering at the hem and cap
This version works best on a sleeve that’s symmetrical. Knit patterns are often drafted this way.
I used a Jalie pattern for my t-shirt which already has a sleeve pattern that’s cut on the fold. If your pattern isn’t cut on the fold, fold your pattern in half first.
Trace off a new version of your sleeve along the fold. It’ll look like a sleeve that’s been cut in half vertically.
Lay your sleeve pattern down on tracing paper. Extend the fold line vertically at the top of the cap and the hem.
Draw a horizontal line even with the hem. Make a mark on the horizontal line that’s half the distance between the fold and the bottom of the hem.
Slide the sleeve along the horizontal line until it meets that mark you just made. Trace the side seam of the sleeve and the bottom of the cap up to the notch.
Make a mark 1 1/2-2” above the top of the cap. Use your ruler to draw a curve that blends into the original sleeve cap line.
Make another mark 1 1/2-2” below the hem. Use your ruler to draw a curve that blends up into the original hem line.
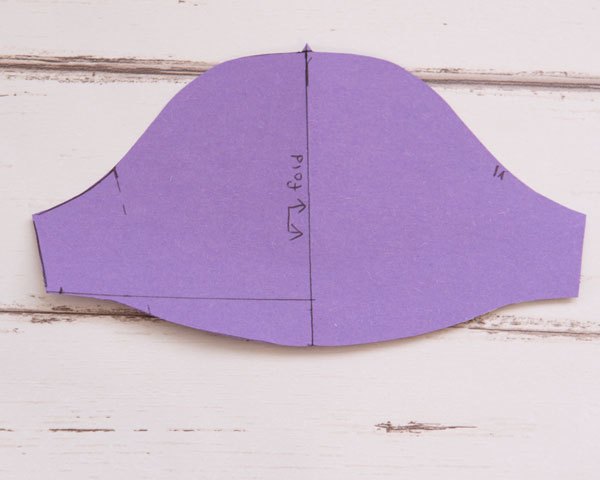
To get a full sleeve, either cut another half sleeve and tape them together or fold your paper along the fold line and cut on the new lines. Here’s what your new pattern will look like.
How to sew puff sleeves
Now that you have a puff sleeve pattern, it’s time to sew these beauties. For this puff sleeve sewing tutorial, I’m going to show you how to sew a puff sleeve with gathers in the hem and top of the cap, and you’ll be gathering it into a cuff.
Cut your sleeves as you would and your front and back pieces of your top/dress/shirt. Cut a cuff that’s 4”x the width of the bottom of the sleeve before you added gathering to it.
You might need to adjust the length of the sleeve if you’re using a full length sleeve since cuffs take up some vertical space that a regular hem doesn’t.
Gathering a puff sleeve
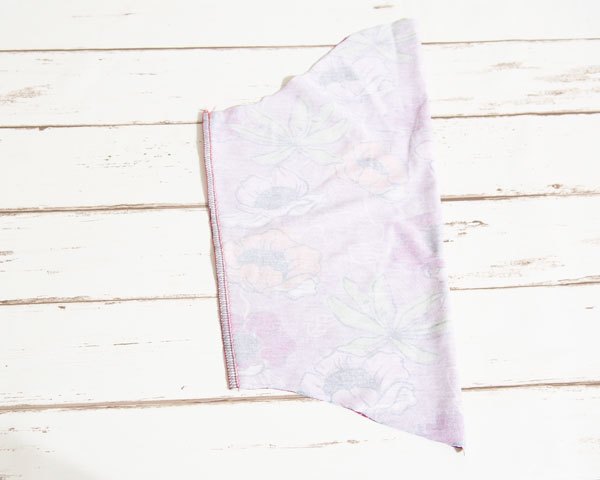
Sew your underarm seam and the shoulder and side seams of your top/dress/shirt. Finish the seams as you like.
Not sure how to finish a seam? Check out 13 seam finishes to make your garment insides sing.
From here, set your machine for the longest straight stitch. Sew 1 row of gathering stitches from notch to notch 1/4” away from the raw edge of the cap. If you’d like, you can sew a second row 3/8” inch from the raw edge.
With wovens, I always sew 2 rows to gather, but with knits, 1 row of gathering stitches is usually sufficient.
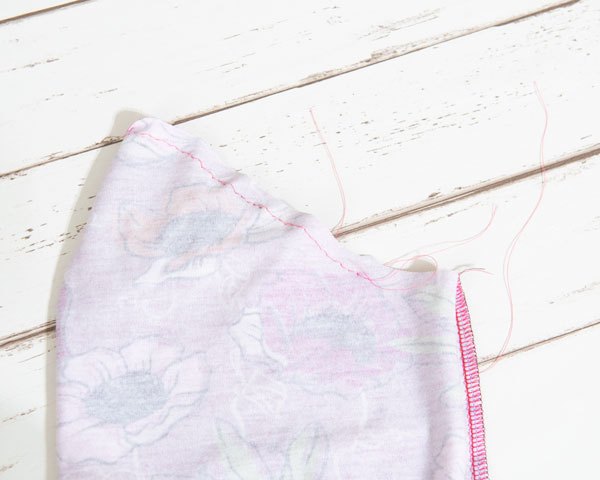
Pull up the bobbin thread to gather the fabric. Pinch lightly along the gathers to distribute the fabric evenly.
Pin the sleeve the bodice, matching the notches and the top of the cap. Distribute the gathers as needed.
Sewing with the bodice on top, sew the sleeve to the bodice with the seam allowance used in your pattern.
Remove your gathering stitches. Press the seam towards the sleeve and finish the seam as you’d like.
Gathering the sleeve into a cuff
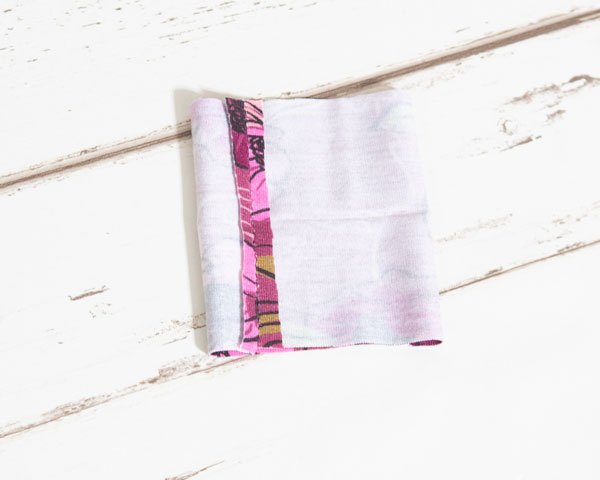
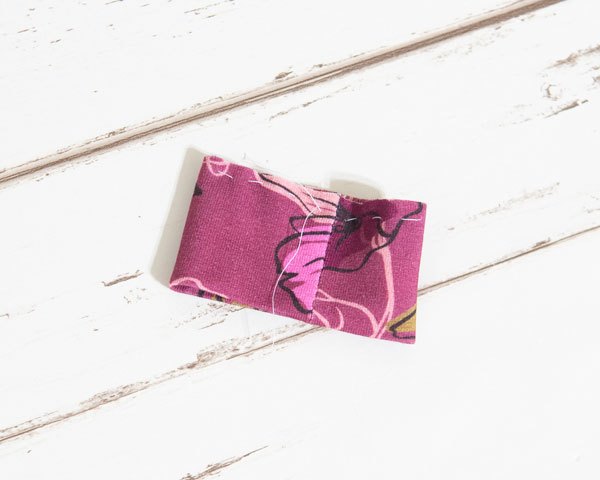
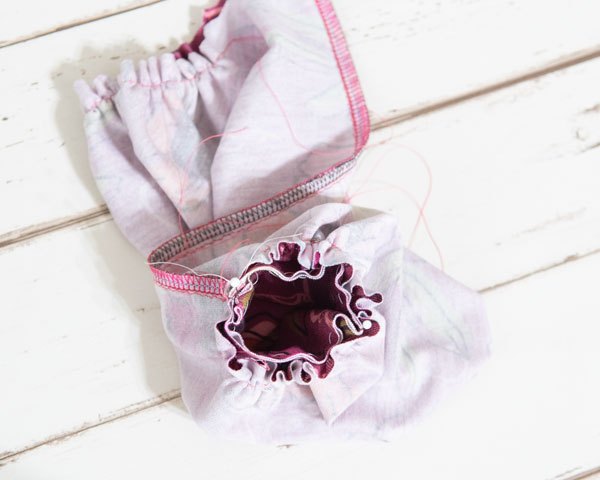
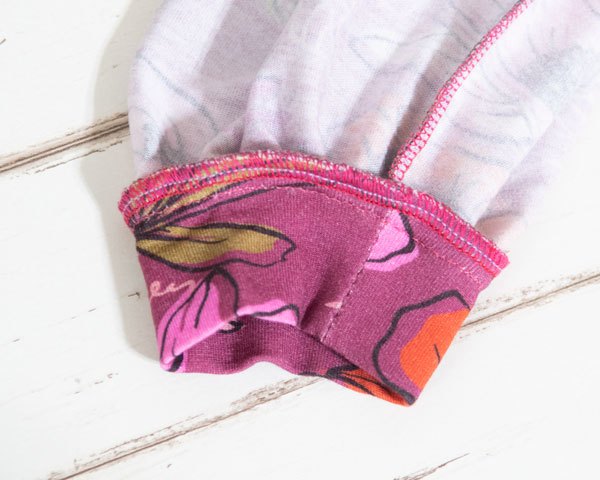
Fold the cuff wrong sides together along the width and press.
Fold the cuff right sides together and sew a seam along the short sides. Press this seam open.
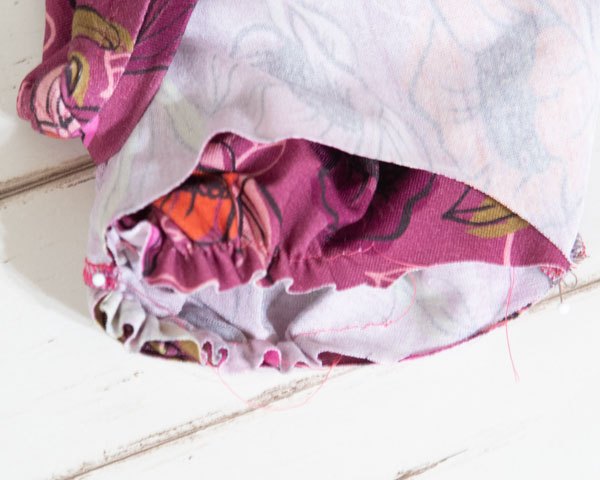
Fold the cuff back on itself, matching the raw edges. Hand baste the edges together. This will keep them from moving around on you when you’re sewing in the sleeve.
Fold the bottom of the sleeve together to find the midpoint of the hem. Mark this with a pin or a fabric marker. Fold the cuff along the seam to find the midpoint of the cuff. Mark this with a pin, too.
Fold the sleeve right sides together and sew the underarm seam. Press the seam to one side and finish the seam.
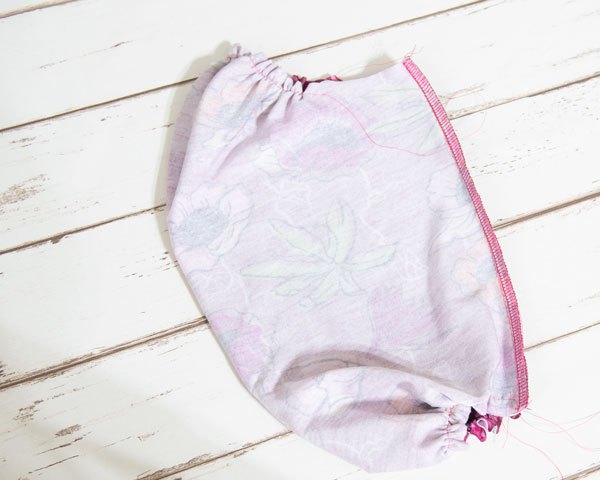
Run a gathering stitch around the bottom of the sleeve. You can sew the gathering stitch in just the curved part or all the way around.
Then, pull up the bobbin threads to gather the fabric.
Next, pin the sleeve to the cuff, matching the seam of the sleeve to the cuff’s seam. Match the center point mark to the center point on the cuff as well.
Distribute the gathers as you need to between the pins. Sew the cuff to the sleeve, sewing with the cuff side up.
Take out the gathering stitches and basting stitches. Press the seam towards the cuff, then finish the seam.


So that’s all there is to sewing puff sleeves. Give this tutorial a go, I think you’ll love this little hack for adding some variety into your sleeve sewing repertoire.
Elizabeth Farr is the writer behind the Elizabeth Made This blog where she shares helpful sewing tips, step by step sewing tutorials and videos to help you explore your creativity through sewing. She has written sewing Eguides and patterns, been a featured teacher at Rebecca Page’s Sewing Summit and Jennifer Maker’s Holiday Maker Fest and her work has appeared in Seamwork and Altered Couture magazines. She also created a line of refashioned garments for SEWN Denver. When her sewing machine isn’t humming, she’s playing and teaching violin, and hanging around a good strategic board game with her husband and 4 kids.
The author may collect a small share of sales from the links on this page.


Comments
Join the conversation
Thanks. Very detailed and well illustrated instructions. Great for beginner sewers as the idea of puff sleeves might be intimidating.