How to Do a Classic Brown & Gold Eyeshadow Look That Suits Everyone

Today I have created this brown and gold eyeshadow look that softly contours the eyes. This classic eyeshadow application suits all eye shapes, including hooded eyes. Ready to start this everyday brown eyeshadow tutorial? Let's get started.
Tools and materials:
- Primer
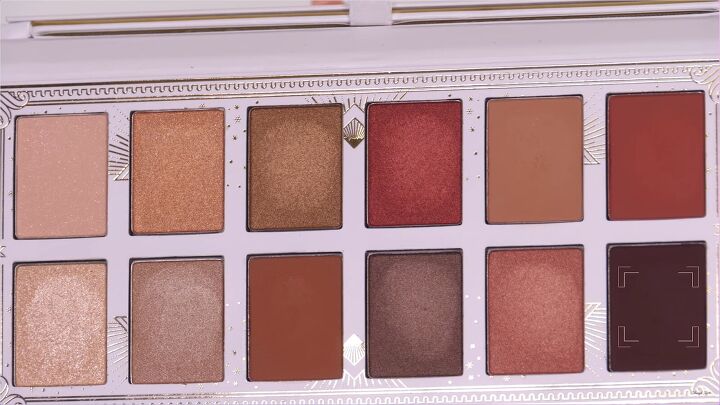
- Eyeshadow palette
- Mascara
- Fake eyelashes
- Foundation
- Concealer
- Makeup brushes
- Beauty blender sponge
- Blush
- Setting powder
- Eyebrow pencil
- Eyeliner pencil
- Liquid eyeliner
- Contour

1. Apply primer
Before we jump onto the brown eyeshadow makeup, we need to prep our face. So go ahead and apply your favorite primer.
I’m using a primer that’s lighter in consistency and has a softer texture. I concentrate it on areas where I tend to get oily.
2. Apply foundation
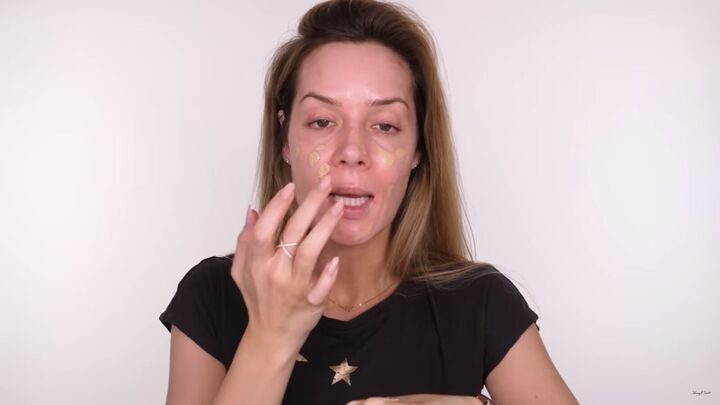
Now that the primer is applied go ahead and apply your favorite foundation. I’m going for a hydrating medium-coverage foundation, and I’m gently applying it with my fingers in blotches.
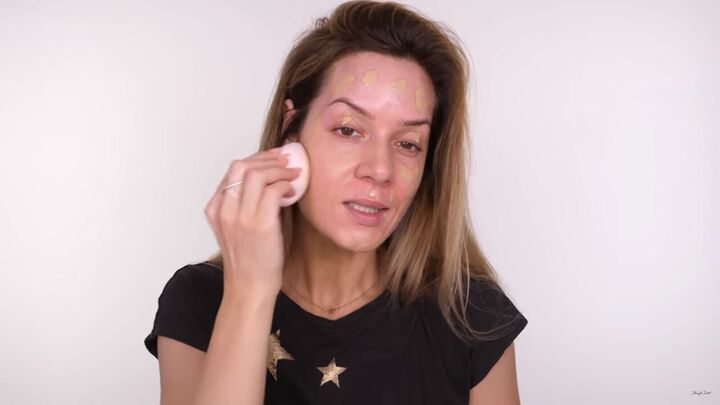
Blend the foundation with a damp makeup sponge so that it looks smooth and gives off a lovely sheerness.
Tip: Use a foundation that contains hyaluronic acid, as it will not dry out your skin. It draws moisture from the air so it plumps your skin throughout the day. Your skin will feel really hydrated while wearing it.

One layer should do the trick, but buff a little more on with your foundation brush if you feel you need extra coverage.
Add a little more foundation to the sides of your nose; this will give a lovely airbrushed finish to the skin.

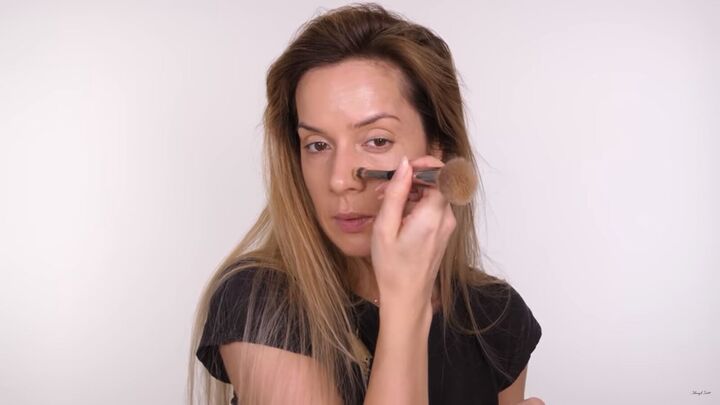
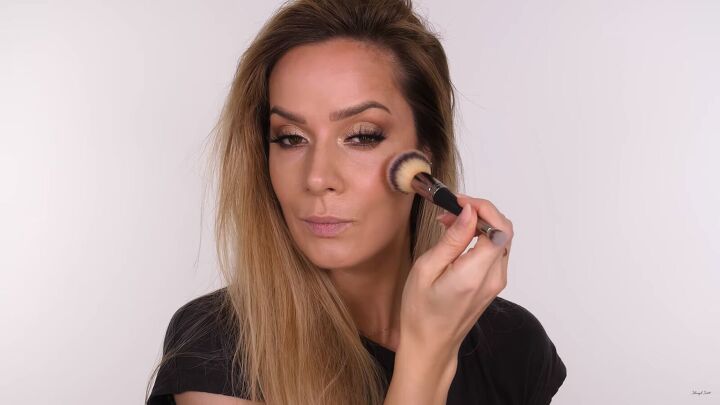
3. Add powder
To eliminate shine, press a little powder to your face with your makeup sponge. If you’re using cream-based blush or contour, then apply it to the T-area (forehead, nose, and chin).
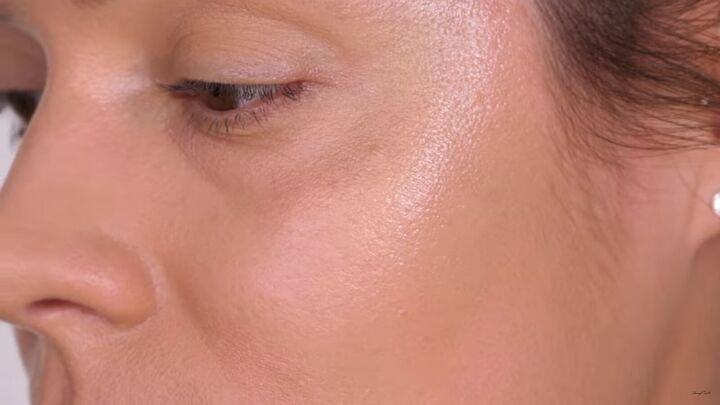
This is my face makeup so far.
4. Fill in your brows
Before we get to the brown and gold eyeshadow look, go ahead and fill in your brows as you normally would.
I did mine off-camera, but you can see my previous tutorial on filling in eyebrows and drawing individual hair strokes here.
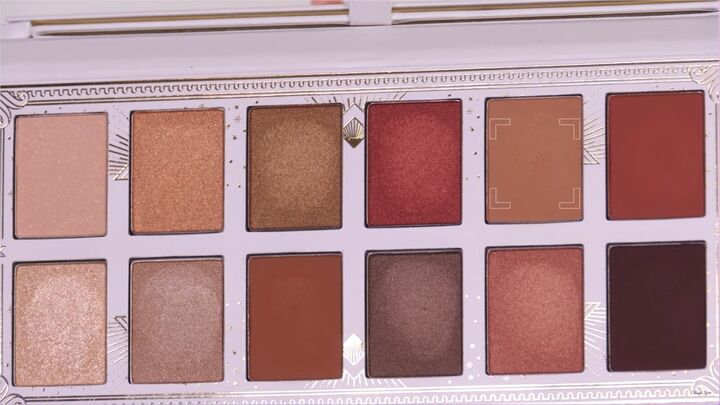
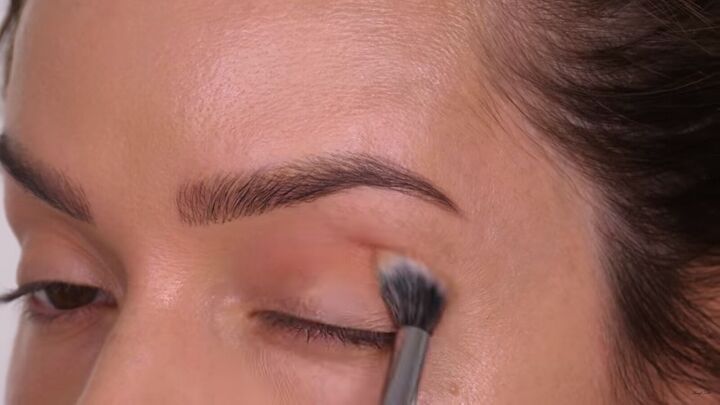
5. Apply eyeshadow
Let’s start with a soft brown eyeshadow. This is a transitional shade, meaning it’s the first color we lay down and the one that tends to go the highest. I’m going for a soft matte brown and applying it right to the sockets of the eye.
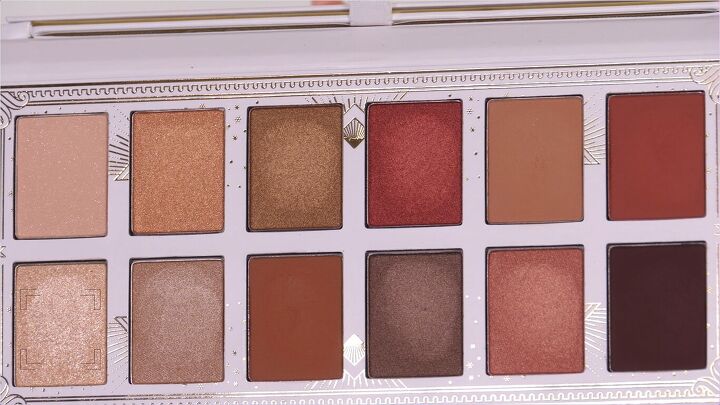
With a smaller, flatter brush, add a frosted champagne sparkly eyeshadow to the corners of your eyes. Also, dab it across your mobile eyelid. You do need to build it up since it’s a sheer eyeshadow.

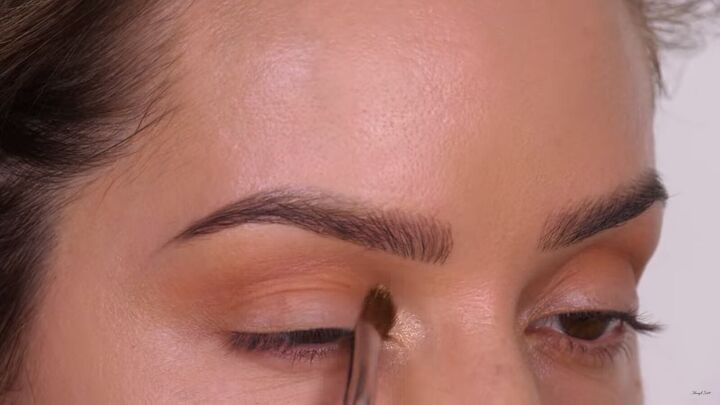
Next, take a minky sandstone brown and apply it to the outer third eyelid. Use a tap motion to bring it toward the center of the eyelid.
Use the tip of the brush to extend the eyeshadow out; so you have a bit of a V-shape. However, don’t go higher than the highest point of the socket line.
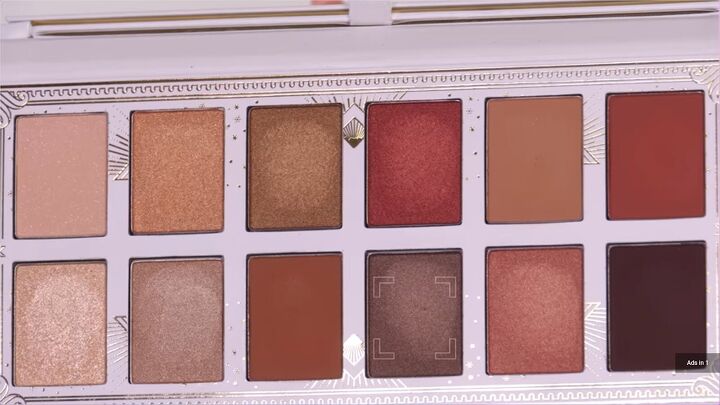
Next, use a darker metallic shade, as pictured above, and pack that on the very outer quarter of your eyes. Use the tip and belly of the brush for this.
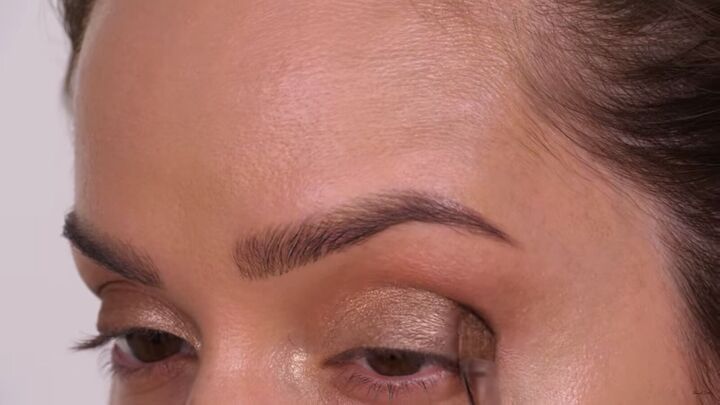
Then, feather out the color into that sandstone shade that you already applied in the v-shape.
Go back in with the transitional shade (with a blending brush) and go over the lines to ensure there are no harsh seams.
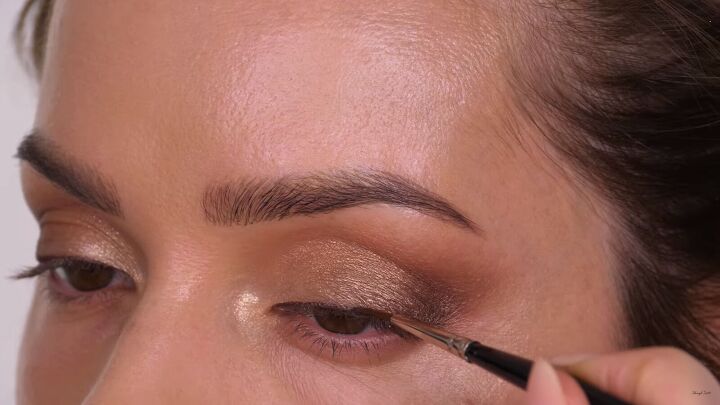
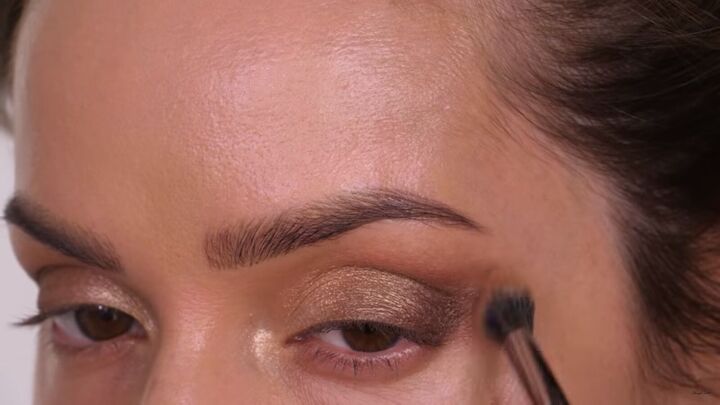
Take a dark brown shade and apply it to your upper lash line with a damp eyeliner brush. Create a liner from the very inner corner toward the outer edge. The reason why I’m using the eyeshadow is that it’s a lot softer than using an actual eyeliner.
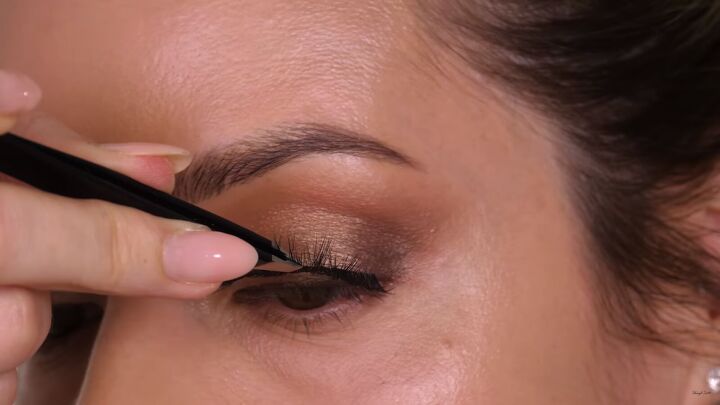
6. Apply false lashes and mascara
Apply your favorite false lashes. I chose a lightweight type that has longer lashes in the center, as we're not creating a winged look and it suits most eye shapes.
Tightline your eyes before going in with mascara. I used liquid eyeliner for this step.
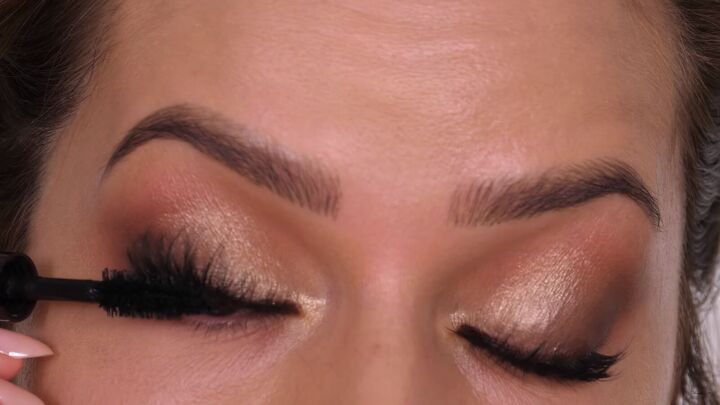
Now, apply your mascara.
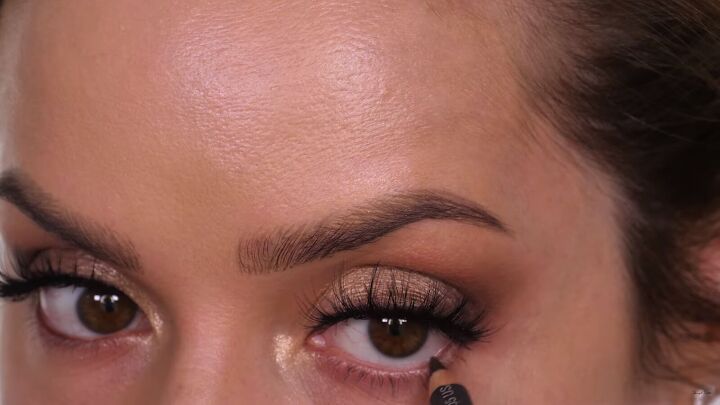
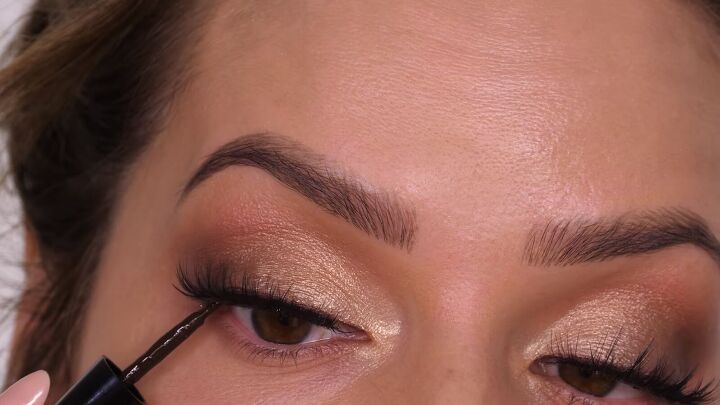
7. Line the lower lash line
This step is completely optional. Line ¾ of your lower lash line with dark brown eyeliner.
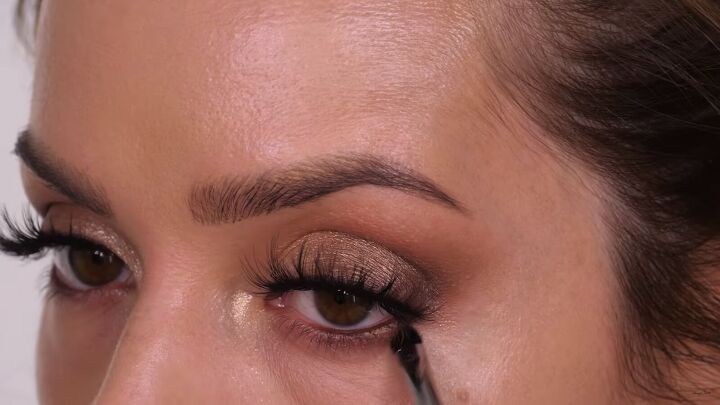
Next, take what’s left of your shimmer and blend it in along the lower lashes.
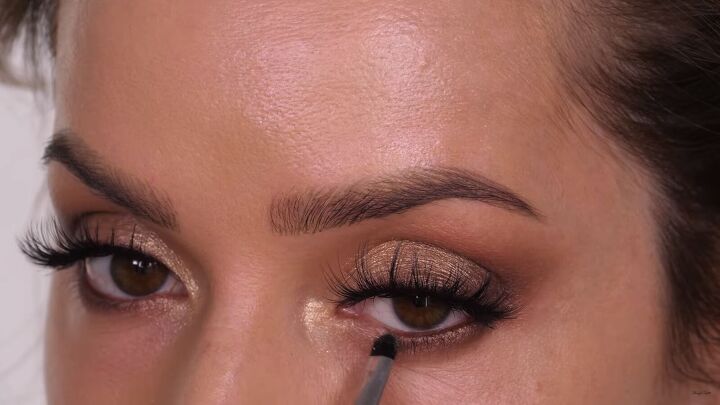
Then, apply the gold sparkle along the tear duct area.
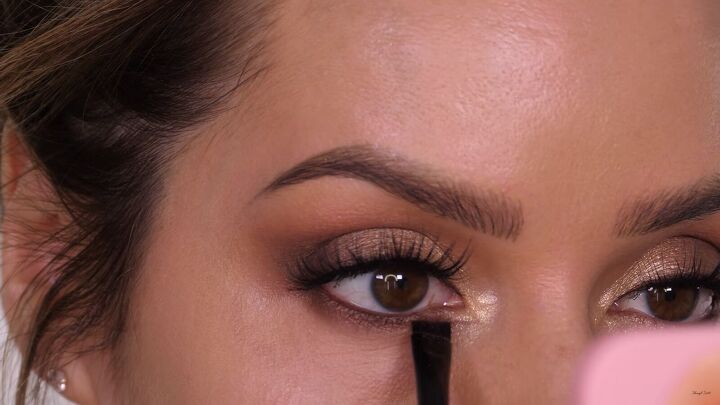
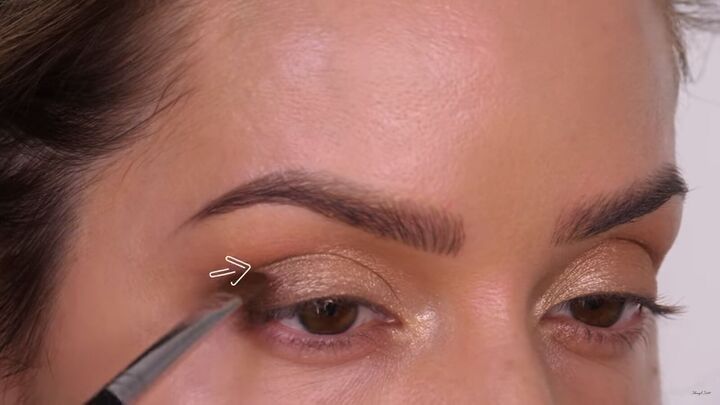
Take a dark matte eyeshadow and run it underneath the tear duct (by about 1.5mm) with an angled brush. This is a nice trick to open the eyes.
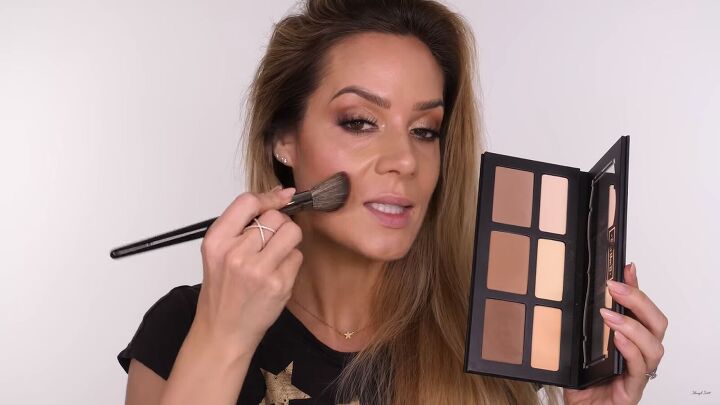
8. Contour
Apply contour around the perimeter of your forehead, contours of the cheekbones, and around the temples.
Tip: Make sure not to take the contour much further than the eye's pupil.
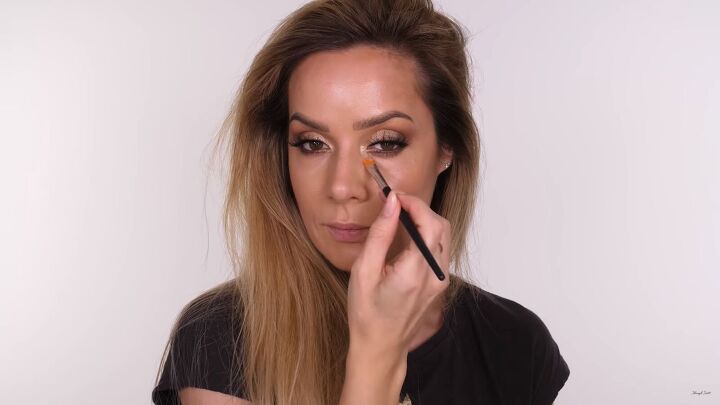
9. Concealer
Next, apply concealer to the little dip under your eyes. This technique will lift the appearance of that little sunken area.
10. Setting powder
Mattify the T-section of your face with setting powder.
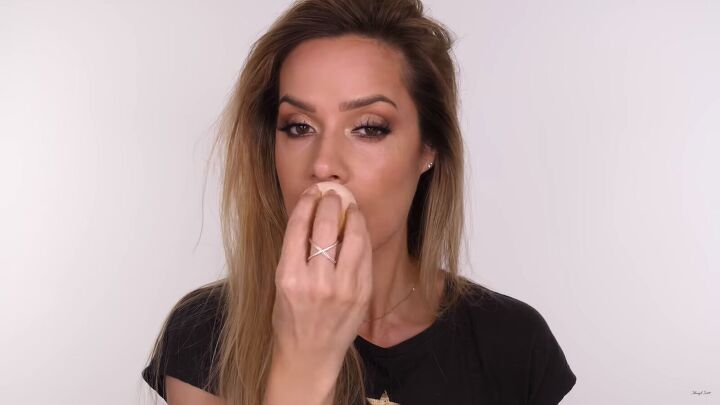
11. Apply blush and lipstick
Today, I'm using a cream-based blush, which can also be used as lipstick. Cream products give a glassy, dewy finish, which I really love. When I wear this, I don't need to wear a highlighter.
Bounce your brush on the blush and dab it on the back of your hand. Use what’s left on the bristles to apply the color to your cheeks. This way, it won’t come out super intense.

For the lips, I’m using the same cream-based blush I used for my cheeks. Using a multi-use product like this makes your makeup look more cohesive.

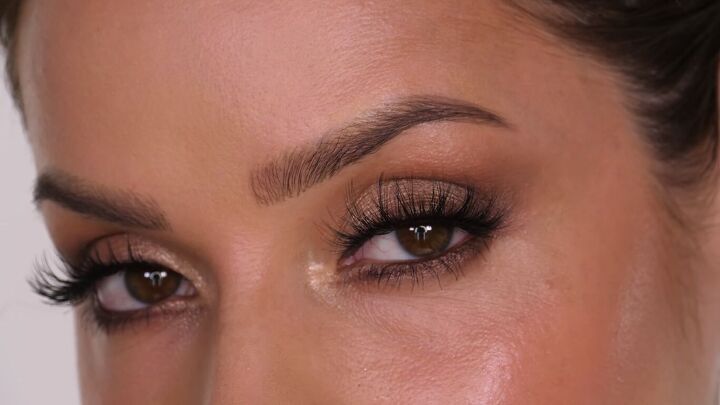
Brown and gold eyeshadow look
So, what do you think of this brown and gold eyeshadow look? I love how all the colors come together and give off a warm glow. I hope you found this brown eyeshadow makeup tutorial useful. Good luck!
Products used:
- Benefit Cosmetics The POREfessional Lite Ultra-lightweight Face Primer
- Charlotte Tilbury Beautiful Finish Foundation
- IT Cosmetics No.7 Heavenly Luxe Complexion Perfection Brush
- Beauty Blender Sponge
- Charlotte Tilbury Airbrush Flawless Powder
- Urban Decay Brow Blade - Cool Cookie
- Bobbi Brown Golden Illusion Eyeshadow Palette
- Morphe M453 Crease Blender
- Morphe M124 Small Eyeshadow Brush
- KISS MLBB - So Real Lashes
- Wet n Wild MegaLiner Liquid Eyeliner
- Charlotte Tilbury Full Fat Lashes
- KVD Shade & Light Palette
- Morphe E4 Angled Contour Brush
- AYU Instant Under Eye Concealer
- Anastasia Beverly Hills No.18 Concealer Brush
- STILA Convertible Colour - Camellia
The author may collect a small share of sales from the links on this page.


Comments
Join the conversation