10+ Bridesmaid Infinity Dress Styles That Are Easy to Do

In this style guide, I’m going to show you some bridesmaid infinity dress styles. An infinity dress gets its name because there are an infinite number of ways in which you can style it!
Bridesmaids can style this dress how they prefer, yet the wedding party will still look cohesive in color and fabric. Let’s take a look at some infinity dress options!
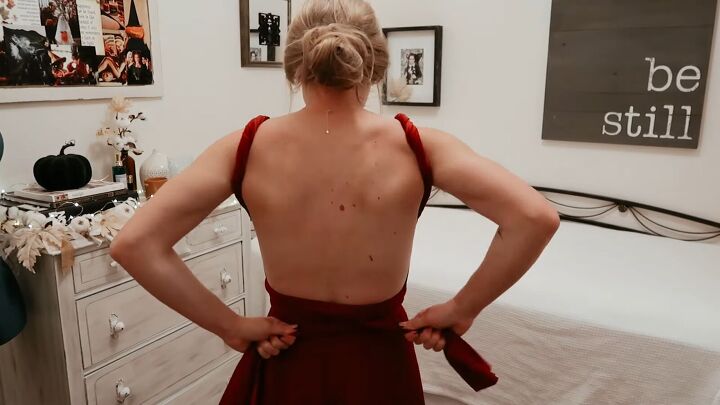
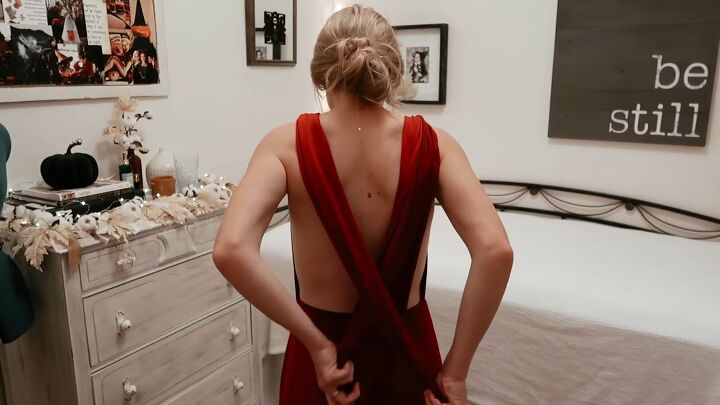
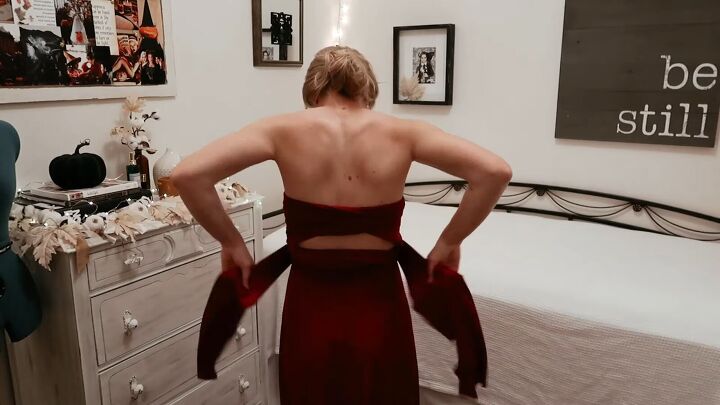
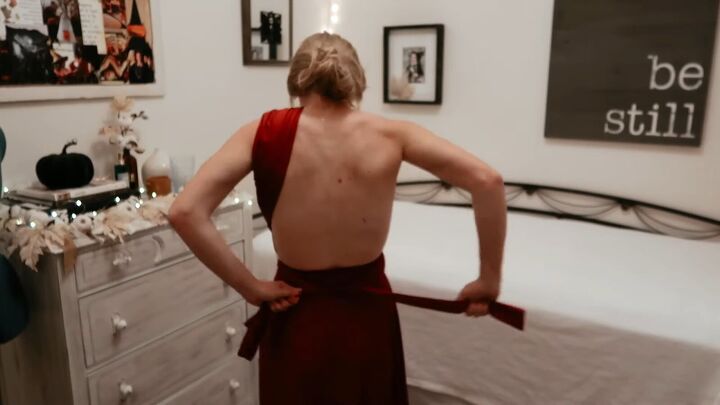
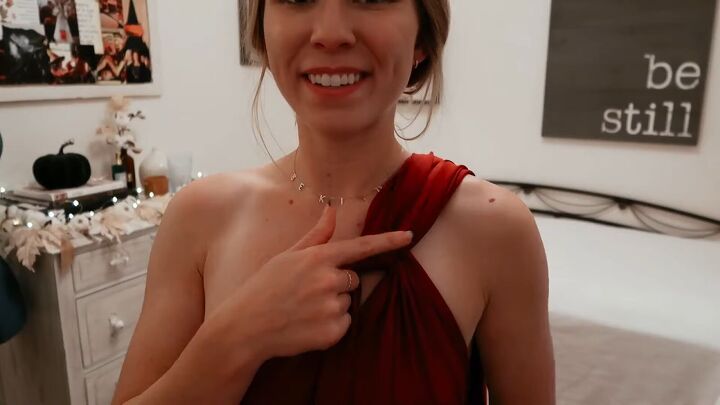
Style 1

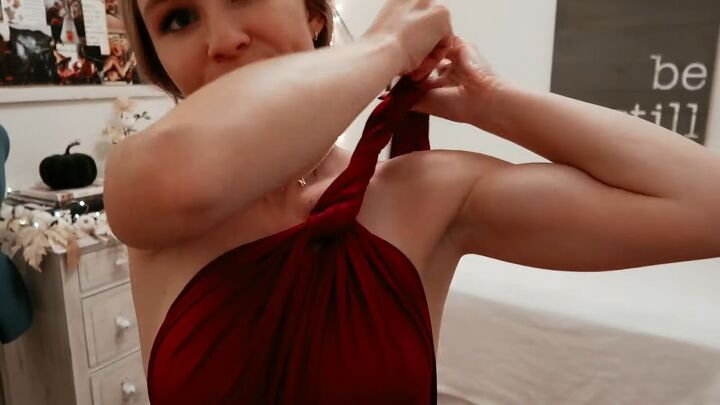
1. Roll the straps
Start by rolling the straps on either side

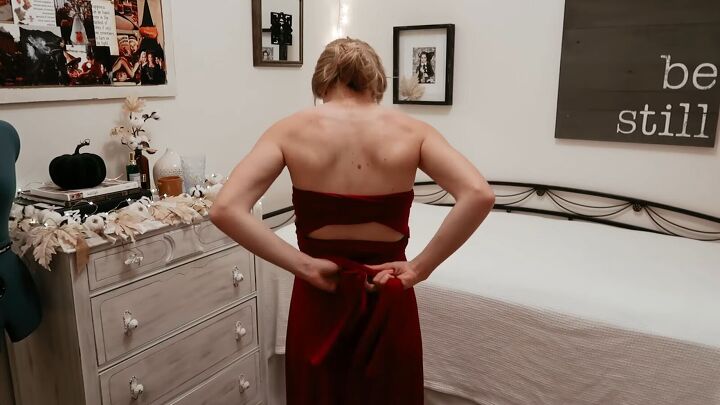
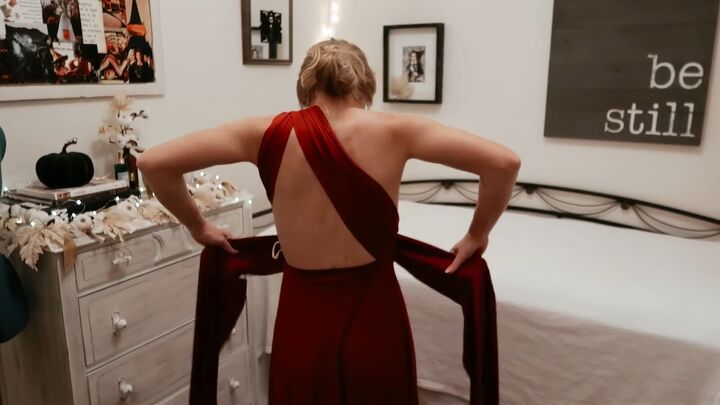
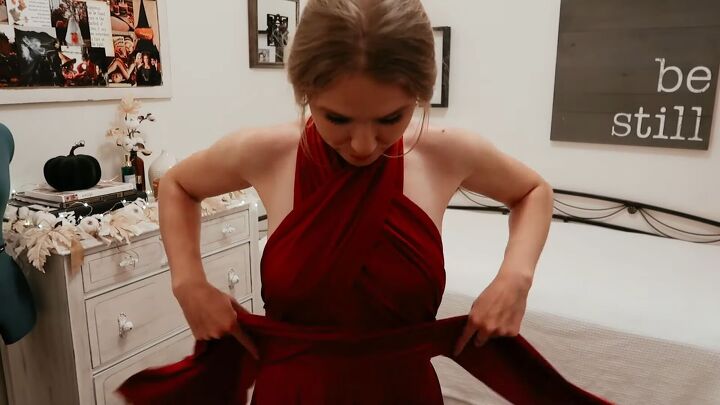
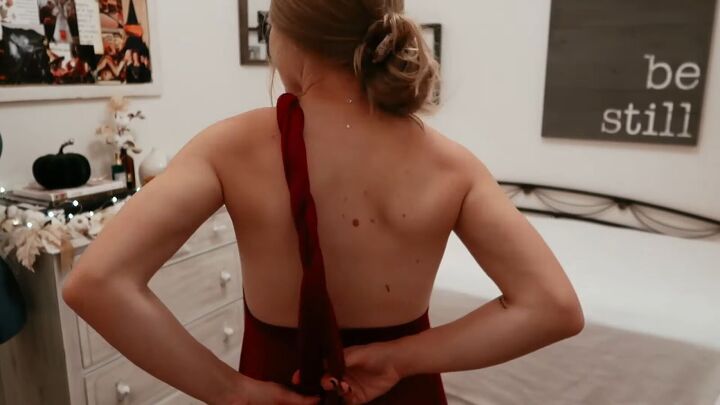
2. Cross at waist
Take the straps from under your arms, bring them across your waist and cross them over.
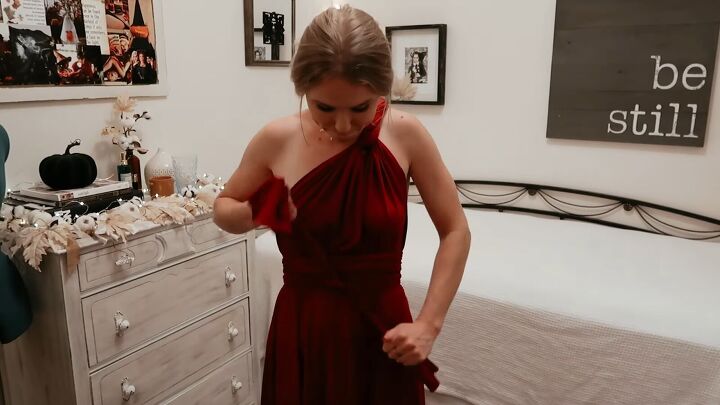
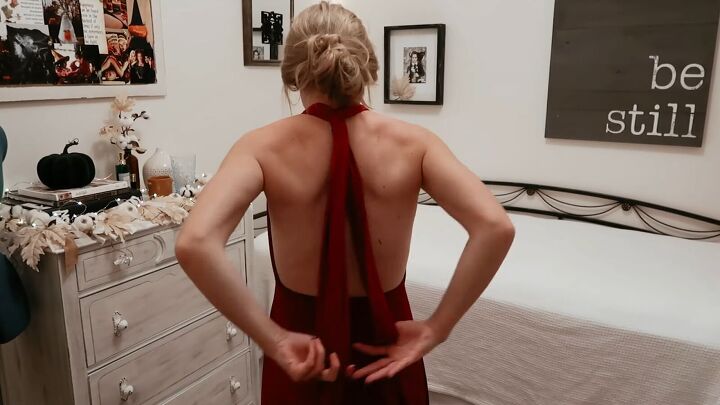
3. Cross and tie
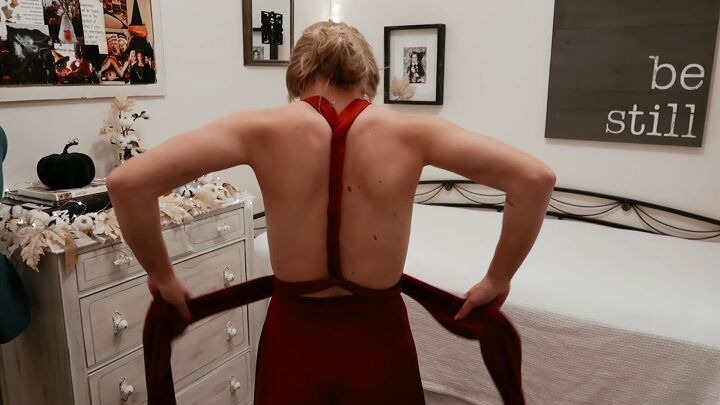
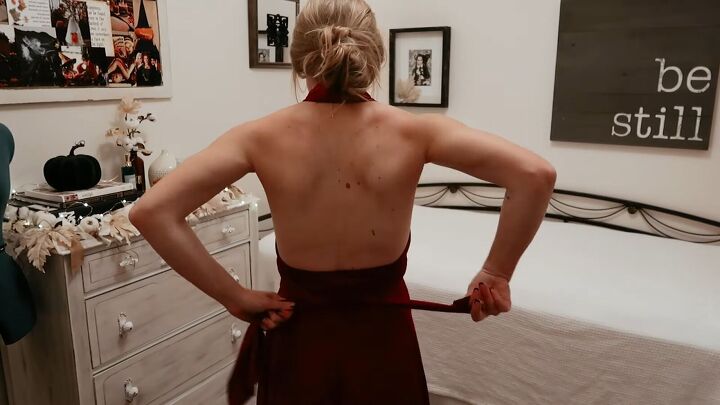
Repeat the process of bringing the straps around your waist and crossing them over so that you have a double waistband. Then take the straps round to the back and tie them together.
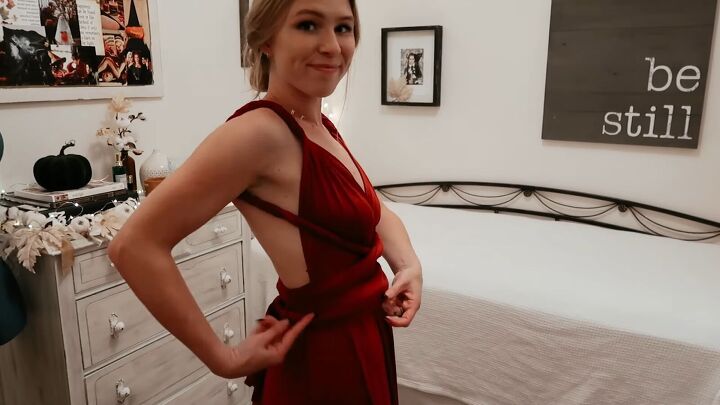
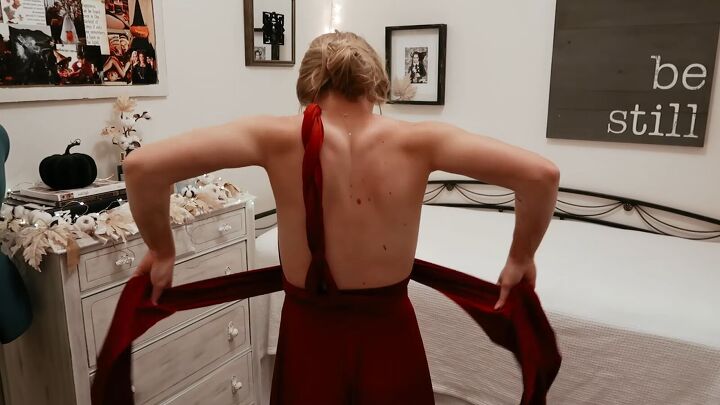
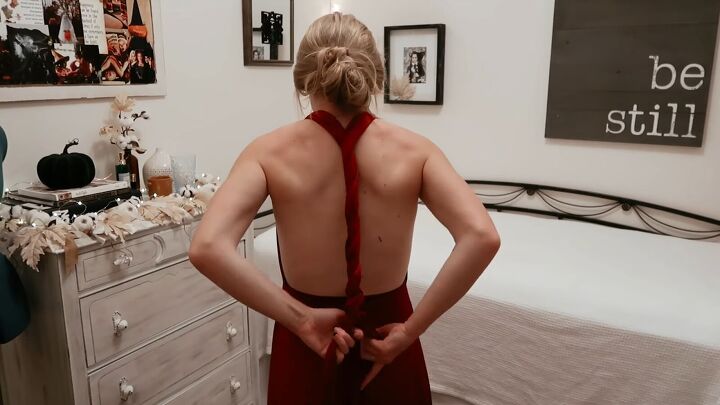
4. Tuck the ends in
Tuck the ends of the straps under the rolled waistband.
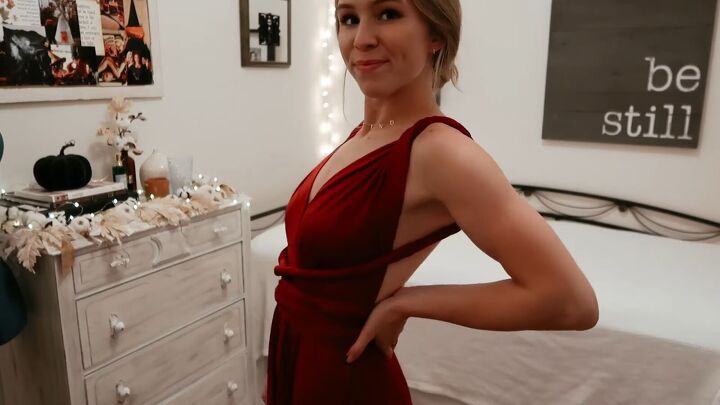
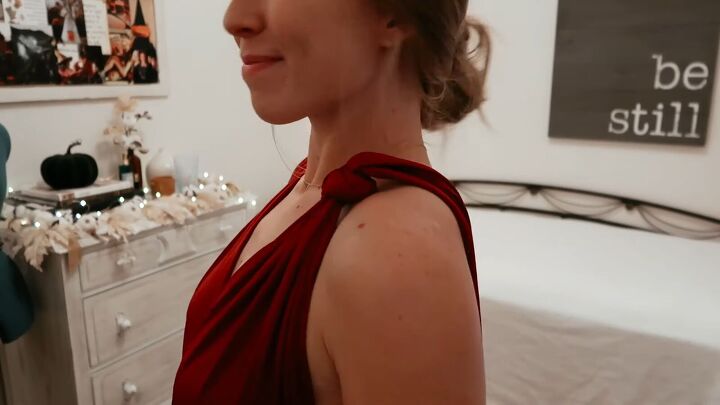
Here is the finished look!

I love the rolled crossover detail at the front, and the look has a completely open back.
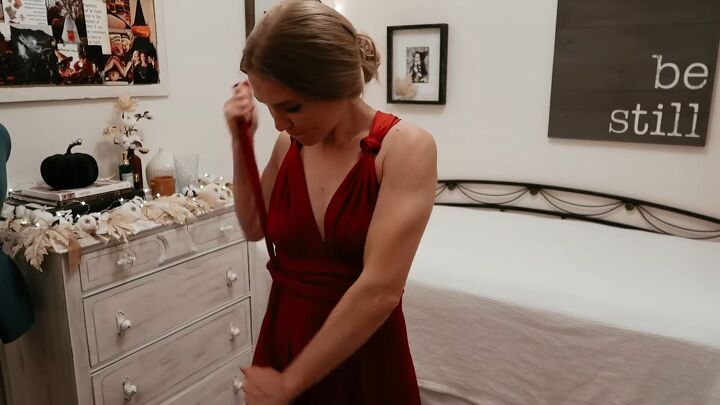
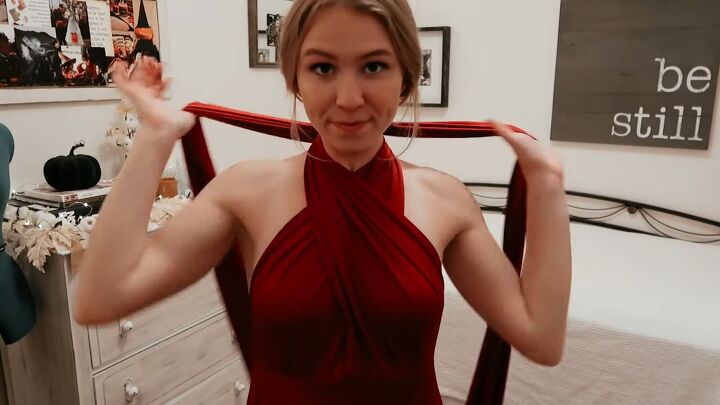
Style 2

1. Cross over the front
Start by making a knot at the front, then throwing the ends over your shoulders.
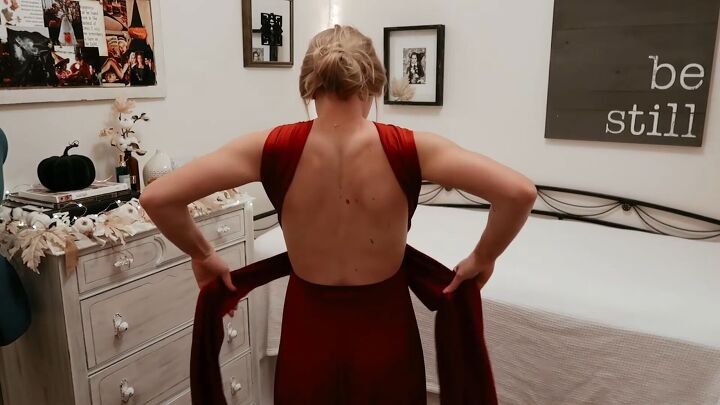
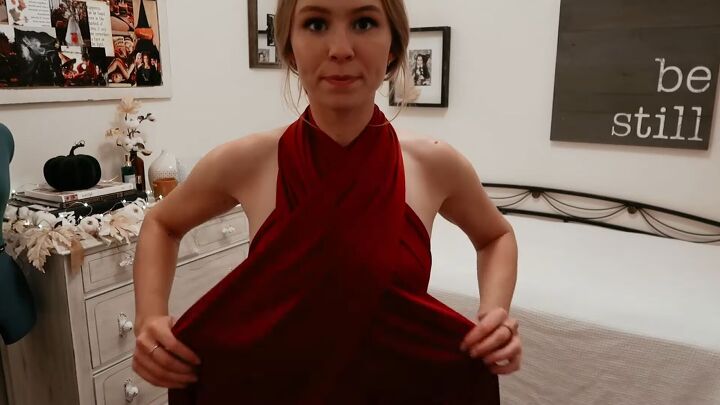
2. Cross over again
Loop the straps around your arms, bringing them to the front. Then, cross them over and bring them around to the back again..

3. Make a tie
Finally, bring the straps round to the front and tie them in a double knot at one side of your waist.

Here is the finished look. I love the v-shaped crossover neckline as well as the asymmetrical tie on the waist.
Style 3
1. Braid the straps
For this third look, you want to start with the v-shaped crossover neckline, as shown in the previous look. Then take one of the straps over to the other side so that they are both across the same shoulder.
Proceed to twist and braid the straps together. You want to braid them over your shoulder until you reach your waistline. When you have braided until this point, tie a knot.
2. Cross over at the waist
Separate the two straps, bring them to the front, across your waist, and then back around to your back again.
3. Make a tie
Bring them round to the front once more and tie a knot. Finish off by tucking the sides of the straps under the waistband to hide them.

I love how the dress looks when done up this way. The twisted, one-shoulder look makes me feel like a fairytale princess.
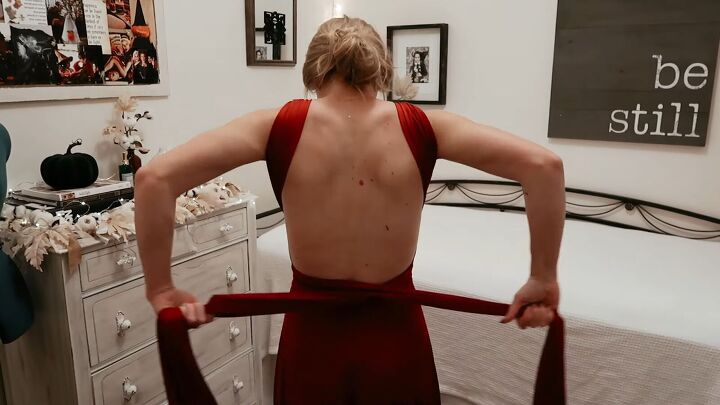
Style 4
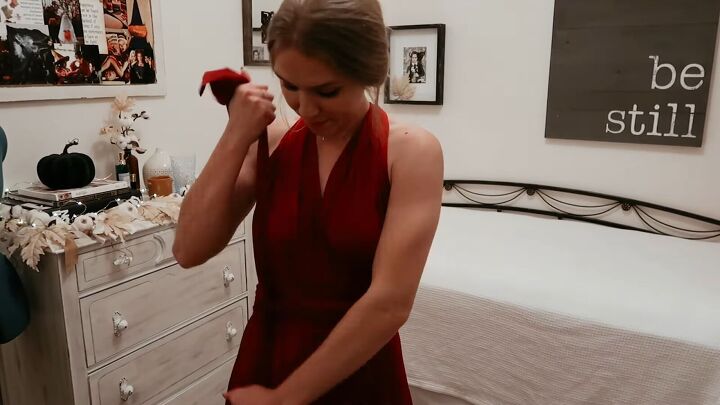
1. Tie a knot in the straps
To begin this next look, tie a knot on either strap just at the start of it so that the knot will lie on your shoulders. Ensure this looks the same on both sides.
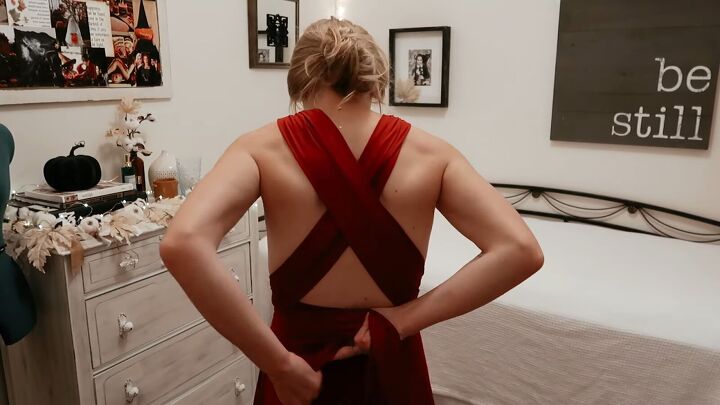
2. Cross over at the back
Next, cross the two straps over at the back, bring them round to your waist and cross them over.
3. Cross over at the front and tie
Proceed to bring the straps round to the back again, then cross them over at the front and finish by making a tie on the side.

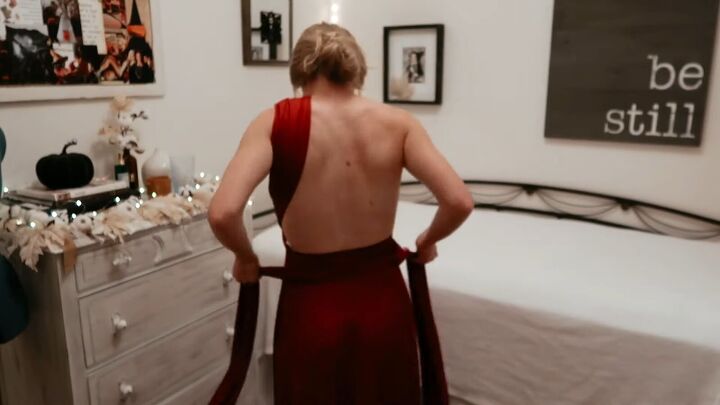
Here is the finished dress design. I love the knotted straps at the shoulders and the wraparound waist.
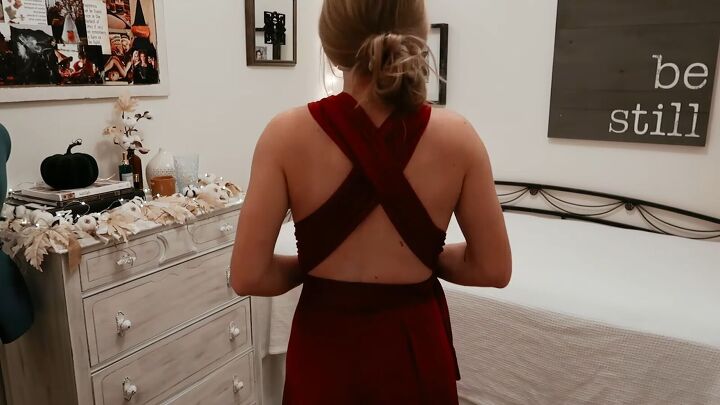
Oh and just look at that crossover back; this dress is a work of art!
You also can give this style an open-back design by undoing the knot and uncrossing the straps at the back. You then need to cross the straps over at the bottom of your back, as shown above, and then tie them at the front.
Style 5

1. Cross over at the front
This next style is a strapless look. Start by crossing the straps over your chest.
2. Continue crossing over
Then, cross the straps over at the back, take them round to the front, cross them over and repeat this process again.
3. Tie a knot
Finish by tying a knot a the back and tucking the ends under the straps around the waist.

This is such a cute little look that you can’t help but fall in love with.
Style 6
1. Cross over at the top
Bring the straps up over your chest, then cross them over at the back of the neck.
2. Braid
Proceed to braid the strap until you reach your waistline.
3. Cross over at the waist
Then cross the straps over at your waist, bring them round to the back and repeat the process.
4. Tie a knot
Next, tie a double knot at the side of your waist.

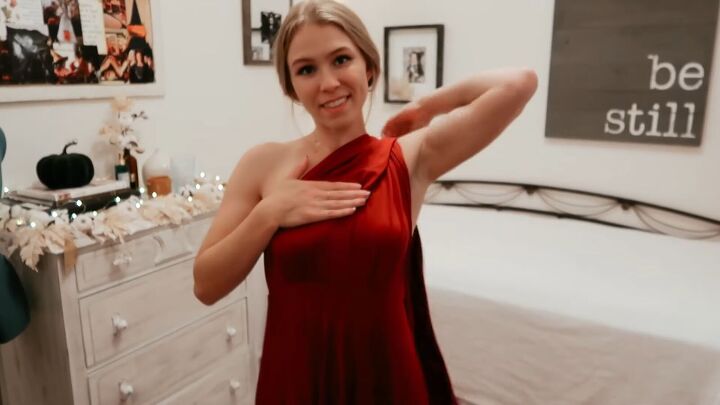
The front of the dress looks like a very classic infinity dress style.

The twisted detail at the back is a really stunning feature.
Style 7
1. Put straps over one shoulder
First, place both straps over one shoulder.
2. Cross over at the back
Loop the straps under the arm. Then, separate and cross the straps over at the back, bring them to the front, and then round to the back again.
3. Tie a knot
Finish by tying a double knot and tucking the ends under the waist.

This looks so classy and elegant.
Style 8

1. Separate the straps
Start with how the dress was in the previous look, but this time bring one of the straps to the other side of your waist.
2. Cross over at the waist
Cross the straps around your waist, bring them to the back and then to the front again.

3. Tie a knot
Tie a knot at your waist and leave the ends hanging.

Here we have a simple yet elegant look.

You can also style this dress by taking the strap that is nearest your neck and pulling it across the other and down onto your upper arm.

This is really gorgeous and unique.
Style 9

1. Cross the straps
Start by crossing over the straps, as shown.
2. Bring around the neck
Bring the straps around your neck and round to the front.
3. Cross at the front
Cross the straps at the front as shown.
4. Wrap around waist
Wrap the straps around your waist.
5. Tie a knot
Finish by tying a knot at the back.

I love the double crossover look.
You can also style this dress by crossing the straps over at the back.
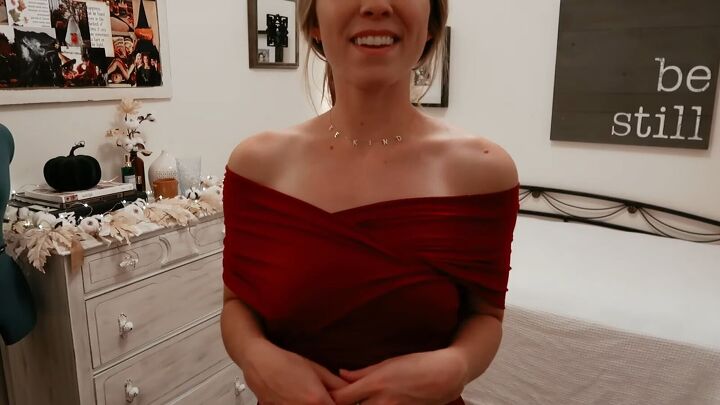
Another styling option is to widen the straps and pull them off your shoulders for a glamorous 1950s look.

You can also put the widened straps on your shoulders to make it look like the dress has short sleeves.
Style 10
1. Tie a knot
For the final look, tie a knot at the very top of the dress.
2. Braid
Place the straps over one shoulder and braid them until you reach halfway down your back.

3. Wrap around the front
Halfway down your back, bring the straps round to the front as shown.

4. Cross over at the waist
Cross the straps round at the front, bring them to the back, and repeat. Wraps the straps as you do so. Then make a tie at the front and tuck the ends under the straps.

This wrapped, one-shoulder look is fabulous.

The design at the back is pretty special too.
Bridesmaid infinity dress styles
There we have 10 ways that you can style a bridesmaid infinity dress, but as the name suggests, there are tons more options.
This dress is incredibly versatile, so you can play around with a style that suits you and even wear it again for another occasion. Let me know which style was your favorite in the comments below.
The author may collect a small share of sales from the links on this page.


Comments
Join the conversation