5 Super-Cute Christmas Acrylic Nail Ideas to Rock This Holiday Season

It's the holiday season and time to express your holiday joy through nail art! Follow this tutorial for 5 cute Christmas acrylic nail ideas using red and white nail polish.
At this time of year, you can buy sets of holiday-colored nail polish online that include all the colors you need and often some Christmas-themed nail stickers and glitter as well! Once you’ve learned how to do these Christmas acrylic nails, you can adapt the designs for other holidays too.
Tools and materials:
- Clear acrylic nails in desired shape
- Red, white, and black nail polish
- Nail glitter
- Stick-on nail decorations (optional)
- Cuticle pusher
- Nail file
- Nail glue
- Nail trimmer
- Nail base and topcoat
- Thin nail polish brush
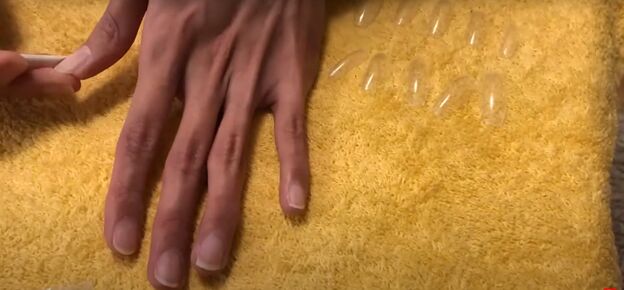
1. Prep your natural nails
Cut and file your natural nails short and run the file over the top of your nails so the acrylic nails will adhere better. Push back your cuticles.
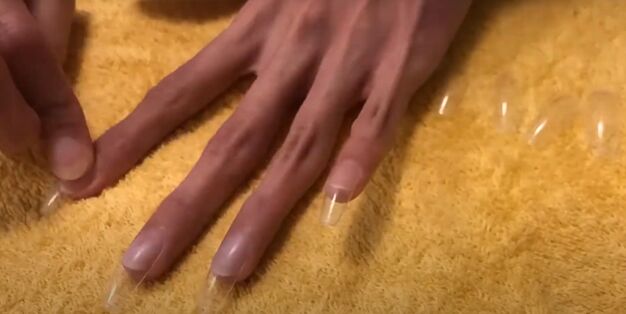
2. Apply acrylic nails
Apply nail glue to the top of your nails and place the acrylic nails onto the glue. Press down tightly so they adhere well.

Use a regular nail trimmer if you want to shorten the acrylic nails once you’ve glued them on. If you do cut the acrylic nails, then file the cut ends smooth as well.
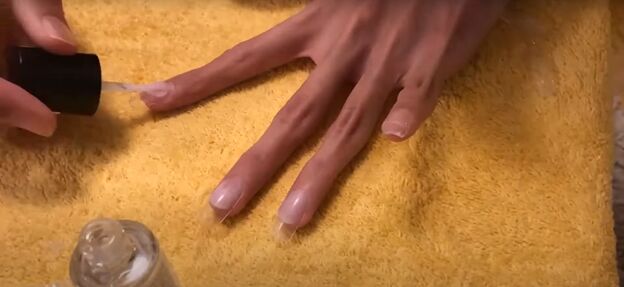
3. Base coat
Apply a clear base coat to your acrylic nails.
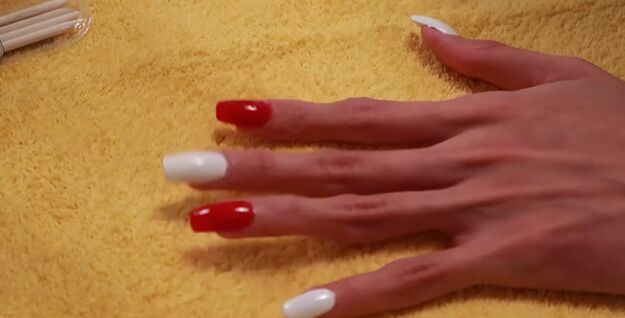
4. Apply red and white nail polish
Apply two coats of white polish on alternating nails, and two coats of red polish on the other nails. Now you have 5 red nail canvasses and 5 white nail canvasses to create your designs on.
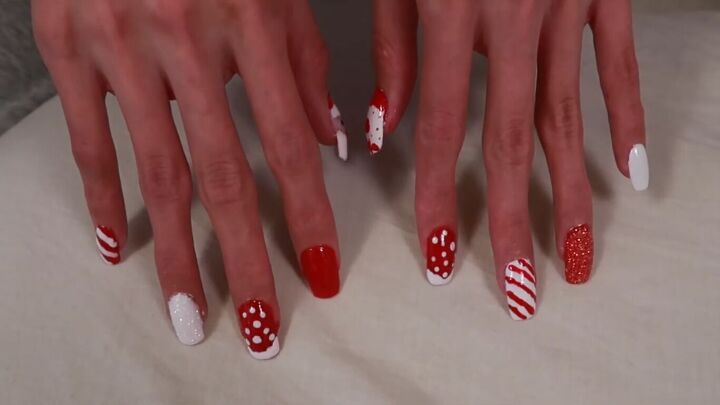
Christmas acrylic nail ideas
These designs use just red, white, and black nail polish. Most of the designs demonstrated in this video can be reversed. So, a red design on white nail polish could also be done as a white design on red nail polish.
The only ones you won’t want to reverse are the snow design and the Santa design, because they are color specific.
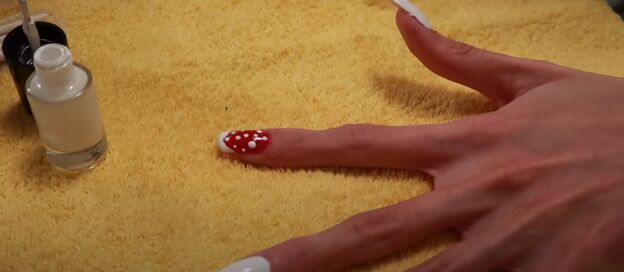
1. Snow
On one of your red repolished fingernails, apply white polish to the tip of your nail following the arch of your nail shape.
Now, add dots on the remainder of the red polished nail, making the dots varying sizes to look like snow.
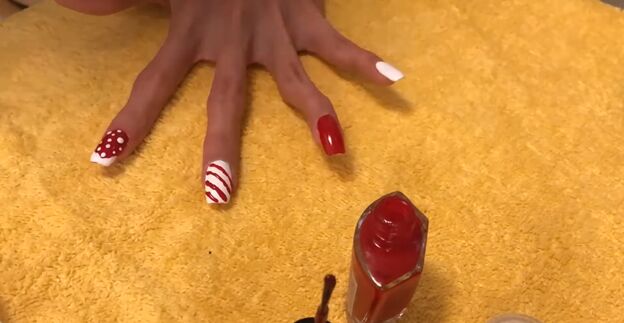
2. Stripes
On one of your white polished fingernails, apply red polish in thin diagonal lines from the top to the bottom of your nail.

3. Glitter
On a still wet red polished nail, use your fingers to sprinkle a liberal amount of white nail glitter all over the wet red nail polish.
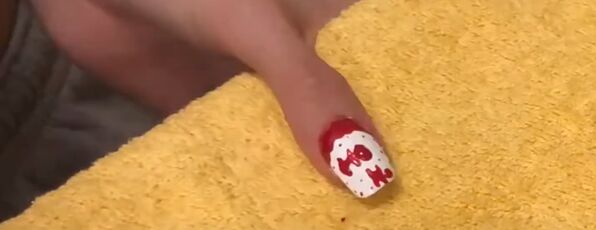
4. Ho, ho, ho!
On a white polished nail, apply red nail polish at the base of the nail following the arc of your nail bed.
Now use the red nail polish to write “Ho, ho, ho” on the white part of your nail (or any other short holiday words you’d like!) Add some small red dots for extra decoration.
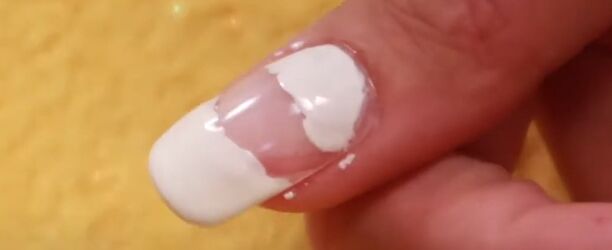
5. Santa
After you have applied the base coat to your nail and let it dry, apply white nail polish to the bottom half of your nail and the top of your nail, leaving the center of the nail clear.
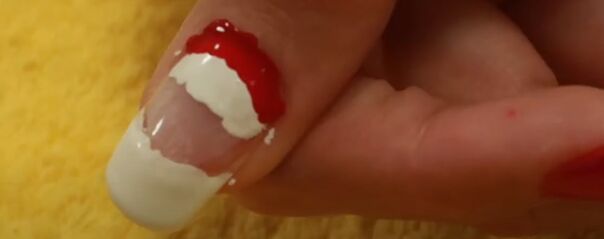
Add red polish to the bottom half of the lower, white-painted part of your nail, following the arc of your nail bed. That is Santa’s hat!
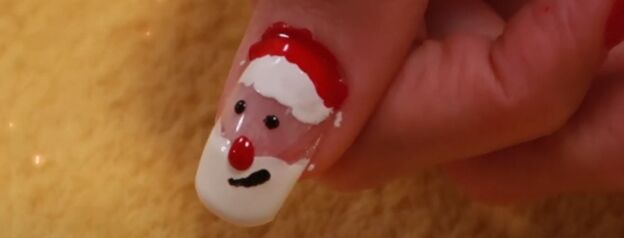
Add a red dot for Santa’s nose at the center top of the upper white painted part of your nail, overlapping the white and clear parts of your nail.
Now use black nail polish to make two dots on the clear part of your nail for eyes, and a small mouth on the white nail polish below the nose.
Let all your nails thoroughly dry and then add a topcoat.
Christmas acrylic nail ideas
These are only a few Christmas acrylic nail design ideas. Let your imagination and your holiday spirit run free and create your own designs! Which was your favorite? Leave a comment to let me know what you came up with.
The author may collect a small share of sales from the links on this page.


Comments
Join the conversation