Make Your DIYs Cleaner With an Edge Stitch

If your sewing doesn’t have that crisp, clean look that a commercial garment does, I have the answer for you right here.
Edge stitch your seams to give all your DIY sewing a more professional finish.
You don’t need any fancy equipment either, just the regular presser foot on your sewing machine.
Tools and materials:
- Garment to sew
- Iron
- Sewing machine
1. Sew the seam
Join your seam as usual with the right sides together and take a half inch (1 cm) seam allowance.
2. Press
Open out the fabric.
On the wrong side, press both the seam allowances in the same direction.
Turn the fabric over so the right side is uppermost and press the seam open.
3. Align the presser foot
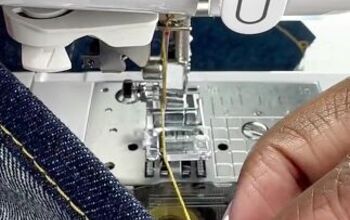
With the right side facing you, place the seam under the presser foot of your machine.
Line up the stitching line with the notch on the presser foot and the seam allowance under the needle.
4. Edge stitch
Lower the presser foot.
Sew a straight line 1/8” (0.3 cm) away from the seam line.
Edge stitch
Edge stitching works particularly well on denim, especially if you use a contrast color.
It’s definitely worth the small amount of extra time it takes to get a professional finish on the outside and inside of your garment.
Why not give it a try and let me know in the comments how you get on?
Next, check out this Top Stitching Sewing Tutorial for Beginners.
Follow my TikTok: @.keycult
Enjoyed the project?
Suggested materials:
- Garment to sew
- Iron
- Sewing machine
The author may collect a small share of sales from the links on this page.


Comments
Join the conversation