Get Started on Your Sewing Journey With These Essential Tips and Tools

If you’ve seen any of my videos, you know I’m all about that upcycle life. I love sewing and taking something and turning it into something cool and new. I’ve been sewing now for about ten years, and I’m completely self-taught, which means a lot of trial and error. So in this tutorial, I’ve broken down some of my hard-learned lessons, which will hopefully help you get started on your own sewing journey!
Tools and Materials:
- Fabric scissors
- Various threads
- Various needles
- Sewing pins
- Sewing machine
- Flexible tape measure
- Fashionary notebook
- Seam ripper
- Pinking shears (optional)
- Dress form (optional)
- Sewing clips (optional)
- Cutting mat (optional)
- Rotary mat (optional)
Choose your sewing machine
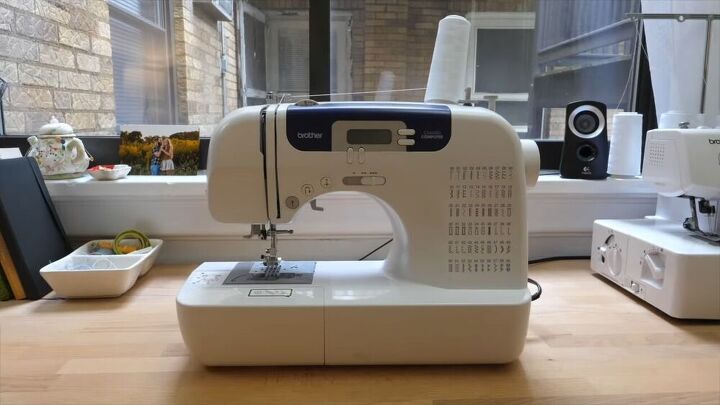
My recommendation when it comes to choosing your first sewing machine is to get a quality machine with a lot of different basic stitch settings. The one I use is the Brother CS-6000i and I really do recommend it. One of my favorite things about it is that it’s kind of computerized, which really helps you avoid making a lot of beginner mistakes. It also has three buttons on the front that are super useful. The first, which is an arrow, allows you to operate the machine without adding a presser foot. Next to it is the button that looks like a U-shaped arrow, and that reverses the stitch to create a backstitch. You can also use this button with or without a presser foot. And my favorite button is that third one on the front, which brings up your needle instead of having to use the wheel on the side of the machine. There’s also a speed dial so that I can customize how fast or slow I sew, and the bobbin access is super simple and straightforward.
Sergers
The next machine I own is a serger. That’s a separate machine that provides an overlocking stitch that you might see on hems and edges of fabric. It also has a knife feature that cuts off the edge of your fabric as it overlocks to provide a super clean and professional finish overlocked edge. The serger I use is a Brother Lock 1034D. It’s around $200 on Amazon, and if you ask me, it’s totally worth it. If you don’t want to purchase a serger, though, keep reading to see how you can use your sewing machine for a similar effect.
Use a zigzag stitch instead of a serger
You can set your machine to a zigzag stitch, and use that as an overlocking stitch. You would do this by putting a zigzag stitch on the very edge of your fabric and that’ll act as a kind of overlocking stitch to lock in those raw edges. It doesn’t lock up all the fraying as much a serged stitch would, but it’s definitely better than nothing and recommended to do if you don’t have a serger.
The importance of needle and thread
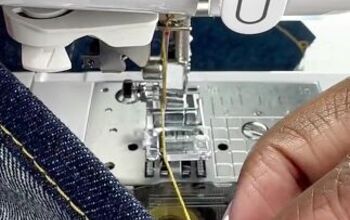
It’s really important to understand that not every type of needle and thread will work for every type of fabric. I get a lot of people asking me why their machine isn’t working well with a certain fabric, and that’s usually the reason. With every type of fabric you need to understand what stitch length and type of stitch to use, what tension to set your machine to, and what needle size and thread type will work best. So you definitely want to switch out your needle accordingly. With denim, for example, you’re going to want a heavy-duty needle and a more robust thread. The needles I use for denim are size 110/18, and I also use a thicker and stronger denim thread. For lightweight fabric, you’ll want to use a lighter fabric like an 80/12 needle, or even lighter. It really depends on your fabric, so definitely do your research!
Projects for beginners
If you’re just starting out, you might be interested in some simpler projects to try out. Some recommendations I would give are cloth napkins and tablecloths. These are both an easy square shape that will help you get the hang of the basic straight stitch. Something else you could try is an elastic tube top, which I actually made for my first Youtube video, so you can check out that video on my channel if you want. Hair scrunchies or hair ties are also a great project that will get you used to elastic. One of my favorite projects as a beginner was an apron, which really allowed me to experiment with different stitches and fun things. If you want even more ideas, you can try a tote bag, and if you’re ready to take it a step further, try out a circle skirt. There are so many tutorials out there for all of these things, so definitely check out YouTube and Google to get you started.
Essential tools to get started
If you ask me, there are only a few things that I would consider essential. I don’t have too many fancy tools. It’s true that the fancier things out there might make your life easier, but I don’t think you really need them. The first thing I think is absolutely essential, is a good quality pair of fabric scissors. You definitely want to have that control when you’re working with your fabric, and a random pair of scissors you found in your drawer just isn’t going to cut it. No pun intended. Maybe. Next, is a very basic seam ripper, to help you remove stitching - it’s really useful for when you mess up. Pins and long pins are also a total must. Something else that I love is my Fashionary notebook, which is a notebook that comes with faint figures already on the page so that I can really quickly jot down my ideas for projects. You’re also going to want a flexible tape measure, which will help you get measurements on curvier areas, and some fabric chalk or washable marker to make your markings. You’re going to need an iron to get your projects looking neat and crisp, and don’t forget the various types of pins and needles we already talked about.
Non-essential extras
Obviously, there are tons of products and tools out there that you can use for your sewing projects. So here are some tools that people tend to rave about and that would definitely be useful, but aren’t essential. A cutting mat and rotary knife will make your life easier when cutting fabric. If you don’t want to pin clothes to your body, you can also get a dress form that will allow you to make your adjustments off of your body. Sewing clips is something I have never used, but I do think they would be super handy. Lastly, pinking shears, which cut out in a zigzag pattern and therefore reduce fraying.
That’s it! You are officially ready to get started. Seriously, though, sewing can be hard and frustrating, but my biggest recommendation is really to just go for it and keep practicing. Start off by getting cheap materials second-hand, and keep at it. Trust me, things have gone wrong for me so many times, so don’t get discouraged. It really is worth it. I hope these tips have helped you and that you’ll get started on your sewing journey! If you have any questions that I haven’t addressed, hit me up in the comments!
How to replace a sewing machine needle
Enjoyed the project?
Suggested materials:
- Fabric scissors
- Thread
- Needles
- Sewing pins
- Sewing machine
- Flexible tape measure
- Dashionary notebook
- Seam ripper
The author may collect a small share of sales from the links on this page.


Comments
Join the conversation
Great job! love your approach to sewing and life! Lots of good reminders and new info as well. Keep it up!
Just wanted to mention that I have found, over a lifetime of sewing, that Simplicity patterns are really the easiest to use. Also, all sleeve patterns in this brand will cross-fit with their other patterns. So if you like the sleeves of a certain Simplicity dress pattern and the tunic of another Simplicity pattern, you can use the dress sleeves in the tunic! (Must be the same size, of course!) Can't do that with other pattern brands!