Shorten a Jacket Sleeve by Hand | Elise's Sewing Studio

We may earn money or products from the companies mentioned in this post.
Shortening a jacket sleeve is one of the rare times I do an alteration by hand. It is possible to shorten a jacket sleeve using the sewing machine. (I once worked with someone who would do this, but it involves opening up the jacket lining in the body. I’d rather leave parts of a jacket that don’t have to be altered alone).
This tutorial can be used for a jacket sleeve, coat sleeve or blazer sleeve.

Try the jacket or coat on and place one horizontal pin at the new sleeve length. I usually go with just below the wrist for when I want to shorten a jacket sleeve or coat sleeve.
When adjusting a suit jacket or blazer, the standard “rule” is to have it end about 1/4″ up from the wrist. This allows the shirt cuff to stick out just a little bit underneath. (But I’m not one who follows rules for rules’ sake – make your sleeve end where you like!)
I usually just mark hems for jackets and pants on one side and then transfer the measurement over. However, an exception would be if someone has a longer arm/leg than the other, or perhaps a higher shoulder. This is more common than you may think.
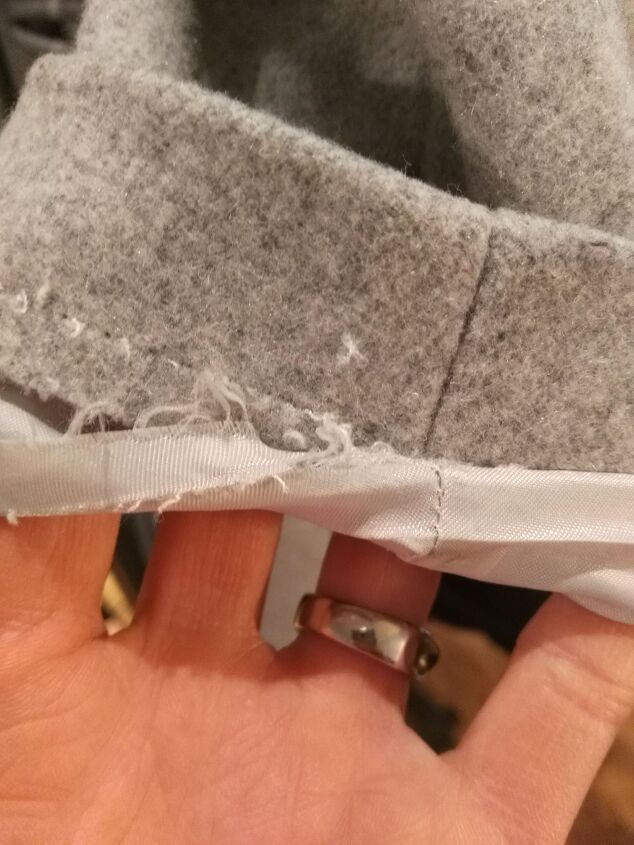
Open the lining then measure and cut excess.
Now it’s time to undo the stitching that attaches the lining to the jacket in the sleeve opening. I like to do both sleeves at the same time.
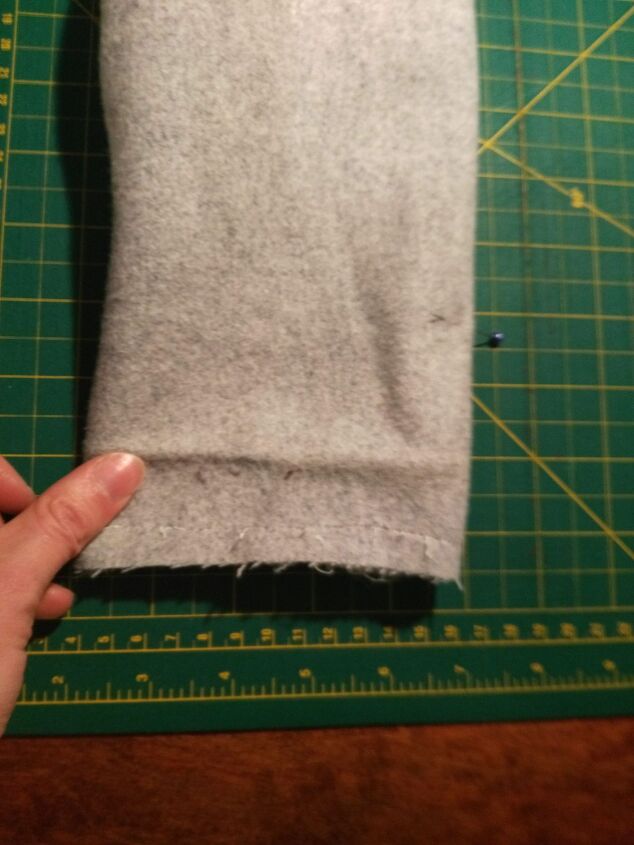
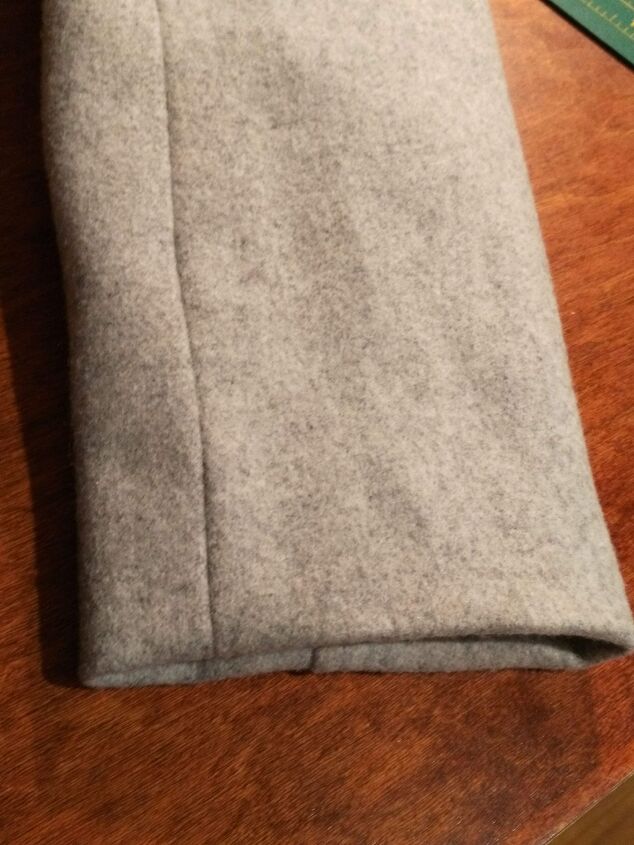
Press the crease where the sleeve previously ended. Use the steam setting on the iron. For more on pressing and ironing, including the difference between the two, check out my post Pressing and Ironing Tools.
Cut your sleeve 1″ below your pin marking your new length. DO NOT CUT YOUR JACKET LINING YET. I shove the lining high up in the sleeve at this point to get it out of the way.
I like to use a rotary cutter, ruler and mat for this, as I find it faster than measuring and drawing a line and cutting with fabric scissors (affiliate link). But, you can measure and cut with a regular ruler and fabric scissors too. (These are affiliate links – should you click the link and make a purchase, I receive a small commission at no extra cost to you).
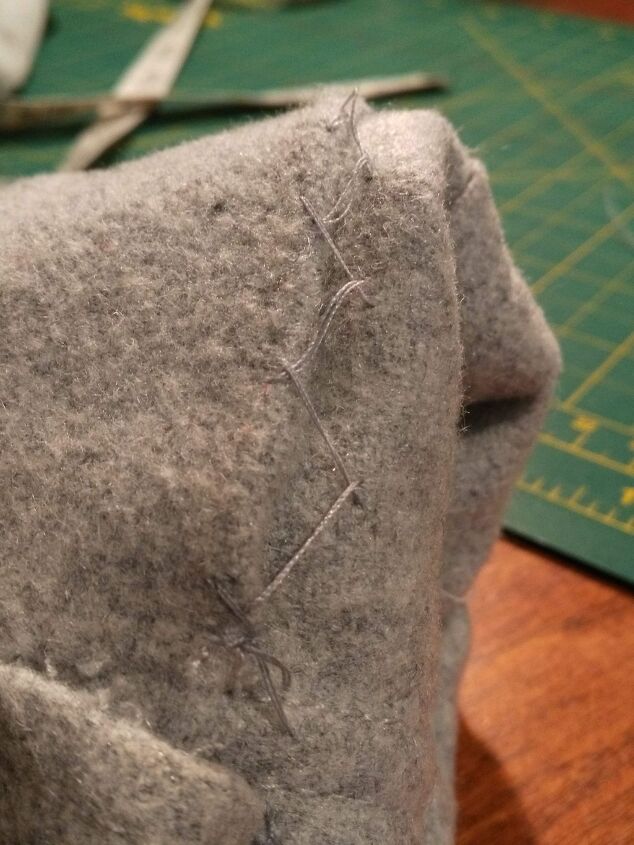
Hand stitch the sleeve opening.
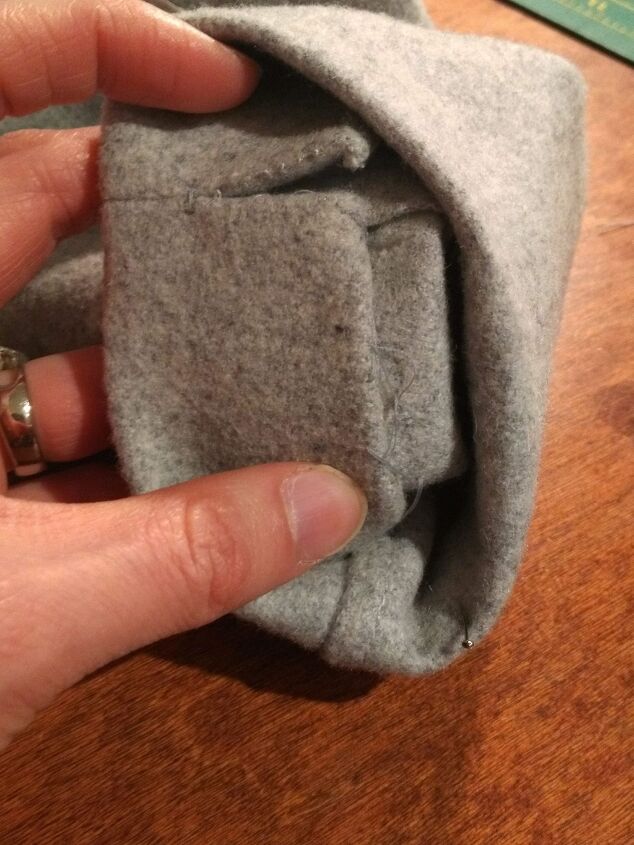
Pin your sleeve up 1″, this should be where your pin that marked your desired length is. Take it out now.
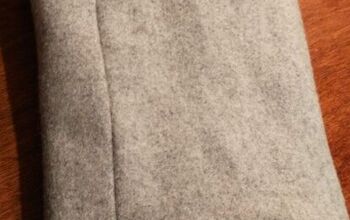
If your sleeve is narrower where the cut line is than where it sits when it is turned up. it won’t lay flat. You will have to open the sleeve a bit in the seam allowance of the arm to give it a bit of extra room to lay flat. (See photo above.)
After you open the seam just enough for it to lay flat, do a few stitches by hand here so the seam won’t continue to come undone.
Using a cross stitch, sew around the sleeve opening. Be careful not to pull the thread too tight. If you have too much tension between the stitches it will pucker on the outside. You can check this as you go.
Press when you are done this step, with the iron on the inside of your sleeve to avoid any shiny marks on the outside.
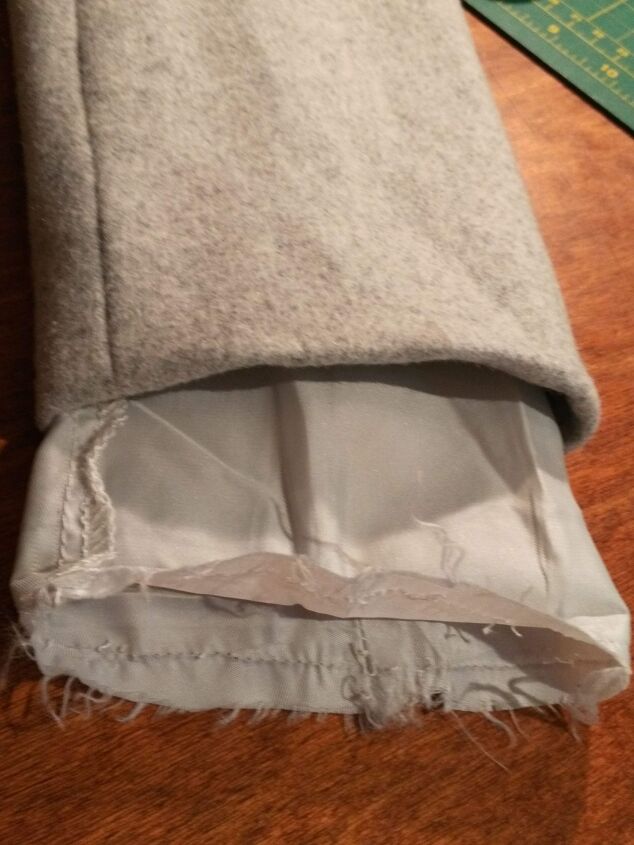
Cut and sew the sleeve lining.
Now that the main sleeve fabric hemmed, it’s time to look at the lining. Warning! You have to be careful with sleeve linings. If the sleeve lining is too short, it will cause the whole sleeve to pucker.
For the lining, cut it about 1″ longer than the finished sleeve. Do a double turned hem, 1/4″ each turn.
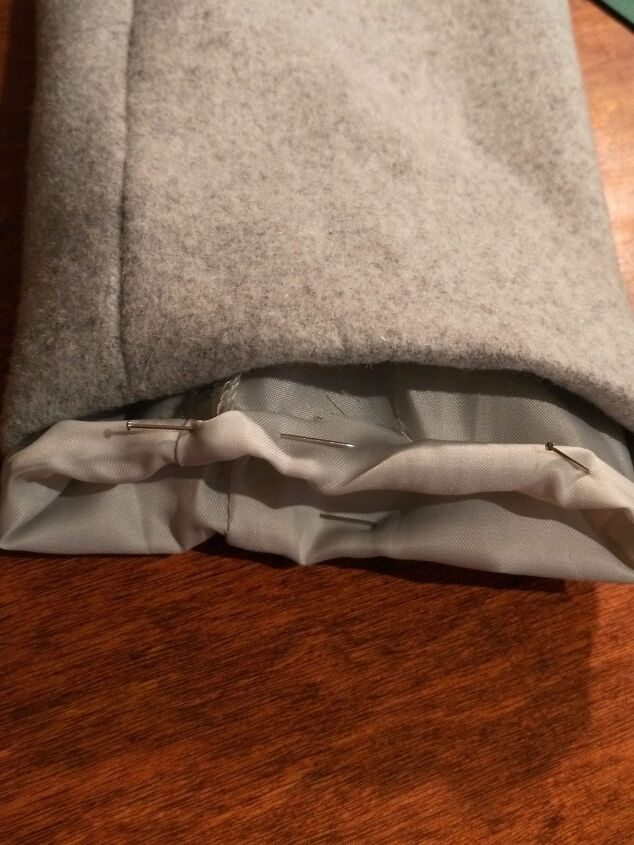
Sew the hem on the sewing machine. Or if you have to do it by hand, you could use a backstitch. Press the hem to make it lay smooth.
Next, pin the hemmed lining inside the coat sleeve about 1/2″ up from the edge, or so the lining is inside the sleeve and doesn’t show below the finished sleeve edge. Make sure to match any sleeve seams , and make sure that the lining is not twisted.
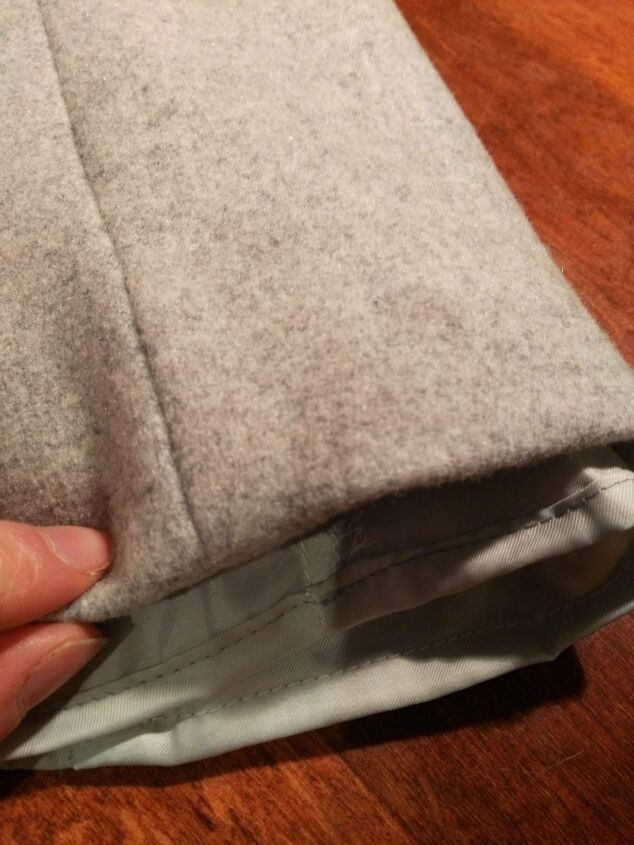
Then slipstitch the lining to the coat sleeve hem allowance. Use fairly small stitches to make it more secure. Lastly, I like to tack it in a few extra spots after stitching to make it a bit more secure.
Now you know how to shorten a jacket sleeve to fit you!
Want to learn more about altering clothes you already have, to fit your unique body and style? Receive my free guide full of tips to get you started doing your own clothing adjustments by signing up to my newsletter here.
If you liked this tutorial, might also like How to Sew a Cuffed Hem on Sleeves or Pants
Find out more about my custom size skirt workshop:
The author may collect a small share of sales from the links on this page.


Comments
Join the conversation