How to Make a DIY Sherpa Denim Jacket With a Sherpa Collar & Lining

In this tutorial, I will show you how to convert a regular jean jacket into one of these really cool DIY Sherpa denim jacket. It’s like that faux shearling; super on-trend, it’s retro, it’s comfy, and it’s perfect for fall and winter, just such a great DIY.
Tools and materials:
- Collared jean jacket
- Scrap fabric or pattern paper
- Marker
- ½ Yard Sherpa
- Fabric scissors
- Seam ripper
- Sewing machine or fabric glue
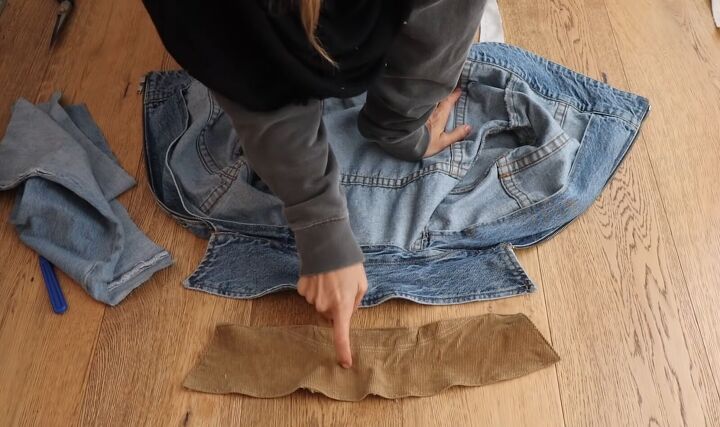
Step 1 - Cut the collar pattern
My jean jacket had a corduroy piece all along the neckline, so I started by seam ripping it off, and then I can use this collar as my pattern for the Sherpa fabric.
If you don’t have a piece like this, you’ll need to make a pattern for the collar. To do this, simply take some scrap fabric or pattern paper, lay the collar of your jacket out flat, and trace around it.
Tip: You really only need to make half a pattern because you could fold your fabric in half and then cut it, and you would end up with something perfectly symmetrical.

Step 2 - Make the Sherpa collar
Next, lay the pattern on the back side of your Sherpa fabric and cut it out. You don’t need to include a seam allowance.
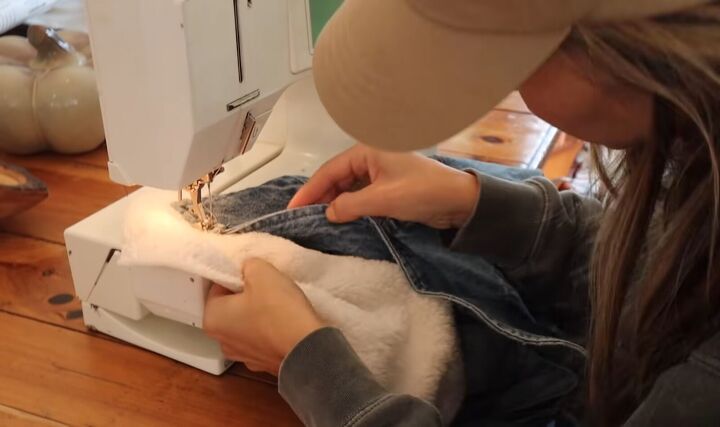
Step 3 - Sew the collar on
Now, you’re going to sew it so that when it folds down, it will be clean finished. Kind of like when you do a waistband, you sort of fold it upside down so that when you fold the waistband down, it’s clean finished.
Basically, what you’re going to do is lay it down the way you know you want it, and then from there flip it up, and then you’ll know exactly where to pin and sew.
Proceed to do a simple straight stitch all the way across.
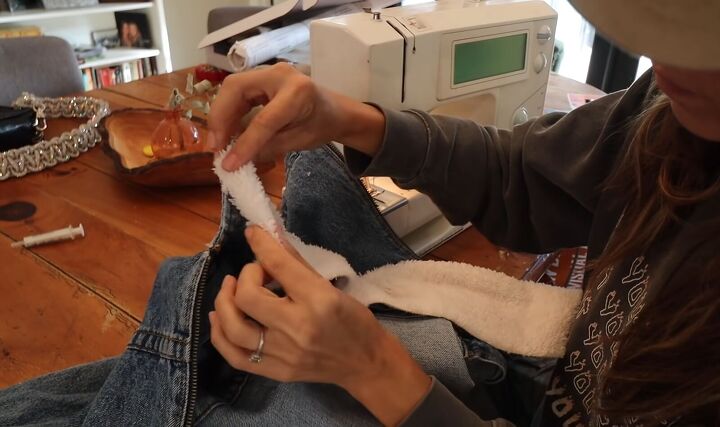
Step 4 - Sew down the sides
Now it’s time to work on the sides of the collar. You’re basically going to fold it like a present. You’re just going to tuck that excess fabric in and then fold it until it’s nice and flush with the edge.
You just want a little bit of overlap because it’s a cool detail, and you don’t want to see the denim peek out. So just lay that down until it’s nice and even, use your fingers to manipulate it, and pin it into place.

Now it’s time to actually sew it down. I’m going to do a looser stitch on this because I don’t want to see the indentation of the stitch line on the Sherpa.
You obviously don’t have to worry about that with the top piece because the stitch was hidden inside.
But these are topstitched, so a loose stitch will allow you to kind of use your fingernail, and you can almost scratch at the seam, and it will fluff up and hide the stitch line.
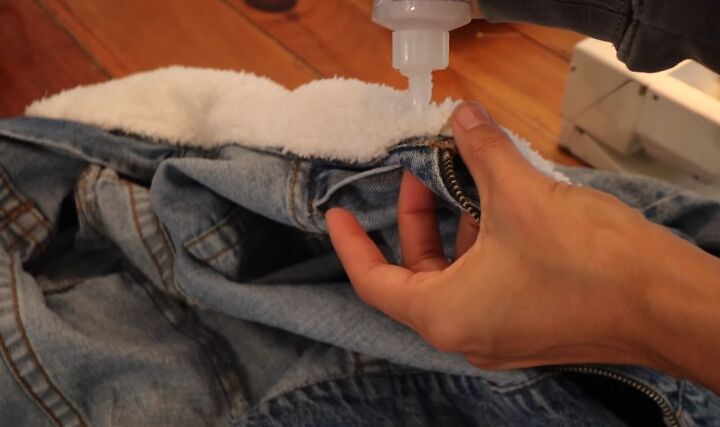
In these little corners, this is an area where there are so many layers of denim that are flooded into the corner seam that it’s impossible to sew through with your machine.
So, you can either use fabric glue or if you use a needle and thread, you can just pick up a couple of threads of the denim and tack down the denim into those corners.
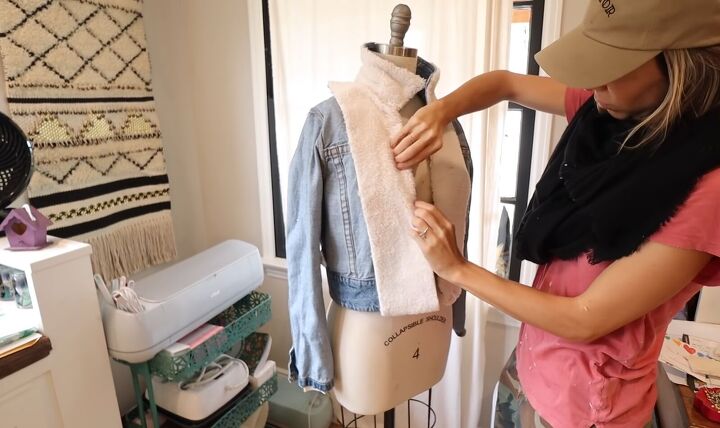
Step 5 - Line the inside
I decided to turn the jacket inside out and line this center piece on the inside.
I cut out two pieces in the Sherpa and pinned them directly to my jacket, so when I wear my jacket, it will look like the collar connects all the way down to the center front where the zipper is, and it will look like one consistent piece.
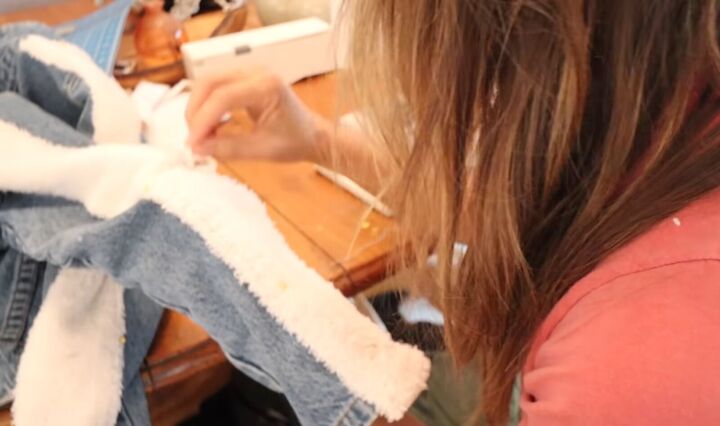
So, I’m pinning everything into place, and then I will go over and sew it. Now that piece where the collar connects to the new piece that I’m adding, I decided to hand sew this.
Sometimes using a needle and thread is much easier because with every single stitch, you can manipulate, move, tweak, and adjust everything exactly where you want it.
This allowed me to pull the two pieces of fabric together perfectly to look like one piece. For this part, I’m stitching it directly onto the zipper.
Step 6 - Sew the sleeves
For the sleeves, I’m going to have a line of Sherpa running down the middle on each side.
At the top of the sleeve, I started off sewing them on with the machine, but I knew that I wasn’t going to be able to sew it entirely into the sleeve because the sleeve is really narrow.
So, towards the bottom, I took the pieces and just hemmed both sides so that they were clean finished.
DIY Sherpa denim jacket outfit ideas
I love the way that the jacket turned out! Now, I’m going to show you some different ways to style it.
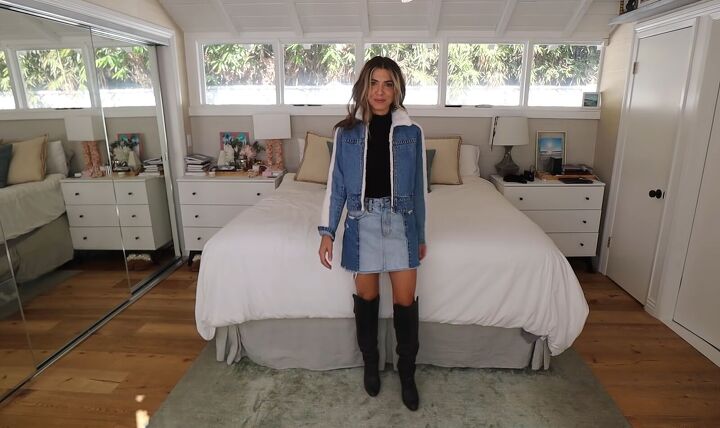
First up, I’ve teamed it with a denim mini-skirt for that denim-on-denim look, alongside a black turtleneck and over-the-knee boots.
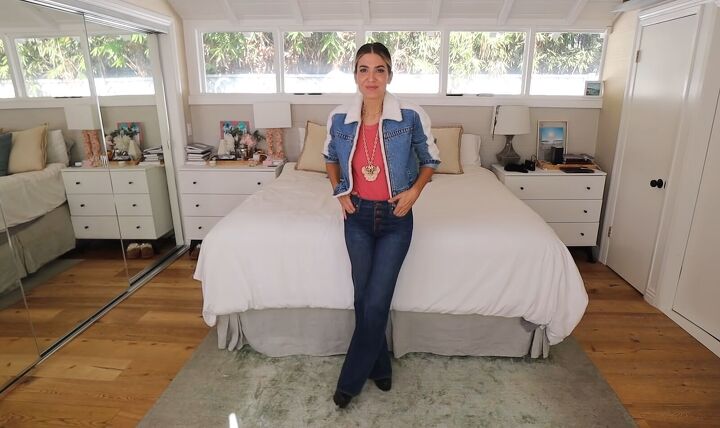
Here, I’m wearing it with some blue jeans in a darker shade for a nice contrast. We also have a pink t-shirt and a statement necklace.
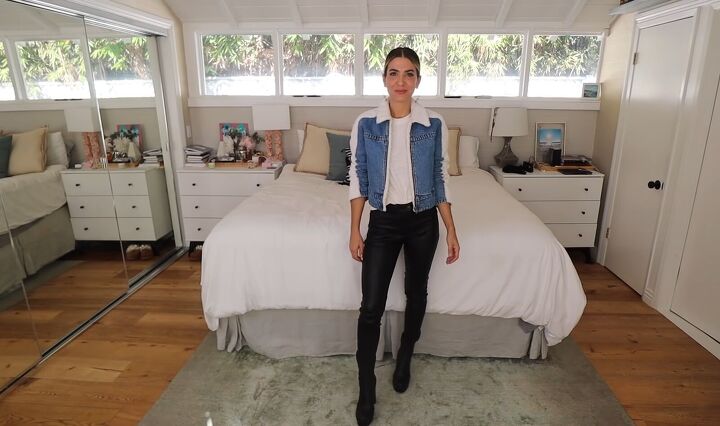
In this outfit, I’m wearing black skinny jeans, a white t-shirt, and the Sherpa jacket. This is such a classic look.
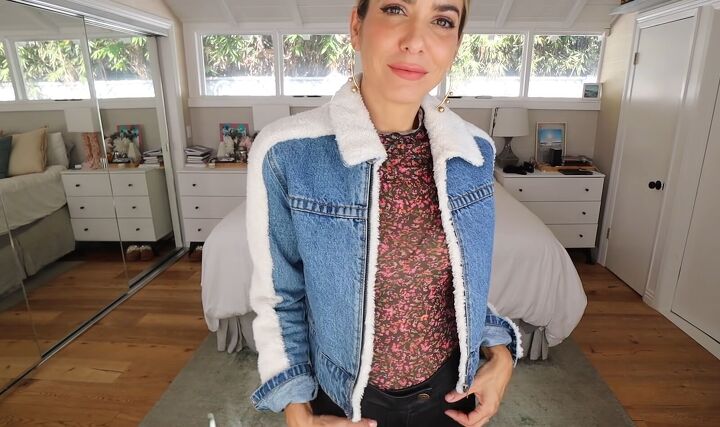
You can add some print by opting for a floral top.

Or play with contrasting proportions with a long white shirt.
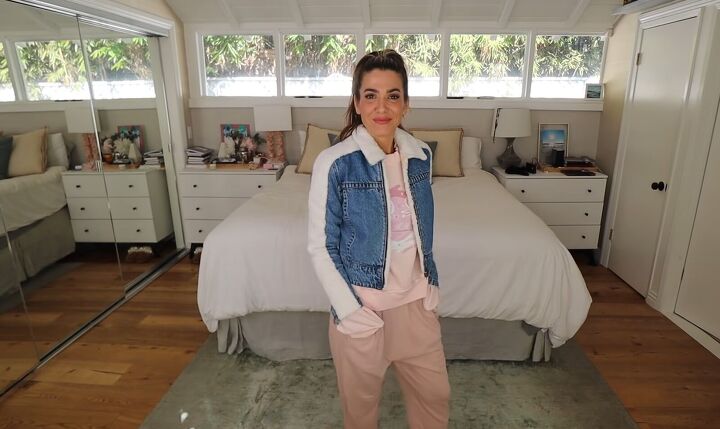
To keep it comfy, I’ve paired it with some pale pink loungewear.
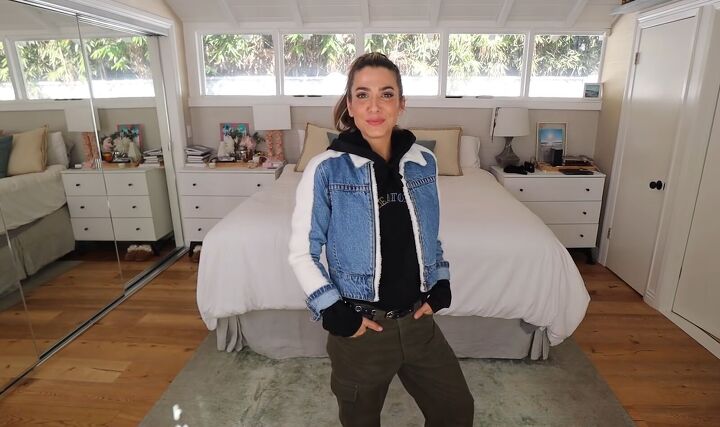
For a more boyish look, I’ve paired it with khaki combat pants and a black hoodie. I love how the sleeves of the hoodie poke out from beneath the jacket.
The author may collect a small share of sales from the links on this page.


Comments
Join the conversation
I will try this.Did you wash and dry the Sherpa first?
I definitely will try this! Darling!!