DIY Corset With Dritz
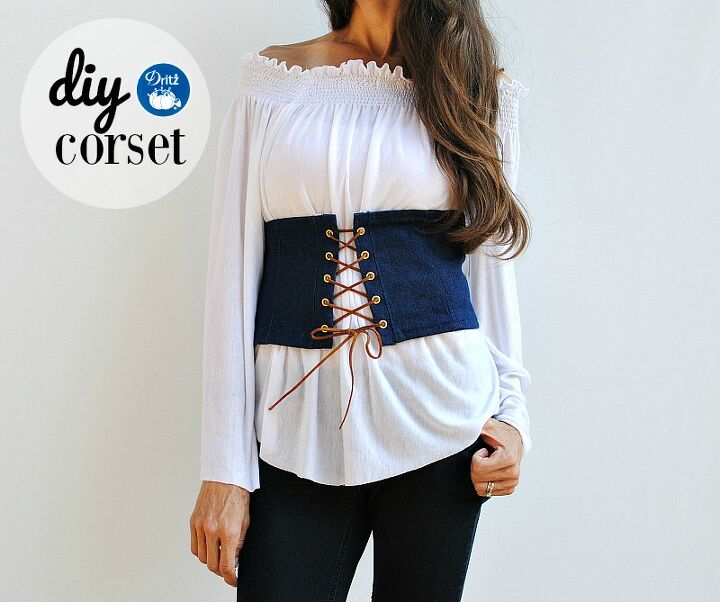
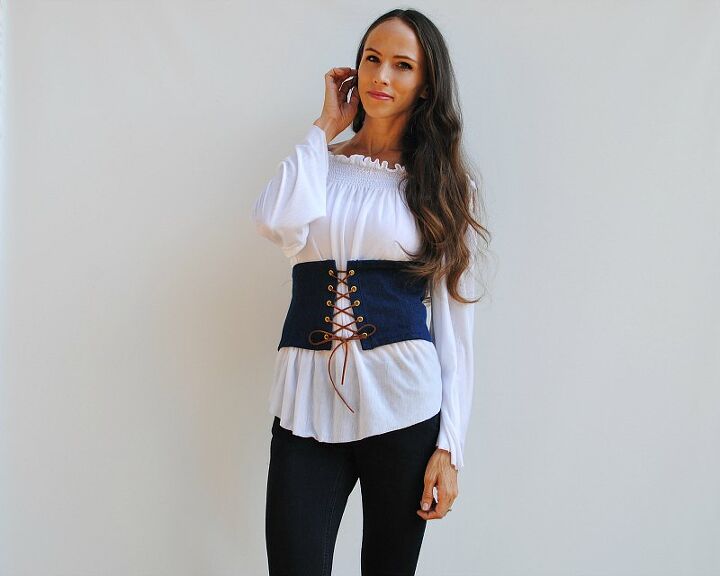
The corset trend is one of my favorites right now because of its historic background which dates back to the 1500's. Originally designed to slim the waist and exaggerate the bust and hips. The construction of a traditional corset is a time consuming process done by a skilled tailor called a corsetmaker. This involves accurate measuring and materials like leather, metal, wood, and plastic for the boning inserted into the cloth of the corset. Now most of us aren't skilled corsetiers and nor do we plan to be. I just like the look of a corset as a fashion-forward piece to add to my wardrobe. It's a great addition to a baggy top and even for cosplay costumes (Halloween's coming). Dritz products make it easy to create your own custom corset using their 2-Part Eyelet Tools and Eyelets. You can even try their Eyelet Pliers which I used for the vinyl corset.
Get the details below and make your own corset.
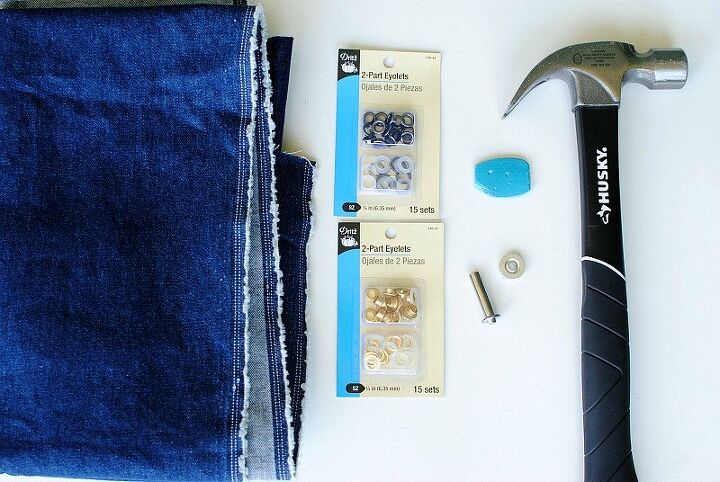
Supplies:
- Dritz 2-Part Eyelet Tools
- Dritz 2-Part Eyelets (I used the gold but they have silver and gunmetal too).
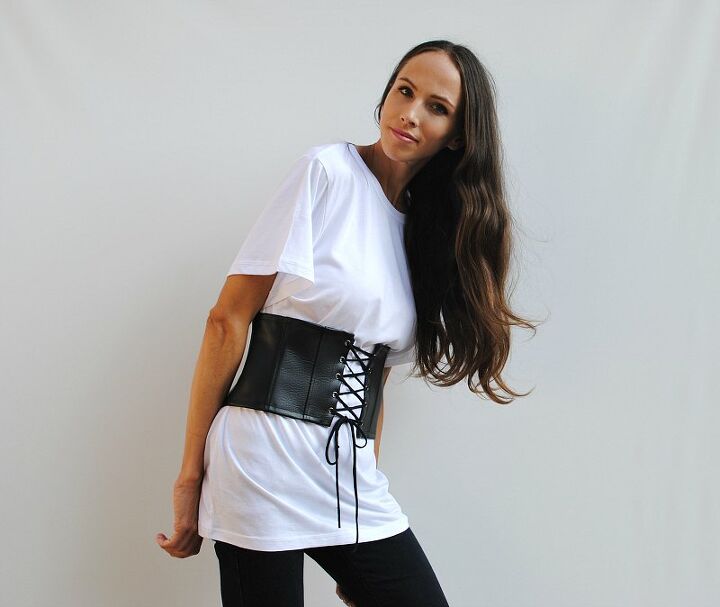
- 1/2 yard of fabric (I used a TÉLIO Denim and vinyl)
- Brother Sewing Machine XR3774
- tailors chalk
- hammer
- embroidery scissors
- ruler
- thread
DIY Instructions:
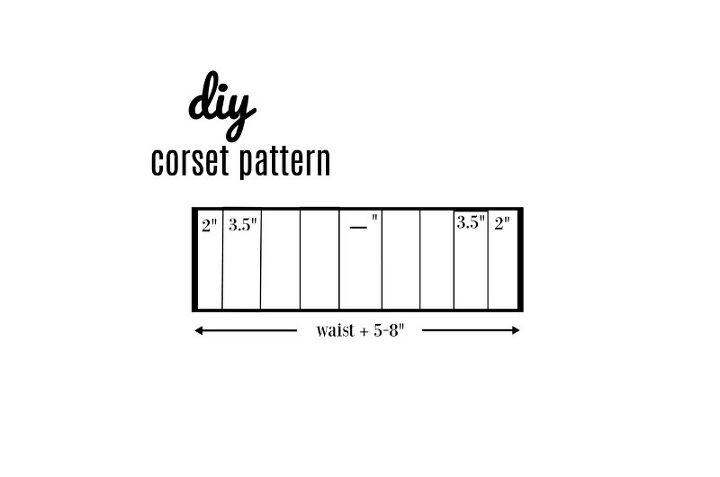
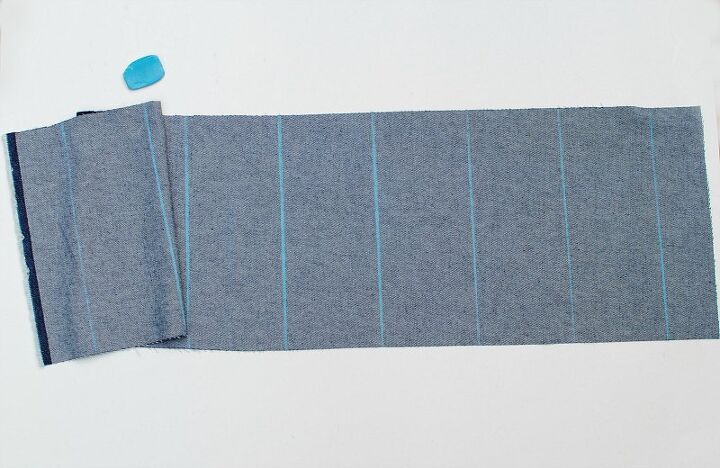
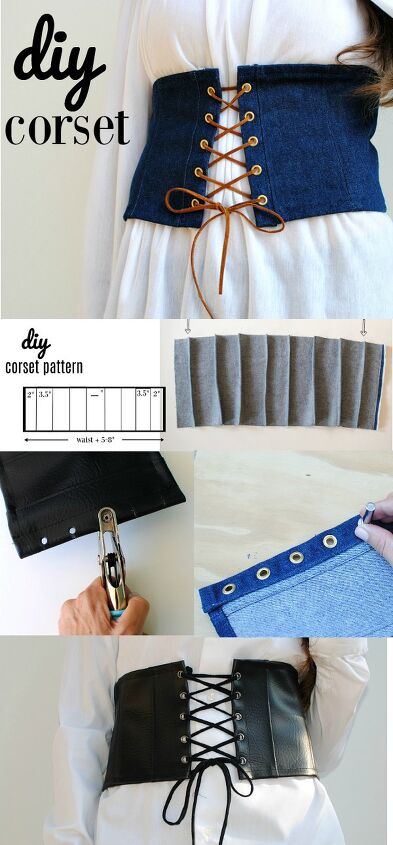
You will need a strip of fabric that measures your waist + 5-8 extra inches. The width depends on how wide you want your corset to be. Mine was 6.5" when finished + 1.5" seam allowance (8" total width).
The pattern above shows sections of 2" on each side and then 3.5" sections in between. The _" is the middle of the corset which will be the center back. This will be whatever measurement you get at the end. We're basically making an accordion with fabric by folding pleats and sewing them.
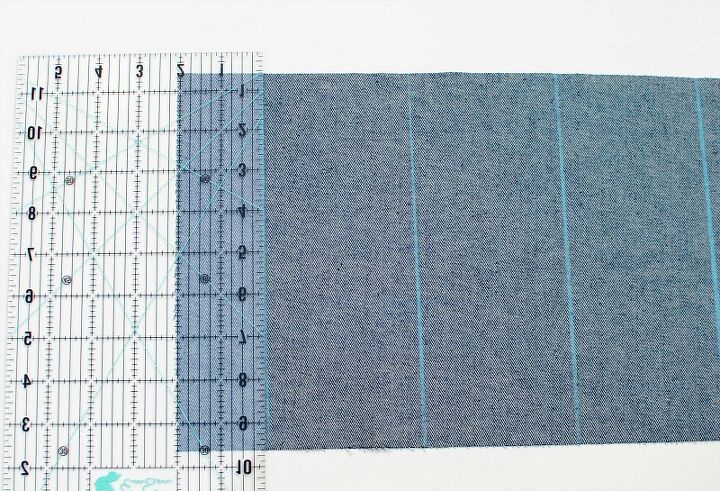
Begin by marking a line down the 1/2 way point of the fabric. Then mark 2" lines out from the sides. Be sure to mark on the wrong side of the fabric using tailors chalk or a fabric marking tool. Now mark 3.5" from that point till you get to the center. Repeat the same for the other side going to the center. Any remaining space you have left should be in the center. This measurement will most likely not be 3.5".
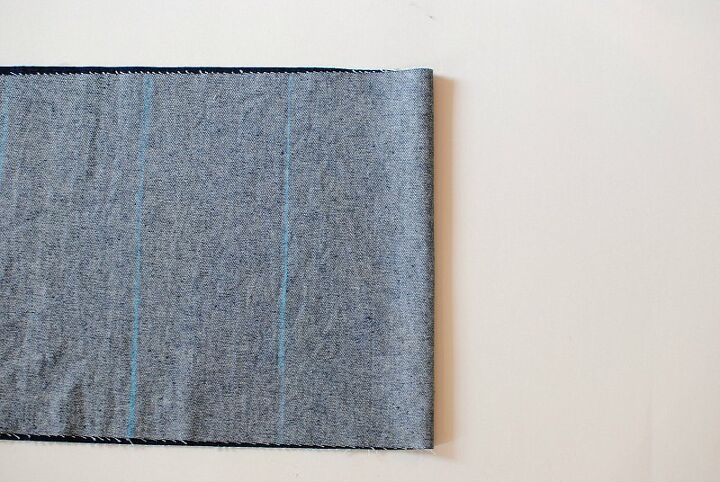
It should look like this when done.
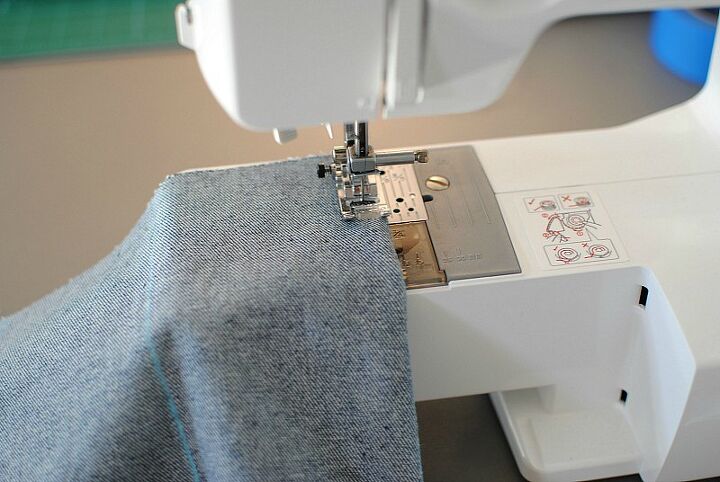
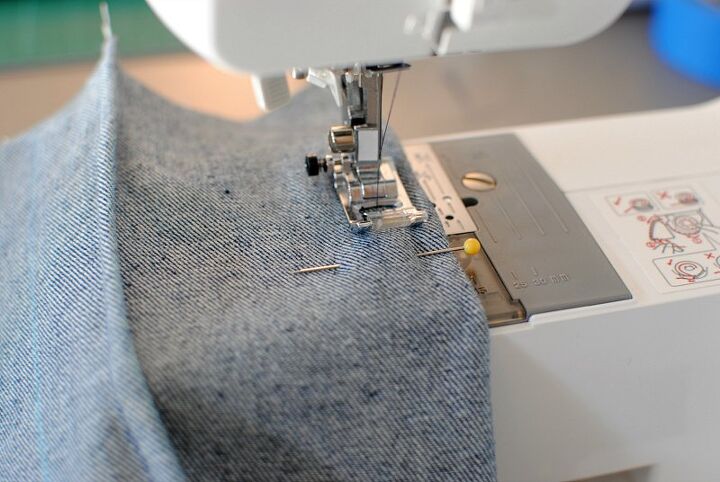
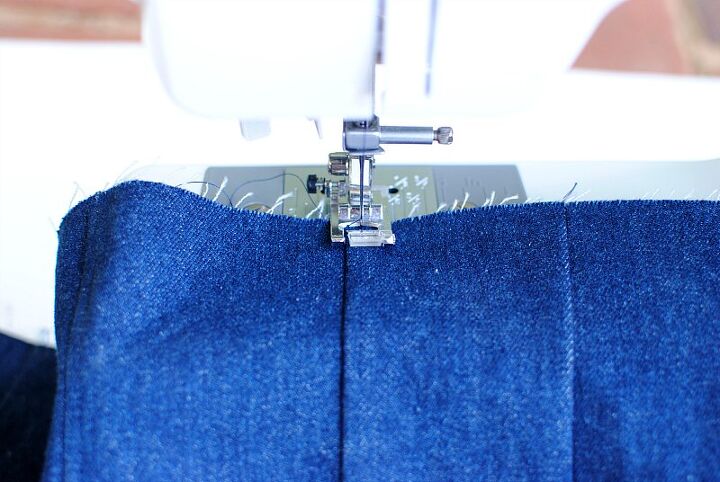
You should now have 2 center lines. Fold either one so the marked line is the folded edge and right sides are together. Pin or press flat and sew a 1/4" seam.
Sewing a 1/4" seam from top to bottom.
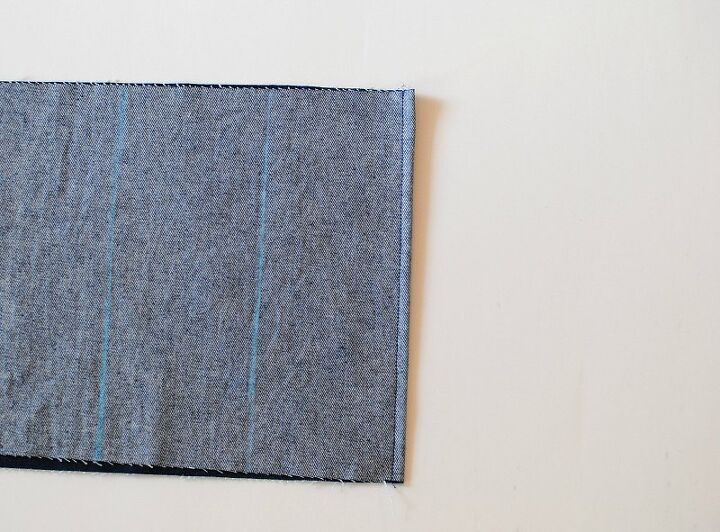
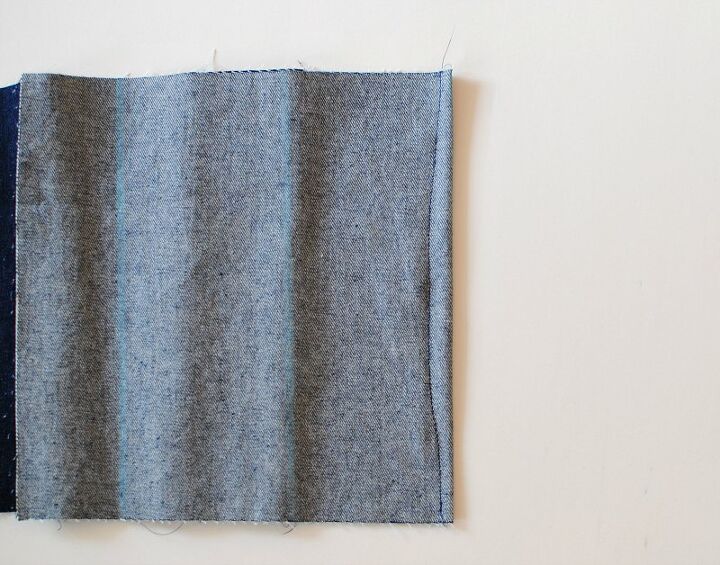
It should look like this.
Now repeat for the other center line (the mark in between mine is the half way point).
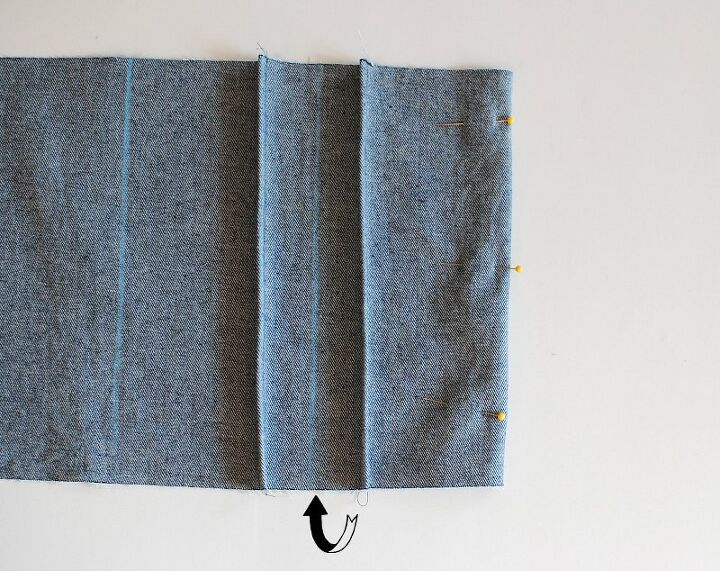
The 2 center pleats are wear the arrow is. Now for the additional pleats we will be sewing a curve instead of a straight line. Fold again with the marked line as the folded edge but pin the half way point.
When you sew, do start with a 1/4" seam allowance and gradually sew out to about 1/2" by the middle point. Then gradually back to finish with a 1/4"...see below for the photo and you'll get what I mean.
Repeat this for the rest of the sections until you reach the last lines marked on each side.
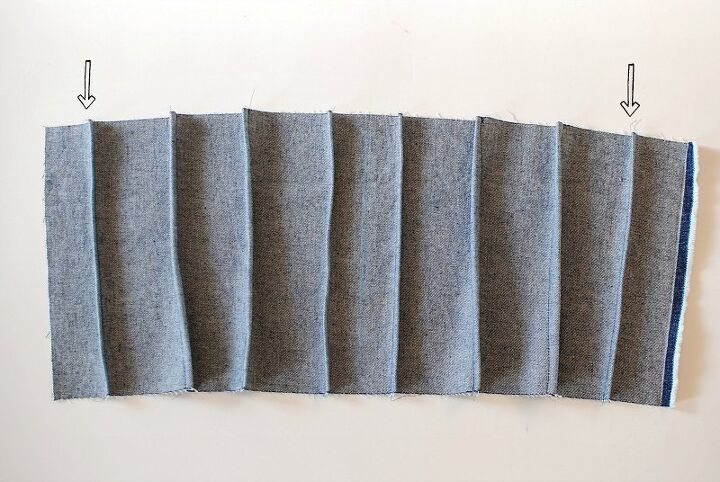
For the last lines you will just do a 1/4" straight seam like we did the center (where the arrows are).
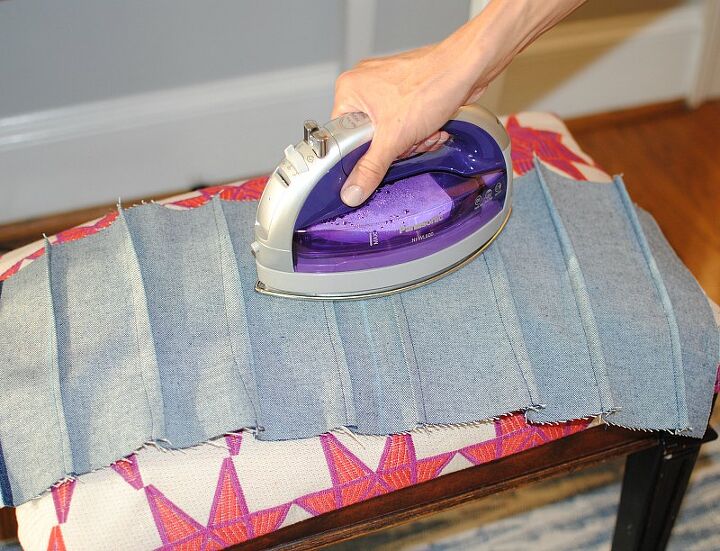
Press everything nice and flat. The center folds should be going the opposite directions of each other. Press the remaining pleats so they align with the coordinating center direction.
Now top stitch the folds/pleats down into place. You can use a different colored thread to get a nice detailed top stitch or use the same like I did. These folds will act as our "boning" for the corset rather than inserting metal or plastic into each section. It's a much easier process...
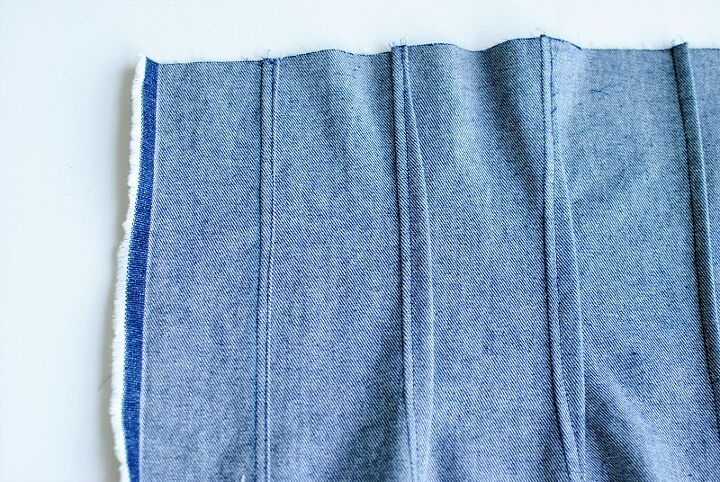
It should look like this on the wrong side.

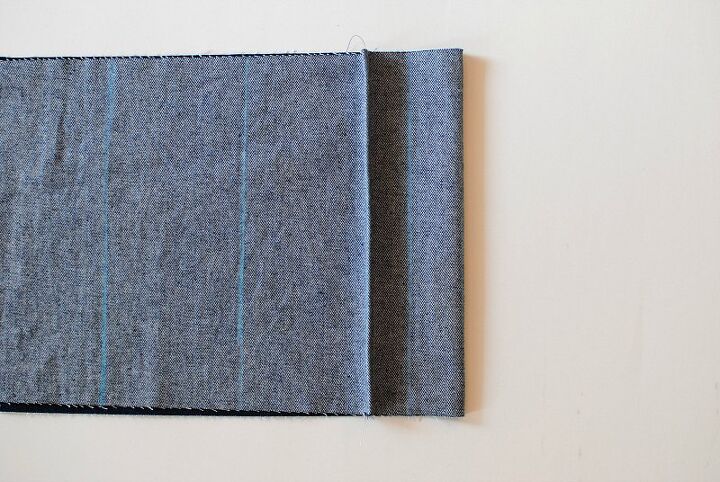
Hem the top and bottom edges. I folded a 1/4" over and then another 1/2" over, pressed, and hemmed into place.
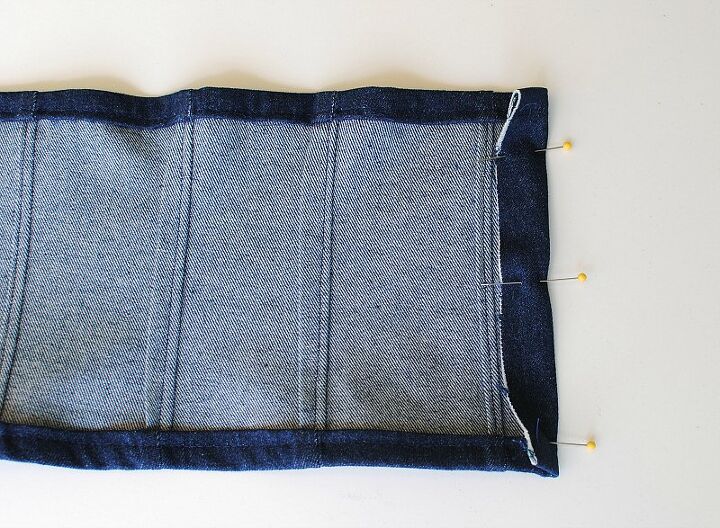
For the sides fold over 1" and sew into place. I did sew the raw edge into the seam.
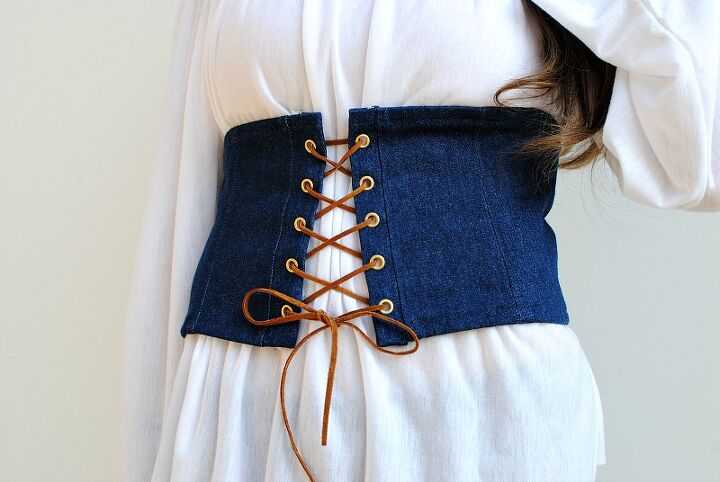
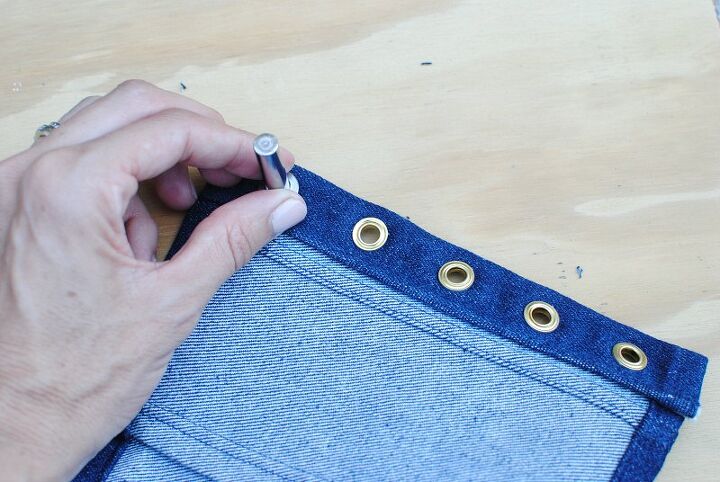
It should now look like this. Mark evenly where you want your eyelets to be with a dot of tailors chalk. Mine were spread about 1/2" apart.
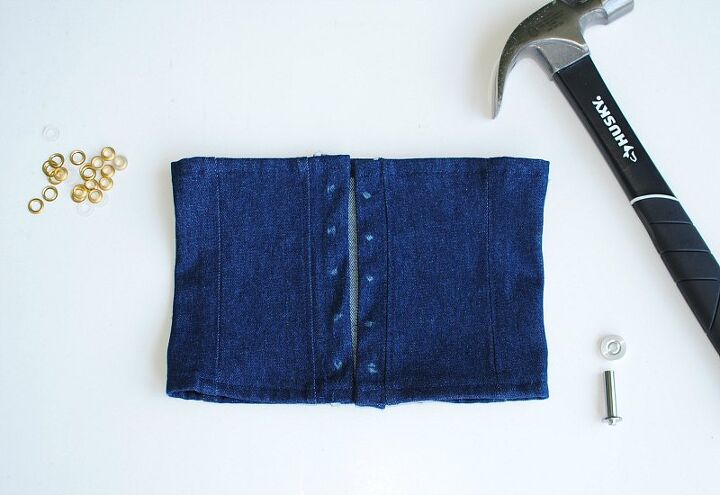
Use Dritz's 2-Part Eyelet Tools and eyelets to create the lace up front.
Applying the grommets and eyelets
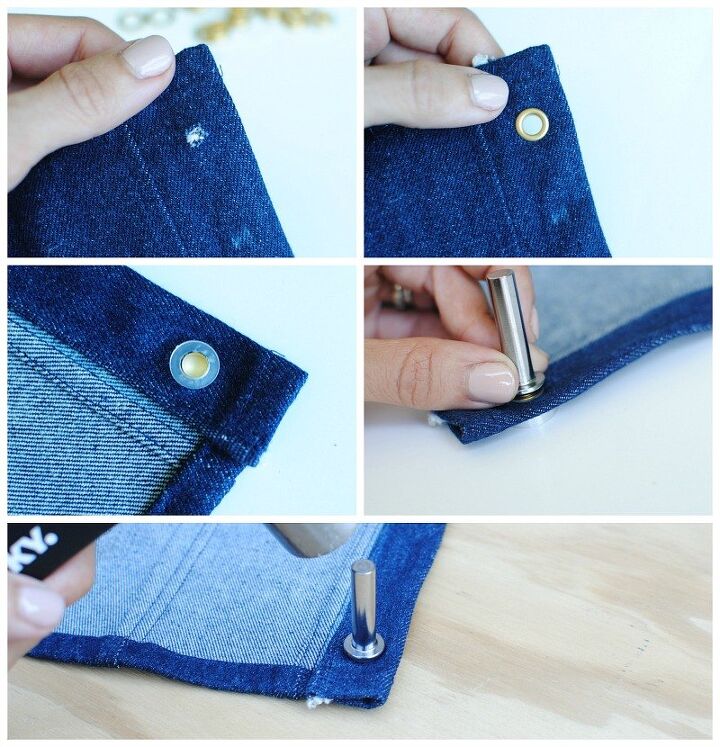
- Mark position of grommet by tracing around inside opening of grommet. Cut hole with scissors. Note: For fabrics with stretch, cut hole smaller than inside opening of grommet.
- Insert grommet (deep half) into hole from right to wrong side of fabric. Place anvil on a hard surface. Position grommet on anvil.
- Place insert over center of grommet.
- Place washer, dome side up, over insert.
- Insert setter into grommet; hammer using 2 or 3 forceful taps. Center of grommet will roll over to secure grommet and provide a smooth finish.
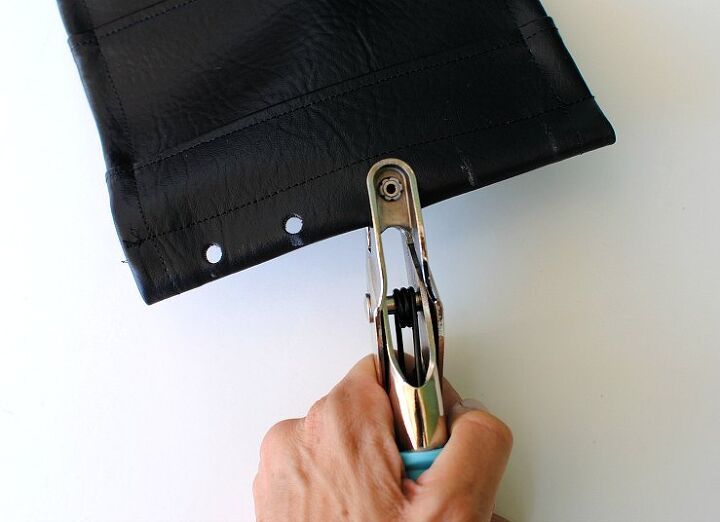
For the vinyl corset everything was done the same but for the holes I used the Eyelet Pliers instead of cutting them myself. This is a great tool for leather, suede, and vinyl materials. You can even apply the eyelets with these.
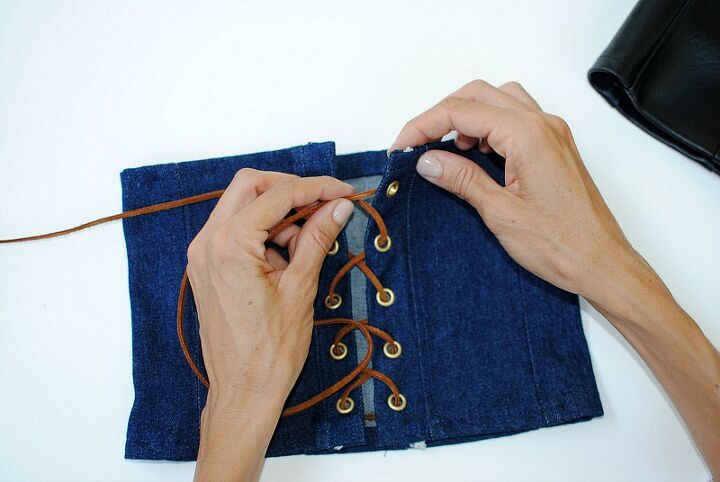
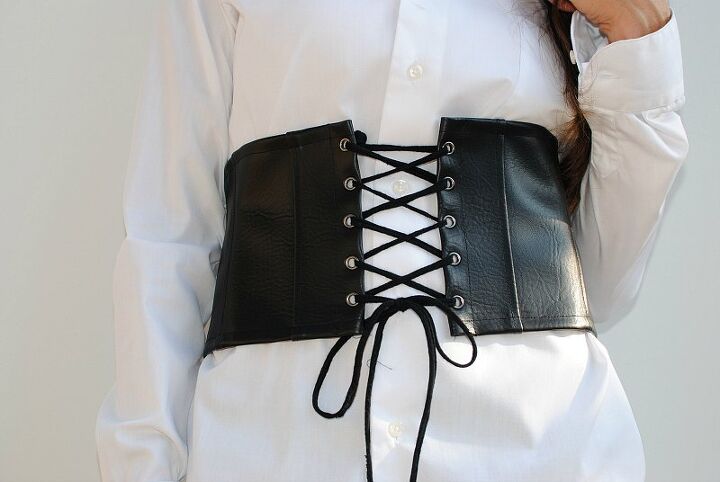
Finish by lacing up with string or cording through the eyelets. Make sure it's long enough to lace through and tie into a bow at the end. Mine measured a full yard.
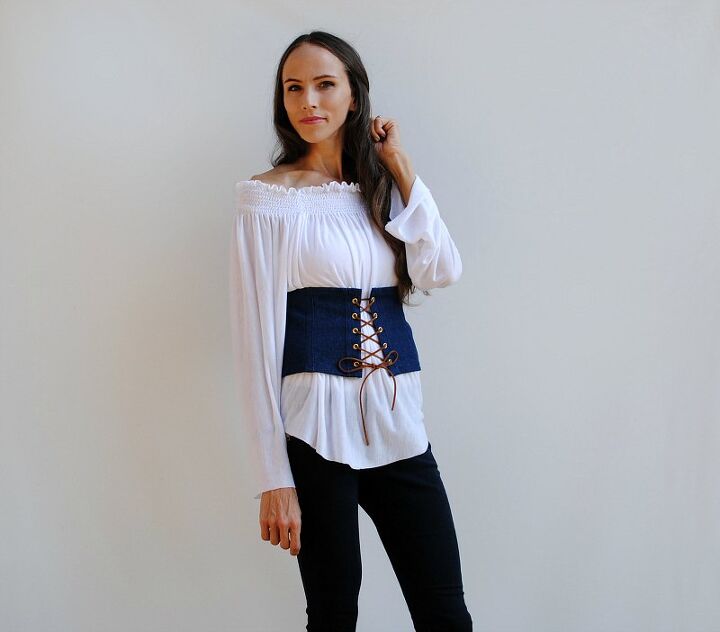
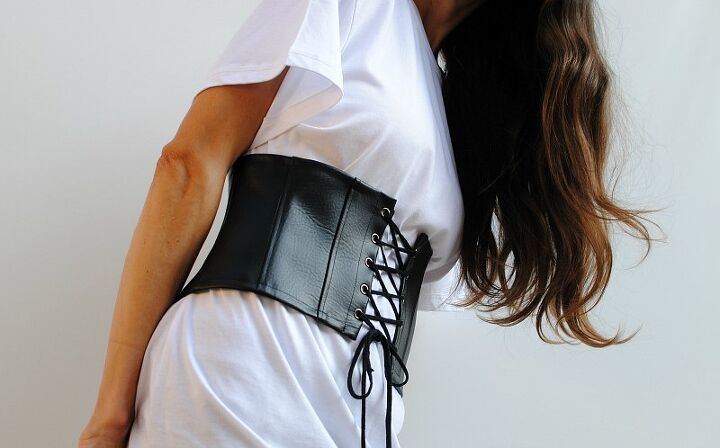
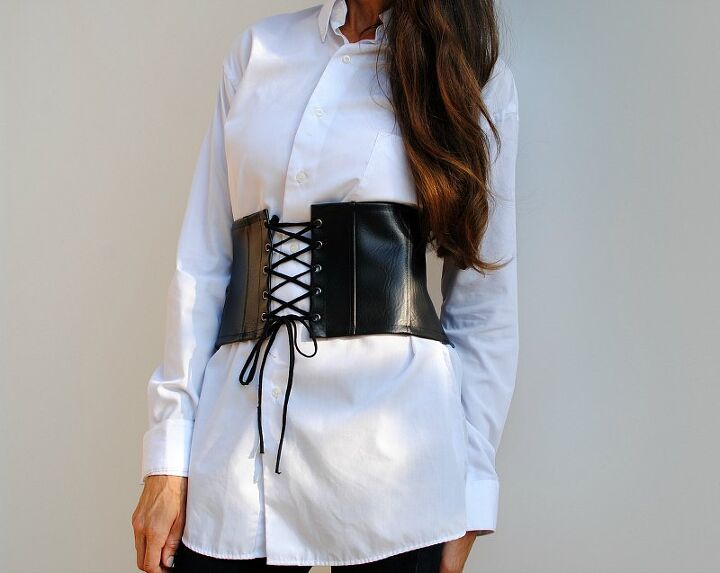
I love pairing these with an oversized t-shirt or men's shirt. They also look great styled with a loose peasant top. It helps accentuate the waist and adds some edge to my look. Great for cosplay costumes as well (Halloween inspo).
*In collaboration with Dritz.
I received compensation from Dritz®, and some of the materials featured here or used in this project were provided free of charge by Dritz®. All opinions are my own.
The author may collect a small share of sales from the links on this page.


Comments
Join the conversation