Summer Style: DIY Crop Top

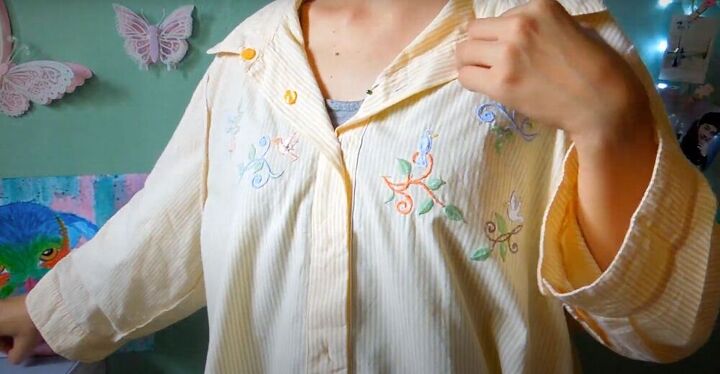
If you know me, you know I love a good thrift find. This shirt was a little wild but held a lot of potential. I knew I wanted to take this fun yellow shirt and turn it into something great for the summer. So, without further ado, here is my DIY crop top tutorial!
Tools and materials:
- Thrifted button down
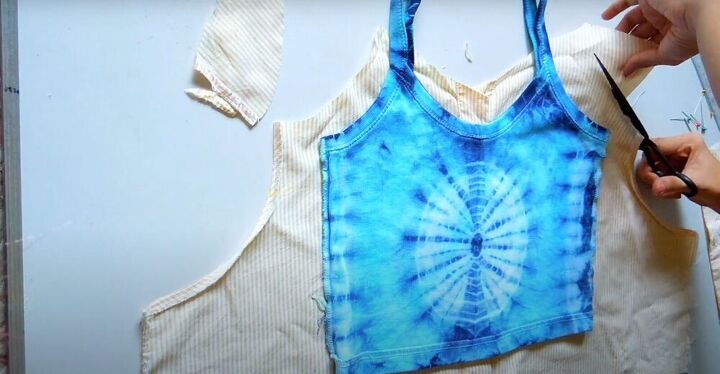
- Crop top
- Tailor’s chalk
- Pins
- Scissors
- Tank top
- Sewing machine
- Thread
Find your fit
Put the shirt on and button it up, leaving the top button open. Pull the shirt back so it rests on the back of your shoulders and pin the folded opening down (as seen in the image above). Next, pull the shirt back around your waist so it’s more fitted, making sure the top doesn’t bunch. Now, take the shirt off and lay it flat (and buttoned). Place a crop top that fits you over it and use some tailor’s chalk to mark its size. Grab a ruler to perfect those lines and drag them out to the end of the shirt.
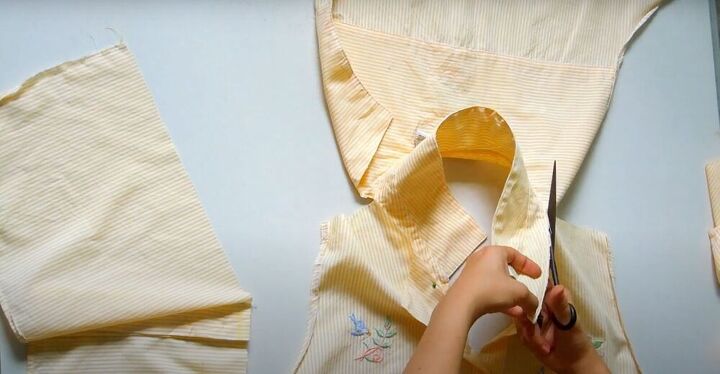
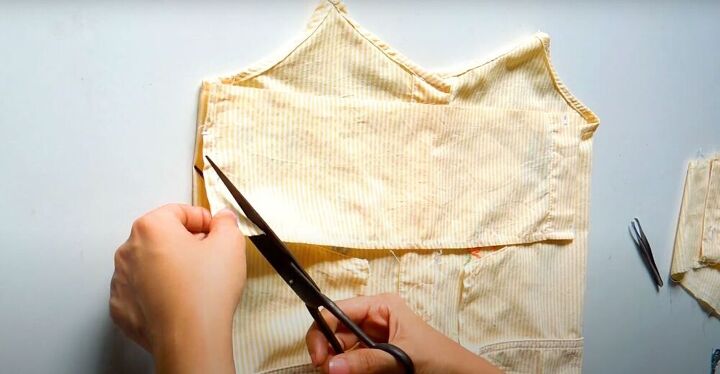
Cut out the front
Cut off one of the sleeves. Cut the seam of the sleeve open and remove the cuff. Repeat this on the other side and cut open the side seams of the button-down. Now open the shirt and cut off the excess fabric on the bottom of the front (that we marked off with the crop top). Close the shirt back up (right sides touching) and cut along the shoulder and collar seams, removing the front from the rest of the top.
Secure the top
Grab another tank top and use it as a guide for creating your armholes. Fold over the raw edges of your neckline and pin them down. Continue pinning all the way down to the armholes and then sew in place using a double fold.
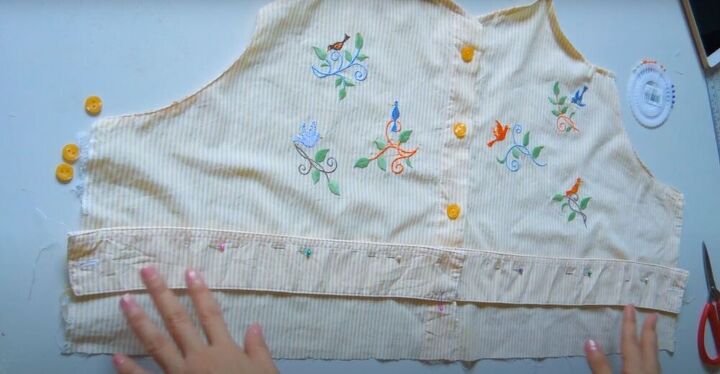
Add the waistband
Take the sleeve cuffs that we removed before and lay them out flat, buttoning them together. Wrap it around the waist of your crop top. Pin the cuffs to the crop top and sew them in place, leaving about an inch of fabric beneath the cuff. Once that’s done, fold the extra inch inwards, sew that in place and be rid of any raw edges. (Remember to fold the fabric inwards).
Secure the back
Take the bottom piece of the button-down that we cut off earlier and unbutton it. Fold it into thirds and then cut. Place one of the strips across the upper back of the crop top. Cut off any excess fabric (so the curve of the strip matches the shirt), hem the edges, and then attach the strip to the side of the crop top. Repeat this on both sides.
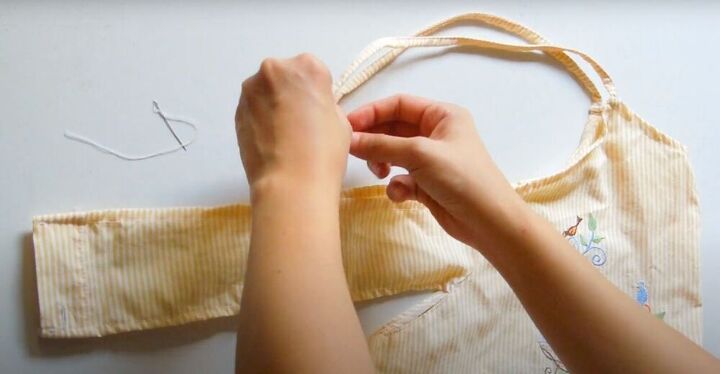
Create your straps
With another piece of extra fabric, create the straps. Do this by folding the two ends inwards and then together so no raw edges are showing. Pin the strap together and sew it down. Next, hand sew the strap to the back pieces we just created, lining them up to make sure they match.
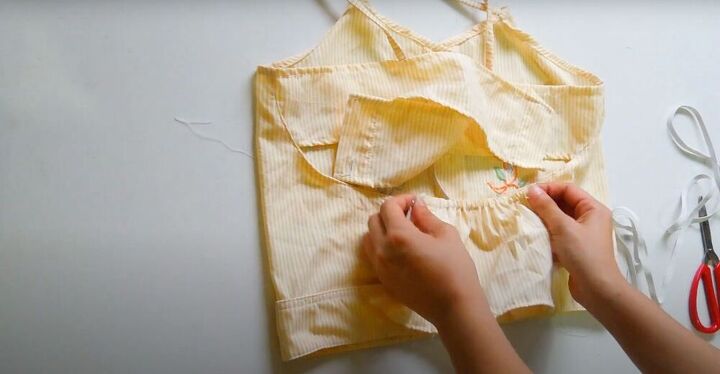
Finish the top
Finally, let’s use the fabric from the sleeve that we cut open. Lay it flat and then cut out a square big enough to cover the bottom of your back. Fold the edge over to create a tunnel for the elastic. Next, measure out your elastic and cut a piece. Attach a safety pin to the edge of the elastic and then pin it to the fabric you just cut out with a second safety pin. Weave the elastic through the tunnel and then pin the flap of fabric to either side. Double fold the sides and pin them to the back of the shirt, securing the edge of the elastic on the back as well. Hand sew on both sides, secure all the seams, and you’ve completed your crop top! (For a better understanding of this final step, see the video at 6:50)

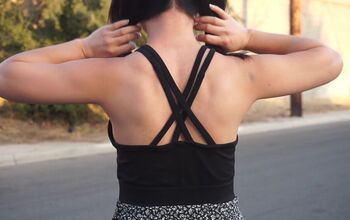
For the finishing touch, resew the buttons from the sleeve cuffs in place. This DIY crop top tutorial gives new life to an out of fashion, thrifted button-down. You can do this with any button-down you have and see a new piece be born!
The author may collect a small share of sales from the links on this page.


Comments
Join the conversation
great idea, I can already picture different straps, shirred, bow tie etc.
Gorgeous!! It looks better as a crop top!