Fun DIY Ice Cream Cone Costume for Halloween

Are you looking for a Halloween costume that is sweet, cool, and super easy to make? Well, I have you covered. Today’s tutorial is a DIY ice cream cone costume. Isn’t that the cutest idea? I am so excited to show you how to make it, you are going to love it!
Tools and materials:
- Pencil skirt (light brown or nude)
- Paint pen or fabric pen (dark brown)
- T-shirt (color of your choice)
- Felt sheets (in an assortment of fun colors)
- Fabric glue
- Scissors
- Red bow (optional)
- White sneakers (optional)
- Red lipstick (optional)
Make the ice cream cone skirt
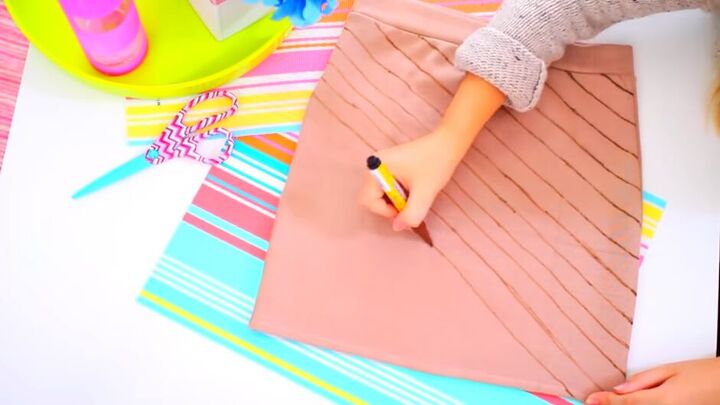
The first part of the costume we are going to make is the ice cream cone skirt. For this, you will need a light brown or nude-colored pencil skirt and a dark brown paint or fabric pen.
1. Draw diagonal lines on the front of the skirt
Start off by drawing diagonal lines across the front of the skirt. They don't have to be completely straight so don't worry about using a ruler, just freehand it. When you have finished drawing the diagonal lines in one direction, draw diagonal lines in the opposite direction.
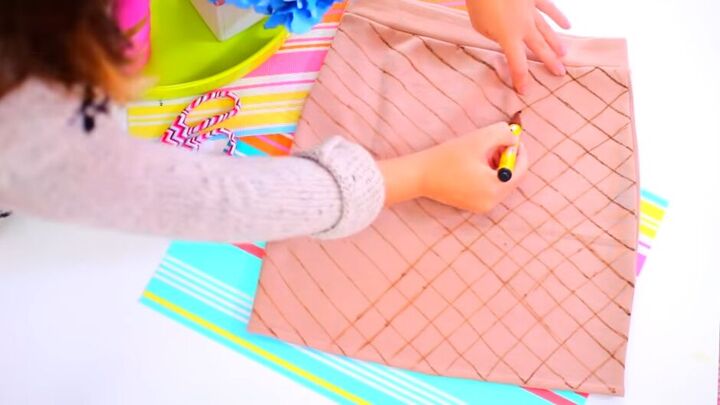
2. Repeat the lines on the back of the skirt
Once the front of the skirt is filled with lines repeat on the back.
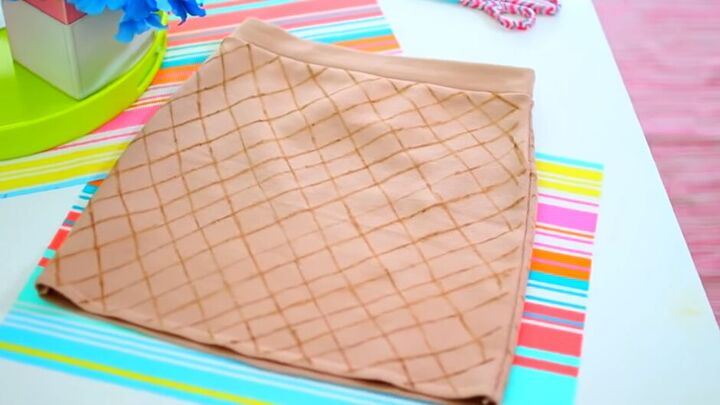
This is what the finished skirt looks like. As you can see, it is a very simple design, but once you add the top, it will become obvious that this is the cone for your ice cream costume.
Make the ice cream shirt
The next part of the ice cream cone costume is the shirt. I chose a pink shirt to represent strawberry-flavored ice cream, yummy, but you can choose any color shirt you want. Brown for chocolate, blue for bubblegum, green for mint, or white for vanilla.
The truth is there are so many different flavors and colors to choose from, so go with what suits you best.
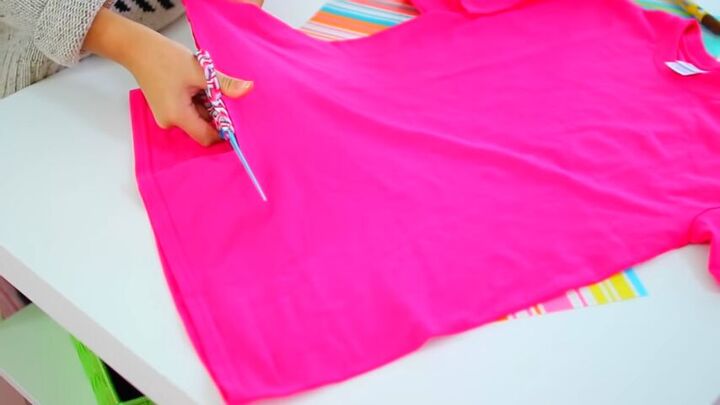
1. Cut your t-shirt to the desired length
Start off by cutting the bottom end of the shirt to your preferred length.
2. Turn the t-shirt inside out
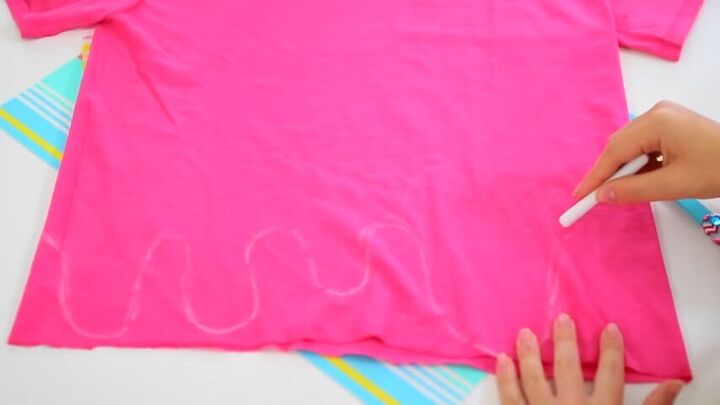
3. Outline the drips
Using chalk, draw wavy lines on the bottom of your shirt to resemble drips.
Try to capture the look of the ice cream naturally dripping down a cone in hot weather. Make sure to do this on both the front and back of your shirt.
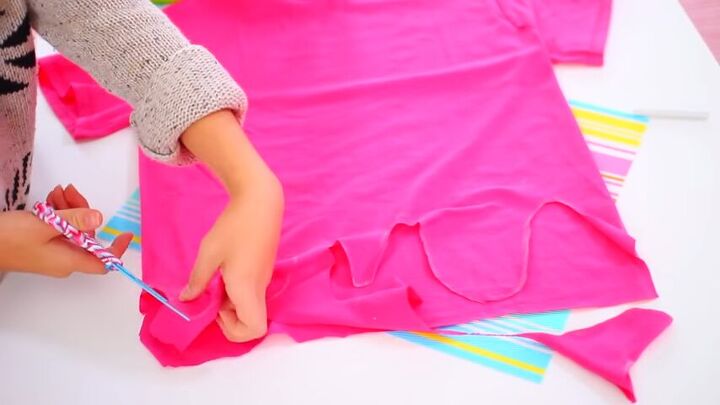
4. Cut out the drips
Cut along your chalk lines to create the drips.
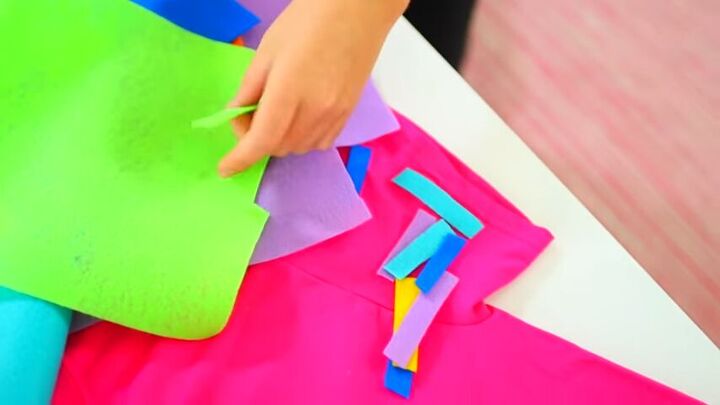
5. Cut your sprinkles
Now it's time to make some sprinkles. I did this by cutting thin, short rectangular pieces, from a variety of bright felt pieces.

6. Stick your sprinkles to your shirt
Run a thin line of fabric glue in the center of each sprinkle.
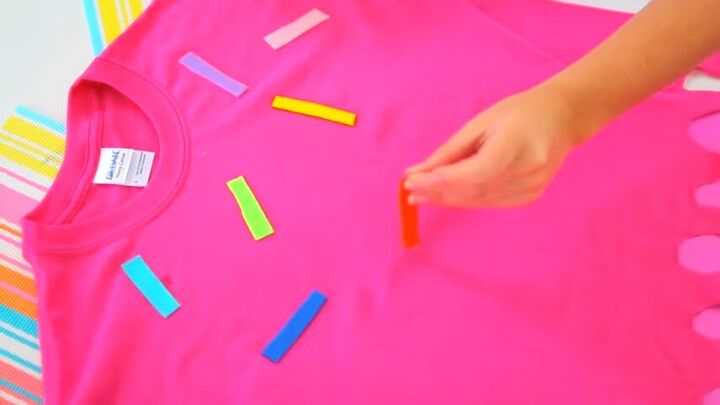
Then, stick it on the shirt. Place them randomly along the front of the shirt focusing on the top of it and then grading them down so they get less and less bunched together as it goes down the shirt.
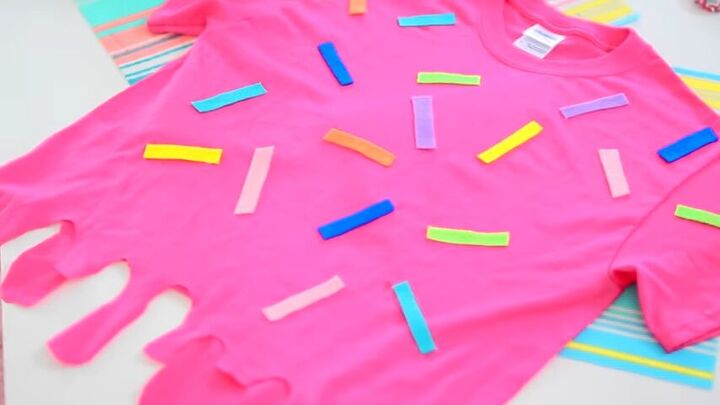
Here is the final look of the ice cream shirt. So cute!
Accessorize
I added a few accessories to bring the whole look together. You can add whatever you choose but I added the following:

A red bow in my hair.
Some white sneakers.

And red lips.
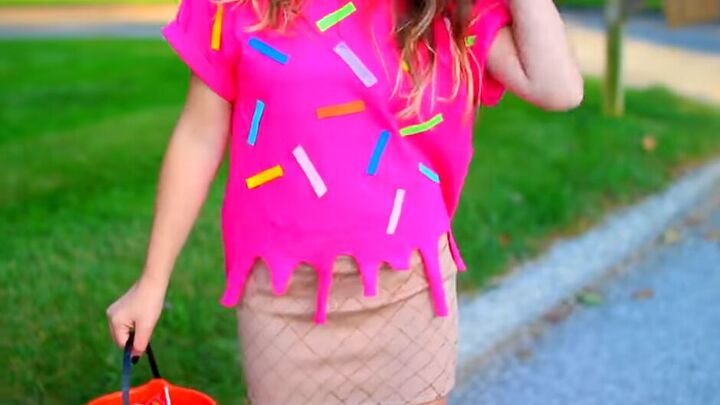
DIY ice cream cone costume
This is the finished DIY ice cream cone costume. I think this turned out so adorable I would totally wear this for Halloween.
If you live in a colder state and would like to be a little warmer, you can easily make the shirt using a crew neck or a non-hooded sweatshirt. Instead of a mini pencil skirt, try a pair of khaki pants to keep your legs warm.
This would be such a cute group costume with a bunch of friends, everyone could wear a different colored shirt to represent different ice cream flavors. So much fun!
Hope you all enjoyed this ice cream cone Halloween costume. I would love to hear your thoughts in the comments.
The author may collect a small share of sales from the links on this page.


Comments
Join the conversation