Two Fantastic Shirt Refashion Ideas

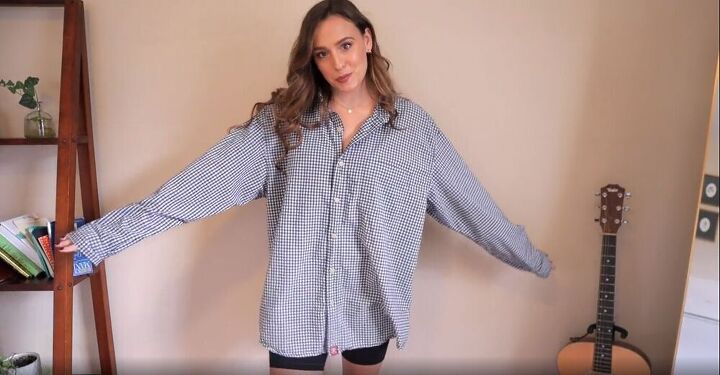
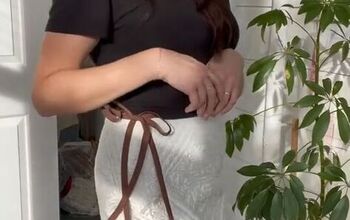
In this tutorial, I will take you step-by-step through two different upcycle projects that can be done with a men’s button-down shirt. The first is an adorable wide-strapped crop top that can be worn either buttoned up the front or the back, along with a matching mini skirt. The second project is a short-sleeved button-up crop top with a coordinated asymmetrical wrap skirt. I hope you enjoy this upcycle as much as I did!
Tools and materials:
- Button-up shirts
- Scissors
- Ruler
- Fabric chalk
- Pins
- Seam ripper
- Hook and eye clasp
- Sewing machine
First project
Mark the length of the skirt
Use a skirt you already own as a guide. Lay the skirt on top of the button-up shirt, and mark the shirt at the top corners and center of the waistband with fabric chalk. Mark the shirt at the center of the bottom hem, as well.
Cut the fabric
Cut straight down from the seam where the sleeves meet the shoulders of the shirt until you reach the marks you made at the top edges of the skirt. Then cut directly across the shirt, right below the collar. Cut across the bottom half of the shirt, using the marks you made as a guide. This will create two rectangles, one small and one large.
Place pins where the slits will be
Hold the larger rectangle up against your body, and figure out where and how long you want the slits to be. There will be a slit on either side of the front panel of the skirt, so make sure to mark both sides.
Mark those areas with pins.
Draw lines to mark the front panel
From the pins, draw a straight line up to the opposite edge of the fabric.
Do this on both sides. Use a ruler to ensure your lines are straight.
Cut out the fabric for the front panel
Cut along the lines you marked to create the piece for the front panel of the skirt. You now have the front panel as well as two long rectangles that include the side seams of the original shirt and the plackets for the buttons and buttonholes.
Pin the front panel to the other skirt pieces
Lay the front panel on top of one of the long rectangles, right sides facing, and pin them together along the side.
Then, lay the front panel on top of the second long rectangle, and pin those together as well. On both sides of the front panel, make sure to leave some fabric unpinned at the bottom for the slits.
Sew the seams
Sew down the pinned seams, stopping at the point where the tops of the slits have been marked. Sew a few securing stitches across the top of each slit, to prevent the seam from ripping open.
Iron the seams
Press the seams flat.
Hem the edges of the slit
Fold the raw edges of the slits over about a quarter of an inch and pin them in place.
Then, sew down the edges of the slits with a straight stitch.
Pin the pieces of the top together
There should be three pieces of fabric for the top--one rectangle, and two small square pieces that contain the plackets for the buttons and buttonholes. Lay the square pieces on top of the rectangle, right sides facing, and pin them down along both short sides of the rectangle.
Sew the seams
Sew down the side seams.
Create darts
Create darts along the top edge of the skirt. To do this, lay the fabric of the skirt with the wrong side facing up. Measure two inches from the short side of the fabric, and then make two small vertical folds that reach from the top edge of the skirt down about three or four inches. Pin the folds so the right sides of the fabric are facing each other. Measure two inches from the second short edge of the fabric, and repeat the process. Sew the folds down.
To create darts on the shirt, fold the short end of the fabric over about six inches, right sides facing. Place a pin on the bottom edge of the fabric, about two inches away from the fold. Place another pin along the fold, about four inches up from the bottom edge. Place a third pin at the halfway point between these two pins. Fold the second short end of the fabric over, and repeat the process. Then sew the folds down, using the pins as a guide to create an angled seam.
Fold and iron the raw edges
Fold the raw edges of both the shirt and skirt down about a quarter of an inch, and iron them down.
Sew the hems
Sew the hems down along the top and bottom edges of both the shirt and skirt.
Cut out straps
From the offcuts of the original shirt, cut out two long rectangles approximately fifteen inches long, and six inches wide.
Fold, iron, and sew the straps
Fold each rectangle in half lengthwise.
Then, iron them so the fold will hold, and sew the long edges together.
Turn the straps right side out
Fold one open end of the fabric up, and keep pushing the fabric of the strap through until the entire seam is hidden inside.
Attach the straps to the top edge of the shirt
Hold the fabric of the shirt up to your body to get an idea of where the straps should be attached, and then pin the straps along the top edge in the preferred place.
Then sew the straps in place, and you’re done!
The top buttoned in the front
Second project
Trace around a shirt
To create the top for this outfit, turn the button-up shirt inside out, and lay a cropped shirt on top, aligning the top edges of the sleeves on both shirts. Trace around the cropped shirt with fabric chalk.
Cut the fabric for the top
Use the chalk outline as a guide to cut out the fabric for the top.
Cut out the skirt
Cut a straight line down one side of the remaining fabric to create a long rectangle for the skirt. One side seam of the original shirt should remain intact.
Add fabric if necessary
Wrap the fabric for the skirt around your waist to make sure it fits. If you’re short on fabric, you can cut more from the offcuts and attach it to make the rectangle longer. Make sure that the plackets with the buttons and buttonholes remain along the short edges of the rectangle.
Sew down the side seams and underarm seams of the shirt
Keep the shirt inside out, and sew down the seams along the sides of the shirt, and along the bottoms of the sleeves.
Create darts in the skirt
Fold and pin four evenly spaced darts on the back panel of the skirt, and sew them down.
Hem the openings of the sleeves and the bottom edge of the shirt
Fold the raw edges of the sleeves and the bottom edge of the shirt up a quarter-inch, and sew them down.
Hem the top edge of the skirt
Fold the raw edge at the top of the skirt over half an inch, and sew it down.
Remove the buttons
Use a seam ripper to remove the buttons on the front of the skirt.
Sew the buttons back on
Place the buttons in a diagonal line across the front of the skirt. Use the buttonholes to ensure they are spaced properly. Mark the points where the buttons should be, and then sew them into place by hand.
Sew a hook and eye closure onto the top edge of the skirt
Sew the eye of the closure onto the wrong side of the fabric in the top corner of the placket where the buttons used to be. Wrap the skirt around your waist to determine where the hook should be, and mark that spot. Then sew the hook onto the skirt, on the wrong side of the fabric. The closure will be hidden behind the front panel of the skirt.
The project is complete!
I love both of these projects so much! The tops of both outfits are super cute, and I’m really happy with them. The skirts are also adorable, but they are a tad too short for my taste. But that’s what I get for making them out of shirts. Let me know what you think of these upcycles!
Enjoyed the project?
Suggested materials:
- Button-down shirts
- Scissors
- Ruler
- Fabric chalk
- Pins
- Seam ripper
- Hook and eye clasp
- Sewing machine
The author may collect a small share of sales from the links on this page.


Comments
Join the conversation
So cute!