How to Make a Sexy Cowl Neck Dress From Scratch

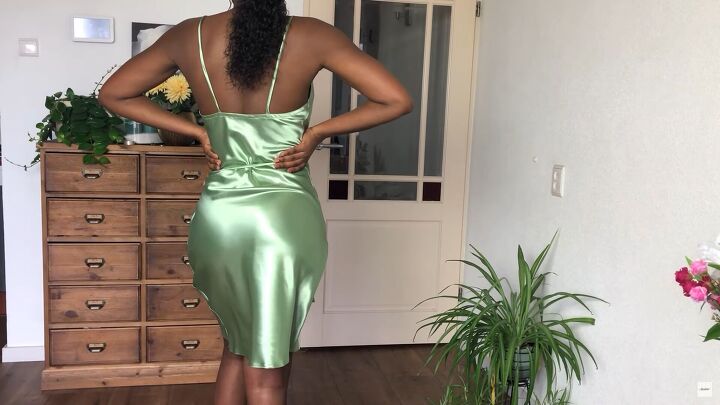
If you’ve been wanting to learn how to make a cowl neck slip dress, this tutorial is perfect for you. You’ll learn how to make a cowl neck dress pattern from scratch so you can make this simply stunning and sexy dress to wear for a special occasion!
Tools and materials:
- Poly satin fabric
- Pattern paper
- Pen
- Ruler
- Measuring tape
- Pins
- Scissors
1. Measure your body
You’ll need the following measurements:
- Bust
- Waist
- Hip
- Shoulder to waist
- Waist to hip
- Overall length
2. Draw the cowl neck dress pattern
To make the cowl neck dress pattern to your exact measurements, follow the instructions in the video from 0:25 to 3:50.
Add ½ inch seam allowance all over except the neckline and the center front.
3. Cut out the pattern.
At the top of the pattern from the first horizontal line, cut almost through to the end but keep it connected. Spread it a bit to create the cowl neck.
Put another piece of pattern or tracing paper underneath the top of the dress pattern. Don’t spread the top part too much or the neckline will be too low. Between 2 to 4 inches is wide enough.
Extend the neckline to the center front. Make sure it’s long enough to cover the armhole as well. Trace about 2 inches down the armhole. Cut from the armhole at the additional 2-inch mark.
Bring the facing out. Draw a line from where the cut ended to the center front. Cut along the line. Trim any overlap at the center front.
Now to the back.
Straighten the straight edge of the paper. Use the front pattern to cut out the back without the neckline. Draw in the depth of the backline to your desired length. Mark out the waist and the hip line. Leave a ½ seam allowance. Trim any excess paper.
At the top of the back pattern, fold the paper and tape it down. This fold will be on both sides of the back to prevent gaping. There is no zipper.
Time to put in the grain lines, as the dress will be cut across the grain line. The pattern is ready!
3. Cut the fabric
Fold the fabric diagonally on the bias, right sides in. Lay the pattern on the fabric. Pin into place.
Cut the fabric in the front. Cut a small notch where the fold in the front is.
Repeat the process for the back pattern.
Cut the straps also on the bias. You’ll need at least 3. Two are for the shoulders and one is to finish the backline. If you want to make a belt, cut an extra long strip of fabric.
The straps should be 1 ¼ inches wide by about 16.5 inches long. The backline and optional belt should be much longer.
4. Sew the dress
Start with the straps first. Fold the right sides of the fabric inward. Stitch them about ¼ inch in. Use a loop turner or safety pin to turn them right side facing out.
Sew the straps at the front fold where the notch is. Place the strap between the notches and pin into place. Do the other side. Stitch into place. Trim any excess seam allowance and snip little slits into the seam allowance to flatten the seam.
Sew an understitch on the facing fabric. You can already see it cowling!
For the back, mark 2 ½ inches from the center and notch it. Straighten the straps.
Face the back with the third strip. Pin it in place. Stitch it close to the edge. Make an understitch on the backline strap.
Flip it to the wrong side of the fabric and stitch it close to the edge. Finish the raw edge of the facing with a zigzag stitch.
Match the front to the back with the right sides facing inward. Pin them into place.
Stitch the side seams. Trim any excess allowance. Zigzag stitch to finish the sides. Zigzag stitch the bottom. To hem the dress, fold in the hemline about ¼ inch and stitch it very close to the edge.
Iron the dress on a silk setting.
Cowl neck dress tutorial
If you love sewing, this cowl neck dress sewing pattern is a must for your repertoire! You can whip up this dress in less than half a day and wear it to a glamorous event that evening. Let me know what you think of this tutorial and the final result in the comments below.
Enjoyed the project?
Suggested materials:
- Poly satin fabric
- Pattern paper
- Pen
- Ruler
- Measuring tape
- Pins
- Scissors
The author may collect a small share of sales from the links on this page.


Comments
Join the conversation
Beautiful!
I love it, it is stunning on you. Thank you for explaining the measurements so well!